
Subscribe to Our Youtube Channel
Summary of Contents for Harison SHARP X2
- Page 1 OWNER’S MANUAL SHARP X2 Attention: Read and follow all instructions in this owner’s manual.
- Page 2 Safety Precau ons – Please Read the Instruc on before Using! 1. Assembly this product properly using original parts according to the installa on instruc on. Before assembly, inspect whether packages are in good condi on and whether spare parts are complete in accordance with transport precau ons and the list of spare parts.
-
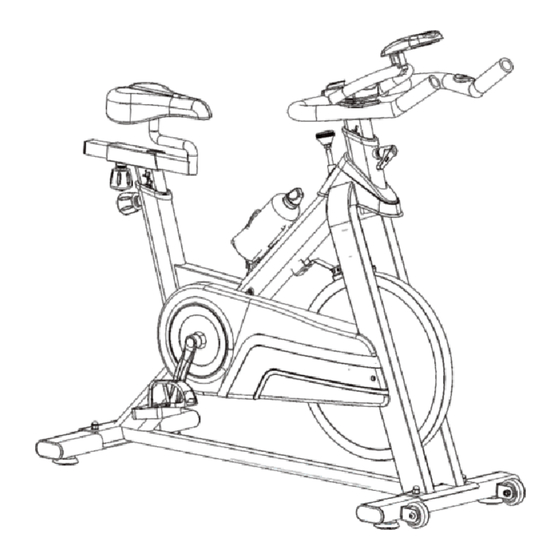
Page 3: Explode View
EXPLODE VIEW UPPER LOWER... -
Page 4: Part List
PART LIST DESCRIPTION DESCRIPTION Main Frame Mobile holder Cap nut Monitor Flat washer Monitor holding bracket Front stabilizer Self-tapping screw Fixing bolt Handlebar Combina on screw with Pedal L/R washer Rear stabilizer Handlebar supporter tube Adjustable knob M16 L shape knob Water bo le Adjustable foot Seat supporter tube... - Page 5 ASSEMBLY INSTRUCTIONS 6 easy steps to assemble then you’re ready to workout – it takes approx 30 mins to assemble. STEP1 1. Fix the front (4) and rear stabilizers (7) to the main frame (1). 2. Lock into the proper place with the fixing bolts (5), washers (3) and nuts (2) by the provided screwdriver (23) –...
- Page 6 STEP3 1. Insert the handlebar supporter tube (20) into the lower part of the mobile holder (14), then into the frame, to ghten with the L shape knob (21) - see the illustra on. 2. Fix the handlebar (18) on the handlebar supporter tube (20) with the combina on screws with washers (19) to ght - see the illustra on.
- Page 7 STEP4 1. Fix the monitor bracket (16) on the handlebar , to ghten it with one screw (17) by the screwdriver (23). 2. I nsert the monitor bracket (16) into the flute on the back of the monitor (15) - see the illustra on. Then remember to load the 2AA ba eries, and connect the sensor line with the pulse line –...
- Page 8 STEP6 Please adjust the 4 feet (22) under the stabilizers un l flat if don’t feel smooth while riding the bike. Most Important A er all above 6 steps finished, the most important is to make sure all the bolts and parts are securely fixed before you are riding on the bike.
-
Page 9: Exercise Instructions
EXERCISE INSTRUCTIONS Using your EXERCISECYCLE will provide you with several benefits, it will improve your physical fitness, tone muscle and in conjunc on with calorie controlled diet help you lose weight. 1. The Warm Up Phase This stage helps get the blood flowing around the body and the muscles working properly. It will also reduce the risk of cramp and muscle injury. -
Page 10: Specifications
EXERCISE MONITOR INSTRUCTION MANUAL NO:0003-2 SPECIFICATIONS: TIME(TMR)……………………………………………………………… .…00:00-99:59 SPEED(SPD) ………………………………………………………… 0.0-99.9KM/H(621.3MPH) DISTANCE(DIST) ……………………………………………………… 0.00-99.99KM(62.1MI) CALORIES(CAL) …………………………………………………………… 0.0-999.9KCAL ※TOTAL DISTANCE(ODO) ………………………………………………0-9999KM(6213MI) ※PULSE(PUL) ……………………………………………………………… . …40-240BPM KEY FUNCTIONS MODE: This key lets you to select and lock on to a particular function you want. Hold the key 3 seconds to reset all of the values to zero. - Page 11 HARISON FITNESS LTD 113 BARKSDALE PROFESSIONAL CENTER NEWARK, DE 19711 USA www.harisonfitness.com info@harisonfitness.com...
Need help?
Do you have a question about the SHARP X2 and is the answer not in the manual?
Questions and answers