Advertisement
PACK CONTENTS
1 zigbee smoke sensor
2 fixing screws and wall plugs
1 Installation and User Manual
1 CR123 battery
BRIEFLY
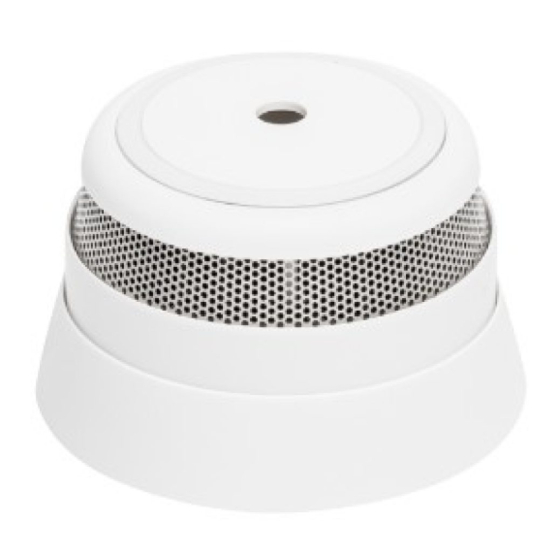
The zigbee smoke sensor GWA1512 quickly detects the presence of smoke in your home, activating a warning buzzer and sending an alarm message via zigbee. The device is designed for use in private homes, camping trailers, mobile homes and caravans. It's not recommended for use on boats.
The device is fitted with (Figure A):

A1. Multi-function push-button/RED LED
A2. Push-button for test and alarm silencing
ASSEMBLY
To install the device:

- Remove the sensor from the base, rotating it anti-clockwise.
- Use the holes on the base to mark the fixing points for the wall plugs on the ceiling or wall (Figure D1).
- Use the screws and wall plugs supplied to fix the base in place (Figure D2).
- Rotate the sensor clockwise on its base until you hear a "click"; if the battery isn't installed, or has been inserted incorrectly, you won't hear the click (Figure D3).
Tips for positioning the sensor: 
- If mounted on a wall, it must be positioned 30-50cm from the ceiling (Figure E1).
- If mounted on the ceiling, it must be positioned at least 50cm from the wall (Figure E2).
- The device must be positioned at least 50cm from the walls, ventilation system or any other obstacle.
- It must be positioned at least 4 metres from the fireplace or stove.
- To ensure optimum safety in rooms measuring more than 80m², fit several smoke sensors.
- The installation place must be easy to reach so that the battery can be checked and replaced without difficulty.
- You are advised to install at least one smoke sensor on each floor, and keep a maximum distance of 10 metres between them.
DO NOT INSTALL the sensor:
- in dusty rooms
- in the highest part of sloping ceilings, in the corners of the ceiling, or less than 50cm from a wall.
- in the kitchen or garage, or near fireplaces, where there is a risk of dampness, gas and smoke.
FUNCTIONS
The device performs the following functions:
Smoke detection
The device detects the presence of smoke, activating a buzzer and sending a zigbee radio signal.
Temperature sensor
The device has a built-in temperature sensor. the temperature value is sent every minute if the variations are more than 0.1°C, or every 10 minutes if the value remains constant.
NETWORK CONFIGURATION
Joining to the network

The smoke sensor can be added (with the factory settings) to an existing zigbee network, by inserting the battery (Figure B). It will automatically launch a search for a zigbee network to connect to (maximum 15 minutes). Make sure the zigbee network is open ("permit join" active). During the search, LED A1 will flash every second. When the device is associated with a network, the search ends and the LED stops flashing and switches off. If the search time expires, it can be restarted by a short press on the multi-purpose push-button (A1).
Factory reset
In the event of anomalous device operation, or before using it in a new zigbee network, you must reset it.
To make the factory reset of the device and restore the factory conditions:
- Remove the sensor from the base, rotating it anti-clockwise.
- Press the multi-purpose push-button (A1) and hold it until the LED starts flashing continuously.
- Release the push-button.
- Once the reset has been completed, the device will search for a new network to connect to, and LED A1 will blink every second.
The device resumes its factory configuration, deleting all the bindings and the data relating to the zigbee network that it was formerly connected to.
BINDING CREATION/DELETION
The bindings and application functions can be configured via software or locally, using the multi-purpose push-button/LED. Detailed information about the configuration parameters and their values is given in the technical manual of the zigbee Commissioning Tool software (www.gewiss.com).
Binding of smoke alarm and measured temperature (EZ Mode Initiator)
To associate the smoke sensor with at least one zigbee device that uses the smoke alarm or the measured temperature value, you must:
- Activate the identification mode on the device that you want to link with the smoke sensor
- Press the multi-purpose push-button/LED (A1) of the smoke sensor and keep it held for about 5 seconds, until the LED flashes, then release it.
- Make sure the multi-purpose LED of the smoke sensor flashes regularly (every 3 seconds), indicating the compatible device search phase; if this is not the case, repeat the procedure from point 2
- If the binding was completed correctly, or if the compatible device search phase has expired (3 minutes), the multi-purpose LED will stop flashing.
NOTE: if you want to create a system consisting of at least one smoke sensor with the actuator GWA1521, complete the binding phase and then set the actuator dip-switches as follows:

With this configuration, the actuator closes the output contact when at least one sensor activates the smoke alarm; the contact can only be re-opened by pressing the local push-button associated with the actuator.
TEST AND ALARM SILENCING

When smoke is detected, the siren will sound. To silence the alarm, press the silencer push-button on the front of the device (Figure C). The sensor will be inhibited for 10 minutes. Always check the smoke sensor is working properly after installing or replacing the battery. When the test and alarm silencing push-button is pressed, the device must emit an acoustic signal. If the test and alarm silencing push-button is held down (6.5 s - the equivalent of 3 acoustic signals), it generates an alarm that is sent on the zigbee network.
Test all the sensors once a week, to make sure they're working properly.
REPLACING THE BATTERY
When the battery is run down, the device will emit a brief acoustic signal every minute. To replace the battery, remove the sensor from the base by rotating it anti-clockwise. Insert the new battery, respecting the polarity.
Replace the sensor, rotating it clockwise on its base until you hear a "click". You are now advised to make sure the device is working properly.
TECHNICAL DATA
| Radio protocol | zigbee / IEEE 802.15.4 |
| Frequency | 2.4 GHz |
| Output power | +8 dBm |
| Power supply | Battery: 1 x CR123 replaceable |
| Estimated battery life | max. 3 years |
| Command elements | Multi-purpose push-button (A1) |
| Push-button for test and alarm silencing (A2) | |
| Visualisation elements | RED multi-purpose LED (A1) |
| Type of smoke sensor | Optic |
| Siren | 85dB / 3m |
| Temperature sensor |
Range: 0 to 50°C Resolution: 0.1°C (precision ± 0.5°C) |
| Usage environment | Dry indoor places |
| Operating temperature | 0 to +50°C |
| Storage temperature | -20 to +80°C |
| Relative humidity | 10 - 95% (non-condensative) |
| Degree of protection | IP20 |
| Size | Ø 65 x 40mm |
| Colour | White |
| Reference Standards |
IEC 60669-2-1 ETSI EN 300 328 EN 14 604 |
| Certifications | zigbee |
- Device safety is only guaranteed when the safety and usage instructions are respected, so keep them handy. Make sure these instructions are received by the installer and end user.
- This product must only be used for the purpose for which it was designed. Any other form of use should be considered improper and/or dangerous. If you have any doubts, contact the GEWISS SAT technical support service.
- The product must not be modified. Any modification will annul the warranty and may make the product dangerous.
- The manufacturer cannot be held liable for any damage if the product is improperly or incorrectly used or tampered with.
- Contact point indicated for the purposes of fulfilling the applicable EU directives and regulations:
![]()
GEWISS S.p.a. Via A. Volta, 1 - 24069 Cenate Sotto (BG) - Italy
Tel.: +39 035 946 111 - qualitymarks@gewiss.com


If the crossed-out bin symbol appears on the equipment or packaging, this means the product must not be included with other general waste at the end of its working life. The user must take the worn product to a sorted waste centre, or return it to the retailer when purchasing a new one. Products ready for disposal and measuring less than 25cm can be consigned free of charge to dealers whose sales area covers at least 400m², without any purchase obligation. An efficient sorted waste collection for the environmentally friendly disposal of the used device, or its subsequent recycling, helps avoid the potential negative effects on the environment and people's health, and encourages the reuse and/or recycling of the construction materials. GEWISS actively takes part in operations that sustain the correct salvaging and re-use or recycling of electric and electronic equipment.
Gewiss declares that the radio article (code GWA1512) complies with Directive 2014/53/EU. The complete text of the EU declaration is available at the following Internet address: www.gewiss.com
Contact details according to the relevant European Directives and Regulations:
GEWISS S.p. A. Via A.Volta, 1 IT-24069 Cenate Sotto (BG) Italy Tel: +39 035 946 111 E-mail: qualitymarks@gewiss.com


+39 035 946 111
8.30 - 12.30 / 14.00 - 18.00
monday ÷ friday

+39 035 946 260


Documents / Resources
References
Download manual
Here you can download full pdf version of manual, it may contain additional safety instructions, warranty information, FCC rules, etc.
Advertisement
Need help?
Do you have a question about the CHORUS GWA1512 and is the answer not in the manual?
Questions and answers