
Summary of Contents for WCCTV WIRELESS CCTV
- Page 1 SUPPORT GUIDE: WCCTV Body Worn Camera (Connect) Originated by: WCCTV Customer Support Date: 07/10/2021 Tel: 877 805-9475 Email: tech@wcctv.com...
-
Page 2: Table Of Contents
LED Indicators ..................5 Charging the WCCTV Body Worn Camera .......... 6 Mounting the WCCTV Body Worn Camera .......... 7 Switching the WCCTV Body Worn Camera on ........8 PIN Screen ..................8 Home Screen ..................9 Recording Video and Audio ............... 10 10. -
Page 3: Introduction
1. Introduction Thank you for purchasing a WCCTV Body Worn Camera, this guide is designed to get you started using your body worn camera. To review all features of the WCCTV Body Worn Solutions range please visit: https://www.wcctv.com/body-worn-cameras/ If you require any further assistance, please contact our technical support team on 877 804-9475 or email tech@wcctv.com... -
Page 4: Wcctv Body Worn Camera
2. WCCTV Body Worn Camera The WCCTV Body Worn Camera (Connect) captures video, audio and pictures on the move. Designed and manufactured to meet and exceed recommended standards for Body Worn Cameras. 1: Status Indicator 2: LED 4M illuminator light... -
Page 5: Led Indicators
3. LED Indicators The WCCTV Body Worn Camera has several different coloured LED indicators. Status LED Colour Indicator Charging (No videos on unit) Slow Flashing Dark Blue Charging (Videos on unit) Fast Flashing Dark Blue Fully Charged (No videos on unit) -
Page 6: Charging The Wcctv Body Worn Camera
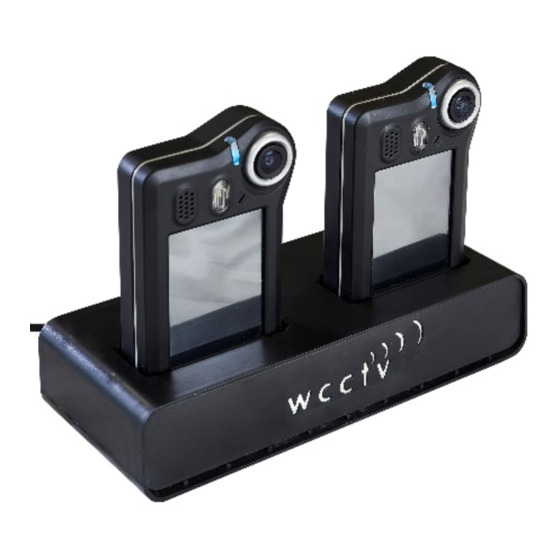
2. Charging via the WCCTV Smart Hub: Plug the WCCTV Smart Hub power adapter into the electrical supply and then insert the 2.1mm plug into the WCCTV Smart Hub. Place the WCCTV Body Worn Camera onto the WCCTV Smart Hub in one of the charging pockets provided. -
Page 7: Mounting The Wcctv Body Worn Camera
5. Mounting the WCCTV Body Worn Camera The WCCTV Body Worn Camera will be provided with a Klickfast tilt-mount which is pre- fitted to the back of the body worn camera. To mount the WCCTV Body Worn Camera, simply turn the body worn camera upside down and slide into the mount, then twist the body worn camera back into its upright position to secure. -
Page 8: Switching The Wcctv Body Worn Camera On
6. Switching the WCCTV Body Worn Camera on To switch the WCCTV Body Worn Camera on, press and hold the red button on the side of the unit. The camera will beep once then release the button and the LED indicator at the top of the unit will flash yellow to signify it is powering up. -
Page 9: Home Screen
8. Home Screen Once the PIN code has been entered, the WCCTV Body Worn Camera’s home screen will be displayed. 1: SD card status 2: GPS status 3: Time and Date 4: LTE Status 5: Battery status 6: Silent mode... -
Page 10: Recording Video And Audio
9. Recording Video and Audio To begin recording on the WCCTV Body Worn Camera press and hold the top red button for two seconds on the side of the unit. The LED indicator at the top of the unit will turn red and the unit will make an audio notification - beep once to signal recording is activated. -
Page 11: Silent Mode
This mode is designed to be used for covert applications where stealth of recording is required. To enable this function on the WCCTV Body Worn Camera, press the speaker on the home screen to remove the line through it – this will now activate silent mode. -
Page 12: Switching The Illuminating Light On
LTE Status To gain an LTE status on the WCCTV Body Worn Camera (Connect) ensure you are in an area where the signal strength is strong. The symbol below is what you will get when the WCCTV Body Worn Camera (Connect) has an LTE signal and it is ‘locked’... - Page 13 If the SD Card shows a cross going through it; turn off the unit and at the bottom the WCCTV Body Worn Camera you will see a casing, pull this casing down and push the SD card to ensure it comes out and then place back in with the SD cards’ gold contacts facing down.
-
Page 14: Advanced: Gps Status
15. Advanced: GPS Status Pressing the GPS icon on the main screen of the WCCTV Body Worn Camera will bring up the following information: if the unit is connected to GPS. If the GPS Icon shows a cross running through it, this means there is no GPS fix as shown below, to gain GPS simply go to an area that has better signal, for example outside, a room with windows and doors. -
Page 15: Advanced: Time And Date Status
16. Advanced: Time and Date Status Pressing the Time and Date on the main screen of the WCCTV Body Worn Camera will bring up for the following information: current firmware on the unit, build time and date, uC version, uCBL version and FPGA version. -
Page 16: Advanced: Lte Status
17. Advanced: LTE Status Pressing the LTE icon on the main screen of the WCCTV Body Worn Camera without the key will bring up for the following information: mobile connection, Conn-State, Conn- Strength, Conn-Quality, Modem and VPN Conn State. The LTE symbol indicates connection to the SIM service provider... -
Page 17: Advanced: Battery Status
18. Advanced: Battery Status Pressing the Battery icon on the main screen of the WCCTV Body Worn Camera will bring up for the following information: charger plugged, battery power (left), current load and voltage. Indication Colour Yellow Battery Battery is nearly dead @ 7%... -
Page 18: Fcc Radiation Exposure Statement
Increase the separation between the equipment and receiver. Consult Wireless CCTV LLC Technical Support for help. This device complies with part 15 of the FCC Rules. Operation is subject to the following two conditions: (1) This device may not cause harmful interference, and (2) this device must accept any interference received, including interference that may cause undesired operation.
Need help?
Do you have a question about the WIRELESS CCTV and is the answer not in the manual?
Questions and answers