Advertisement
Quick Links
Advertisement

Summary of Contents for Savetek GS-R07
- Page 1 интернет-магазин GADGETPLANET.COM.UA...
- Page 2 Quick operation guide Preface Thank you for using our recording pen In order to familiarize you with the operation of the machine as soon as possible, we have provided a user manual with detailed contents, from which you can obtain knowledge about product introduction, use methods, system settings, safety precautions, etc.Before you use this product, please carefully read all the...
- Page 3 Quick guide 1. switch machine (1) Power on: push the power switch of the recording pen from the "off" position to the "on" position, and it will start automatically (2) Turn off: push the power switch of the recording pen from the "on" position to the "off"...
- Page 4 (3) Pause recording: in the process of recording, short press the "play" key. At this time, the red light starts flashing to indicate that the recording is paused. If you want to continue recording, short press the "play" key again. At this time, the red light is always on to indicate that the machine continues recording.
- Page 5 the "off" position, and keep it for about 3 months to replenish the power of the machine *Please do not use this product in extremely hot, cold, dusty or humid environment *Do not let this product fall when using *Please replenish the power when the power indicator is empty -- - ", or the power is automatically shut down due to low power...
- Page 6 *This machine has no waterproof function and should not suffer from splashes and drops 2、 Functional features ● new generation of digital high definition recording pen High clear screen display of IPS is easy to operate Zinc alloy die-casting integrated shell with high strength, falling resistance and impact resistance ●...
- Page 7 ● voice control function ● built in high fidelity speaker ● built in lithium battery ● MP3 play function ● power on password lock ● support for multiple languages 3、 Appearance description интернет-магазин GADGETPLANET.COM.UA...
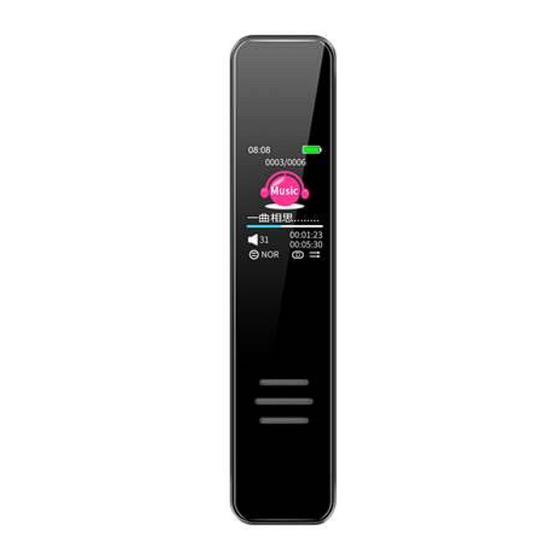
- Page 8 1. Recording / saving key 2. Power on / off 3. Display 4. Recording light 5. Speaker 6. Play / pause key 7. Menu key 8. Previous music / rewind 9. Next music / rewind 10. Microphone 11. USB interface 12. Headphone hole интернет-магазин...
- Page 9 4、 Instructions for use 1. Basic operation 1.1 power supply This machine is powered by built-in lithium battery. When the battery indicator indicates, please charge in time. When charging, please turn the power switch to the on position." Precautions for charging the machine: (1) Disable mobile phone fast charging charger (2) Disable chargers and charging tools...
- Page 10 indicating that the machine is in charging state 1.2 switch machine (1) When the power on key is in the "off" position, the machine is disconnected from the power supply and cannot be started (2) When the power on key is turned from "off"...
- Page 11 1.3 playing recording or music files (1) Play recording file: in the main menu, press "previous" or "next" to select the recording mode, and then press "play" to enter the recording selection interface, press "previous" or "next" to select the recording file you want to play, and press ""...
- Page 12 the play key briefly to confirm whether to delete the file 1.4 suspension In the play file state, short press "" to play pause state, and then short press "" to continue playing.Playback and playback 1.5 previous / next, fast forward / rewind In the playing state, short press "next"...
- Page 13 In the playing state, long press the "menu" key to enter the playing setting list, short press the "" key to enter the playing mode, you can press the "next song" key to select all cycles respectively, random play, browse play, single cycle. Short press the ""...
- Page 14 rereading setting and return to the playback interfaceplay Set rereading start, LCD display a flashes at this time, short press "next song" key, LCD display B flashes at this time, start rereading start point, then short press "next song" key, LCD display B stops flashing at this time, end rereading end point, LCD display A-B at this time, repeat the content between start point and end...
- Page 15 return to the main menu interfacePlayback and playback 2.1recording format Short press the "play" key to enter the recording format, short press the "previous" or "next" key to select the required recording format, and then short press the "play" key to confirm and return to the previous level.
- Page 16 then short press the "play" key to confirm and return to the previous level. 2.4Recording light switch Short press the "play" key to enter the recording light switch, short press the "previous" or "next" key to select whether the recording light is on or off, and then short press the "play"...
- Page 17 2.7Recording segmentation Short press the "play" key to enter the recording segmentation, short press the "previous" or "next" to select the size of the required segmentation recording time (0 to 300 minutes), if you do not need to split the recording, please set it to 0, short press the "play"...
- Page 18 "next" to select items, short press "" to enter.Playback and playback 4. setting In the main menu interface, press "previous" or "next" to select settings, short press "" to enter, then press "previous" or "next" to select the items to be set, short press ""...
- Page 19 Short press the "play" key to enter the date and time, short press the "previous" or "next" key to select the required date and time (short press the previous or next key to adjust the value, short press the menu key to adjust the position), short press the "play"...
- Page 20 modification (turn on the password switch and enter the password setting again), short press the "play" key to confirm, short press the "menu" key to return to the previous level. 4.5factory setting Short press the "play" key to enter the factory setting, short press the "previous"...
- Page 21 Technical specifications Outline size 90X18.8X11.8MM Display TFT display screen USB 2.0 High Speed interface Storage 4GB – 32GB (optional) medium Battery 3.7v/250ma polymer battery 8KHz–48KHz Music 8Kbps–320Kbps Sound 512 768 1024 recording format 1536Kbps maximum 2X20MW(16ohm) output frequency 20Hz to 20KHz headphone response output...
- Page 22 Statement Users are required to back up their own data during use. Our company is not responsible for the loss and damage of personal data caused by software and hardware misoperation, product maintenance, battery replacement or other accidents. We are not responsible for other indirect losses caused by this.
Need help?
Do you have a question about the GS-R07 and is the answer not in the manual?
Questions and answers