Table of Contents
Advertisement
Available languages
Available languages
Advertisement
Chapters
Table of Contents

Subscribe to Our Youtube Channel
Summary of Contents for HAPIMP SV-TCQ
- Page 3 Contents English..1-26 Deutsch..27-54 Francais..55-81 Español..82-107 Italiano..108-136...
-
Page 4: Table Of Contents
Introduction 1 .Introduction 1.1. After sales service ........01 1. 2. Trail cam e ra work in g pr in cip le ....02 1. 3 . Wa r n i n g ..........0 3 1. -
Page 5: After Sales Service
If you have any questions or concerns about our products, please feel free to email us at: supportus@hapimp.net We will reply you within 24 hours and provide you with a 100% perfect solution. If you want to learn more about the following information, you can scan the QR code to visit our website www.hapimpofficial.com... -
Page 6: Trail Camera Working Principle
Introduction 1.2. Trail camera working principle The trail camera is triggered by motion and variance in temperature. The trail camera is able to do this by using a motion sensor. The PIR sensor is aware that something is in front of them by changes in motion and the temperature difference between the moving object and the background environment. -
Page 7: Wa R N I N
Introduction 1.3. Warning ■ This camera can record sound when you turn on the audio recording, but it is not equipped with the speaker, so you can not hear sound while you are playing the video from the camera itself. If you would like to watch the video with sound, you need to watch from the PC. - Page 8 Introduction protective film on the lens and on the sensor of the product. ■ Ensure that the motion sensor is not dirty or damaged , if there is any scratch or damage, it will affect the normal triggering of the camera. ■...
-
Page 9: C A M E R A O V E R V I E
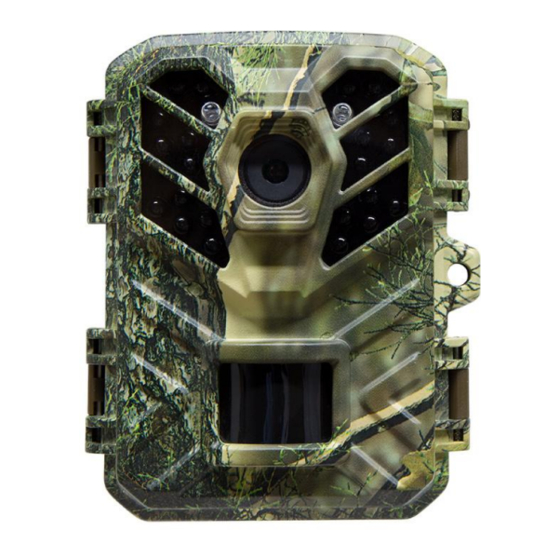
Introduction 1.4. Camera overview... -
Page 10: Br I E F Op E R A T I O N Of Th E Ca M E R
Introduction 1.5. Brief operation of the camera... -
Page 11: Sp E C If I C At I
Introduction 1.6. Specification... -
Page 12: Preparing The Camera
Preparing the Camera 2. Preparing the Camera 2.1. Power supply This camera supports 2 ways of power supply: AA battery or external power supply. ■A battery: Place 4 pieces 1.5V AA batteries,and make sure the battery polarity is correct. ■A good option to get longer battery life is to add an external power supply: At the bottom of camera, there is an external power supply(DC) port, you can use a 6V 1.5A-2A AC adapter with 3.5mm*1.35mm DC jack size or you can use a 6V 1.5A-2A trail camera solar panel. -
Page 13: Inserting The Memory Card
Preparing the Camera ■ Avoid mix-matching brands, types, or ages of the batteries, which will greatly increase the odds of a battery leaking, leading to a damaged camera. ■ Anytime you place or remove the batteries, make sure that the camera is OFF. - Page 14 Preparing the Camera To remove the memory card, please push the card in again until it is partly ejected. Notice: ■ Please format the memory card if it is used for the first time or if it has been used with other cameras before. ■...
-
Page 15: Using The Wall Mount/Bracket
Preparing the Camera 2.3. Using the wall mount/bracket The camera can also be securely attached to walls or ceilings by using the included wall mount. Installing the wall mount ensures that all existing bolts are securely tightened. 1. 1/4“Screw 2.Counter screw/Lock nut 3.Pivot bolt 4.Drilled holes 5.Hexagonal screw... - Page 16 Preparing the Camera installed at the proposed drilling location! ■ The supplied wall plugs are only suitable for mounting on concrete or stone. Before starting the installation, please check your installation location carefully for its suitability for the plugs. The assembly material used must be suitable for the respective location.
-
Page 17: In St Al Li N G Th E Ca M E R A Prop E R L
Preparing the Camera 2.4. Installing the camera properly Under TEST mode, you can work out the optimum exposure angle and the range of the motion sensors. During alignment, consider whether the use of the motion sensor may be useful for attaining the desired observation results. Align the camera as follows: Fasten the camera to a tree or similar object at a height of 1-2 meters and align the camera in the desired direction. - Page 18 Preparing the Camera the “TEST” position, then move slowly from one side of the target area to the other side. While doing this, look at the left LED indicator. If you see the left LED indicator light up, that means you have been detected by the motion sensor and know the motion sensor is working properly.
-
Page 19: Basic Operation
Basic Operation ■ The installation height is determined by the size of the shooting target or the distance, such as a small hedgehog, the shooting distance should be as short as possible, and the installation height should be as low as possible). ■... - Page 20 Basic Operation Meaning of icons on the photo and video interfaces...
- Page 21 Basic Operation 3.1.2. When the camera is under the "ON" mode After you have finished all the setting under the TEST mode and have had the general location determined, you can switch the camera to ON and it to work. The screen will display 5 seconds countdown and the right LED indicator will light up.
-
Page 22: How To Play The Recorded Videos And Photos
Basic Operation screen will countdown for 5 seconds, and the right LED indicator indicator will also light up till the countdown ends. 3.2. How to play the recorded videos and photos? You can play the recorded files through the camera screen directly or connect the camera to the PC by the micro USB cable, or remove the memory card and use a card reader to read it on the PC. - Page 23 Basic Operation appear on the drive lists. Double-click the "U Disk" icon to view its contents. The recorded videos and photos from the memory card are stored in the folder named "DCIM"----"100MEDIA". 3)You can download the photos or videos to your computer. Notice: The USB cable is not used to and it can not charge the camera or the battery, it is only used to transfer the files from camera to PC.
-
Page 24: S E T U P M E N U A N D F U N C T I O N
Setup Menu and Functions 4. Setup Menu and Functions Mode Photo:Capture photos with motion detection. Video: Capture video clips with motion detection. Photo + Video: Capture both photo and video with motion detection. Photo resolution Set resolution for still photos. Options:24MP/20MP/16MP/12MP(preset)/8MP Photo series Also called photo burst. - Page 25 Setup Menu and Functions not hear sound while you are playing the video from the camera itself. If you would like to watch the video with sound, you need to watch from the PC. IR distance Also called IR flash distance, it is the distance at which a trail camera can illuminate an object with the IR LEDs.
- Page 26 Setup Menu and Functions Shot lag Set the time period that the camera should wait before reacting to subsequent activation of the main sensor after the initial recording. During the selected interval, the camera will not record any images or videos.
- Page 27 Setup Menu and Functions Target recording time Select "On" if the camera should only be active during a certain time period. In the screen menu that subsequently appears, you can then set the start and ending time for the active phase. Notice: The camera will not record any images outside of the active period.
- Page 28 Setup Menu and Functions pictures can not be formed into a playable file, but they will be in the form of pictures instead. 2. When you confirm "On" with the OK button, time-lapse mode disables the PIR sensor, which means the camera will not automatically detect the motion.
- Page 29 Official email: supportus@hapimp.net Format memory card Delete (erase) all files stored on a card to prepare it for reuse. Always format a card that has been previously used in other devices.
- Page 30 5.FAQ For more detailed product questions and answers, please check through our website www.hapimpofficial.com, which contains a variety of very detailed questions and answers. You can directly enter the website to view by scanning the following QR code...
- Page 31 Deutsch 1 .Einführung 1. 1 . Ku n d e n d i e n s t ........28 1.
-
Page 32: Kundendienst
Unsere Produkte haben eine zweijährige Garantie, wenn Ihr Produkt irgendwelche Qualitätsprobleme hat, können Sie sich gerne per E-Mail an unser Kundendienstteam wenden: supportus@hapimp.net Wir werden Ihnen innerhalb von 24 Stunden antworten und Ihnen eine 100%ig perfekte Lösung anbieten. Wenn Sie mehr über die folgenden Informationen erfahren möchten, können Sie sich auf unserer Website... -
Page 33: Funktionsprinzip Der Wildkamera
Einleitung 1.2. Funktionsprinzip der Wildkamera ■ Die Wildkamera wird durch Bewegung und. Temperaturschwankungen ausgelöst. Die Wildkamera kann dies mithilfe eines Bewegungssensors tun. Der PIR-Sensor erkennt durch Bewegungsänderungen und den Temperaturunterschied zwischen dem sich bewegenden Objekt und der Hintergrundumgebung, dass sich etwas vor ihm befindet. -
Page 34: Wa R N U N
Einleitung 1.3. Warnung ■ Diese Kamera kann Ton aufnehmen, ist aber nicht mit einem Lautsprecher ausgestattet. Wenn Sie das Video mit Ton ansehen möchten, müssen Sie es vom PC aus ansehen. ■ Im Testmodus hören Sie möglicherweise Klickgeräusche, begleitet von Bildschirmflackern, was normal ist. 1.Bitte platzieren Sie die Kamera vertikal, damit das Umgebungslicht stabilisiert werden kann. - Page 35 Einleitung ■ Wenn Sie die Jagdkamera zum ersten Mal benutzen, formatieren Sie bitte die Speicherkarte, bevor Sie sie verwenden. Wenn Sie den Akku einlegen, achten Sie bitte darauf, dass Sie ihn normal einlegen. Wenn Sie den Akku verkehrt herum einlegen, kann dies zu einem Kurzschluss in der Kamera führen und diese ausbrennen.
- Page 36 Einleitung ■ Bei niedrigem Ladezustand der Akku sollten Sie alle Akkus rechtzeitig austauschen, um ein Auslaufen des Elektrolyts zu vermeiden, das die Kamera beschädigen könnte. Wenn Sie weitere Informationen wünschen, Bitte besuchen Sie unsere Website www.hapimpofficial.com, um sie anzuzeigen, oder scannen Sie direkt den QR-Code, um sie anzuzeigen.
-
Page 37: K A M E R A Ü B E R S I C H
Einleitung 1.4.Kamera übersicht... -
Page 38: Kurze Bedienung Der Kamera
Einleitung 1.5.Kurze Bedienung der Kamera... -
Page 39: S P E Z I F I K A T I O
Einleitung 1.6.Spezifikation... -
Page 40: Vorbereiten Der Kamera
Vorbereiten der Kamera 2.Vorbereiten der Kamera 2.1. Stromversorgung This camera supports 2 ways of power supply: AA battery or external power supply. ■ AA-Batterie: Legen Sie 4 Stück 1,5-V-AA-Batterien ein und vergewissern Sie sich, dass die Polarität der Batterien korrekt ist. ■... - Page 41 Vorbereiten der Kamera ausreicht. Wir empfehlen Hochleistungs-Alkaline-Batterien (nicht im Lieferumfang enthalten). ■ Vermeiden Sie das Mischen von Marken, Typen oder Alter der Batterien, da dies die Wahrscheinlichkeit stark erhöht, dass eine Batterie ausläuft und die Kamera beschädigt wird. ■ Achten Sie immer darauf, dass die Kamera ausgeschaltet ist, wenn Sie die Batterien einlegen oder entfernen.
-
Page 42: Ei N Le Ge N De R Sp E I Ch E R K Ar T E
Vorbereiten der Kamera 2.2. Speicherkarte einlegen Die Kamera verwendet eine Micro-SD-Speicherkarte zum Speichern von Fotos (im .jpg-Format) und/oder Videos (im .AVI-Format). Unterstützt werden SD-Karten bis maximal 32 GB Kapazität. 1. Schalten Sie die Kamera aus; 2. Setzen Sie die Speicherkarte ein;... - Page 43 Vorbereiten der Kamera ■ Empfehlen Sie, die Micro-SD-Karte mindestens Klasse 10 oder höher zu verwenden. ■ Wenn die Speicherkarte viele Male verwendet wurde, kann ihre Leistung reduziert werden. Wenn die Leistung der Speicherkarte nachlässt, ersetzen Sie bitte die alte neue Speicherkarte durch die neue. ■...
-
Page 44: Verwenden Der Wandhalterung/Halterung
Vorbereiten der Kamera die Kennzeichnung auf der Kamera. Drücken Sie leicht auf den Rand der Karte, um die TF-Karte herauszuziehen. 2.3.Verwendung der Wandhalterung/Halterung Mit der mitgelieferten Wandhalterung kann die Kamera sicher an Wänden oder Decken befestigt werden. Stellen Sie vor der Montage der Wandhalterung sicher, dass alle vorhandenen Schrauben fest angezogen sind. -
Page 45: In S T A L L I N G Th E Ca M E R A Pro P E R L Y
Vorbereiten der Kamera 2.4. Richtige Installation der Kamera Richten Sie die Kamera wie folgt aus: Befestigen Sie die Kamera an einem Baum oder einem ähnlichen Objekt in einer Höhe von 1-2 Metern und richten Sie die Kamera in die gewünschte Richtung aus. Bewegen Sie sich dann langsam von einer Seite des Zielbereichs zur anderen. - Page 46 Vorbereiten der Kamera Bewegungssensor erkannt.Auf diese Weise können Sie die beste Ausrichtung für die Kamera ermitteln.Die Bewegungsanzeige leuchtet nur, wenn sich der Betriebsartenwahlschalter in der Position TEST befindet und der Bewegungssensor eine Bewegung erkannt hat. Während des normalen Betriebs leuchten keine Lichter. Damit die Kamera keine ungewollten Aufnahmen von irrelevanten Bewegungen macht, sollte sie nicht an einem sonnigen Standort oder in der Nähe von Ästen aufgestellt werden, die sich im Wind bewegen können.
-
Page 47: Schalten Sie Die Kam Era Test Ein Und Aus
Grundlegende Bedienung Entfernung (z. B. bei einem kleinen Igel sollte die Schießentfernung so kurz wie möglich und die Montagehöhe so niedrig wie möglich sein). ■ Es sollten sich keine offensichtlichen Hindernisse (wie Äste und Blätter) vor dem Objektiv befinden, und versuchen Sie, es so offen wie möglich zu halten. - Page 48 Grundlegende Bedienung Bedeutung der Symbole auf den Foto- und Videooberflächen...
- Page 49 Grundlegende Bedienung 3.1.2.Wenn sich die Kamera im „ON“-Modus befindet Nachdem Sie alle Einstellungen im TEST-Modus abgeschlossen und den ungefähren Standort bestimmt haben, können Sie die Kamera auf ON schalten und es funktioniert. Der Bildschirm zeigt einen 5-Sekunden-Countdown an und die rechte LED-Anzeige leuchtet auf. Dann sind die LEDs und der Bildschirm ausgeschaltet.
- Page 50 Grundlegende Bedienung entfernen und einen Kartenleser verwenden, um sie auf dem PC zu lesen. 3.2.1. Spielen Sie die aufgezeichneten Dateien über den Kamerabildschirm ab Schieben Sie den Schalter in die TEST-Position, drücken Sie die PLAY-Taste, drücken Sie die Taste ▲ oder ▼, um die Dateien auszuwählen, drücken Sie die Taste OK, um das Video abzuspielen oder anzuhalten.
-
Page 51: S E T U P - M E N Ü U N D Fu N K T I O N E N
Einstellungsmenü und Funktionen 4.Einstellungsmenü und Funktionen Modus Foto: Bilderaufnahme mit Bewegungserkennung. Video: Videoaufnahme mit Bewegungserkennung. Foto + Video: BiIder- und Videoaufnahme mit Bewegungserk- ennung. Fotoauflösung Stellen Sie die Auflösung für ein Foto ein. Wir empfehlen 5MP Optionee:24MP/20MP/16MP/12MP/8MP. Serienaufnahme Legen Sie hier fest, wie viele Fotos bei einmal Auslösen in Folge gemacht werden sollen. - Page 52 Einstellungsmenü und Funktionen Wenn Sie diese Funktion auswählen, wird derTon während der Videoaufnahme mit aufgezeichnet. IR-Entfernung Auch IR-Blitzentfernung genannt, ist die Entfernung, in der eine Wildkamera ein Objekt mit den IR-LEDs beleuchten kann. Auto: Die Helligkeit des Infrarotlichts wird automatisch angepasst. Bei Nachtarbeiten passt der Bildsensor der Kamera die Helligkeit des IR-Lichts an die Helligkeit des Objekts an.
- Page 53 Einstellungsmenü und Funktionen Hier stellen Sie die Zeitdauer ein, die zwischen dem ersten Auslösen und einer erneuten Aktivierung des Hauptsensors vergehen soil. Während dieses Zeitraumes wird keine Aufeeich- nung gestartet. Dies soil verhindern, dass Sie Aufnahmen von immer gleichen Auslöseereignissen bekommen und sich Ihr Speicherplatz zu schnell füllt.
- Page 54 Einstellungsmenü und Funktionen für warme Umgebungstemperaturen, während „Low“ für Kälte geeignet ist. Zielaufnahmezeit Wählen Sie „On“ wenn die Kamera nur in einem bestimmten Zeitraum aktiv sein soil. Anschließend erscheint die Eingabemaske, in der Sie Start und Endzeit eintragen können. Die vorgenommenen Einstellungen gelten jeden Tag. Die Kamera macht außerhalb ihrer Einstellungen keine Aufzeichnungen.
- Page 55 Einstellungsmenü und Funktionen Diese Fotos werden in ein Video umgewandelt. [Aus]: Schaltet die Zeitrafferfunktion aus. Hinweis Die Kamera muss mehrere Bilder aufnehmen, um die Wiedergabedatei zu erstellen. Wenn die Anzahl der aufgenommenen Bilder zu gering ist, kann die Wiedergabedatei nicht erstellt werden, sondern wird in Form von Bildern angezeigt.
- Page 56 Einstellungsmenü und Funktionen aufgenommenen Fotos oder Videos automatisch überschreiben, ohne die Arbeit zu unterbrechen Optionen: 【EIN】/【AUS】. Zeit & Datum Hier können Sie das Format für das Datum ändern:(Jahr/Monat/Tag; Tag/Monat/Jahr; Monat/Tag/Jahr) Und das Format für die Uhrzeit: (12/ 24 Stunden) Verwenden Sie die „links/rechts“ Taste um zum nächsten Feld zu gelangen, die „hoch/runter“...
- Page 57 Einstellungsmenü und Funktionen Offizielle E-Mail: supportus@hapimp.net Speicherkarte formatieren Löschen aller Dateien auf der Speicherkarte für einen erneuten Einsatz.Speicherkarten, die vorher in anderen Geräten verwendet wurden, müssen immer formatiert werden. Achtung! Stellen Sie sichen dass alle Daten die Sie aufbe-wahren möchten, von der Karte heruntergeladen und geskhert wurden.
-
Page 58: Faq
5. FAQ Ausführlichere Produktfragen und -antworten finden Sie auf unserer Website www.hapimpofficial.com, die eine Vielzahl sehr detaillierter Fragen und Antworten enthält. Sie können die Website direkt aufrufen, indem Sie den folgenden QR-Code scannen:... - Page 59 Francais 1 .Introduction 1.1. Service après-vente ............56 1.2. Principe de fonctionnement de la caméra de trail ..57 1.3. Avertissement..............58 1.4. Présentation de la caméra ...........60 1.5. Brève utilisation de la caméra ........61 1.6. Spécification..............62 2 .Préparation de la caméra 2.1.
-
Page 60: Introduction
Nos produits ont une garantie de deux ans, si votre produit a des problèmes de qualité, s'il vous plaît n'hésitez pas à contacter notre équipe de service à la clientèle par e-mail : supportus@hapimp.net Nous vous répondrons dans les 24 heures et vous fournirons une solution 100% parfaite. -
Page 61: Principe De Fonctionnement De La Caméra De Trail
Introduction variation de température dans une zone définie. La caméra utilise un capteur de mouvement et un capteur PIR qui s’activent dès que quelque chose se déplace devant eux, grâce la différence de température entre l'objet en mouvement et l'environnement en arrière-plan. ■... -
Page 62: Avertissement
Introduction 1.3. Avertissement ■ Cet appareil peut enregistrer du son, mais il n'est pas équipé d'un haut-parleur. Si vous souhaitez regarder la vidéo avec le son, vous devez la regarder depuis le PC. ■ En mode test, vous pouvez entendre des clics accompagnés d'un scintillement de l'écran, ce qui est normal. - Page 63 Introduction protégé par le court-circuit ! ■ Lorsque vous utilisez le produit pour la première fois, veuillez retirer la couche de film de protection sur l'objectif et sur le capteur du produit. ■ N'endommagez pas la surface du capteur du produit, s'il y a une rayure ou un dommage, cela affectera le déclenchement normal de la caméra.
-
Page 64: Présentation De La Caméra
Introduction 1.4. Aperçu de la caméra... -
Page 65: Brève Utilisation De La Caméra
Introduction 1.5. Brève utilisation de la caméra... -
Page 66: Spécification
Introduction 1.6. Spécification... -
Page 67: Préparation De La Caméra
Préparation de la caméra 2.Préparation de la caméra 2.1.Alimentation Cette caméra prend en charge 2 modes d'alimentation : pile AA ou alimentation externe. ■ Pile AA : placez 4 piles AA de 1,5 V et assurez-vous que la polarité de la pile est correcte. ■... - Page 68 Préparation de la caméra car elles ne suffisent pas pour assurer le fonctionnement normal de l'appareil photo. Nous recommandons des piles alcalines hautes performances (non incluses). ■ Évitez de mélanger les marques, les types ou les âges des piles, sinon cela augmenterait considérablement les risques de fuite d'une pile et d'endommagement de l'appareil photo.
-
Page 69: Insertion De La Carte Mémoire
Préparation de la caméra 2.2. Insertion de la carte mémoire L'appareil photo utilise une carte mémoire Micro SD pour enregistrer des photos (au format .jpg) et/ou des vidéos (au format .AVI). Les cartes SD jusqu'à une capacité maximale de 32 Go sont prises en charge. 1.Éteignez la caméra ;... - Page 70 Préparation de la caméra ■ Une carte mémoire Micro SD/TF doit être insérée dans l'emplacement de la carte mémoire pour pouvoir enregistrer des photos et des vidéos. ■ Après avoir utilisé la carte mémoire de nombreuses fois, ses performances seront réduites. Si les performances de la carte mémoire diminuent, vous devez acheter une nouvelle carte mémoire.
-
Page 71: Utilisation Du Support Mural/Support
Préparation de la caméra 2.3. Utilisation du support mural/support Le support mural fourni permet de fixer solidement la caméra aux murs ou aux plafonds. Avant d'installer le support mural, assurez-vous que tous les boulons existants sont bien serrés. Composants 1. Vis de trépied 2. -
Page 72: Installer Correctement La Caméra
Préparation de la caméra 2.4. Installez correctement la caméra Alignez la caméra comme suit : Fixez la caméra à un arbre ou un objet similaire à une hauteur de 1 à 2 mètres et alignez la caméra dans la direction souhaitée. Ensuite, déplacez-vous lentement d'un côté... - Page 73 Préparation de la caméra L'affichage de mouvement s'allume uniquement lorsque le sélecteur de mode de fonctionnement est en position TEST et que l'un des capteurs de mouvement a détecté un mouvement. En fonctionnement normal, aucun voyant ne s'allume. Pour éviter que la caméra ne fasse des enregistrements non désirés de mouvements non pertinents, elle ne doit pas être installée dans un endroit ensoleillé...
-
Page 74: Tourner Test, On Et Off La Caméra
Fonctionnement de base ou la distance, comme un petit hérisson, la distance de tir doit être aussi courte que possible, et la hauteur d'installation doit être aussi basse que possible). ■ Il ne doit pas y avoir d'obstructions évidentes (telles que des branches et des feuilles) à... - Page 75 Fonctionnement de base Signification des icônes sur les interfaces photo et vidéo...
-
Page 76: Comment Lire Les Vidéos Et Les Photos Enregistrées
Fonctionnement de base 3.1.2.When the camera is under the "ON" mode Une fois que vous avez terminé tous les réglages en mode TEST et que l'emplacement général a été déterminé, vous pouvez allumer la caméra et elle fonctionne. L'écran affichera un compte à rebours de 5 secondes et le voyant LED de droite s'allumera. - Page 77 Fonctionnement de base faites glisser le commutateur sur la position TEST, appuyez sur le bouton PLAY, appuyez sur le bouton ▲ ou ▼ pour sélectionner les fichiers, et appuyez sur le bouton OK pour lire ou mettre en pause la vidéo.
-
Page 78: Menu De Configuration Et Fonctions
Menu et fonctions de configuration 4.Menu et fonctions de configuration Mode Photo: Prendre des photos avec la détection de mouvement. Vidéo: Prendre des clips vidéo avec la détection de mouvement. Photo + Vidéo: Prendre à la fois des photos et des vidéos avec Résolution de l'image Options :24MP/20MP/16MP/12MP(preset)/8MP Série de photos... - Page 79 Menu et fonctions de configuration de I'enregistrement vidéo. Distance IR Aussi appelée distance de flash IR, c'est la distance à laquelle une caméra de trail peut éclairer un objet avec les LED IR. Auto : Il ajustera automatiquement la luminosité de la lumière infrarouge.
- Page 80 Menu et fonctions de configuration Définissez la période de temps que la caméra doit attendre avant de réagir une activation ultérieure du capteur principal après I'enregistrement initial. Pendant I'intervalle sélectionné, I'appareil n'enregistra pas des photos ou des vidéos. Ceci empêche le remplissage de la carte de mémoire par des enregistrements concernant un même événement.
- Page 81 Menu et fonctions de configuration les environnements avec un niveau élevé d'interférence. La température peut également affecter la sensibilité. Le réglage "High" est adapté pour des températures ambiantes chaudes, alors que le réglage "Low" doit être sélectionné pour les environnements froids. Durée d’enregistrement cible Sélectionnez "On"...
- Page 82 Menu et fonctions de configuration heures. Si l'appareil photo fonctionne pendant 24 heures, il y aura 24 photos. Ces photos seront converties en une vidéo. [Arrêt]: Ferme la fonction time lapse. Noter ■ L'appareil photo doit prendre plusieurs photos pour former le fichier de lecture.
- Page 83 Si vous avez oublié votre mot de passe, veuillez contacter notre e-mail officiel pour obtenir le fichier de réinitialisation de la caméra. Email officiel: supportus@hapimp.net Formatar la carte mémoire Supprimez (effacez) tous les fichiers enregistrés sur une carte pour la...
- Page 84 Menu et fonctions de configuration préparer pour une réutilisation ultérieure. II faut toujours formater une carte qui a été utilisée sur d'autres appareils. Attention! Assurez-vous d'abord que vous avez téléchargé et sauvegardé les flchiers que vous souhaitez conserver! Appuyez sur OK pour exécuter, appuyez sur MENU pour abandonner I'opération de formatage.
-
Page 85: Faq
5.FAQ Pour des questions et des réponses plus détaillées sur les produits, veuillez consulter notre site Web www.hapimpofficial.com, qui contient une variété de questions et de réponses très détaillées. Vous pouvez accéder directement au site Web pour le consulter en scannant le code QR suivant... - Page 86 Español 1 .Introducción 1.1.Servicio postventa ............83 1.2. Principio de funcionamiento de la cámara de rastreo .84 1.3. Adverte................85 1.4. Descripción general de la cámara ......87 1.5. Breve manejo de la cámara .........88 1.6. Especificación ...............89 2 . Preparando la cámara 2.1.
-
Page 87: Servicio Postventa
Nuestros productos tienen una garantía de dos años, si su producto tiene algún problema de calidad, no dude en ponerse en contacto con nuestro equipo de atención al cliente por correo electrónico: supportus@hapimp.net Le responderemos dentro de las 24 horas y le proporcionaremos una solución 100% perfecta. - Page 88 Introducción 1.2.Principio de funcionamiento de cámara Sendero ■ La cámara se activa con el movimiento gracias a un sensor PIR que detecta la radiación infrarroja emitida por la fauna (o personas) que pasan por su campo de visión. El sensor PIR (Passive Infrared) detecta la diferencia de temperatura entre el objeto en movimiento y el entorno de fondo.
-
Page 89: Adverte
Introducción 1.3. Advertencia ■ Esta cámara puede grabar audio, pero no tiene altavoz, para escuchar el video con audio primero debe guardar el archivo video en su PC. ■ En el modo de prueba, es posible que escuche clics acompañados de un parpadeo de la pantalla, lo cual es normal. - Page 90 Introducción cortocircuito. ■ Cuando utilice el producto por primera vez, retire la capa de película protectora de la lente y del sensor del producto. ■ No dañe la superficie del sensor del producto, si hay algún rasguño o daño, afectará al disparo normal de la cámara. ■...
-
Page 91: Descripción General De La Cámara
Introducción 1.4. Descripción general de la cámara... -
Page 92: Breve Manejo De La Cámara
Introducción 1.5. Breve manejo de la cámara... -
Page 93: Especificación
Introducción 1.6. Especificación... -
Page 94: Preparando La Cámara
Preparación de la cámara 2.Preparando la cámara 2.1.Fuente de alimentación Esta cámara admite 2 modos de alimentación: batería AA o fuente de alimentación externa. ■Pila AA: inserte 4 pilas AA de 1,5 V y asegúrese de que la polaridad de las pilas sea la correcta. ■Una buena opción para prolongar la vida útil de la batería es agregar una fuente de alimentación externa: hay un puerto de alimentación de corriente continua (CC) externo en la parte inferior de la cámara, puede... -
Page 95: Inserción De La Tarjeta De Memoria
Preparación de la cámara la cámara. ■ Siempre que coloque o retire las pilas, asegúrese de que la cámara esté APAGADA. ■ La mayoría de las baterías se descargan más rápido y/o fallan cuando se trabaja a bajas temperaturas, lo que hace que la cámara no funcione correctamente. - Page 96 Preparación de la cámara en la ranura para tarjetas hasta que encaje en su lugar. Para expulsar la tarjeta Micro SD, simplemente empújela suavemente (no intente sacarla sin empujarla primero). La tarjeta se libera de la ranura y está lista para ser extraída cuando se escucha un "clic". Nota: ■...
-
Page 97: Uso Del Soporte De Pared/Soporte
Preparación de la cámara ■ No inserte la tarjeta de memoria a la fuerza. Consulte la marca de la cámara. Presione suavemente el borde de la tarjeta para que aparezca la tarjeta TF. 2.3. Uso del soporte de pared/soporte Con el soporte de pared suministrado, la cámara se puede fijar de forma segura a paredes o techos. -
Page 98: Instalar La Cámara Correctamente
Preparación de la cámara 2.4. Installare la telecamera correttamente Alinee la cámara de la siguiente manera: Fije la cámara a un árbol u objeto similar a una altura de 1-2 metros y alinee la cámara en la dirección deseada. Luego, muévase lentamente de un lado del área objetivo al otro lado. - Page 99 Preparación de la cámara rango de captura de la cámara y el ángulo de disparo. Nota: ■ La distancia de instalación correcta debe estar al menos a un metro del sujeto; de lo contrario, es fácil ser vago. ■ Asegúrese de instalar la cámara de caza horizontalmente, de lo contrario, puede reducir el rango de detección de la cámara.
-
Page 100: Operación Básica
Operación básica de disparo o la distancia, como un erizo pequeño, la distancia de disparo debe ser lo más corta posible y la altura de instalación debe ser lo más baja posible). ■ No debe haber obstrucciones obvias (como ramas y hojas) en la parte frontal de la lente e intentar mantenerla lo más abierta posible. - Page 101 Operación básica Significado de los íconos en las interfaces de foto y video...
-
Page 102: Cómo Reproducir Los Videos Y Fotos Grabados
Operación básica 3.1.2.Cuando la cámara cambia a «ON» Después de configurar la cámara en modo TEST y determinado la posición óptima para disparar y/o tomar fotos, puede encender la cámara y funcionará automáticamente. La pantalla mostrará una cuenta regresiva de 5 segundos y el indicador LED derecho se iluminará. Luego, el LED y la pantalla se apagarán. - Page 103 Operación básica memoria y usar un lector de tarjetas para leerla en la PC. 3.2.1. Reproducir archivos grabados a través de la pantalla de la cámara: Deslice el interruptor a la posición de PRUEBA, presione el botón PLAY, presione el botón ▲ o ▼ para seleccionar los archivos, presione el botón OK para reproducir o pausar el video.
- Page 104 Operación básica leer el archivo. 3.2.3. Use un lector de tarjetas de memoria para leer la tarjeta de memoria en la PC 1) Saque la tarjeta de memoria de la cámara e insértela en un lector de tarjetas. Luego conecte el lector de tarjetas a una computadora. 2)...
-
Page 105: Menú De Configuración Y Funciones
Menú y funciones de configuración 4.Menu di configurazione e funzioni Modo Foto: captura fotos con detección de movimiento. Video: capture clips de video con detección de movimiento. Foto + Video: capture fotos y videos con detección de movimiento. Resolución de foto Opciones: 24MP/20MP/16MP/12MP/8MP Disparo continuo Selecciona cuántas fotos se sacan en secuencia por disparo. - Page 106 Menú y funciones de configuración cámara de caza puede iluminar un objeto con los LED IR. Automático: Ajustará automáticamente el brillo de la luz infrarroja. Cuando trabaje de noche, el sensor de imagen de la cámara ajustará el brillo de la luz IR de acuerdo con el brillo del objeto. Cuando un animal o una persona está...
- Page 107 Menú y funciones de configuración Sensibilidad del sensor de movimiento Aquf se ajusta la senslbilldad del sensor de movimiento principal. Para interiores, zonas y entomos con pocas interferencias, como ramas balanceándose por el aire, seteccione "High” (Alta). Seleccione "Medium" (Media) para zonas exterlores y entomos con una cantidad normal de interferencias, y "Low"...
- Page 108 Menú y funciones de configuración confirmación de acuerdo con su modo de trabajo se toma foto o video). Si quieres observar que una planta florece, la cámara tomará 24 fotos en 24 horas para grabar todo el proceso de floración. [ Video TL]: Puede configurar el tiempo de intervalo.
- Page 109 Menú y funciones de configuración Aqui puede elegir entre lnglés, Alemán, Finés, Sueco, Danés, Francés, Italiano, Holandés, Español o Portugués como idioma del Menú Capture sin fin Establezca la cámara para grabar video en bucle. Cuando la memoria está llena, la cámara puede sobrescribir automáticamente las fotos o videos tomados previamente sin detener el trabajo.
- Page 110 Si olvidó su contraseña, comuníquese con nuestro correo electrónico oficial para obtener el archivo para restáblecer la cámara. Correo electrónico oficial: supportus@hapimp.net Formatear tarjeta de memoria Elimina (borra) todos los archivos almacenados en una tarjeta para prepararia para ser reútilizada. Formatee siempre una taijeta que haya sido usada previamente en otros dispositivos.
-
Page 111: Faq
5.FAQ Para preguntas y respuestas más detalladas sobre productos, visite nuestro sitio web www.hapimpofficial.com, que contiene una variedad de preguntas y respuestas muy detalladas. Puede ingresar directamente al sitio web para ver escaneando el siguiente código QR... - Page 112 Italiano 1 .Introduction 1.1. Servizio post-vendita ..........10 9 1.2. Principio di funzionamento della FVT ....110 1.3. Avvisi ................111 1.4. Panoramica della fotocamera .........114 1.5. Breve utilizzo della fotocamera ......115 1.6.
-
Page 113: Servizio Post-Vendita
Noi siamo impegna a fornire un servizio sincero e premuroso per garantire la soddisfazione del cliente. In caso di domande o problemi sui nostri prodotti, non esitare a contattarci via e-mail: supportus@hapimp.net Ti risponderemo entro 24 ore e ti forniremo una soluzione perfetta al 100%. -
Page 114: Principio Di Funzionamento Della Fvt
Introduzione 1.2.Principio di funzionamento della FVT ■ La fototrappola viene attivata dal movimento e dalla variazione della temperatura attraverso un sensore di movimento. Il sensore PIR si accorge che qualcosa è davanti alla camera dal movimento e dalla differenza di temperatura tra l'oggetto in movimento e l'ambiente di sfondo. -
Page 115: Avvisi
Introduzione 1.3. Avvisi ■ Questa videocamera può registrare l'audio, ma non è dotata di altoparlante. Se si desidera guardare il video con l'audio, è necessario guardarlo dal PC. ■Nella modalità di prova si potrebbero sentire dei clic accompagnati da uno sfarfallio dello schermo: è normale. 1.Posizionare la fotocamera verticalmente in modo che la luce ambientale possa essere stabilizzata. - Page 116 Introduzione memoria prima dell'uso.■ Quando si installa la batteria, assicurarsi di installarla normalmente, se la batteria è installata capovolta la fotocamera potrebbe cortocircuitare e bruciarsi. Si prega di notare che la fotocamera non è protetta dal cortocircuito! ■ Quando si utilizza il prodotto per la prima volta, rimuovere lo strato di pellicola protettiva sulla lente e sul sensore del prodotto.
- Page 117 Introduzione oggetti appuntiti. ■ In caso di batteria scarica, sostituire tutte le batterie in tempo per evitare perdite di elettrolita che potrebbe danneggiare la fotocamera. Se vuoi saperne di più informazioni, si prega di visitare il nostro sito Web www.hapimpofficial.com per visualizzare o scansionare direttamente il codice QR per visualizzare.
-
Page 118: Panoramica Della Fotocamera
Introduzione 1.4. Panoramica della fotocamera... -
Page 119: Breve Utilizzo Della Fotocamera
Introduzione 1.5. Breve utilizzo della fotocamera... -
Page 120: Specifica
Introduzione 1.6. Specifica... -
Page 121: Alimentazione
Preparazione della Foto-Video Trappola 2.Preparazione della fotocamera 2.1.Alimentazione Questa fotocamera supporta 2 modi di alimentazione: batteria AA o alimentatore esterno. ■ Batteria AA: inserire 4 batterie AA da 1,5 V e assicurarsi che la polarità della batteria sia corretta. ■ Una buona opzione per prolungare la durata della batteria consiste nell'aggiungere un alimentatore esterno: nella parte inferiore della fototrappola è... -
Page 122: Inserimento Della Scheda Di Memoria
Preparazione della Foto-Video Trappola fornite). ■ Evitare di abbinare marche, tipi o età delle batterie diverse tra loro, perché aumenta notevolmente la probabilità che una batteria perda, causando danni alla fotocamera. ■ Ogni volta che si posizionano o si rimuovono le batterie, assicurarsi che la fotocamera sia SPENTA. - Page 123 Preparazione della Foto-Video Trappola foto (in formato .jpg) e/o video (in formato .AVI). Sono supportate schede SD fino a una capacità massima di 32 GB. 1. Spegnere la fototrappola; 2. Inserire la scheda di memoria; 3.Spingere scheda memoria nell'apposito slot finché non scatta in posizione;...
- Page 124 Preparazione della Foto-Video Trappola prestazioni potrebbero essere ridotte. Se le prestazioni della scheda di memoria diminuiscono, sostituire la vecchia scheda di memoria con una nuova. ■ Non rimuovere la scheda, non spegnere l'alimentazione durante la formattazione, la lettura o il salvataggio perché i dati potrebbero venire danneggiati.
-
Page 125: Utilizzo Del Supporto/Staffa A Parete
Preparazione della Foto-Video Trappola 2.3.Utilizzo del supporto/staffa a parete Utilizzando il supporto a parete in dotazione, la telecamera può essere fissata saldamente a pareti o soffitti. Prima di installare il supporto a parete, assicurarsi che tutti i bulloni esistenti siano serrati saldamente 1. -
Page 126: Installazione Corretta Della Fotocamera
Preparazione della Foto-Video Trappola 2.4.Installare la telecamera correttamente Allineare la fotocamera come segue: Fissare la fotocamera a un albero o un oggetto simile a un'altezza di 1-2 metri e allineare la fotocamera nella direzione desiderata. Quindi spostati lentamente da un lato dell'area target all'altro lato. Mentre lo fai, guarda il display di movimento. - Page 127 Preparazione della Foto-Video Trappola modalità di funzionamento è in posizione TEST e uno dei sensori di movimento ha rilevato un movimento. Durante il normale funzionamento, non ci saranno luci accese. Per garantire che la telecamera non esegua registrazioni indesiderate di movimenti irrilevanti, non dovrebbe essere installata in un luogo soleggiato o vicino a rami che possono muoversi col vento.
-
Page 128: Selezionare La Modalità "On", "Test" E "Off
Operazioni di base ■ L'altezza di installazione è determinata dalle dimensioni del soggetto che vi suole riprendere e dalla distanza; ad esempio un piccolo riccio, la distanza deve essere ridotta e l'altezza di installazione deve essere la più bassa possibile). ■... - Page 129 Operazioni di base Significato delle icone sulle interfacce foto e video...
- Page 130 Operazioni di base 3.1.2. Quando è su "ON" Dopo aver terminato tutte le impostazioni in modalità TEST e aver determinato la posizione generale, è possibile accendere la telecamera mettendo l’interruttore su “ON”. Lo schermo visualizzerà un conto alla rovescia di 5 secondi e l'indicatore LED destro si illuminerà. Quindi i LED e lo schermo si spegneranno.
-
Page 131: Come Riprodurre I Video E Le Foto Registrati
Operazioni di base 3.2. Come riprodurre i video e le foto registrate? È possibile riprodurre i file registrati direttamente dallo schermo della fotocamera o collegare la fotocamera al PC tramite il cavo micro USB, oppure rimuovere la scheda di memoria e utilizzare un lettore di schede per leggerla sul PC. - Page 132 Operazioni di base 3)Puoi scaricare le foto oi video sul tuo computer. Avviso: Il cavo USB non viene utilizzato per caricare la fototrappola o la batteria, ma solo per trasferire i file dalla fotocamera al PC. Il driver USB di alcuni computer potrebbe non riconoscere la fotocamera, se non è...
-
Page 133: Menu Di Configurazione E Funzioni
Menu di configurazione e funzioni 4.Menu di configurazione e funzioni Modalità 1)Foto: cattura foto con rilevamento del movimento. 2)Video: Cattura clip video con rilevamento del movimento. 3)Foto + Video: Cattura sia foto che video con rilevamento del movimento. Risoluzione foto Opzioni: 24MP/20MP/16MP/12MP/8MP Ripesa in serie Seleziona quante foto vuoi scattare in sequenza per ogni trigger. - Page 134 Menu di configurazione e funzioni Aprendo questa funzione, è possibile registrare l'audio durante la registrazione di video. Distanza IR Chiamata anche distanza flash IR, è la distanza alla quale una telecamera da trail può illuminare un oggetto con i LED IR. Auto: regolerà...
- Page 135 Menu di configurazione e funzioni Impostare il periodo di tempo che la telecamera deve attendere prima di reagire alla successiva attivazione del sensore principale dopo la registrazione iniziale. Durante l'intervallo selezionato, la fotocamera non registrerà immagini o video. Ciò impedisce che la scheda di memoria venga riempita con troppi file dello stesso evento.
- Page 136 Menu di configurazione e funzioni Tempo di registrazione target Selezionare "On" se la fbtocamera dovrebbe essere attivata solo durante un dato periodo. Nella schermata del menu che appare successivamente, è possibile impostare l'orario di inizio e di fine per la fese attiva.
- Page 137 Menu di configurazione e funzioni Nota: la fotocamera deve scattare più foto per formare il file di riproduzione. Se il numero di immagini scattate è troppo piccolo, il file di riproduzione non può essere formato ma viene visualizzato sotto forma di immagini. Nota: quando si conferma "On"...
- Page 138 Se hai dimenticato la password, contatta la nostra email ufficiale per ottenere il file per ripristinare la fotocamera. supportus@hapimp.net Email ufficiale: Formatta scheda memoria Elimina (cancella) tutti i file memorizzati su una carta per il riutilizzo.
- Page 139 Menu di configurazione e funzioni backup di tutti i file che si desidera conservare! Premere OK per procedere, premere MENU per uscire senza formattare. Numero serie. Impostare il numero di serie univoco per la fotocamera. Il numero è di quattro cifre, ogni cifra va da 0 a 9 o dalla A alla Z. Opzioni:【On】/【Off】.
-
Page 140: Faq
5.Domande frequenti Per domande e risposte più dettagliate sui prodotti, consultare il nostro sito Web ufficiale www.hapimpofficial.com, che contiene una serie di domande e risposte molto dettagliate. È possibile accedere direttamente al sito Web per visualizzarlo scansionando il seguente codice QR...
Need help?
Do you have a question about the SV-TCQ and is the answer not in the manual?
Questions and answers
Sensor is off how to turn on
To turn on the sensor for the HAPIMP SV-TCQ camera:
1. Insert batteries and a micro SD card.
2. Slide the switch to "TEST" mode to set up the camera and check the sensor. The left LED will flash when motion is detected, confirming the sensor is working.
3. After setup, slide the switch to "ON" mode. The screen will show a 5-second countdown, then turn off, and the camera will enter standby mode.
4. The sensor is now active and will trigger the camera to take photos or videos when motion is detected.
This answer is automatically generated