Table of Contents
Advertisement
Advertisement
Chapters
Table of Contents

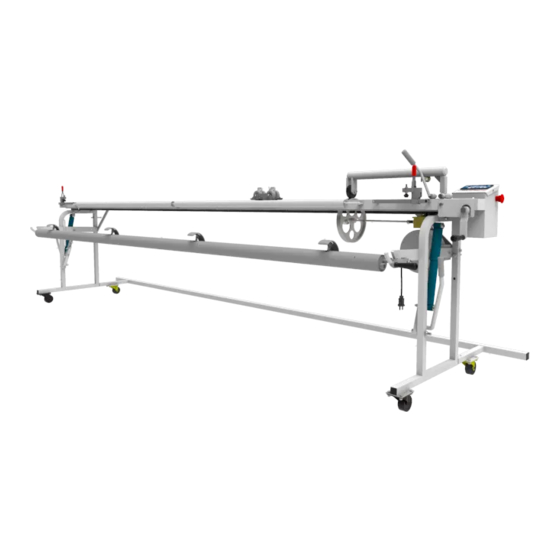
Summary of Contents for VIDIR CAROUSEL MATE
- Page 1 CAROUSEL MATE Service Manual...
-
Page 2: Table Of Contents
End Frame & Drop Handle ��������������������������������������������������������������������������������������������������������������������������������������������������������17 Misc� parts ���������������������������������������������������������������������������������������������������������������������������������������������������������������������������������������18 Cutter Parts �������������������������������������������������������������������������������������������������������������������������������������������������������������������������������������19 Cutter Wheel Cover ���������������������������������������������������������������������������������������������������������������������������������������������������������������������20 Re-roller parts ��������������������������������������������������������������������������������������������������������������������������������������������������������������������������������21 TROUBLESHOOTING �������������������������������������������������������������������������������������������������������������������������������������������������������������������������22 WIRING SCHEMATIC ��������������������������������������������������������������������������������������������������������������������������������������������������������������������������23 WARRANTY & LIABILITY Vidir Machine Inc� Warranty Agreement and Limitation of Liability ��������������������������������������������������������������������������25 Service: 1-866-821-2647 Office: 1-800-210-0141 www.storevertical.com CarouselMate_sm-1300-01-Oct2014... -
Page 3: Introduction
This manual provides you with operation, troubleshooting, and maintenance procedures for your machine� However, if help is needed or if any of these procedures are unclear, please contact Vidir at 1-800-210-0141� SERIAL NUMBER Please be sure to record the serial number for any future service calls and parts ordering�... -
Page 4: Safety
Carousel Mate - Service Manual SAFETY Important Safety Instructions Read this manual carefully to ensure familiarity with the controls and the proper use of the equipment� The warnings and precautions contained in this manual DO NOT cover all potential dangers, and hazards that may be encountered�... -
Page 5: Safety Precautions
Carousel Mate - Service Manual SAFETY Safety Precautions In order to avoid personal injury, make sure the operator(s) and/or maintenance person(s) of the machine have been oriented with the machines operating procedures and are aware of all safety precautions� 1� Unplug power cord before making any adjustments or repairs�... -
Page 6: Preparations
Carousel Mate - Service Manual PREPARATIONS Electrical Specifications Machine Power Requirements: Please see machine label for electric power requirements� FEATURES: This machine is equipped with a Master Switch� This switch is highly visible and easy to reach� It shuts off all power to the carousel�... -
Page 7: Building Requirements
Installation Requirements Vidir provides the installation equipment� This installation equipment requires a local electrical circuit at the machine installation site� Your electrician may need to run a temporary service line before the installers ar- rive�... - Page 8 Carousel Mate - Service Manual MENARDS COUNTERS The Display below with 4 arrow Keys has been used since November 2009� This PLC is programmed to work with 4 arrow displays, NOT the older 5 arrow one� If the stores display looks like this then the display we use today will work without a PLC upgrade The display below was used after the durant display up until November 2004�...
- Page 9 The Durant counter was used on the Carousel Mate before the PLC and Display This counter will be a 220 volt Counter The carousel Mate plugs in to the carousel and that is why its 220v Some older Menards stores still have a...
-
Page 10: Operating Instructions
Carousel Mate - Service Manual OPERATING INSTRUCTIONS Counter Functions Explained CAROUSEL MATE PRODUCT PRESET CLEAR COUNT DELETE 110-0249 Black Keys Data Entry – used for numeric data entry� This is explained below in the password section� White Arrows Used to navigate machine setup screens�... -
Page 11: Password Protection
(left most) digit is reached pressing again will start at the first digit again� Press to enter the password� This same pattern is used for all data entry in the Carousel Mate� Service: 1-866-821-2647 Office: 1-800-210-0141 www.storevertical.com Page 9 ... -
Page 12: Setup
You will now see the splash screen� Press the button to select the Master Password entry screen� Enter the Master Password� If you do not know the master password, contact Vidir Support at 1-866-821-2647 buttons are used to navigate through the various setup screens�... -
Page 13: Calibration Factors
As the name suggests, this is where you can change the User Password� This is not the Master Password� To disable the password feature, set this value to zero (it is recommended)� The default setting is ‘off’ , and Vidir recommends to leave this setting as ‘off’... -
Page 14: Operating The Carousel
OPERATING INSTRUCTIONS Operating the Carousel 1� Roll Carousel Mate in front of the carousel that has the desired product� 2� Position the desired roll of material so the top of the roll is 1” BELOW the top of the table� If the material feeds in at an angle from higher up it will lift off the table and cause inaccurate counts�... - Page 15 Carousel Mate - Service Manual OPERATING INSTRUCTIONS 11� Engage re-roller latches by turning the re-roller latch engagement nut clockwise� 12� Grasp material and pull it to the center of the re-roller tube� 13� Clamp the material to the re-roller tube�...
- Page 16 Carousel Mate - Service Manual OPERATING INSTRUCTIONS 15� Lock the material to the table with clamps provided� 16� Recheck the counter to ensure you have the correct length of material� 17� Grasp the cutting bar handle crank and run cutter across the table to make the cut�...
-
Page 17: How To Change The Cutter Blade
OPERATING INSTRUCTIONS 22� Remove the re-roller by pulling it out of the cut product� 23� Place reroller back onto the Carousel Mate� 24� Re-roll the product back onto the roll and strap with Velcro straps� (min of 3 per roll) How to change the cutter blade CAUTION: CUTTING BLADES ARE SHARP. -
Page 18: How To Check Counter Calibration
9� If reading is different then repeat the test until you have a consistent read- ing� 10� If the reading is consistently off, the counter needs to be recalibrated� 11� Call Vidir Machine service at 1-866-821-2647 to assist you with this proce- dure� Service: 1-866-821-2647 Office: 1-800-210-0141 www.storevertical.com... -
Page 19: Parts
Carousel Mate - Service Manual PARTS Electrical Parts CAROUSEL MATE PRODUCT PRESET CLEAR COUNT DELETE 110-0249 Item ..Description ..............Part # A������������������������Interface ��������������������������������������������������������������������������������� 409-0057 B������������������������PLC �������������������������������������������������������������������������������������������� 409-0055 C������������������������Plug, 110V twist lock ���������������������������������������������������������� 408-0018 �������������������������� Plug, 220V twist lock ���������������������������������������������������������� 408-0015 D������������������������Retractable cord reel ���������������������������������������������������������... -
Page 20: Counter Parts
Carousel Mate - Service Manual PARTS Counter Parts Item ..Description ..............Part # A������������������������Idler Roller (2) ��������������������������������������������������������������������������7-51599 B������������������������Roll pin ������������������������������������������������������������������������������������ 113-0031 C������������������������Counter bearing ���������������������������������������������������������������������8-52907 D������������������������Threaded rod bearing holder ��������������������������������������������8-51589 E������������������������Pillow block ��������������������������������������������������������������������������� 006-0052 F������������������������Nut ��������������������������������������������������������������������������������������������� 004-0014 G������������������������Counter shaft bearing ������������������������������������������������������� 006-0027 H������������������������Counting wheel 10”... -
Page 21: End Frame & Drop Handle
J������������������������Release pin roll pin������������������������������������������������������������������������������������ �������113-0028 K������������������������Swivel caster wheel���������������������������������������������������������������������������������� �������104-0001 L������������������������CM right frame asmb���������������������������������������������������������������������������������������� �7-51602 CM left frame asmb��� ���������������������������������������������������������������������������������������� �7-51608 M������������������������End frame brace��������������������������������������������������������������������������������������������������7-1380 N������������������������ Carousel Mate guide track (not shown) ���������������������������������������������������� 2-52154 Service: 1-866-821-2647 Office: 1-800-210-0141 www.storevertical.com Page 19 ... -
Page 22: Misc. Parts
Carousel Mate - Service Manual PARTS Misc. parts Item ....Description ................Part # A������������������������Counter hold down wheel ������������������������������������������������������������������104-0002 B������������������������Counter hold down arm ����������������������������������������������������������������������� 7-61348 ���COUNTER HOLD DOWN ASMB CM� ����������������������������������������������� �7-61347 C������������������������Counter hold down lift out handle ���������������������������������������������������� 8-46941 D������������������������Operators manual ������������������������������������������������������ om-1300-008-Mar2013 E������������������������Cutter assembly ����������������������������������������������������������������������������������������... -
Page 23: Cutter Parts
Carousel Mate - Service Manual PARTS Cutter Parts Item Description ..............Part # A������������������������Cutting bar end cover ����������������������������������������������������������� 7-1090 B������������������������Cutter chain �����������������������������������������������������������������������������7-68046 C������������������������Cutter chain idler �������������������������������������������������������������������7-43434 D������������������������Chain idler securing nut ��������������������������������������������������� 004-0015 E������������������������Blade holder wheel ����������������������������������������������������������������8-44087 F������������������������Wheel securing nut ������������������������������������������������������������ 004-0055 G������������������������Cutter assembly ���������������������������������������������������������������������8-44079... -
Page 24: Cutter Wheel Cover
Carousel Mate - Service Manual PARTS Cutter Wheel Cover Item Description ..............Part # 1������������������������Cutter wheel cover �����������������������������������������������������������������2-62058 2������������������������8-32-12-Machine-screw ��������������������������������������������������� 002-0104 3������������������������Screw combination 1/4 x 3/8 ������������������������������������������ 002-0018 4������������������������Double blade holder hex spacer 7/16 in������������������������2-60282 5������������������������ Complete cutter wheel cover assembly �������������������������2-62215... -
Page 25: Re-Roller Parts
Carousel Mate - Service Manual Re-roller parts PARTS Re-roller parts Item Description ..............Part # A������������������������Crank handle mounting bolt ������������������������������������������ 001-0218 B������������������������Crank handle with bolt & washer ���������������������������������� 111-0121 C������������������������Crank handle securing nut ���������������������������������������������� 004-0001 D������������������������Re-roller crank (complete) ������������������������������������������������� 2-44403 E������������������������Re-roller (complete, crank not included) �������������������� 503-0010 Reroller latch kit (includes 3 items below) ��������������������7-59538... -
Page 26: Troubleshooting
1� Reprogram the display� Please call Vidir Service for assistance� wrong information NOTE: If a PLC is Present: z The Large PLC will be used in Carousels/Carousel Mate which MAY or WILL HAVE a computer used in conjunction with them� Service: 1-866-821-2647 Office: 1-800-210-0141 www.storevertical.com... - Page 27 Carousel Mate & Cutting Bar Cutter Cover Retrofit Instructions ATTENTION: In the event that this cover does not fit your cutter please have your store information available and call toll free 1-866-521-2647 and we will supply a cover for the slim style cutter.
- Page 28 Table Of Contents Carousel Mate Cutter Cover Installation ···············································································1 Hold Down Arm Spacer Installation ······························································4 Cutting Bar Cutter Cover Installation ···············································································5 Counter Arm Replacement············································································8 Final Installation of Counter Arm·································································10 Hold Down Arm Spacer Installation ····························································11 Cutter Cover Install—020811...
-
Page 29: Carousel Mate
Carousel Mate—Cutter Cover Installation Cutter Cover Install—020811 pg. 1... -
Page 30: Cutter Cover Installation
Carousel Mate—Cutter Cover Installation Cutter Cover Installation The following instructions will describe the process of installing the cutter cover on your carousel mate. Please follow the instructions carefully to ensure proper installation. Kit Includes: Cutter Cover, Set Screws (4), Hex Spacer (4) Tools Required: 9/16”... - Page 31 Carousel Mate—Cutter Cover Installation 3. Apply non-permanent loctite to the wheel side of the hexagon nut and screw on to existing bolts. (4) 4. Place the cover over the cutter ensuring the screws on the cover are loose to ad- just the size as needed.
- Page 32 Carousel Mate—Cutter Cover Installation 5. Using an 1/8” Allen Wrench insert set screws into the holes to secure the cover. Once the set screws have been tightened proceed to tighten the screws on the cover to secure it in place.
-
Page 33: Hold Down Arm Spacer Installation
2. Insert extra spacers provided (Item # 1) and insert 1/4” x 1 1/4” screws (item#2) provided. You will need to do this on both ends of the carousel mate. Cutter Cover Install—020811... -
Page 34: Cutting Bar
Cutting Bar—Cutter Cover Installation Cutter Cover Install—020811 pg. 6... -
Page 35: Cutter Cover Installation
Cutting Bar—Cutter Cover Installation Cutter Cover Installation The following instructions will describe the process of installing the cutter cover on your cutting bar. Please follow the instructions carefully to ensure proper installation. Kit Includes: Cutter Cover, Set Screws (4), Hex Spacer (4) Tools Required: 9/16”... - Page 36 Cutting Bar—Cutter Cover Installation 3. Apply non-permanent loctite to the wheel side of the hexagon nut and screw on to existing bolts. (4) 4. Place the cover over the cutter ensuring the screws on the cover are loose to ad- just the size as needed.
- Page 37 Cutting Bar—Cutter Cover Installation 5. Using an 1/8” Allen Wrench insert set screws into the holes to secure the cover. Once the set screws have been tightened proceed to tighten the screws on the cover to secure it in place. Cutter Cover Install—020811 pg.
-
Page 38: Counter Arm Replacement
Cutting Bar—Cutter Cover Installation Counter Arm Replacement You will need to replace the counter arm to ensure the there is enough room for the cutter with the new cover. Kit Includes: Counter Arm, Bolt, Washers Tools Required: Large Flat Screw Driver, 3/4” Wrench 1.Using a screw driver pry the counter arm off of the bolt. - Page 39 Cutting Bar—Cutter Cover Installation 3.Remove the counter from the arm. 4.Fasten the counter to the provided arm. 5.Slide the counter arm(1) onto the existing mount of the cutting bar using the pro- vided bolt(2). Flip the counter arm down(3) to set in place. Cutter Cover Install—020811 pg.
-
Page 40: Final Installation Of Counter Arm
Cutting Bar—Cutter Cover Installation Final Installation of Counter Arm. Cutter Cover Install—020811 pg. 12... -
Page 41: Hold Down Arm Spacer Installation
Cutting Bar—Cutter Cover Installation Hold Down Arm Spacer Installation You will need to install spacers to be sure the cover does not hit the hold down lever. Kit Includes: Hold down arm Spacers (4), Screw 1/4” x 1 1/4” (4) Tools Required: Screw Driver 1. - Page 43 MENARDS CAROUSEL MATE COUNTER OPERATING AND REPROGRAMMING INSTRUCTIONS Ver. 5.01 Familiarization CAROUSEL MATE PRODUCT PRESET PRODUCT PRESET CLEAR COUNT AUTO-RUN CLEAR COUNT AUTO-RUN ENTER DELETE Arrow Keys- Data entry (used for entering numeric data after MOD is pressed Left / Right Arrow-...
- Page 44 To enter the master password 1. Press (all data begins to blink) Press Press to increment or decrement the value Repeat steps 2 & 3 for remaining digits till desired value is displayed. (4321) Press when the 4 digit number is entered. (master password is 4321) Press Upon entering the correct password you now have gained access to the Master Users Menu.
- Page 45 6. Press Change Blade: N/A Press Imperial or Metric ----------------------------------------- 1 IMPERIAL 2 METRIC ----------------------------------------- To change the setting: 1. Press 2. Press till you reach 1 (IMPERIAL). 3. Press 4. Press Auto-Run N/A Press Carpet one calibration correct value is 228000 1.
- Page 46 Slow down N/A Press FS Auto Run N/A Press Turn the power off and then on The counter displays enter password. Changing machine setup for counter. 1. Press (at the same time) counter displays “Config password” 2. Press 3. Press (one digit begins to blink) 4.
- Page 47 ----------------------------------------- | PASSWORD TIMER 100 SECONDS ----------------------------------------- Change timer value back to 0 : 1. Press (all data begins to blink) 2. Press (one digit begins to blink) 3. Press to increment or decrement the value 4. Set value to 000 5.
- Page 48 Carousel Mate - Service Manual WIRING SCHEMATIC Service: 1-866-821-2647 Office: 1-800-210-0141 www.storevertical.com Page 46 CarouselMate_sm-1300-01-Oct2014...
- Page 49 Conclusion: This unit has been inspected and serviced for safe operation and is operating as intended by the manufacturer� Comments and Parts Used (If any):_____________________________________________________________________________ __________________________________________________________________________________________________________ __________________________________________________________________________________________________________ __________________________________________________________________________________________________________ __________________________________________________________________________________________________________ Fax completed checklist to 1-204-364-3072 Attn: Service Manager or e-mail to service@vidir�com Service: 1-866-821-2647 Offi ce: 1-800-210-0141 www�storevertical�com Page 1 ...
- Page 50 Buyer’s performance under or compliance with such laws and regulations� 6� If the equipment is found by the Buyer to be defective, the Buyer must notify Vidir within a period of 30 days of discov- ery of the defect�...
Need help?
Do you have a question about the CAROUSEL MATE and is the answer not in the manual?
Questions and answers