Table of Contents
Advertisement
Quick Links
Advertisement
Table of Contents

Related Manuals for Minox DC 3311


Summary of Contents for Minox DC 3311
- Page 1 English.
-
Page 2: Warranty Policy
Warranty Policy This camera is under warranty for one full year from the date of purchase by the original purchaser. In case of defects in materials or workmanship, we will replace or repair the camera free of charge. - Page 3 WARNING Do not use this camera if it is emitting smoke, becomes unusually hot to be touched, emitting any unusual odor or noise, or if it is in any other abnormal states. Operating the camera in any of these situations may cause a fire or an electrical shock. Stop using the camera immediately, turn the camera off, and then disconnect the power source (batteries or AC power adapter).
- Page 4 WARNING Do not insert or drop metallic or inflammable foreign objects into the camera through access points such as the Compact Flash card slot. This may cause a fire or an electrical shock. Do not attempt to modify this camera.
- Page 5 CAUTION Do not place this camera in damp or dusty locations. This may cause a fire or an electrical shock. Do not place this camera in a location affected by oil fumes or steam, such as near a cooking stove or humidifier. This may cause a fire or an electrical shock.
- Page 6 CAUTION Do not use batteries other than those specified for use with your camera. The use of unsuitable batteries may result in the batteries splitting or leaking and causing a fire, injury, or soiling of the battery compartment.
-
Page 7: Table Of Contents
Table of Contents Introduction Preparing the camera Getting to know the camera Front View Top View Back View Bottom View Side View Dial Knob Zoom Lever Menu Controller Voice Memo Button View Angle Adjustment Knob Status LCD Attaching the Strap Preparing Power Supply Loading Batteries Using the Power Adapter... - Page 8 Taking Pictures Taking Single Pictures Taking Distant/Close-up Pictures Zoom Control Optical Zoom Digital Zoom Focus Lock Taking Sports Pictures Taking Burst Pictures Using the Flash Using the Self-Timer Voice Memo Camera Settings The Picture Menu ISO (Sensitivity)
- Page 9 Protecting Pictures Copying Picture to CF Card (Optional) Selecting Pictures for Printing Playing a Slide Show Viewing on a TV Monitor Installing Camera Software System Requirements Installation CD Contents Installing the Software (Driver & Image Application) Transferring Pictures to the Computer Connecting the Camera to Your Computer Downloading Pictures USB Connection Troubleshooting...
-
Page 10: Introduction
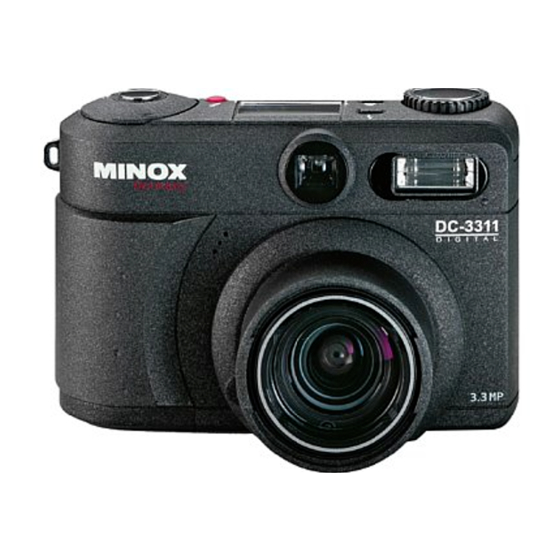
Introduction Congratulations on your purchase of the new digital camera. Capturing high-quality digital pictures is fast and easy with this state-of-the-art smart camera. Equipped with a 3.3 Megapixel CCD, this camera is capable of capturing pictures with a resolution of up to 2048X1536 pixels. -
Page 11: Preparing The Camera
Preparing the Camera This section introduces you to the digital camera. Follow the instructions in this section to install batteries, use the power adapter, and install a Compact Flash card. Getting to Know the Camera Front View 1.Lens 2.Flash 3.Viewfinder window 4.Microphone... -
Page 12: Bottom View
Bottom View 1.Battery door 2.Tripod socket 3.CF card slot door Side View 1.AC adapter terminal 2.USB terminal 3.A/V out terminal Dial Knob The dial knob turns the camera on and off. It also allows you to choose from four camera modes:... -
Page 13: Voice Memo Button
Voice Memo Button Press to start 15 seconds clip, press again to terminate earlier. View Angle Adjustment Knob This adjustment can be made in a range +1 to -1 diopter. Before taking pictures, turn the view angle adjustment to adjust the finder view to point where it is most clearly seen. Turning the knob clockwise adjusts in the positive(+) direction;... -
Page 14: Attaching The Strap
Attaching the Strap To attach the strap to the camera: 1.Insert the small loop at the end of the strap into one side of the camera's strap holder. 2.Push inward until the loop comes out of the other side of the strap holder. -
Page 15: Inserting/Removing The Compact Flash Card
Notes: Always be sure to use the AC adapter which comes with the camera, or optional from the manufacturer. Any other adapter may cause damage to the camera, which is not covered under the warranty. Grasp the adapter, not the cord, when unplugging the adapter from a wall socket. If the power cord becomes damaged (exposed or severed wires, etc.), please purchase a new AC adapter. -
Page 16: Removing A Compact Flash Card
Removing a Compact Flash Card To remove a CF card from the camera: 1.Open the card slot located on the button of the camera. 2.Press the Eject button. The card will unlock and eject. 3.Close the card slot cover. -
Page 17: Getting Started
Getting Started Once you have installed batteries or connected a power adapter and inserted a CF card(optional) into the camera, you are ready to use the camera. Note: If you camera does not have internal memory, you need to insert a CF card into the camera before you start taking pictures. -
Page 18: Adjusting The Menu Display Language And Time/Date
Adjusting the Menu Display Language and Time/Date When using the camera for the first time, set the menu display language and time/date. The setting range is between January 1, 2000 and December 31, 2099. The menu language, time and date are maintained by the backup condenser. The setting contents are therefore retained even when replacing the AA batteries. -
Page 19: Internal Memory/Cf Card Full
Navigating through Menus The digital camera provides several menus that provide options for tuning picture results and for enabling or disabling camera features such as sounds, self-timer, etc. The menus that are available vary, depending on which camera mode you are currently in. -
Page 20: How To Change Settings
File Menu Refer to "How to Change Settings" below on how to select options in a menu and adjust the settings. The section "Viewing, Copying and Printing" discusses about the different menu options of the above menus in detail. -
Page 21: Taking Pictures
Taking Pictures Have fun taking pictures with your digital camera. Specifically, these are the things you can do with your camera: Take single pictures of sceneries and close-ups. Use Digital Zoom to move in closer to your subject. Adjust the flash settings according to what is needed in the shooting location. -
Page 22: Taking Distant/Close-Up Pictures
Digital Zoom If you want your subject to appear larger and closer when the picture is taken, use your camera's Digital Zoom feature. Your digital camera provides 2X Digital Zoom. To use Digital Zoom, the LCD monitor is required. 1.Press the LCD button to turn on the LCD monitor. -
Page 23: Focus Lock
All distances are measured from the CCD. Taking Sports Pictures ( Your digital camera features Sports mode ( higher shutter speed (of 1/500 second, at most) to "freeze" the subject in action. This makes the subject appear sharp and the background blurred, giving the picture a feeling of speed. -
Page 24: Taking Burst Pictures
Burst pictures are a series of pictures that are photographed in sequence. You can use your digital camera’s Burst mode ( of 8 pictures can be taken in each capture. When you set the camera to Burst mode, the status LCD shows the remaining sets of pictures that can be taken. -
Page 25: Using The Self-Timer
You can choose one of these flash options: Auto Red-eye Reduction Fill-in To select a flash option, toggle the Flash button until you see its icon appear on the status LCD. Using the Self-Timer ( If you need to take a group picture including yourself or a solo picture but no one is there to help you, use your camera's Self-Timer. -
Page 26: Voice Memo
Voice Memo ( Voice memo allows a fifteen seconds audio track to be recorded with a still image. Voice memo is controlled by pressing Voice Memo button. When the function is active, the microphone icon is displayed on the status LCD. The recording will automatically stop when the set time has elapsed. -
Page 27: Camera Settings
When taking pictures, you may simply use the default settings which have already been chosen for use with your digital camera. But if you want to have more control over the quality of your pictures and customize how you want to use your digital camera, you may adjust the various camera settings to suit your needs. -
Page 28: White Balance
EV (Exposure Value) Compensation to control how much light enters the digital camera when taking pictures. EV Compensation also helps prevent having too light or too dark pictures. EV Compensation can be adjusted over a range of -1.5 to +1.5 EV in steps of 0.3 EV. Here are guidelines on how to choose an ideal exposure setting for your pictures: a. -
Page 29: The Camera Menu
High compression reduces the picture’s file size to the minimum Moderate compression makes the file size small yet retains picture quality Low compression preserves picture details and does not compress much data. This results in a higher file size yet provides higher quality pictures. This results in a higher file size yet provides higher quality pictures. -
Page 30: Self-Timer
The languages available for selection may be different on cameras in certain countries. Set Clock Use the Set Clock option to set your digital camera to the current date and time (in month/day/ year, hour:minutes format). You need to have accurate date and time settings in order to know... -
Page 31: Auto Off
If batteries are removed from the camera, you may need to reset the correct Date and Time. Auto Off The digital camera provides a power conservation feature which helps save battery life by automatically turning off the power when the camera is not in use. -
Page 32: Lcd
Use the LCD option to adjust LCD brightness. The brightness level of the LCD display can be adjusted over a range of -5.0 to +5.0. -
Page 33: Viewing, Copying And Printing
Viewing, Copying and Printing After taking pictures with your digital camera, you can access the pictures from the CF card and view, delete, copy or print them. When you set your camera to Playback mode ( able to do the following: Select and view pictures you have taken. -
Page 34: Magnifying Pictures
5.Press button to select what picture information you want to be displayed on LCD monitor. Choose one of the following: # Show picture number only # / Date Show Picture number and date picture was taken None Do not show picture information 6.After selecting an item, press Menu button to exit... -
Page 35: Erasing Pictures
scroll to the previous screen. 5.Once you have positioned the selection box on the desired thumbnail, press ENTER button to select it and display the picture in normal view. Erasing Pictures You can erase unwanted pictures from the internal memory or CF card while in Playback mode ) . -
Page 36: Protecting Pictures
Copying Pictures to CF Card(Optional) Your digital camera provides this feature, allowing you to copy the images stored in your camera’s internal memory to CF card. After copying the image to CF card, you can remove the CF card from camera and delete those pictures on the internal memory. -
Page 37: Selecting Pictures For Printing
Make sure a CF card is properly inserted into camera before copying process. Selecting Pictures for Printing DPOF (Digital Print Order Format) is a feature that enables a digital camera to "mark" pictures on a CF card for later printing. Your digital camera provides this feature, allowing you to select and mark pictures for printing. -
Page 38: Viewing On A Tv Monitor
TV standard (NTSC or PAL) your television uses. 1.First, connect the TV to your digital camera. Plug one end of the video cable to the video-out port of the digital camera, and connect the other end of the cable to the video-in port on the television. -
Page 39: Installing Camera Software
Installing Camera Software Before you can transfer the pictures from the CF card to your computer, you need to install first the camera software into your computer (Driver installation: Applicable only on Windows 98 or MAC OS 8.6 user). System Requirements Before installing the camera software, make sure your computer meets the following system requirements: Windows 98/2000/Me/XP, Pentium 166 MHz or higher for PC Users... -
Page 40: Transferring Pictures To The Computer
Connecting the Camera to Your Computer Your digital camera comes with a USB cable that you can use to connect the camera to your computer. 1.Plug the smaller connector of the USB cable into the digital port on your camera. -
Page 41: Usb Connection Troubleshooting
USB Connection Troubleshooting If you cannot find Removable Disk or get error message “Unknown Device” while connecting your camera with computer, please check your USB connection: 1.Right click My Computer icon on your desktop, Select Properties and click on Device Manager (to check your USB port on Device Manager). -
Page 42: Appendices
Appendices Understanding Camera Sounds and LED While the digital camera is in the process of capturing, storing, and displaying pictures, it gives off beeping sounds and may also display a blinking LED. The camera also beeps and displays a blinking LED when it is unable to perform a certain function. -
Page 43: Default Camera Settings
Default Camera Settings When you first purchased your digital camera, these are the factory default settings that have been chosen for your camera: EV Compensation White Quality Resolution LCD Brightness Sounds Auto OFF Language Video Out Display (Information in Playback mode) -
Page 44: Camera Specifications
Camera Specifications Image Sensor Color Image Resolution Lens Focal length Working Distance Viewfinder Type Zoom Shutter Speed Exposure White Balance Memory File Format Operating System Software Language Support Flash Self-timer Connectors Certification Weight Dimension *Design and Specifications are subject to change without notice.
Need help?
Do you have a question about the DC 3311 and is the answer not in the manual?
Questions and answers