
Related Manuals for Worcester Greenstar HIU


Summary of Contents for Worcester Greenstar HIU
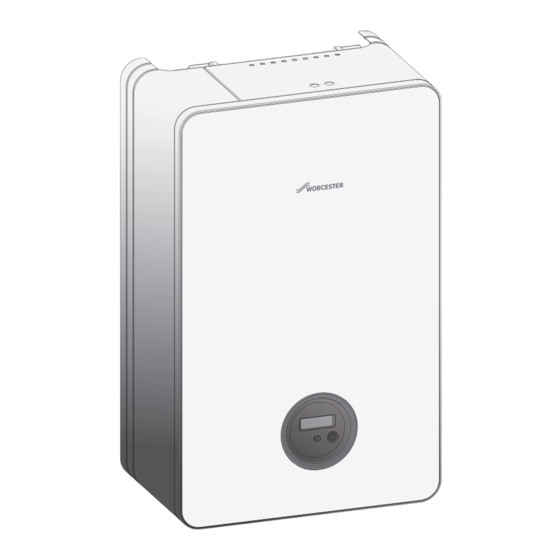
- Page 1 Installation and maintenance instructions for specialists Heat Interface Unit Greenstar HIU / HIU E / HIU KE Draft - 24.11.22...
-
Page 2: Table Of Contents
Table of contents Table of contents 12 Data Protection Notice ....... 27 13 Appendix . -
Page 3: Explanation Of Symbols And Safety Instructions
Explanation of symbols and safety instructions High pressures and high temperatures may occur on the primary side. Explanation of symbols and safety instructions ▶ Wear suitable protective equipment. H Packaging Explanation of symbols The following points should be observed during unpacking. Warnings ▶... -
Page 4: Product Information
Product Information ▶ Hand over the installation and operating instructions to the user for safekeeping. Product Information Scope of delivery ▶ Check that the delivery is complete and undamaged. 0010032940-001 Fig. 1 Scope of delivery of heat interface unit Heat Interface Unit Wall mounting bracket Installation and maintenance instructions, gaskets (10 x), drilling 00100... -
Page 5: Type Plate
Product Information System separation Type Plate • The two heat exchangers for DHW and heating hydraulically The data plate includes the performance information, approval data and disconnect the primary heating circuit from the heating circuit. serial number of the product [2]. There is an additional data plate behind the control unit [1]. -
Page 6: Declaration Of Conformity
British legislation, which is stipulated by attaching these markings. The complete text of the Declaration of Conformity is available on the Internet: worcester-bosch.co.uk. Regulations ▶ Observe updated regulations or supplements. These regulations also apply at the time of installation. -
Page 7: Preparatory Work
Preparatory work Nalco Varidos 1+1 (1-2%) MC ZERO (25-40%) Preparatory work Nalco Varidos FSK (22-55%) Table 5 Typical additives for the heating water Observe general notices ▶ Remove the packaging, observing all notices in the packaging. Floor heating ▶ Mount the HIU as close as possible to the most frequently used water To protect the underfloor circuit in the event of faults: draw-off point. -
Page 8: Mounting The Filling Device
Assembly Assembly Quick reference guide ▶ For detailed information, refer to the following chapters. Fig. 8 Discharge pipe Discharge pipe (turned back onto external wall example) Outside wall Discharge pipe (into drain or gully example) External drain Mounting the filling device You have the following options for filling the system: Fig. -
Page 9: Mounting Wall Mounting Bracket
Assembly Mounting wall mounting bracket NOTICE Incorrect assembly can cause material damage. If the device is assembled incorrectly, it may fall off the wall. ▶ Only install the device on a rigid, solid wall. This wall must be able to carry the weight of the device and must at least be as large as the bearing surface of the device. -
Page 10: Installing The Mounting Plate (Accessory)
Electrical connection Installing the mounting plate (accessory) ▶ Tighten the connections [5]. The mounting plate makes it easier to connect the pipework to the HIU and is a necessary accessory. ▶ Attach mounting plate securely. ▶ Connect pipework to mounting plate. Ø22mm 0010032964-02 Ø15mm... -
Page 11: Opening The Control Unit
Electrical connection Opening the control unit Connection Function Cables/wires To access the unit: DHW control valve • Blue (4) ▶ Pull the unit [1] forwards and attach to the holder of the heat • Green (3) exchanger [2]. • Grey (2) •... -
Page 12: Cable Preparations
Electrical connection Heating circuit with radiator Connection Function Outdoor ambient temperature sensor BUS connection for Sense II room temperature- dependent controller Temperature switch, underfloor heating system Table 11 Option 1: Sense II room controller connection Connection Function Temperature switch, underfloor heating system External time and temperature control (e.g. -
Page 13: Commissioning
Commissioning To remove the cover [1]: Commissioning ▶ Release locking devices [2] with a screwdriver. Make all electrical connections in accordance with the wiring diagram and then carry out the commissioning! ▶ Observe the installation instructions for all components and assemblies in the system. -
Page 14: Adjusting The Control Unit
Commissioning ▶ Clean strainer ( chapter "Inspection and maintenance"). ▶ Fill the system and check for tightness. ▶ Close the shut-off valves once the pressure gauge has reached between 1 and 1.5 bar. ▶ Switch on the power supply. ▶ Ensure the correct primary flow rates are available to the HIU ( chapter Heat meter (Option)). -
Page 15: Control Valve Status Indicators
Commissioning Control valve status indicators To be able to see the On/Off indicators of the control valves: [mbar] ▶ Remove the enclosure, insulation and control unit. LED power-saving mode: if the position of the valves does not change for 15 seconds, the LED displays are not visible. Indicators Description Orange, blue, green... -
Page 16: Heat Meter (Option)
Commissioning Heat meter (Option) The energy meter uses an ultrasonic flow sensor to record all billing- relevant data for measuring the energy consumed by heating and hot water. The data read out is displayed on different loops in the display. The seal on the energy meter must not be damaged! A damaged seal will result in immediate invalidation of the factory warranty and verification. -
Page 17: Commissioning Checklist
Commissioning Commissioning checklist Window 1 Window 2 Window 3 ▶ Complete and sign checklist following assembly and commissioning. Accounting date 1 Accounting date 1 Accd 1 A Date Energy kWh User: Accd. 1 Date of future accounting date 1 Accounting date 1 Accounting date 1 Accd 1L System location:... -
Page 18: Shutdown
Shutdown Commissioning checklist Shutdown Primary circuit average return temperature measured? NOTICE ______ °C Damage due to freezing! Is the average return temperate 40 degrees or below? ▶ Leave the heating system switched on if there is a risk of frost. ______ °C Volumetric flow rate of primary circuit? If the heating system is decommissioned for a longer period:... -
Page 19: Inspection And Service
Inspection and service 10.1 Inspection and maintenance report Inspection and service WARNING To safeguard the functional reliability of the system and the validity of Risk to life from electric shock! guarantee claims: Touching live electrical parts can cause an electric shock. ▶... -
Page 20: Cleaning The Primary Strainer
Inspection and service 10.2 Cleaning the primary strainer ▶ Close the air vents again after draining! ▶ Turn the drain valve [1] anti-clockwise to open [2]. Draining the appliance To drain the primary circuit and the heating system: ▶ Disconnect heat interface unit with shut-off valves from the primary circuit and the heating system. - Page 21 Inspection and service ▶ Unplug the connecting lead [2] from the control valve [1]. ▶ To replace the sensor: unplug the connecting lead from the sensor [1]. ▶ Undo screw fittings [3] and remove control valve. ▶ Remove the retaining spring [3] and pull off the sensor. ▶...
- Page 22 Inspection and service Position °C Position °C Position °C Table 25 Bypass valve positions Heat meter ▶ Drain the HIU completely. ▶ Remove the connected sensor (primary circuit flow). 1. Remove the front cover by pulling forward. 2. Detach heat meter upwards from the holder. 3.
-
Page 23: Troubleshooting
Troubleshooting ▶ Vent water circuits sufficiently. ▶ Release the locking devices [5] to remove the cover. 6720808926-37.1Wo Fig. 48 control unit 6720808926-36.1Wo ▶ Unplug connections from the module. ▶ Remove cable and strain reliefs. Fig. 47 Flow limiter and flow turbine (flow rate 35 kW: 14 l/min, bottom pink / 50 kW: 21 l/min, bottom red) Control unit DANGER... -
Page 24: Domestic Hot Water Trouble Shooting Guide
Troubleshooting Problem Possible cause Possibly solution/check Room controller incorrectly set or ▶ Check that room controller is set correctly and is calling for heat. faulty ▶ Replace room controller if necessary. ▶ Check that control valve is functioning correctly, section 7.3. Faulty Central Heating control valve or dirt inside valve body causing low ▶... - Page 25 Troubleshooting Problem Possible cause Possibly solution/check ▶ Check that control valve is functioning correctly, section 7.3. Faulty DHW control valve or dirt ▶ Perform re-calibration of control valve, section 7.2. inside valve body causing low flow or no flow though district supply circuit ▶...
-
Page 26: Led Displays At The Control Unit
Troubleshooting 11.3 LED displays at the control unit Left LED Right LED Cause Conclusions Outdoor temperature sensor error No set value has been specified for weather-compensated control. The heating function is not detecting a heating load. Heating flow temperature sensor fault Heating and frost protection functions are disabled If the HIU detects a heating module, a low loss Heating function is deactivated. -
Page 27: Data Protection Notice
11.6 Heating pump fault display Data Protection Notice We, Bosch Thermotechnology Ltd., Cotswold Way, Warndon, Worcester WR4 9SW, United Kingdom process product and installation information, technical and connection data, communication data, product registration and client history data to provide product functionality (art. 6 (1) sentence 1 (b) GDPR / UK GDPR), to fulfil our duty of product surveillance and for product safety and security reasons (art. -
Page 28: Tech Data
Appendix Setting Maximum head (nominal) Maximum P1 (nominal) Primary circuit Curve 1 25 W 65 °C 70 °C 80 °C Curve 2 33 W HIU (...) Curve 3 39 W Potable Hot Water output 31.3 36.6 41.8 Volumetric flow rate of primary 0.17 0.18 0.17... - Page 29 Appendix Resistance Resistance Resistance Resistance Temperature Temperature Temperature Temperature °C °C °C °C 14772 2744 95893 19860 11981 2322 72228 15693 9786 1990 54889 12486 8047 1704 42069 10000 6653 1464 32506 8060 5523 1262 25313 8060 4608 1093...
-
Page 30: Domestic Hot Water Performance Chart
Appendix 13.3 Domestic Hot Water performance chart K v = 1.1 m³/hr HIU + DPCV + Heat Meter K v = 1.3 m³/hr HIU + DPCV K v = 1.3 m³/hr HIU + Heat Meter K v = 1.7 m³/hr 50°C 45°C 00100... -
Page 31: Heating Circuit Performance Chart
Appendix 13.4 Heating circuit performance chart K v = 1.1 m³/hr HIU + DPCV + Heat Meter K v = 1.3 m³/hr HIU + DPCV K v = 1.4 m³/hr HIU + Heat Meter K v = 1.7 m³/hr Fig. 55 Heating circuit performance chart for 3 kW and 6 kW (DPCV = Differential Pressure Control Valve) Greenstar –... - Page 32 CONTROLS AND CONNECTIVITY TEAM: 0330 123 3641 APPOINTMENTS: 0330 123 9339 SPARES: 0330 123 9779 LITERATURE: 0330 123 9119 TRAINING: 0330 123 0166 SALES: 0330 123 9669 Bosch Thermotechnology Ltd. Cotswold Way, Warndon Worcester WR4 9SW United Kingdom Tel. 0330 123 9559 worcester-bosch.co.uk...
Need help?
Do you have a question about the Greenstar HIU and is the answer not in the manual?
Questions and answers