Table of Contents
Advertisement
Quick Links
Advertisement
Table of Contents

Related Manuals for Yamaha SR-C30A


Summary of Contents for Yamaha SR-C30A
- Page 1 User Guide Sound Bar...
-
Page 2: Table Of Contents
CONTENTS CONTENTS INTRODUCTION 5 About this User Guide................ 5 Features.................... 6 Confirming the included items.............. 8 PART NAMES AND FUNCTIONS 10 Part names of the sound bar (front/top)............. 10 Part names of the sound bar (rear)............. 12 Part names of the subwoofer.. - Page 3 CONTENTS Adjusting the sound to your preference............ 38 Sound functions of this product.............................. 38 Surround playback................................... 40 Stereo playback.................................. 41 Adjusting the volume of the subwoofer.......................... 42 Playing back human voices clearly (CLEAR VOICE)........................ 43 Enjoying rich bass sound (BASS EXT)............................ 44 Listening to audio from a Bluetooth® device.......... 45 ADDITIONAL FEATURES 48 Changing the brightness of the indicators (Dimmer)........ 48...
- Page 4 CONTENTS Other actions.................. 79 How to connect AV devices such as BD/DVD players...................... 79 How to minimize standby power consumption........................ 80 Precautions for remote control batteries.......................... 81 How to replace the remote control battery.......................... 82 What to do if the sound bar and subwoofer are not paired automatically..
-
Page 5: Introduction
INTRODUCTION > About this User Guide INTRODUCTION About this User Guide This User Guide uses the following signal words for important information: WARNING This content indicates “risk of serious injury or death.” CAUTION This content indicates “risk of injury.” NOTICE Indicates points that you must observe in order to prevent product failure, damage or malfunction and data loss, as well as to protect the environment. -
Page 6: Features
INTRODUCTION > Features Features This product is a bar-shaped speaker system for your TV that allows you to easily enjoy surround sound on the TV with a rich sense of presence. Produce surround sound just by connecting to a TV Related links “Surround playback” (p.40) Easily play audio content from a Bluetooth device... - Page 7 Certified as a Yamaha Eco-Product Yamaha Eco-Label is a mark that certifies products of high environmental performance. With an advanced energy saving design, this product achieves a low power consumption of 1.8 W or less...
-
Page 8: Confirming The Included Items
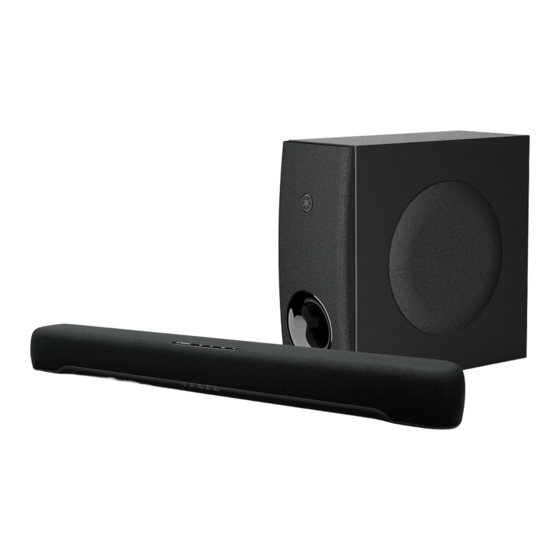
INTRODUCTION > Confirming the included items Confirming the included items The following items are included with this product. Make sure that all of the included items are present. Main devices Sound bar (SR-CUC30A) Subwoofer (SR-WSWC30A) Accessories Remote control * A Lithium battery (CR2025) has already been inserted into the remote control. AC adaptor (model number: ANAD-420FIOT-B) Power cords (×2) Digital optical audio cable... - Page 9 INTRODUCTION > Confirming the included items Non-skid pads (×4 on 1 sheet) * Attach these to the bottom of the subwoofer. Mounting template * Use when mounting the sound bar on a wall. Spacers (A: ×2, B: ×2 on 1 sheet) * Use when mounting the sound bar on a wall.
-
Page 10: Part Names And Functions
PART NAMES AND FUNCTIONS > Part names of the sound bar (front/top) PART NAMES AND FUNCTIONS Part names of the sound bar (front/top) This section describes the part names and functions of the front/top of the sound bar. Indicators The indicators flash or glow to show the operation and setting status. During normal playback, the setting status is indicated as follows: TV, OPTICAL, BLUETOOTH, or ANALOG: Selected playback device SURROUND: Surround playback (glowing) / Stereo playback (off) - Page 11 PART NAMES AND FUNCTIONS > Part names of the sound bar (front/top) NOTE To prevent unintended operation, do not place anything on the controls of the sound bar. Enabling the Child Lock function prevents accidental operation. The brightness of the indicators can be adjusted by pressing DIM. Related links “Enabling/disabling the Child Lock function” (p.54) “Changing the brightness of the indicators (Dimmer)” (p.48)
-
Page 12: Part Names Of The Sound Bar (Rear)
PART NAMES AND FUNCTIONS > Part names of the sound bar (rear) Part names of the sound bar (rear) This section describes the part names and functions of the rear of the sound bar. UPDATE ONLY jack Use to update the sound bar’s firmware. Refer to the instructions supplied with the firmware for details. -
Page 13: Part Names Of The Subwoofer
PART NAMES AND FUNCTIONS > Part names of the subwoofer Part names of the subwoofer This section describes the part names and functions of the subwoofer. Front Rear Bass reflex port Speaker PAIRING button Use to pair the sound bar with the subwoofer manually. (p.83). STANDBY indicator Indicates the status of the subwoofer (p.72). -
Page 14: Part Names Of The Remote Control
PART NAMES AND FUNCTIONS > Part names of the remote control Part names of the remote control This section describes the part names and functions of the remote control. z (Power) button Turn the sound bar on and off (p.35). Input source buttons Select an audio input source (p.36). - Page 15 PART NAMES AND FUNCTIONS > Part names of the remote control Sound mode buttons Switch to your preferred sound mode (p.38). STEREO STANDARD 3D MOVIE GAME INFO button Check information such as the type of audio signal being played and the settings for the sound bar’s functions (p.50).
-
Page 16: Preparation Preparation
PREPARATION > Preparation PREPARATION Preparation Install the sound bar and connect a TV to it. Install the sound bar and subwoofer. “Installing the product” (p.20) Connect a TV to the sound bar. Connect the TV to the sound bar using a method suitable for the type of jacks on the TV and the functions to be used. - Page 17 PREPARATION > Preparation NOTE Connect AV devices (such as BD/DVD players and set top boxes) to the TV’s HDMI input jacks. HDMI IN This sound bar AV devices When playing audio from a TV or AV device via the sound bar, set the input sources as follows: Sound bar’s input source: TV TV’s input source: AV device playing the content Audio Return Channel (ARC) is a function that transmits audio signals from the TV’s HDMI input jack.
-
Page 18: Precautions For Preparation
PREPARATION > Precautions for preparation Precautions for preparation Before installing the sound bar and connecting other devices, be sure to read the following precautions. Be sure to follow the precautions. Precautions for installation WARNING Install as instructed in the User Guide. Failure to observe this may cause devices to fall and result in injury. Confirm that the finished installation is safe and secure. - Page 19 PREPARATION > Precautions for preparation Precautions for connections WARNING Use this product with the power supply voltage printed on it. Failure to observe this may cause a fire, electric shocks, or malfunctions. Be sure to use the included power cord and AC adaptor. Do not use the included power cord and AC adaptor for other devices. Failure to observe this may cause a fire, electric shocks, or malfunctions.
-
Page 20: Installing The Product
PREPARATION > Installing the product Installing the product Before installing the sound bar, be sure to read the following precautions. “Precautions for preparation” (p.18) Install the sound bar as shown in the following illustration. Controls Installing the subwoofer There are two ways to install the subwoofer: upright and on its side. Attach the non-skid pads to the bottom of the subwoofer according to how the subwoofer is installed. - Page 21 For proper installation of the sound bar on a wall, make sure to have it done by the dealer from which you purchased the unit or by a qualified contractor. Refer to the Wall Mounting Installation Guide for more information. https://manual.yamaha.com/av/sb/wallmount/src20a_c30a/ If you change how the sound bar is installed, switch the frequency characteristics. This will make the sound suitable for whichever way the sound bar is installed (p.59).
-
Page 22: Connecting A Tv
PREPARATION > Connecting a TV Connecting a TV Connecting a TV to the sound bar Select the connection procedure according to the type of jacks on the TV and the functions to be used. Connecting a TV equipped with a digital optical audio output jack, and controlling the sound bar using the remote control included with this product Connect the TV using the included digital optical audio cable. - Page 23 PREPARATION > Connecting a TV When connecting to an HDMI input jack not compatible with ARC Connection procedure “Connecting a TV using an HDMI cable (commercially available)” (p.26) TV without a digital optical audio output jack, but equipped with an HDMI input jack compatible with Audio Return Channel (ARC) Connect a TV using an HDMI cable.
-
Page 24: Connecting A Tv Using Only The Included Digital Optical Audio Cable
PREPARATION > Connecting a TV Connecting a TV using only the included digital optical audio cable Before connecting devices, be sure to read the following precautions. “Precautions for preparation” (p.18) Connect a TV using the included digital optical audio cable. The TV’s audio signal is transmitted to the sound bar. Connect a TV to the sound bar. - Page 25 PREPARATION > Connecting a TV Connect the sound bar and subwoofer to power. Sound bar (rear) AC adaptor (included) Power cord (included) To an AC wall outlet Power cord (included) To an AC wall outlet Subwoofer (rear) NOTE Connect an AV device (such as a set top box) to the TV.
-
Page 26: Connecting A Tv Using An Hdmi Cable (Commercially Available)
PREPARATION > Connecting a TV Connecting a TV using an HDMI cable (commercially available) Before connecting devices, be sure to read the following precautions. “Precautions for preparation” (p.18) If a TV is connected via an HDMI cable, the sound bar can be controlled by the HDMI Control function using the TV’s remote control. - Page 27 PREPARATION > Connecting a TV Connect the sound bar and subwoofer to power. Sound bar (rear) AC adaptor (included) Power cord (included) To an AC wall outlet Power cord (included) To an AC wall outlet Subwoofer (rear) When connecting to an HDMI input jack not compatible with ARC Connect the TV using an HDMI cable (commercially available) and included digital optical audio cable.
- Page 28 PREPARATION > Connecting a TV Connect a TV to the sound bar. HDMI OUT/TV (ARC) jack Control signal HDMI HDMI input jack HDMI IN HDMI HDMI Sound bar (rear) TV’s audio signal OPTICAL Digital optical audio output jack TV jack 2.
- Page 29 PREPARATION > Connecting a TV Connect the sound bar and subwoofer to power. Sound bar (rear) AC adaptor (included) Power cord (included) To an AC wall outlet Power cord (included) To an AC wall outlet Subwoofer (rear) NOTE When connected to an ARC-compatible HDMI input jack, enable the HDMI Control function of the sound bar. Default setting: Enabled Use a 19-pin HDMI cable with the HDMI logo printed on it.
-
Page 30: Connecting An Audio Device
PREPARATION > Connecting an audio device Connecting an audio device Before connecting devices, be sure to read the following precautions. “Precautions for preparation” (p.18) Devices equipped with audio output jacks can be connected directly to the sound bar. A device with a digital optical audio output jack Connect an audio device using a digital optical audio cable. - Page 31 PREPARATION > Connecting an audio device Connect the sound bar and subwoofer to power. Sound bar (rear) AC adaptor (included) Power cord (included) To an AC wall outlet Power cord (included) To an AC wall outlet Subwoofer (rear) NOTE When connecting a device equipped with video output, connect the video output jack directly to the video input jack on the TV. A device with an analog audio output jack Connect an audio device using a 3.5 mm stereo mini plug cable (commercially available).
- Page 32 PREPARATION > Connecting an audio device Connect an audio device to the sound bar. ANALOG jack Audio output jack Audio signal OUTPUT Sound bar (rear) Audio device Cable to use 3.5 mm stereo mini plug cable (commercially available)
- Page 33 PREPARATION > Connecting an audio device Connect the sound bar and subwoofer to power. Sound bar (rear) AC adaptor (included) Power cord (included) To an AC wall outlet Power cord (included) To an AC wall outlet Subwoofer (rear) CAUTION If the volume can be adjusted on a device connected to the ANALOG input jack of the sound bar, adjust the volume of the device so that the volume is about the same for both the TV and the device.
-
Page 34: Preparing The Remote Control
PREPARATION > Preparing the remote control Preparing the remote control Remove the battery insulating strip before attempting to use the remote control. Battery insulating strip Related links “How to replace the remote control battery” (p.82) -
Page 35: Turning On And Off The Sound Bar
PREPARATION > Turning on and off the sound bar Turning on and off the sound bar Turn the sound bar on and off. Press z (power) button. Pressing the button turns the sound bar on and off. z (Power) When the sound bar is turned on, all the indicators glow, and then some indicators remain glowing to show the setting status (normal display). -
Page 36: Playback
PLAYBACK > Basic control during playback PLAYBACK Basic control during playback This section describes the basic control operations available during playback. Selecting an input source Press one of the following buttons. TV button: Audio from a TV OPTICAL button: Audio from a device connected to the OPTICAL input jack BLUETOOTH button: Audio from a Bluetooth device ANALOG button: Audio from a device connected to the ANALOG input jack The indicator of the selected input source button glows. - Page 37 PLAYBACK > Basic control during playback If audio is being output from both the TV speakers and the sound bar, mute the TV. To temporarily mute the sound bar, press |. To unmute, press | again or press VOLUME (+/-). While muted, the indicators will show the following.
-
Page 38: Adjusting The Sound To Your Preference
PLAYBACK > Adjusting the sound to your preference Adjusting the sound to your preference Sound functions of this product This product is equipped with sound modes for surround playback and for stereo playback. There are also various sound settings for adjusting the sound to suit your preferences even better. Sound modes A sound mode can be selected from among three sound modes for surround playback and one sound mode for stereo playback. - Page 39 PLAYBACK > Adjusting the sound to your preference Related links “Surround playback” (p.40) “Stereo playback” (p.41) “Playing back human voices clearly (CLEAR VOICE)” (p.43) “Enjoying rich bass sound (BASS EXT)” (p.44)
-
Page 40: Surround Playback
PLAYBACK > Adjusting the sound to your preference Surround playback Press STANDARD, 3D MOVIE, or GAME to switch to surround playback. Select your preferred sound mode according to the content viewed or listened to. Glows Related links “Sound functions of this product” (p.38) -
Page 41: Stereo Playback
PLAYBACK > Adjusting the sound to your preference Stereo playback Press STEREO to switch to 2-channel stereo playback. Related links “Sound functions of this product” (p.38) -
Page 42: Adjusting The Volume Of The Subwoofer
PLAYBACK > Adjusting the sound to your preference Adjusting the volume of the subwoofer Adjust the volume of the subwoofer only. Press SUBWOOFER (+/-) to adjust the volume. The glowing indicator changes to show the volume level. Volume is turned down (-) Volume is turned up (+) -
Page 43: Playing Back Human Voices Clearly (Clear Voice)
PLAYBACK > Adjusting the sound to your preference Playing back human voices clearly (CLEAR VOICE) The human voices within the audio can be heard more easily without turning up volume when the Clear Voice function is enabled. The function is recommended for enjoying movies or dramas at a low volume, and for movies or dramas that use a lot of background music and sound effects. -
Page 44: Enjoying Rich Bass Sound (Bass Ext)
PLAYBACK > Adjusting the sound to your preference Enjoying rich bass sound (BASS EXT) The acoustic image of bass sound is enhanced when the Bass Extension function is enabled. It allows you to enjoy rich bass performance with a strong presence without disturbing the balance of the overall sound. This function is recommended when you want to increase the bass while suppressing the volume of the subwoofer, or when you want to emphasize the sounds of low-pitched instruments. -
Page 45: Listening To Audio From A Bluetooth® Device
PLAYBACK > Listening to audio from a Bluetooth® device Listening to audio from a Bluetooth® device Audio content from a Bluetooth device can be played through the sound bar. Bluetooth device Press BLUETOOTH to switch the input source to Bluetooth. The sound bar enters the connection wait status, and the BLUETOOTH indicator flashes. - Page 46 PLAYBACK > Listening to audio from a Bluetooth® device Select the sound bar on the Bluetooth device. Yamaha SR-C30A YamahaAV When the connection is established, the BLUETOOTH indicator on the sound bar stops flashing and starts glowing blue. Glowing blue Start playback on the Bluetooth device.
- Page 47 PLAYBACK > Listening to audio from a Bluetooth® device Bluetooth device (performing playback) Bluetooth device (playback stopped) Perform the following procedures to switch between devices for playback. Stop playback on the Bluetooth device. Start playback on the other Bluetooth device. Audio from the other Bluetooth device can be heard on the sound bar.
-
Page 48: Additional Features Changing The Brightness Of The Indicators (Dimmer)
ADDITIONAL FEATURES > Changing the brightness of the indicators (Dimmer) ADDITIONAL FEATURES Changing the brightness of the indicators (Dimmer) Change the brightness of the indicators of the sound bar to one of three levels: “Bright”, “Dim”, or “Off”. The brightness is “Dim” by default. Turn on the sound bar. -
Page 49: Using A Tv's Remote Control To Control The Sound Bar (Hdmi Control)
ADDITIONAL FEATURES > Using a TV’s remote control to control the sound bar (HDMI Control) Using a TV’s remote control to control the sound bar (HDMI Control) When the sound bar is connected to a TV via an HDMI cable, the sound bar can be controlled using the TV’s remote control. -
Page 50: Showing The Type Of Audio Signal And Settings For Functions
ADDITIONAL FEATURES > Showing the type of audio signal and settings for functions Showing the type of audio signal and settings for functions The type of audio signal being played and settings for the sound bar’s functions can be checked. Press INFO. -
Page 51: Controlling The Sound Bar With The Smartphone App
ADDITIONAL FEATURES > Controlling the sound bar with the smartphone app Controlling the sound bar with the smartphone app By installing the free dedicated app “Sound Bar Remote” on a smartphone, the sound bar can also be controlled from that smartphone. Search for “Sound Bar Remote”... -
Page 52: Configuration
CONFIGURATION > Enabling/disabling the HDMI Control function CONFIGURATION Enabling/disabling the HDMI Control function Enabling the HDMI Control function allows the sound bar to be controlled using the TV’s remote control. Default setting: Enabled Turn off the sound bar. Hold down TV for at least five seconds. The HDMI Control function switches from enabled to disabled, or from disabled to enabled. -
Page 53: Enabling/Disabling The Auto Power Standby Function
CONFIGURATION > Enabling/disabling the Auto Power Standby function Enabling/disabling the Auto Power Standby function Enabling the Auto Power Standby function turns off the sound bar in any of the following situations. No control operations for eight hours No audio input and no control operations for 20 minutes (except when ANALOG is selected as the input source) The default setting varies depending on the model. -
Page 54: Enabling/Disabling The Child Lock Function
CONFIGURATION > Enabling/disabling the Child Lock function Enabling/disabling the Child Lock function Locking the controls of the sound bar prevents accidental operation (Child Lock function). Default setting: Disabled (no Child Lock) Turn off the sound bar. Hold down INFO for at least five seconds. The Child Lock function switches from enabled to disabled, or from disabled to enabled. -
Page 55: Enabling/Disabling The Bluetooth Standby Function
CONFIGURATION > Enabling/disabling the Bluetooth Standby function Enabling/disabling the Bluetooth Standby function Enabling the Bluetooth Standby function allows the sound bar to be turned on automatically when a Bluetooth device connects to the sound bar. Default setting: Enabled Turn off the sound bar. Hold down BLUETOOTH for at least five seconds. -
Page 56: Enabling/Disabling The Bluetooth Function
CONFIGURATION > Enabling/disabling the Bluetooth function Enabling/disabling the Bluetooth function The Bluetooth function can be disabled. Default setting: Enabled Turn off the sound bar. Hold down DIM for at least five seconds. The Bluetooth function switches from enabled to disabled, or from disabled to enabled. The indicator shows the setting applied as follows, and the sound bar is turned on. -
Page 57: Setting The Dynamic Range Compression Level
CONFIGURATION > Setting the dynamic range compression level Setting the dynamic range compression level Compressing the dynamic range of audio signals (the volume difference between the loudest and quietest sounds) makes it easier to listen at a low volume. This setting is applied only when Dolby Digital audio signals are being played. - Page 58 CONFIGURATION > Setting the dynamic range compression level Hold down one of the following buttons for at least five seconds. Compression level Function Button of remote control Apply the maximum amount of dynamic Maximum compression range compression. Apply an amount of dynamic range Standard compression compression well suited for a typical room.
-
Page 59: Setting The Frequency Characteristics Of The Sound According To How The Sound Bar Is Installed
CONFIGURATION > Setting the frequency characteristics of the sound according to how the sound bar is installed Setting the frequency characteristics of the sound according to how the sound bar is installed Switch the frequency characteristics of the sound bar so that the sound suits the way it is installed. Default setting: Installed on a stand Wall-mounted Installed on a stand... - Page 60 CONFIGURATION > Setting the frequency characteristics of the sound according to how the sound bar is installed According to how the sound bar is installed, hold down one of the following buttons for at least five seconds. Wall-mounted Installed on a stand The frequency characteristics setting is changed.
-
Page 61: Initializing The Sound Bar
CONFIGURATION > Initializing the sound bar Initializing the sound bar Reset the settings of the sound bar to the factory presets. The sound bar is turned off. While holding down } on the sound bar, hold down z until all indicators flash. Initialization is performed. -
Page 62: Troubleshooting
TROUBLESHOOTING > Check the following first when any problem occurs TROUBLESHOOTING Check the following first when any problem occurs Make sure of the following when the product does not function properly. The power cords of all the devices are connected to AC wall outlets securely. The product, TV and AV devices are turned on. -
Page 63: When A Problem Occurs: Power Or Overall Functionality
After confirming that all connections are made properly, turn on the sound bar again. If the power still turns off frequently, unplug the power cord from the AC wall outlet and contact the nearest authorized Yamaha dealer or service center. “List of support centers” (p.95) - Page 64 The protection circuitry has been activated three times consecutively. To protect the product, the power cannot be turned on. Unplug the power cord from the AC wall outlet and contact the nearest authorized Yamaha dealer or service center. “List of support centers” (p.95)
- Page 65 TROUBLESHOOTING > When a problem occurs: Power or overall functionality No operations can be performed from the sound bar’s controls The controls of the sound bar are locked. Unlock the controls of the sound bar. “Enabling/disabling the Child Lock function” (p.54)
- Page 66 TROUBLESHOOTING > When a problem occurs: Power or overall functionality All indicators are off although the power is on (the power appears to be off) Indicator brightness is set to “Off”. Change the brightness. “Changing the brightness of the indicators (Dimmer)” (p.48)
- Page 67 TROUBLESHOOTING > When a problem occurs: Power or overall functionality The sound bar does not function correctly The internal microcomputer is frozen due to an external electric shock (such as lightning or excessive static electricity) or to a drop in the power supply voltage. Unplug the power cords of the sound bar and subwoofer from the AC wall outlets, and then plug them in again after at least 10 seconds.
- Page 68 TROUBLESHOOTING > When a problem occurs: Power or overall functionality The sound bar turns on by itself Another Bluetooth device is being operated nearby. Terminate the Bluetooth connection with the sound bar. “Listening to audio from a Bluetooth® device” (p.45)
- Page 69 TROUBLESHOOTING > When a problem occurs: Power or overall functionality The sound bar cannot be controlled with the remote control The sound bar is out of the operating range. Use the remote control within the operating range. “Part names of the remote control” (p.14) The battery has run out.
- Page 70 TROUBLESHOOTING > When a problem occurs: Power or overall functionality The sound bar cannot be controlled using the TV’s remote control The HDMI Control function is not properly configured. Confirm that the settings are properly configured as follows: The HDMI Control function of the sound bar is enabled. The HDMI Control function is enabled on the TV.
-
Page 71: When A Problem Occurs: Audio
TROUBLESHOOTING > When a problem occurs: Audio When a problem occurs: Audio No sound The input source you are attempting to play back from is not selected. Select the correct input source. “Basic control during playback” (p.36) The mute function is active. Cancel the mute function. - Page 72 To protect the product, the power of the subwoofer cannot be turned on. Unplug the power cord from the AC wall outlet and contact the nearest authorized Yamaha dealer or service center. The * indicator on the subwoofer is flashing.
- Page 73 TROUBLESHOOTING > When a problem occurs: Audio The volume decreases when the sound bar is turned on The Automatic Volume Adjustment function lowered the volume. To prevent unexpected excessive loudness, the sound bar is equipped with the Automatic Volume Adjustment function. If the sound bar was turned off with the volume set high, the volume is automatically adjusted to a safe listening level the next time the sound bar is turned on.
- Page 74 TROUBLESHOOTING > When a problem occurs: Audio No surround effect Stereo playback is selected. Select surround playback. “Surround playback” (p.40) The volume is too low. Turn up the volume. “Basic control during playback” (p.36) The TV or AV device is set to output 2-channel audio (such as PCM) only. Change the audio output setting on the TV or AV device to output Bitstream audio signals.
- Page 75 TROUBLESHOOTING > When a problem occurs: Audio Noise is heard The sound bar is too close to another digital or high-frequency device. Move those devices away from the sound bar.
-
Page 76: When A Problem Occurs: Bluetooth
TROUBLESHOOTING > When a problem occurs: Bluetooth® When a problem occurs: Bluetooth® The sound bar cannot be connected to a Bluetooth® device Bluetooth is not selected as the input source of the sound bar. Select Bluetooth as the input source. “Listening to audio from a Bluetooth®... - Page 77 TROUBLESHOOTING > When a problem occurs: Bluetooth® No sound can be heard or the sound cuts off intermittently from a Bluetooth® device The volume on the Bluetooth device is too low. Raise the volume on the Bluetooth device. Bluetooth is not selected as the input source of the sound bar. Select Bluetooth as the input source.
-
Page 78: When A Problem Occurs: App
TROUBLESHOOTING > When a problem occurs: App When a problem occurs: App The app cannot detect the sound bar An app not supported by the sound bar is being used. This sound bar supports Sound Bar Remote only. Sound Bar Controller, Home Theater Controller, and MusicCast Controller cannot be used. -
Page 79: Other Actions
TROUBLESHOOTING > Other actions Other actions How to connect AV devices such as BD/DVD players Connect AV devices, such as BD/DVD players and set top boxes, to the TV’s HDMI input jacks. HDMI IN This sound bar AV devices When playing audio from a TV or AV device via the sound bar, set the input sources as follows: Sound bar’s input source: TV TV’s input source: AV device playing the content... -
Page 80: How To Minimize Standby Power Consumption
TROUBLESHOOTING > Other actions How to minimize standby power consumption Change the settings as follows: HDMI Control: Disabled Bluetooth Standby: Disabled Related links “Enabling/disabling the HDMI Control function” (p.52) “Enabling/disabling the Bluetooth Standby function” (p.55) -
Page 81: Precautions For Remote Control Batteries
TROUBLESHOOTING > Other actions Precautions for remote control batteries Before replacing the remote control battery with a new one, be sure to read the following precautions. Be sure to follow the precautions. WARNING The remote control included with this product contains a coin/button cell battery. Do not ingest the coin/button battery. Keep new and used batteries away from children. -
Page 82: How To Replace The Remote Control Battery
TROUBLESHOOTING > Other actions How to replace the remote control battery Before replacing the battery with a new one, be sure to read the following precautions. “Precautions for remote control batteries” (p.81) When the battery runs out, the sound bar can no longer be controlled with the remote control. Replace the battery with a new one. -
Page 83: What To Do If The Sound Bar And Subwoofer Are Not Paired Automatically
TROUBLESHOOTING > Other actions What to do if the sound bar and subwoofer are not paired automatically Normally, the sound bar and subwoofer are paired automatically, but if they are not properly paired due to a temporary communications failure, pair them manually. NOTE Pairing is the process of having the sound bar and subwoofer recognize one another as devices to connect to. - Page 84 TROUBLESHOOTING > Other actions Install the sound bar and subwoofer in positions where they are not obstructed from each other by metal furniture. If a device emitting electromagnetic waves (such as a microwave oven or a wireless LAN device) is located nearby, place the subwoofer and sound bar farther away from it.
-
Page 85: How To Reset The Sound Bar
TROUBLESHOOTING > Other actions How to reset the sound bar Reset the sound bar by performing the following operations. To restart the sound bar Unplug the power cords of the sound bar and subwoofer from the AC wall outlets, and then plug them in again after at least 10 seconds and turn on the power. -
Page 86: Appendix Specifications
APPENDIX > Specifications APPENDIX Specifications The specifications of this product are as follows. Sound bar Amplifier section Maximum rated output power Front L/R 20 W × 2 channels Speaker section Front L/R Acoustic suspension type Type (non-magnetic shielding) Driver 4.6 cm (1-13/16") cone × 2 Frequency response 210 Hz to 22 kHz Impedance... - Page 87 (23-5/8" × 2-1/2" × 4") Weight 1.3 kg (2.9 lb) NOTE The contents of this User Guide apply to the latest specifications as of the publishing date. The latest version of the User Guide is available to download from the Yamaha website.
- Page 88 (13-1/4" × 6-3/8" × 14-3/8") Weight 5.7 kg (12.6 lb) NOTE The contents of this User Guide apply to the latest specifications as of the publishing date. The latest version of the User Guide is available to download from the Yamaha website.
-
Page 89: Supported Digital Audio Signal Formats
2 channels, 32 / 44.1 / 48 / 88.2 / 96 kHz, up to 24-bit Bitstream Dolby Digital NOTE The contents of this User Guide apply to the latest specifications as of the publishing date. The latest version of the User Guide is available to download from the Yamaha website. -
Page 90: List Of Indicator Displays
APPENDIX > List of indicator displays List of indicator displays The indicators of this product display information primarily in the following ways: Sound bar’s indicators NOTE This document shows indicator glowing status as follows: Glowing Flashing Power off state Normal playback state Glowing: Playing audio from the TV OPTICAL Glowing: Playing audio from the OPTICAL input jack... - Page 91 APPENDIX > List of indicator displays Showing the type of audio signal and settings for functions The indicators on the sound bar will show the following information on the type of audio signal and the settings for functions for three seconds immediately after INFO is pressed. Type of audio signal TV glows white: Dolby Digital OPTICAL glows white: AAC...
- Page 92 APPENDIX > List of indicator displays Related links “Basic control during playback” (p.36) “Showing the type of audio signal and settings for functions” (p.50) “Changing the brightness of the indicators (Dimmer)” (p.48) “When a problem occurs: Power or overall functionality” (p.63) Information displayed by the indicators of the subwoofer NOTE This document shows indicator glowing status as follows: Glowing...
- Page 93 HDMI Licensing Administrator, Inc. in the United States and other countries. The Bluetooth® word mark and logos are registered trademarks owned by Bluetooth SIG, Inc. and any use of such marks by Yamaha Corporation is under license. Other trademarks and trade names are those of their respective owners.
-
Page 94: About Third Party Software Programs
APPENDIX > About third party software programs About third party software programs This sound bar uses third party software programs. For the copyright and the license agreement terms and conditions of third party software programs that are used, see the following website. https://manual.yamaha.com/av/cm/sla/22/src30a/... -
Page 95: List Of Support Centers
Please contact the store where you purchased this product, or the Product Support Center as listed in the “Safety Brochure” included with this product. For customers outside of Japan Please contact your nearest authorized Yamaha dealer or service center. https://manual.yamaha.com/av/support/... - Page 96 Stylesheet Name: 01_YMH_PDF_Manual_A5_AV_En-Multi Layout Folder: YMH_PDF_Manual_A5_AV Stylesheet Version: 2022.04.13 Yamaha Global Site https://www.yamaha.com/ Yamaha Downloads https://download.yamaha.com/ © 2022 Yamaha Corporation Published 05/2022 NV-A0 AV21-0115...
- Page 97 Sound Bar Quick Start Guide ............ 3 Barre de son Barra de Sonido Guide de démarrage rapide......11 Guía de inicio rápida ........... 19...
- Page 98 Thank you for purchasing this Yamaha product. This product is a bar-shaped speaker system that can be used by connecting it to a TV. Audio content from a Bluetooth® device can also be played through the sound bar. • Be sure to read this document and the included Safety Brochure to ensure proper and safe use.
- Page 99 Confirming contents of product package This product includes the following main devices and accessories. Take out all items from the box and make sure that all items are present. Main devices NOTE • An HDMI cable is not included with this product.
- Page 100 Preparing the remote control Installing the product A Lithium battery (CR2025) has already been inserted into the remote Install the sound bar and subwoofer as shown in the following control. Pull out the insulation sheet as follows so as to use the illustration: remote control.
- Page 101 Connecting a TV Connect a TV to the sound bar. Select the connection procedure Connecting a TV using the digital optical according to the function to be used. The differences depending on audio cable (included) the connection procedure are as follows: The TV’s audio signal is transmitted to the sound bar when the sound Function and connection procedure bar is connected to a TV using the included digital optical audio cable.
- Page 102 Connecting a TV using an HDMI cable (commercially available) Control signals are transmitted from the TV to the sound bar when the sound bar is connected to a TV using an HDMI cable (commercially available). This will enable you to use the HDMI Control function that controls the sound bar using the TV’s remote control. If the HDMI cable is connected to the TV’s HDMI input jack compatible with Audio Return Channel (labeled as “ARC”), the TV audio signal is also transmitted to the sound bar via the HDMI cable.
- Page 103 Connecting to power Playing TV sound through the sound bar After connecting the sound bar to the TV, connect the sound bar and subwoofer to power as follows: Sound bar (rear) VOLUME (+/−) Remote control AC adaptor (included) Power cord (included) Turn on the TV.
- Page 104 Adjusting the sound to your preference b Playing back human voices clearly (CLEAR VOICE) The human voices within the audio can be heard more easily when the Clear Voice function is enabled. The function is recommended for playback at a low volume and for movies or dramas that use a lot of background music and sound effects.
- Page 105 Select your product displayed within the list. information will not be used for any other purpose. “Yamaha SR-C30A” or “Yamaha AV” is displayed within the list. - For devices using the Android 12 OS or later, configure the settings to allow the use of nearby devices.
- Page 106 Yamaha Global Site https://www.yamaha.com/ Yamaha Downloads https://download.yamaha.com/ © 2022 Yamaha Corporation Published 05/2022 KSOD-A0 VFS3060 10-1 Nakazawa-cho, Naka-ku, Hamamatsu, 430-8650 Japan 10-1 Nakazawa-cho, Naka-ku, Hamamatsu, 430-8650 Japan...
- Page 107 Wall Mounting Installation Guide Sound Bar...
- Page 108 CONTENTS CONTENTS About this Wall Mounting Installation Guide.......... 3 Precautions.................... 4 Items to use for wall mounting installation........... 5 Mounting the sound bar on a wall.............. 6...
-
Page 109: About This Wall Mounting Installation Guide
The Safety Brochure and the Quick Start Guide are included with this product. General precautions for handling this product are described in the Safety Brochure. See this document before installing the sound bar. For details on the functions, see the User Guide of your product. SR-C30A https://manual.yamaha.com/av/22/src30a/ SR-C20A https://manual.yamaha.com/av/20/src20a/... -
Page 110: Precautions
Fix the cables in place so nothing will accidentally catch on them. Check that the sound bar is securely fixed in place immediately after the installation. Yamaha will bear no responsibility for any accidents caused by improper installations. -
Page 111: Items To Use For Wall Mounting Installation
Items to use for wall mounting installation Items to use for wall mounting installation Make sure that all of the following items are present before installing the sound bar. Items included with this product Spacers A (×2) Spacers B (×2, on 1 sheet) Mounting template Commercially available items In addition to the included items, the following commercially available items are required. -
Page 112: Mounting The Sound Bar On A Wall
Mounting the sound bar on a wall Mounting the sound bar on a wall Before mounting the sound bar on a wall, be sure to read the following precautions. “Precautions” (p.4) Use the screw-hanging holes on the sound bar to mount the sound bar on a wall. 3 cm or more apart NOTE To bring out the best performance of the sound bar, install the sound bar 3 cm or more apart from the TV. - Page 113 Mounting the sound bar on a wall Mark the positions for the screws on the wall using a pencil. Screw position Remove the mounting template from the wall. Install the spacers A (included) and screws at the points marked on the wall. Be sure to use screws of the following size.
- Page 114 Mounting the sound bar on a wall Peel off the backing paper from the spacers B (included), and attach the adhesive face of each spacer to the rear of the sound bar. Spacers B Connect cables to the sound bar. For the connection procedure, see the Quick Start Guide or User Guide of your product.
- Page 115 Mounting the sound bar on a wall Sound bar’s indicators Glow The setting is completed. NOTE When changing the installation of the sound bar from wall-mounted to on a stand, also change the frequency characteristics setting. For more information, refer to the User Guide of your product.
- Page 116 Stylesheet Name: 01_YMH_PDF_Manual_A5_En-Multi Layout Folder: YMH_PDF_Manual_A5 Stylesheet Version: 2022.04.13 Yamaha Global Site https://www.yamaha.com/ Yamaha Downloads https://download.yamaha.com/ © 2022 Yamaha Corporation Published 05/2022 NV-A0 AV21-0136...
- Page 117 SR-C30A Sound Bar ATS-C300 Barre de son Barra de Sonido Safety Brochure Brochure sur la Sécurité Folleto de seguridad...
- Page 118 The serial number is located on the bottom or rear of the unit. Retain this Owner’s Manual in a safe place for future reference. (1024 Ser.No) • This applies only to products distributed by YAMAHA CANADA MUSIC CAN ICES-3 (B)/NMB-3(B) (can_b_02)
- Page 119 Address : 6600 Orangethorpe Avenue, Buena Park, CA 90620 this manual, meets FCC requirements. Modifications not expressly Telephone : 714-522-9011 approved by Yamaha may void your authority, granted by the FCC, to use Type of Equipment : Sound Bar the product.
- Page 120 Yamaha service personnel. Failure to connect to an appropriate AC outlet may cause a fire, electric shocks, or • Yamaha cannot be held responsible for injury to you or damage of the products malfunctions. caused by improper use or modifications to the unit, or data that is lost or •...
- Page 121 Installation Battery for the remote control • Install in the manner instructed in the manual. • DO NOT INGEST BATTERY, CHEMICAL BURN HAZARD ????? Falling or toppling may result in injury or damage. The remote control supplied with this product contains a coin/ button cell battery.
- Page 122 Since the unit may turn over or fall and cause injury, quickly move away from the unit and go to a safe place. CAUTION • Before moving this unit, be sure to turn off the power switch and disconnect all connection cables.
- Page 123 - place the equipment in a stack. - apply unreasonable force to buttons, switches, input/output terminals, etc. Fig. 1 Sound bar - hang on the sound bar installed on a wall. - lean against the sound bar installed on a wall. Failure to observe this may cause injuries or damage to the equipment.
- Page 124 Perchlorate Material—special handling may apply, See www.dtsc.ca.gov/hazardouswaste/perchlorate. Connections * This applies only to products distributed by Yamaha Corporation of America. • If connecting external units, be sure to thoroughly read the manual for each unit (0583 Perchlorate) and connect them in accordance with the instructions.
- Page 125 Information About functions included in the unit • Air may be blown out from the bass reflex port. (Refer to Fig. 2 on page 6.) This is not a malfunction. This occurs particularly often when outputting music with heavy bass. About the name plate of the unit •...
- Page 126 Yamaha Global Site https://www.yamaha.com/ Yamaha Downloads https://download.yamaha.com/ © 2022 Yamaha Corporation Published 05/2022 KSOD-A0 VFS3150 10-1 Nakazawa-cho, Naka-ku, Hamamatsu, 430-8650 Japan 10-1 Nakazawa-cho, Naka-ku, Hamamatsu, 430-8650 Japan...
Need help?
Do you have a question about the SR-C30A and is the answer not in the manual?
Questions and answers