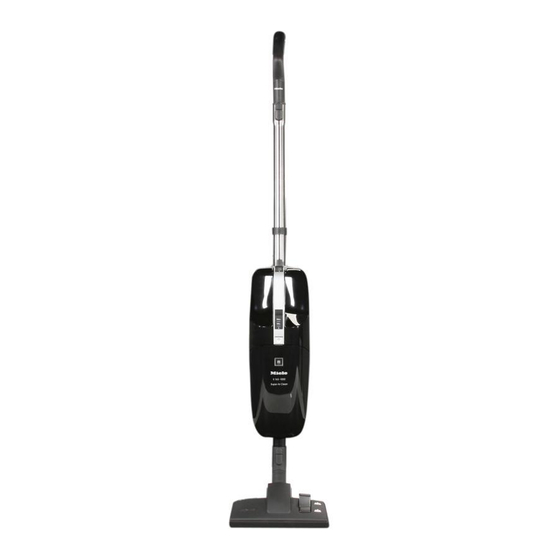
Miele S 140 Operating Instructions Manual
Miele s140: user guide
Hide thumbs
Also See for S 140:
- Operating instructions manual (44 pages) ,
- Operating manual (40 pages) ,
- Operating instructions manual (44 pages)

Related Manuals for Miele S 140


Summary of Contents for Miele S 140
-
Page 1: Operating Instructions
Operating instructions Vacuum cleaner S 140 S 160 en - US, CA To prevent accidents and appliance damage, read these instructions before installation and use. M.-Nr. 07 145 800... -
Page 3: Table Of Contents
Assembling the vacuum cleaner ........ -
Page 4: Important Safety Instructions
Connecting the vacuum cleaner to a higher voltage than indicated in these instructions may result in damage to the vacuum cleaner or injury. To reduce the risk of electric shock, this appliance has a polarized plug (one blade is wider than the other.) This... - Page 5 Do not use outdoors or on wet surfaces. Only dry surfaces should be vacuumed. Use only as described in this manual. Use only Miele recommended accessories. This appliance is intended for household use only. Do not allow the vacuum cleaner to be used as a toy.
-
Page 6: Using Accessories
Miele Powerbrush specified for use with this appliance. To avoid the risk of injury when vacuuming with a Miele Power or Turbobrush do not touch the rotating roller brush. Danger of injury. Danger of injury. The Miele... - Page 7 Repairs by unqualified persons could be dangerous. A damaged power cord must only be replaced with a genuine Miele cord which can be obtained by Miele technical service. Disposing of an old appliance Before discarding an old vacuum cleaner, please cut off the power cord and render the plug useless.
-
Page 8: Guide To The Vacuum Cleaner
Guide to the vacuum cleaner... - Page 9 12 Dust compartment filter (motor protection) 13 Dustbag 14 Powerbrush outlet* The illustration shows all possible features available on Miele vacuum cleaners. Features marked with * do not come standard with all vacuum cleaners and may not be included with your model.
-
Page 10: Assembling The Vacuum Cleaner
^ With the square hole facing the carrying handle, insert the respective wand into the top of the vacuum cleaner body. Gently turn the tube until it locks in place. ^ To remove the wand, press down on the locking button (see inset) and pull slightly twisting the tube. -
Page 11: Connecting The Rug And Floor Tool
Connecting the rug and floor tool ^ Insert the lower tube of the vacuum cleaner into the rug and floor tool and gently turn until it locks into place. ^ To remove the floor brush press and... -
Page 12: Included Accessories
Included accessories The vacuum cleaner includes the following accessories: Accessory clip (depending on model) Crevice nozzle Upholstery nozzle Accessory clip (standard on some models) ^ If needed attach the accessory clip to the extension / telescopic wand, ^ Push the accessory clip over the cord hook ring, , until it clicks. -
Page 13: Crevice Nozzle
Included accessories Crevice nozzle For cleaning in folds, crevices and corners. Upholstery nozzle For cleaning upholstery, mattresses, cushions, curtains, covers, etc. -
Page 14: Use
(see arrow) to release the tubes and adjust to the required height. Plugging the vacuum cleaner ^ Plug the vacuum cleaner in. ^ To prevent the power cord from getting in the way or kinking while vacuuming, hang the cord over the hook on the handle (see insert). -
Page 15: Turning The Vacuum Cleaner On And Off
= vacuum cleaner is off min = minimum suction max = maximum suction ^ To turn the vacuum cleaner on, slide either switch to min or max. ^ To turn the vacuum cleaner off, pull the slide switch to 0. -
Page 16: Adjusting The Suction
Adjusting the suction (depending on model) Some models have an adjustable suction control that allows you to optimize the vacuum cleaner’s performance to meet different cleaning needs. The suction can be adjusted to the amount of dirt and the type of material that will be vacuumed. -
Page 17: Parking And Storing The Vacuum Cleaner
To protect the bristle rings on the rug and floor tool, we suggest hanging the vacuum cleaner on a wall hook by using the hole located on the bottom of the handle. Parking and storing the vacuum cleaner... -
Page 18: Maintenance And Care
Maintenance and care Turn off and unplug the vacuum cleaner before performing any maintenance work. The Miele filter system consists of the following three components. – Dustbag – Exhaust filter – Dust compartment filter Each of these components must be changed periodically to maintain the vacuum cleaner’s efficiency. -
Page 19: When To Change The Dustbag
When to change the dustbag Change the dustbag when the colored marker in the dustbag change indicator fills the display. Miele dust bags are disposable and made to be used only once. Do not attempt to reuse. Checking the dustbag change... -
Page 20: How To Change The Dustbag
Maintenance and care How to change the dustbag ^ Press the dust compartment release button, raise the lid until it clicks into place. ^ Grasp the collar by the two finger holes and pull it out from the dustbag holder. The dustbag has a flap which closes automatically to prevent dust from escaping when the dustbag is... -
Page 21: Replacing The Dust Compartment Filter (Motor Protection)
A dust compartment filter is included in every box of genuine Miele dustbags. ^ Open the filter frame, remove the old filter and replace with a new one. ^ Snap shut the filter frame and close the dust compartment lid firmly. -
Page 22: Replacing The "Air Clean" Filter
Replacing the "Air Clean" filter ^ Press the release button for the exhaust filter compartment on the rear of the vacuum cleaner and remove the lid. ^ Remove the filter at the clean space (see arrow) and replace it with a new one. -
Page 23: Replacing The "Active Air Clean" Filter Or The "Hepa" Filter
Clean" filter or the "HEPA" filter ^ Press the release button for the exhaust filter compartment lid on the rear of the vacuum cleaner and remove the lid. ^ Remove the used filter and replace it with a new one. -
Page 24: When To Change The Thread Catcher
^ Push and take out the roller axle. ^ Take out the roller. ^ Remove all threads, hair, etc. and reassemble the parts. New thread catcher pads can be purchased from any authorized Miele vacuum dealer or Miele. -
Page 25: Exchanging Exhaust Filters
Depending on your model the vacuum cleaner is fitted with one of the following exhaust filters. a Air Clean b Active Air Clean c HEPA All of the above filters are interchangeable. The filters have different features, see "Optional accessories". -
Page 26: Cleaning And Care
Cleaning and care Turn off the vacuum cleaner and unplug it from the outlet before performing any maintenance work. Vacuum cleaner and accessories The vacuum cleaner and other plastic accessories can be cleaned with a damp cloth or a cleaner suitable for plastics. -
Page 27: Frequently Asked Questions
A heavily soiled exhaust or dust compartment filter can also be the cause of overheating. In this case, please turn the vacuum cleaner off. Check for any blockages and allow the vacuum cleaner to cool down for 30 minutes. -
Page 28: Technical Service
Technical service In the event of a fault which you cannot fix yourself please contact the Miele Service Department at the phone number listed on the back of this booklet. ^ Please quote the model type of your appliance. This can be found on the data plate on... -
Page 29: Optional Accessories
Some models are equipped with one or more of the following accessories. Power brush The powerbrushes can only be connected to a vacuum cleaner having a powerbrush outlet. Observe the cleaning instructions of the floor manufacturer. Powerbrush SEB 217 (EB02) - Page 30 The Turbobrush is recommended for cleaning short to medium pile carpeting. It is mechanically driven by the suction power of the vacuum cleaner. In addition to dust particles it also removes stubbornly adhered threads, hairs and carpet fluff.
- Page 31 Optional accessories Floor brush - Hardfloor To vacuum sturdy hard floors, e.g. tiles and stone floors. Floor brush - Parquet (standard on some models) Special brush with natural bristles intended for cleaning parquet and laminate floors, especially those susceptible to scratching.
- Page 32 Optional accessories Canister vacuum cleaner accessories By attaching a hose to the extension tube of the vacuum cleaner, the upright vacuum can be used as a canister vacuum. This allows easy cleaning of taller items such as bookshelves, furniture, blinds, etc.
- Page 33 Optional accessories Dusting brush For cleaning moldings, ornate or carved articles, etc. The head of the dusting brush swivels and can be turned to attain the best cleaning position. Universal brush For dusting books, shelves, etc. Accessory clip (standard on some models) For storing the supplied crevice nozzle and upholstery brush.
- Page 34 Optional accessories Radiator brush For cleaning radiators, narrow shelves or crevices. Use only in connection with the crevice nozzle. Mattress tool For cleaning deep crevices, mattresses and upholstery.
- Page 35 HEPA filtration in one. The active charcoal layer absorbs odors from the dust collected in the dustbag. Vacuum cleaners equipped with this exhaust filter are particularly suitable for allergy sufferers and those concerned with a high level of hygiene because of its ability to trap respirable particles and allergens.
-
Page 36: Caring For The Environment
These items pose a danger of suffocation. Disposing of the dustbag and filters Genuine Miele dustbags and filters are made of environmentally friendly materials. They can be thrown out with the household trash provided the vacuum cleaner has been used only for normal household dust. - Page 40 All rights reserved / 0810 M.-Nr. 07 145 800 / 01 INFORMATION IS SUBJECT TO CHANGE. PLEASE REFER TO OUR WEBSITE TO OBTAIN THE MOST CURRENT PRODUCT SPECIFICATIONS, TECHNICAL & WARRANTY INFORMATION.