Table of Contents
Advertisement
Quick Links
8 a.m. - 7 p.m., EST, Monday-Friday, 9 a.m. - 6 p.m., EST, Saturday
We appreciate the trust and confidence you have placed in Hampton Bay through the purchase of this kitchen cart. We strive to
continually create quality products designed to enhance your home. Visit us online to see our full line of products available for your
USE AND CARE GUIDE
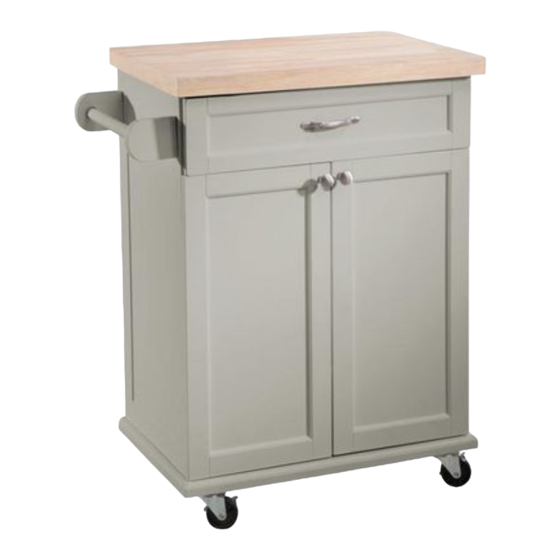
ASHBY KITCHEN CART
Questions, problems, missing parts? Before returning to the store,
call Hampton Bay Customer Service
1-855-HD-HAMPTON
HAMPTONBAY.COM
home improvement needs. Thank you for choosing Hampton Bay!
THANK YOU
Item #1203060006-N
Model #DS03ND
Advertisement
Table of Contents

Related Manuals for HAMPTON BAY ASHBY DS03ND


Summary of Contents for HAMPTON BAY ASHBY DS03ND
- Page 1 THANK YOU We appreciate the trust and confidence you have placed in Hampton Bay through the purchase of this kitchen cart. We strive to continually create quality products designed to enhance your home. Visit us online to see our full line of products available for your...
-
Page 2: Table Of Contents
Table of Contents Table of Contents ............2 Pre-Assembly ..............3 Safety Information ............2 Planning assembly ............. 3 Warranty ................. 2 Hardware Included ............. 3 What is Covered ............2 Package Contents ............5 What is Not Covered .......... -
Page 3: Pre-Assembly
Pre-Assembly PLANNING ASSEMBLY Before beginning assembly of this product, make sure all parts are present. Compare parts with the Hardware Included and Package Contents lists. If any part is missing or damaged, do not attempt to assemble the product. Contact customer service for replacement parts. - Page 4 Part Part Number Description Quantity Additional hardware H10020B12 Screw M5*20 H06060C12 Bolt M6*60 H10014A12 Screw M4*14 P90601A01004 Multi Fit H08040B12 Screw M5*40 H00002C12 Allen Key Size 4 H12001B12 Washer M5 P90302A01002 Caster Wheels with lock P90302B01002 Caster Wheels WWW.HAMPTONBAY.COM Please contact 1-855-HD-HAMPTON for further assistance.
-
Page 5: Package Contents
Pre-Assembly (continued) PACKAGE CONTENTS WWW.HAMPTONBAY.COM Please contact 1-855-HD-HAMPTON for further assistance. - Page 6 Pre-Assembly (continued) Part Part Number Description Quantity P21101C10014 Left Side Panel P21101D10014 Right Side Panel P12301B10011 Top Panel P20601A10014 Base Panel P11801A10014 Support Brace P02201A07014 Plastic Insert P21202A10014 Back Panel P11701B10014 Shelf P20901A10014 Left Door P20901B10014 Right Door P21302C10014 Left Drawer Panel P21302D10014 Right Drawer Panel P21303B10014...
-
Page 7: Assembly
Assembly Attaching the Side drawer Attaching the Bottom drawer panels panel Connect the Left drawer panel (#11) and Right drawer panel Insert the Bottom drawer panel (#14) into the assembled (#12) with the Back drawer panel (#13) using Screws (JJ). drawer body. - Page 8 Assembly (continued) Connecting the Towel bar Attaching the Support braces Connect the Towel bar holders (#16) with the Towel bar Attach the Support braces (#5) to the Left side panel (#1) (#17). Connect the assembled Towel bar holder (#16) using Dowels (CC), Cam bolts (AA) and Cams (BB).
- Page 9 Assembly (continued) Attaching the Caster Attaching the Back wheels Panel Insert the Caster wheels (RR & SS) on the bottom of the Insert the Back Panels (#7) and Plastic Insert (#6) into Base Panel (#4) using Bolts (KK) and Washers (QQ). the slot.
- Page 10 Assembly (continued) Adjusting the Door Attaching the Shelf position Adjust the door position by loosening the screw on the Attach the Shelf (#8) using Shelf Pins (DD). Slant the hinge and moving as shown. Re-tighten when finished. shelf when inserting to protect the boards. NOTE: To avoid destroying the finish, do not put the NOTE: To avoid destroying the finish, do not put the parts on the ground directly.
-
Page 11: Care And Cleaning
Care and Cleaning □ Before using, clean the cart completely with a soft dry towel. □ Clean the surface of the cart after use with a hot, soapy sponge. □ When not in use, store in a cool, dry area. WWW.HAMPTONBAY.COM Please contact 1-855-HD-HAMPTON for further assistance. - Page 12 Questions, problems, missing parts? Before returning to the store, call Hampton Bay Customer Service 8 a.m. - 7 p.m., EST, Monday- Friday, 9 a.m. - 6 p.m., EST, Saturday 1-855-HD-HAMPTON WWW.HAMPTONBAY.COM Retain this manual for future use. WWW.HAMPTONBAY.COM Please contact 1-855-HD-HAMPTON for further assistance.
Need help?
Do you have a question about the ASHBY DS03ND and is the answer not in the manual?
Questions and answers