Table of Contents
Advertisement
Advertisement
Table of Contents

Subscribe to Our Youtube Channel
Summary of Contents for AnyTone BT01
- Page 1 www.anytone.net...
- Page 2 BT01 User Guide Bluetooth Microphone...
- Page 4 AT-D578UV mobile radio to heat up. 4. Please charge the BT01 Bluetooth Microphone before using it. 5. Do NOT insert a micro SD card into the SD-card slot. BT01 microphone doesn't support the SD card use.
- Page 5 AT-D578UV PLUS/ AT-D578UVIII PLUS With GPS and BT When you receive the BT01 microphone, please access the AT- D578UV Menu-Setting-Device Info to check the version first, make sure the radio is upgraded to the latest version to get the BT-01 microphone working correctly. Reset must be done to the radio after the firmware upgrade.
-
Page 6: Table Of Contents
CONTENTS 1.Accessories ..............1 1.1 Supplied Accessories ..............1 1.2 Optional Accessories ..............1 2.Charge The Battery ............1 3. Getting Started ..............2 Indicator Instructions ............... 2 4. Basic Operation .............. 3 4.1 Power ON .................. 3 4.2 BT MODE connect to AT-D578UV ........... 3 4.3 CABLE MODE connect to AT-D578UV ........ -
Page 7: Accessories
3. Insert the other end of the charging cable into the charging/ upgrade interface of the radio. 4. The red charging indicator of the BT01 Bluetooth Microphone is on. 5. When the red charging indicator of the BT01 Bluetooth microphone goes out, the charging is completed. -
Page 8: Getting Started
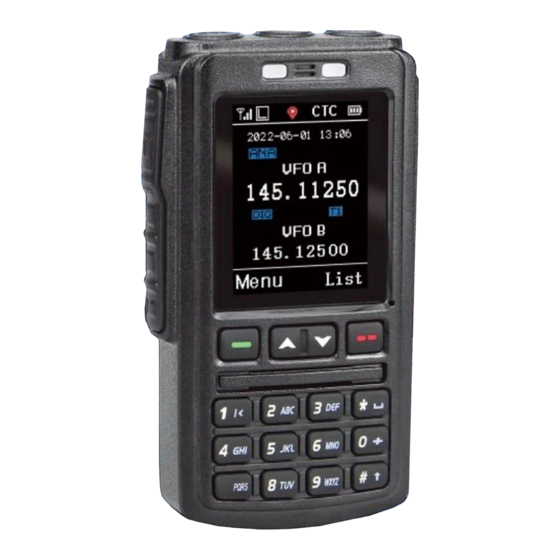
3.Getting Started Indicator Headset Jack USB charge/ Firmware upgrade Speaker RJ45 connector Indicator Instructions Indicator Color Status Left light red Transmit Right light red Charge the battery Right light green Receive Right light red blinking Battery voltage is low... -
Page 9: Basic Operation
AT-D578UV radio will be mapped to the Bluetooth microphone. e.AT-D578UV radio displays "EXTERNAL BT MODE" on the screen, the pairing is done. BT icon is showed on the BT01 display to indicate it is at BT mode. -
Page 10: Cable Mode Connect To At-D578Uv
D578UV radio will be mapped to the Bluetooth microphone. AT-D578UV radio displays "EXTERNAL CABLE MODE" on the screen, BT01 microphone is able to access the radio menu and do communications now. In Cable mode, the BT01 microphone is being charged when the channel is free. -
Page 11: Set Up Vfo Frequency
In BT mode, if you press the [CH-]/[CH+] button rapidly to switch the channel, the BT01 display reacts more slowly than the button press. It is recommended to input the channel number by keypad on microphone to access the channel rapidly, for example, input 0,0,9,9 a total of 4digits will switch to channel 99. -
Page 12: Select A Zone
And in BT mode, when BT microphone is receiving signal, the channel switch speed is slow, it is difficult to improve due to the limitation of bluetooth communication. 4.8- Select a Zone Press the assigned [VFO/MR] key to switch the radio into channel mode first. -
Page 13: Menu Operation
The BT name of BT device connected to the AT- Names D578UV radio. The BT01 microphone disconnects to the radio at once when signal drops. It takes time to rebuild the connection when new signal come in. The BT01 microphone stays connecting to the radio... -
Page 14: Programmed Key
The audio comes out from the speaker on BT01 microphone. BT + int The audio comes out from the speaker on AT- D578UV radio. RfBT Mic Level 1-5 Adjust the transmit audio level on AT-D578UV radio. Gain RfBT Level 1-5 Adjust the receive audio level on AT-D578UV radio. - Page 15 Each [P1], [P2], [P3] key allows to assign different functions for short press, long1 press and long2 press. Short : Function takes effect after click on the button. Long1: Function takes effect after "du" beep, it needs approx 1.5s for the press. Long2: Hold pressing the button until function takes effect, it needs approx 3s for the press.
- Page 16 Main CH Switch Choose channel A or channel B as the main channel Selects Hot Keys 1-6 Note: Hot key setup details on Hot Key 1~6 next page Work Alone Turn on/off the work alone function. Nuisance During scanning, press the key to skip the unwanted Delete channel In DMR mode, press the key to turn on/off digital...
- Page 17 In standby, press the key programmed as" Max Max VOL Set Volume", will enable users to set the maximum RX volume. Choose Slot for current channel, this function is only Slot Set valid in repeater mode. Choose analog or digital Aprs Type for current Aprs Type channel.
-
Page 18: Technical Specifications
5.Technical Specifications GENERAL BT version BT version V5.0 +EDR Protocol HFP; HSP; A2DP; AVRCP; SPP Transmit Distance 10 Meters Maximum Transmission Class2, 4dbm Power Sensitivity -80dBm Audio performance SBC Decoding Speaker 1W/8R Green/Red LCD screen 2.2inch Charge 5V Type C USB Battery capacity/Votage 1800mAh 3.7V Interface... -
Page 19: Eu Declaration Of Conformity
ADD: Qixiang Building, Tangxi Industrial Zone, Luojiang, Quanzhou, Fujian, 362011 China as the manufacturer, hereby declares under our sole responsibility that product(s): Bluetooth Microphone Model name: BT01, BT02, BT03, BT04, BT05, BT06 is in conformity with the essential requirements of the Radio Equipment Directive 2014/53/EU: Radio ETSI EN 300 328 V2.2.2 (2019-07)


Need help?
Do you have a question about the BT01 and is the answer not in the manual?
Questions and answers