
Summary of Contents for ez-wheel 300 Series
- Page 1 Electric wheels Series 300 & 10’’ Instruction manual [EN] Version A - 14/11/2022 – Translated from French...
-
Page 2: Table Of Contents
Important information about the manual ......................4 Important notice ..............................4 Safety instructions ................................4 Precautions for the use of ez-Wheel® products ...................... 4 Precautions for the use of the batteries ......................... 5 ez-Wheel® product overview and compatibility ....................... 6 Before use .................................. - Page 3 INSTRUCTION MANUAL Electric wheels Series 300 & 10’’ version A Maintenance of the stainless-steel wheels without connectors ................21 Prolonged shutdown ............................. 22 Safety rules in relation to the batteries ........................ 22 Incorrect use ................................. 22 Changing the wireless interface box batteries ...................... 22 Versions with tyres: changing a tyre ........................
-
Page 4: Preamble
2. Safety instructions Precautions for the use of ez-Wheel® products This instruction manual contains the instructions to be followed for the installation and the maintenance of the ez-Wheel® products. All mechanical drawings that could serve for the installation of ez-Wheel® products are available on request. -
Page 5: Precautions For The Use Of The Batteries
Electric wheels Series 300 & 10’’ version A Do not try to change the technical performance of the wheel. The product should not be subjected to use beyond the technical performance specified by ez-Wheel. Inappropriate use results in cancellation of the warranty. -
Page 6: Ez-Wheel® Product Overview And Compatibility
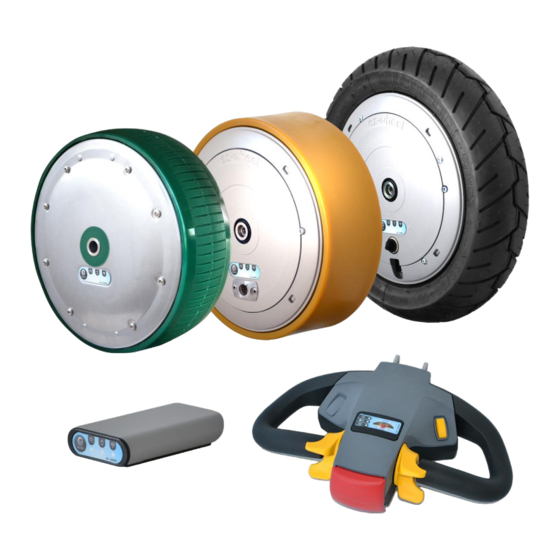
INSTRUCTION MANUAL Electric wheels Series 300 & 10’’ version A 3. ez-Wheel® product overview and compatibility Series 300 Series 10’’ Wheel Ref. Wheel Ref. Wheel Ref. Wheel Ref. Wheel Ref. ezW300I/WR ezW300I/CCR ezW300F/ST/W ezW300M/ST/W ezW10R/W Integration devices ✓ ✓ ✓... -
Page 7: Before Use
90 days. 5. Integration of the ez-Wheel® products Although it is possible to integrate ez-Wheel® wheels directly on a machine, it is recommended to use bracket-type integration accessories. These accessories allow the optimization of the ground/rolling area contacts and guarantee safety and comfort of use. -
Page 8: Mounting Of The Wheel To The Application Via An Integration Bracket
INSTRUCTION MANUAL Electric wheels Series 300 & 10’’ version A Positioning of the ezMAR anti-rotate ring The integration of the ezMAR anti-rotate ring is strongly recommended. Its design is specifically studied to deform in case of excessive effort, and thus preserve the wheel. ▪... -
Page 9: Size Of The Bracket/Wheel Assembly
INSTRUCTION MANUAL Electric wheels Series 300 & 10’’ version A Brackets available on the ez-Wheel® product guide: Reference Visual Wheel compatibility ✓ ezW300I/WR ✓ ezMCS/H ezW300F/ST/W ✓ ezW300M/ST/W ✓ ezMCS/H/CC ezW300I/CCR 5.2.1 Size of the bracket/wheel assembly Refer to 2D drawings available on request from your dealer. -
Page 10: Fitting The Wheel To The Suspended Bracket
INSTRUCTION MANUAL Electric wheels Series 300 & 10’’ version A ▪ Remove the M3 screw from the ezMAR ring with a 2.5 mm Allen key. ▪ Position the hexagon zone of the ezMAR clamp on the wheel axle. It is possible to use a mallet for this operation, but the wheel axle must not be damaged in any circumstances. -
Page 11: Adjusting The Tension
INSTRUCTION MANUAL Electric wheels Series 300 & 10’’ version A ▪ Insert the holding ring between the bracket and the wheel on the opposite side from the anti- rotate ring. ▪ Fix the M16 screw with the M16 nut supplied. M16x180 CHC screw M16 nut 16 mm open ended spanner... -
Page 12: Fixing The Pre-Assembled Unit On The Machine
Integration of directional controls ez-Wheel® electric wheels are controlled by the interface in the tiller heads (ezRTH/W or ezRTH/W/IP) via a wireless communication system. The wheels and the directional controls are designed to work together according to the configuration described in the ez- Config®... -
Page 13: Integration Of The Tiller Head
INSTRUCTION MANUAL Electric wheels Series 300 & 10’’ version A 5.3.1 Integration of the tiller head Two tiller head references are available in the ez-Wheel® product guide: Reference Visual Wheel compatibility ezRTH/W ✓ Series 300 ✓ Series 10’’ ezRTH/W/IP The tiller head must be held by the plate situated on the back of the casing. - Page 14 INSTRUCTION MANUAL Electric wheels Series 300 & 10’’ version A All mechanical drawings that could serve for the installation of ez-Wheel® products are available on request. All the accessories mentioned are available in the ez- Wheel® product guide. Do not insert the batteries into the box before having finished the integration procedure of all the products.
-
Page 15: Setting Of The System
It is essential to charge the tiller head before using it for the first time. ▪ Refer to point “7. Charging the ez-Wheel® products” If one of these steps does not take place as described, refer to point “11. Troubleshooting” or contact your dealer. -
Page 16: Use Of The Tiller Head
INSTRUCTION MANUAL Electric wheels Series 300 & 10’’ version A 6.1.2 Use of the tiller head Motor operation is controlled by the tiller head accelerator. ▪ Press the ON/OFF button to put into operation or to switch off the tiller head. The tiller head goes into sleep mode after a few minutes without movement on the accelerator to conserve battery lifespan. -
Page 17: Use Of The Wireless Interface Box
INSTRUCTION MANUAL Electric wheels Series 300 & 10’’ version A ▪ Insert the batteries in the wireless interface box. ▪ Close and lock the box. ▪ Refer to point “9.5 Changing the wireless box batteries”. ▪ Press the ON/OFF zone of the box label and check that the light is green. -
Page 18: Charging The Ez-Wheel® Products
INSTRUCTION MANUAL Electric wheels Series 300 & 10’’ version A 7. Charging the ez-Wheel® products Charging the wheel 7.1.1 Charging the wheel with charging connector Wheels can be charged every time a mains connection is available (if necessary, several times per day). It is not necessary to wait for the battery to be discharged. - Page 19 INSTRUCTION MANUAL Electric wheels Series 300 & 10’’ version A The following charging instructions are only applicable to the ez-Wheel® electric wheel series with stainless steel housing: ezW300F/ST/W and ezW300M/ST/W. ▪ Check that the housing of the wheel is clean and dry before installing the charger.
-
Page 20: Charging The Tiller Head
INSTRUCTION MANUAL Electric wheels Series 300 & 10’’ version A Charging the tiller head When the light on the wireless tiller head is red, it is necessary to charge the tiller head batteries. ▪ Connect the charger to the tiller head and connect the charger to the mains. -
Page 21: Tiller Head Display
INSTRUCTION MANUAL Electric wheels Series 300 & 10’’ version A Flashing orange One of the wheels in the system is at half charge. One of the wheels in the system is below 1/3 of its total charge. One of the wheels is completely discharged. It is impossible to use the system. Flashing red Charging is necessary. -
Page 22: Prolonged Shutdown
All information and regulations concerning these batteries can be provided on request. Incorrect use ez-Wheel cannot be held responsible in any circumstances for any loss caused to the user in the event of unreasonable or inadequate use of the product. -
Page 23: Versions With Tyres: Changing A Tyre
INSTRUCTION MANUAL Electric wheels Series 300 & 10’’ version A ▪ Lock the box by sliding the metal housing towards the front face The locking point should have returned to its initial position. Versions with tyres: changing a tyre It is recommended to switch off the wireless interface box before handling the wheel: no light should be on. To replace a tyre and to check the type of tyre to be used, contact your dealer. - Page 24 INSTRUCTION MANUAL Electric wheels Series 300 & 10’’ version A ▪ Remove the holding rim flange. ▪ Remove the tyre and the inner tube. ▪ Change the tyre and the inner tube if necessary. It is easier to fit the new tyre if the inner tube is pre-inflated.
-
Page 25: Versions With Solid Tyre
10. Contacting your dealer If an ez-Wheel® product appears to be faulty, contact your dealer. In order to allow the dealer to give you a quick answer, please bring the serial numbers of the ez-Wheel® products and accessories. The warranty conditions for ez-Wheel® products are available within the general sales conditions from your dealer. - Page 26 INSTRUCTION MANUAL Electric wheels Series 300 & 10’’ version A Display: The light on the wheel is not green. ▪ Charge the wheel for several hours and put the system back into operation. The light on the wireless interface box is not green. ▪...
-
Page 27: Troubleshooting The Wheel/Tiller Head Assembly
INSTRUCTION MANUAL Electric wheels Series 300 & 10’’ version A 11.3 Troubleshooting the wheel/tiller head assembly Tiller head no longer works normally. ▪ Put the tiller head in charge and follow the procedure for putting the system back into operation. In the event of a problem not described in this chapter, contact your dealer. -
Page 28: Changing A Tyre
13. Declarations 13.1 Declaration of incorporation The declarations of incorporation are available and can be downloaded on the ez-wheel.com website under “Download center”. https://www.ez-wheel.com/en/resources 13.2 Declaration of CE conformity The compliance declarations are available and can be downloaded on the ez-wheel.com website under “Download center”.
Need help?
Do you have a question about the 300 Series and is the answer not in the manual?
Questions and answers