
Related Manuals for FIS Trinity T650c

Summary of Contents for FIS Trinity T650c
- Page 1 TRINITY EASY SETUP GUIDE Welcome! Trinity T650c Easy Setup Guide Important: Please review the entire guide before you begin.
-
Page 2: Do This First
(Section 2) Do This First! Do This First! Important: The Verifone Trinity T650c installation setup can take up to an Important: The Verifone Trinity T650c installation setup can take hour. Please allow ample time to complete before you can process transactions. - Page 3 First, unpack your new Trinity T650c terminal. A full packing list can be found in the Quick Start Guide. Next, load paper into the Trinity T650c terminal. • Locate the indentations on each side of the printer paper cover as shown in figure 1.
- Page 4 TRINITY EASY SETUP GUIDE STEP 1 (continued) If you use an Ethernet connection, plug the cord into the port labeled “ETH” as shown in figure 4. NOTE: If you plan to connect via Wi-Fi, see Step 3 for additional instructions. If you plan to use a PIN pad, plug the provided PIN pad cable into the port labeled “USB”.
- Page 5 If you wish to connect via an Ethernet cord, return to Step 1. • On the next screen (figure 8), the Trinity T650c will scan for available Wi-Fi Networks. This may take a few moments. Figure 7...
- Page 6 tions listed ch screen. TRINITY EASY SETUP GUIDE eed a secure enter your STEP 3: Setting up your Connection You can connect your T650c to either an Ethernet connection (wired) or Wi-Fi. 3a. Setting up an Ethernet Connection using Dynamic IP addresses (most common) NOTE: If your company requires static IP (not common), then skip to 3b.
- Page 7 If you wish to connect via an Ethernet cord, return to Step 1. On the next screen (figure 8), the Trinity T650c will Figure 10 scan for available Wi-Fi Networks. This may take a few moments.
- Page 8 NOTE: Please be patient. Depending on the required NOTE: Please be patient. Depending on the software updates, the Trinity T650c terminal may required software updates, the Trinity T650c atient. Depending on the required automatically reboot multiple times.
-
Page 9: Run A Test
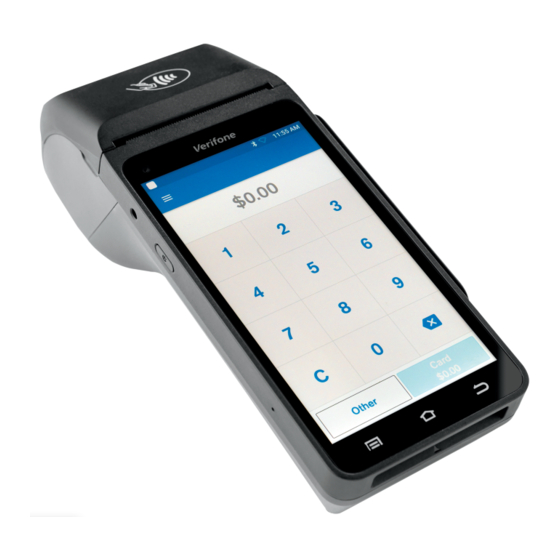
TRINITY EASY SETUP GUIDE Run A Test! Now Let’s Run a Test! STEP 5: Running a Test Transaction est Transaction You will see a prompt (figure 13) confirming that your terminal is ready to use, so let’s run a test transaction. Click the blue, OK button to begin. - Page 10 un test transaction TRINITY EASY SETUP GUIDE STEP 5 (continued) er a test transaction amount of $1.00 following Next, run test transaction “Sale Simple” instructions as seen in Table 1. Enter a test transaction amount of $1.00 then follow the “Sale Simple”...
- Page 11 Order History screen. Select the Menu icon (3 horizontal bars) and then Point of Sale to get back to the Sale screen. Table 1 STEP 7: Start Processing with Worldpay from FIS You’re all set to start processing with your new Verifone Trinity T650c. Table 2...
- Page 12 1011674/WFOB001 08.20 © 2020 FIS. Advancing the way the world pays, banks and invests Worldpay, the logo and any other associated brand names are trademarks or registered trademarks of FIS. All other trademarks are the property of their respective owners...
Need help?
Do you have a question about the Trinity T650c and is the answer not in the manual?
Questions and answers
HOW CAN YOU BYPASS THE PIN FOR THE CUSTOMAER FOR AN CASH ADVANCE? WHEN PROMPTED I SELECT CANCEL AND IT CANCELS THE WHOLE TRANSACTION. MODEL TRINITY T650C
bypass the ID request for Visa