
Summary of Contents for iDventure Marble Run Dragon
- Page 1 Assembly instructions Mechanical model by iDventure To access the digital version of the instructions use the QR-code or the link below. www.idventure.de/dragon...
- Page 13 Cut the toothpicks Index for a spare part Item assembled At this stage, the assembly of the part is completed Direction of the action in this step Remove the protective film before use Insert as far as it will go Operate carefully.
- Page 14 Assembling the tracks right track left track...
- Page 15 Left track Right track A01 - 1 pc. A01 - 1 pc. A02 - 1 pc. A02 - 1 pc. A03 - 3 pcs A03 - 3 pcs A04 - 1 pc. A04 - 1 pc. A05 - 1 pc. A05 - 1 pc.
- Page 16 For safe installation: Assembling the left track first, put A03 in Locate A03 (3 pcs) parallel to C02 Locate A06 (10 pcs) Fragile No A06 here Then rotate counter-clockwise C02 and C01 are NOT THE SAME Check it once again Repeat the operation for all three A03...
- Page 17 Locate A04 (1 pc.) For safe installation: first, parallel put A04 in to C02 Fragile...
- Page 18 Locate A02 (1 pc.) Locate B02 (1 pc.) For safe installation: first, For safe installation, first, parallel to C02 put A02 in parallel put B02 in to C02 Fragile...
- Page 19 Locate B04 (2 pcs) Locate B03 (3 pcs) Place B04 carefully one after another...
- Page 20 Locate A01 (1 pc.) and A05 (1 pc.)
- Page 21 Assembling the right track Right track assembling Locate A06 (10 pcs) and A07 (1 pc.) Upside-down Locate C08 (2 pcs) view Top view Align these junctions Left track complete Align these junctions...
- Page 22 For safe installation: first, parallel put A03 in to C01 Locate A03 (3 pcs) Then rotate clockwise Repeat the operation for all three A03 C02 and C01 are NOT THE SAME...
- Page 23 Locate A04 (1 pc.) For safe installation: first, put A04 in Locate A02 (1 pc.) parallel to C01 For safe installation: first, parallel put A02 in to C01...
- Page 24 Locate B02 (1 pc.) Locate B04 (2 pcs) For safe installation: first, put B02 in parallel to C01 Fragile...
- Page 25 Locate B03 (3 pcs) Locate A01 (1 pc.) and A05 (1 pc.)
- Page 26 Toothpicks and plastic sleeves (included in the kit) Sleeve Sleeve Ensure free movement...
-
Page 27: Assembling The Base
Assembling the base Locate F06 (2*4 pcs) (8 pcs) (8 pcs) Locate F02 Locate F03 (4 pcs) base Locate F03 (4 pcs) Locate C07 & C10 complete... - Page 28 Assembling the main stand hole for axis hole for axis hole for axis hole for axis hole for axis Toothpicks and plastic sleeves hole for axis Wax it! Wax it! & 10 pcs 2 pcs 12 pcs 7 pcs 2 pcs 8 pcs 6 pcs 2 pcs...
- Page 29 Locate the guides (12 pcs) Put on the sleeves on 6 toothpicks (axes) Locate 6 axes...
- Page 30 Var. A and B have different positions of holes Locate H03 (4 pcs), Locate H02 (6 pcs) (not H04 !), H05 Variant B Variant A (Use this principle for all parts with axes) is marked with 4 holes (Var. A) (Var.
- Page 31 Locate E08 (1 pc.) Locate E01 (1 pc.) bottom non-symmetrical part...
- Page 32 Locate H03 (4 pcs), H04 , H05 Locate H02 (6 pcs) is marked with 1 hole...
- Page 33 Locate H01 (6 pcs) Locate D03...
- Page 34 Locate fixing pins (10 pcs) Locate B01 (6 pcs) do not insert the pins here...
- Page 35 Locate 2 x sleeves Remove the guides do not remove the no sleeves here guides from these axes 1 x sleeve...
- Page 36 Locate I07 and fix it with sleeves Put 1 x H01 on...
- Page 37 Locate C09 (2 pcs) Locate 2 x G07 Remove the guides Locate 2 x sleeves...
- Page 38 Work out the gear train until the Check that marbles run all the track through gears move smoothly Otherwise review steps 3 to 17 On the front side cut off the toothpick excess but leave 2-3 mm...
- Page 39 1 х sleeve Locate G01 (2 pcs) On the back side Locate С04 (3 pcs) and 2 sleeves cut off the excess, but leave 2-3 mm...
- Page 40 Join the stand to the base Stand Base Locate D07...
- Page 41 Assemble the handle Install the handle...
- Page 42 Assemble the next unit Install the unit...
- Page 44 Fix the stand to the base...
- Page 45 Cut out a 3-cm toothpick Assemble Join the head to the switch the switch 4 x Sleeves Insert 6 steel Side view Empty space marbles here (no toothpick here) on both sides axis end Push the Cut the toothpick toothpick...
- Page 46 Install the head and the switch onto the stand Check the switch for free movement...
- Page 47 Join the tracks to the base, then fix them with C11...
- Page 48 Join the left track to the head Ensure the tracks are supported here...
- Page 49 Join the right track to the head Ensure the tracks are supported here...
- Page 50 Assemble and install the gutter...
- Page 51 Install 2 x D09 lower tracks...
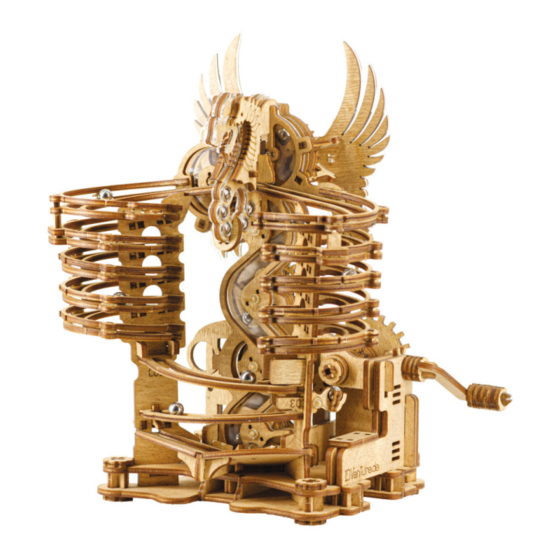
- Page 52 Assemble the wings Put the marbles Join the wings in and enjoy to the stand Congratulations!
- Page 53 Notes...
- Page 54 M o r e p u z z l e s a n d g a me s b y i D v e n t u r e w w w . i d v e n t u r e - s h o p . d e C L U E B O X i s a n i n t e r a c t i v e b o x w i t h v a r i o u s p u z z l e s t h a t y o u h a v e t o s o l v e t o...
- Page 55 B i r t h d a y C a k e T i n Wo o d ma n ’ s H e a r t K r y p t o s - Me c h a n i c a l w o o d e n g i f t b o x - Me c h a n i c a l w o o d e n g i f t b o x - Wo o d e n c o n s t r u c t i o n k i t - S e c r e t v a u l t i n s i d e...
Need help?
Do you have a question about the Marble Run Dragon and is the answer not in the manual?
Questions and answers