Advertisement
Quick Links
Advertisement

Related Manuals for mychway WL-SW6


Summary of Contents for mychway WL-SW6
- Page 1 User Manual WL-SW6...
- Page 2 Preface Dear users: We’re pleased to present to you the Portable Muscular Pain Physical Therapy Electric Shockwave Equipment. It treats frozen shoulder, fasciitis, tendon sheath inflammation, achilles tendinitis, soft tissue injuries and osteoarthritis. It helps boost blood circulation and improve the health of body soft tissues. Portable Muscular Pain Physical Therapy Electric Shockwave Equipment is a specialized physical therapy machine for...
-
Page 3: Table Of Contents
Table of Contents Preface Part I Brief Introduction Advantages Working Principles Main Effects Applicable Range Inapplicable Range During Use After Use Part II 1. Detailed Operations 2. Technical Parameters 3. Safety Precautions 4. Dos and Don’ts 5. Troubleshooting & Solutions FAQs Packing List Operational Diagrams... - Page 4 Part I Brief Introduction Portable Muscular Pain Physical Therapy Electric Shockwave Equipment is currently the most popular machine that works on soft tissue injuries and osteoarthritis. It targets at fasciitis, tendon sheath inflammation, achilles tendinitis, keen joint inflammation, golfer’s elbow and so on. Moreover, it’s convenient and easy to operate. It solves various muscle issues and joint pains.
- Page 5 stress is caused by the incident force when the shock wave enters the diseased tissue, while the tensile stress is caused by the reflection of the shock wave into the diseased tissue and the interface from the diseased tissue. Cavitation: cavitation effect is caused by shock wave of sound waves, whose mechanism is: under the effect of sound waves to tensile stress, the liquid burst and form large blisters or bubble.
- Page 6 brachii and myofascial pain syndrome of neck and shoulder. 6. Improve knee osteoarthritis, golfer’s elbow and other osteoarthritis. 7. Reduce local obesity and fat accumulation. Applicable Range 1. Those with sore limbs and muscles. 2. Those with knee join pain during walking and pain in the muscles around the knee joint.
-
Page 7: Detailed Operations
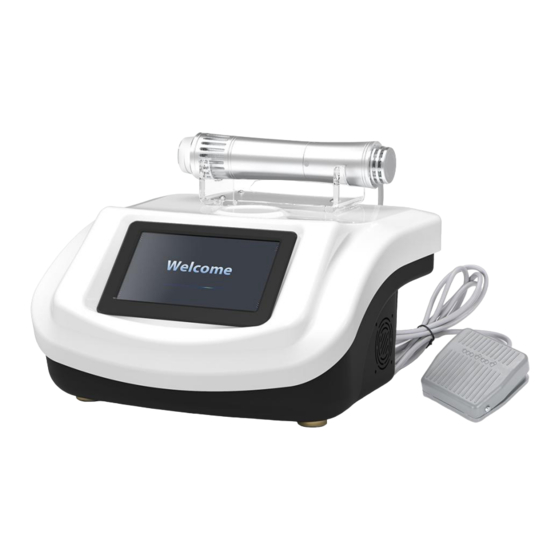
half an hour. Part II 1. Detailed Operation Detailed installation is as follow: ①Jack of Shockwave probe ②Jack of foot pedal ③Switch ④Power After checking that the instrument is connected properly, the following starting interface will appear when the power supply is turned on. The following interface then appears... - Page 8 1.1 Function Selection Energy Level Energy - Energy + Frequency Frequency - Frequency + Work Time Pre-selected Shots Current Shots...
- Page 9 All Working Head Recommended Working Head Start/Pause Return 1.2 Alerts Tip: You have reached the limits of pre-selected shots Tip: The working handle is not connected with the main machine Tip: The temperature of the working handle is too high/loose connection between the handle and the main machine...
- Page 10 1.3 Detailed Operation: Elbow Click to go to the interface below Recommended Working Head (Select based on the size of the treatment area; Select 05# for relaxation of local treatment area) Work Time Pre-selected Shots (2500) After running out of shots, machine enters auto-off mode.
- Page 11 Frequency (1-16) Adjust energy level based on treatment areas and one’s own comfort level. Set energy level between 5-10 when working on bones; Set energy level between 7-13 when working on muscles; Lower frequency, deeper surface it reaches and higher frequency, shallower surface it reaches.
- Page 12 Pre-selected Shots (2500) After running out of shots, machine enters auto-off mode. Click Start again to continue treatment. Current Shots (Machine enters auto-off mode when shots reaching pre-selected number) Energy Level (60-185) Adjust energy level based on treatment areas and one’s own comfort level. Set energy level between 60-90 when working on bones;...
- Page 13 Recommended Working Head (Select based on the size of the treatment area; Select 05# for relaxation of local treatment area) Work Time Pre-selected Shots (2500) After running out of shots, machine enters auto-off mode. Click Start again to continue treatment. Current Shots (Machine enters auto-off mode when shots reaching pre-selected number) Energy Level (60-185) Adjust energy level based on...
- Page 14 reaches. Start/Pause Return 1.6 Detailed Operation: Hips Click to go to the interface below Recommended Working Head (Select based on the size of the treatment area; Select 05# for relaxation of local treatment area) Work Time Pre-selected Shots (2500) After running out of shots, machine enters auto-off mode.
- Page 15 shots reaching pre-selected number) Energy Level (60-185) Adjust energy level based on treatment areas and one’s own comfort level. Set energy level between 60-90 when working on bones; Set energy level between 90-185 when working on muscles; Lower energy level, deeper surface it reaches and higher energy level, shallower surface it reaches.
- Page 16 Recommended Working Head (Select based on the size of the treatment area; Select 05# for relaxation of local treatment area) Work Time Pre-selected Shots (2500) After running out of shots, machine enters auto-off mode. Click Start again to continue treatment. Current Shots (Machine enters auto-off mode when shots reaching pre-selected number) Energy Level (60-185) Adjust energy level based on...
- Page 17 Click to go to the interface below Recommended Working Head (Select based on the size of the treatment area; Select 05# for relaxation of local treatment area) Work Time Pre-selected Shots (2500) After running out of shots, machine enters auto-off mode. Click Start again to continue treatment. Current Shots (Machine enters auto-off mode when shots reaching pre-selected number) Energy Level (60-185) Adjust energy level based on...
- Page 18 Frequency (1-16) Adjust energy level based on treatment areas and one’s own comfort level. Set energy level between 5-10 when working on bones; Set energy level between 7-13 when working on muscles; Lower frequency, deeper surface it reaches and higher frequency, shallower surface it reaches.
- Page 19 Pre-selected Shots (2500) After running out of shots, machine enters auto-off mode. Click Start again to continue treatment. Current Shots (Machine enters auto-off mode when shots reaching pre-selected number) Energy Level (60-185) Adjust energy level based on treatment areas and one’s own comfort level. Set energy level between 60-90 when working on bones;...
- Page 20 Recommended Working Head (Select based on the size of the treatment area; Select 05# for relaxation of local treatment area) Work Time Pre-selected Shots (2500) After running out of shots, machine enters auto-off mode. Click Start again to continue treatment. Current Shots (Machine enters auto-off mode when shots reaching pre-selected number) Energy Level (60-185) Adjust energy level based on...
- Page 21 reaches. Start/Pause Return 1.11 Detailed Operation: Fat Accumulation Click to go to the interface below Recommended Work head Work time Pre-selected Shots (2500) After running out of shots, machine enters auto-off mode. Click Start again to continue treatment.
-
Page 22: Technical Parameters
Current Shots (Machine enters auto-off mode when shots reaching pre-selected number) Energy Level (60-185) Adjust energy level based on the thickness of the fat; Lower energy level, deeper surface it reaches and higher energy level, shallower surface it reaches. Frequency (1-16) Adjust energy level based on treatment areas and one’s own comfort level. -
Page 23: Dos And Don'ts
4. Dos and Dont’s 1. Use a grounding pin and make sure the power socket of the device is properly connected before each operation. 2. Ensure that the voltage of the device is appropriate. If the voltage of the local power supply is unstable, we recommend that users increase to the matching power voltage. -
Page 24: Faqs
B. Check whether the fuse tube on the back of the instrument is loose or burned. 2. The instrument does not work after being turned on? A. Please check whether the foot pedal is being pushed. B. Please check if the working handle is properly connected with the main machine. C. -
Page 25: Packing List
4. Q: How long does a shockwave treatment take? A: Each treatment site takes about 10-15 minutes. According to the graph of the treatment of shock wave, it is calculated according to the number of shots. The number of shots for each treatment site has a specific region value limit. The number of shots is not in direct proportion to the effects or time. - Page 26 4# or 5# Disposable 2. Apply gel on the marked Gloves+ site of the shoulder, 1 min. Body Part: WL-SW6 3. Select and install the Shoulders probe of your choice, 1 min. 4. Adjust the parameters. Energy Level: Click to start.
- Page 27 2# or 3# Disposable 2. Apply gel on the marked Gloves+ site of the shoulder, 1 min. Body Part: WL-SW6 3. Select and install the Elbow probe of your choice, 1 min. 4. Adjust the parameters. Energy Level: Click to start.
- Page 28 1# or 2# Disposable 2. Apply gel on the marked Gloves+ site of the shoulder, 1 min. Body Part: WL-SW6 3. Select and install the Wrist probe of your choice, 1 min. 4. Adjust the parameters. Energy Level: Click to start.
- Page 29 3# or 4# Disposable 2. Apply gel on the marked Gloves+ site of the shoulder, 1 min. Body Part: WL-SW6 3. Select and install the Knee Joint probe of your choice, 1 min. 4. Adjust the parameters. Energy Level: Click to start.
- Page 30 4# or 5# Disposable 2. Apply gel on the marked Gloves+ site of the shoulder, 1 min. Body Part: WL-SW6 3. Select and install the Hips probe of your choice, 1 min. 4. Adjust the parameters. Energy Level: Click to start.
- Page 31 1# or 2# Disposable 2. Apply gel on the marked Gloves+ site of the shoulder, 1 min. Body Part: WL-SW6 3. Select and install the Pubic probe of your choice, 1 min. Symphysis 4. Adjust the parameters. Click to start.
- Page 32 Oil+Disposabl probe of your choice. 2. Adjust the parameters. Body Part: Gloves+Towel Click to start. Shoulder +WL-SW6 3. Apply some oil and massage the shoulder, 1 Energy Level: min. 90-120 4. Put on disposable gloves. 5. Make sure the probe in Frequency: full contact with the skin.
- Page 33 Gloves+ 2. Adjust the parameters. Body Part: Towel+ Click to start. Lumbar Region WL-SW6 3. Apply oil on the 8 crevice area and massage the Energy Level: lumbar region for 1 min. 90-120 4. Put on disposable gloves.
- Page 34 Gloves+ 2. Adjust the parameters. Body Part: Towel+ Click to start. Arms WL-SW6 3. Lay the arm flatwise. Apply oil from the lower arm Energy Level: to the entire arm, 1 min. 90-120 4. Put on disposable gloves.
- Page 35 Gloves+ 2. Adjust the parameters. Body Part: Leg Towel+ Click to start. WL-SW6 3. Have the customer lay on Energy Level: his/her stomach. Apply and 90-120 rub oil in from calf to thigh to heel, 1 min.
- Page 36 Waist Fat Accumulation Reduction: : 20 min, once/week Work Head: Disposable 1. Select and install the No Diagrams Gloves+ probe of your choice. WL-SW6 2. Adjust the parameters. Body Part: Click to start. Waist 3. Put on disposable gloves 4. Have the customer sit...
- Page 37 1. Select and install the Gloves+ probe of your choice. Body Part: Towel+ 2. Adjust the parameters. Elbow (arms) WL-SW6 Click to start. Shoulders 3. Lay the arm flatwise. Lumbar Region Apply oil from the lower arm Knee Joint to the entire arm, 1 min.
- Page 38 10. Cycle through the techniques used earlier until current shock shows to be between 2500-3500. 11. Remove the remaining gel. 12. Do the same on the other side. Shoulders 1. Select and install the probe of your choice. 2. Adjust the parameters. Click to start.
- Page 39 between 4000-5000. 14. Do the same on the other side. 15. Remove the remaining gel. Lumbar Relaxation 1. Adjust the parameters. Click to start. 2. Apply oil on the 8 crevice area and massage the lumbar region for 1 min. 3.
- Page 40 probe of your choice. 2. Adjust the parameters. Click to start. 3. Have the customer lay on his/her stomach. Apply and rub oil in from calf to thigh to heel, 1 min. 4. Put on disposable gloves. 5. Make sure the probe in full contact with the skin.
Need help?
Do you have a question about the WL-SW6 and is the answer not in the manual?
Questions and answers