Table of Contents
Advertisement
Thank you
for choosing our product. We have compiled this manual to give you a comprehensive overview of the quality of this motorcycle. Please read it carefully before riding it for the first
time. It contains information about the usage of the motorcycle, key points and precautions. It also specifies the features, details and equipment of the motorcycle to ensure that you can
operate it properly. We believe that you can get to know your new motorcycle quickly and get a completely satisfying ride if you follow our advice.
The purpose of the instructions in this manual is to provide clear and concise guidance for your use of the motorcycle. Moreover, this manual describes the general maintenance
procedures and regular inspection to be carried out at the officially designated dealer or repair shop. This manual also contains instructions for easy repair. Any operations not explicitly
described in this manual require special tools and/or specific expertise: Please take your motorcycle to the officially designated dealer or repair shop for these operations.
Personal safety
Failure to fully comply with these instructions can result in a serious risk of personal injury
Environmental protection
The symbol indicates proper use of the motorcycle to prevent damage to the environment.
Good condition
Incomplete compliance with or complete failure to comply with these regulations will lead to risks of serious damage to the motorcycle and, in some cases, loss of the
right to warranty.
The symbols shown above are very important. They are used to highlight the parts of the manual that should be read with special attention. Different symbols have been used in this
manual to make the headings in the manual concise and convenient for quick search. Please read this manual carefully before starting the engine, especially the "Safe driving" section.
The safety of yourself and others depends not only on your quick reaction and agility, but also on your understanding of the motorcycle, the maintenance of the motorcycle itself and
your mastery of safe driving rules. For your safety, please get to know your vehicle well enough to be able to drive safely and manipulate it freely under any driving condition.
Important
As an integral part of the motorcycle, this manual should be handed over to the new owner when the motorcycle is resold.
The 1
edition, February 2022
st
Introduction
1
Advertisement
Table of Contents

Related Manuals for Italjet Dragster 2022

Summary of Contents for Italjet Dragster 2022
- Page 1 Introduction Thank you for choosing our product. We have compiled this manual to give you a comprehensive overview of the quality of this motorcycle. Please read it carefully before riding it for the first time. It contains information about the usage of the motorcycle, key points and precautions. It also specifies the features, details and equipment of the motorcycle to ensure that you can operate it properly.
-
Page 2: Table Of Contents
Contents Overview............................. 5 Warning/Attention/Remark......................6 User Notice..........................6 Important Notes...........................7 Location of Batch Number......................8 Instructions for the Use of Fuel Oil and Engine Oil..............8 Brake Fluid..........................9 Running-in...........................9 Operation suggestions for the running-in period..............9 Engine speed change......................9 Running-in of new tyres......................9 Avoid driving at a constant low speed................10 Let the oil warm up before driving.................. - Page 3 Digital Instruments......................41 Adjust and Display Settings......................42 Control............................43 Ignition switch........................43 “Lock”the steering lock....................44 Left Handle Switch Assembly....................45 Right Handle Switch Assembly....................46 Emergency flameout switch....................46 Engine start button......................46 Accelerator control........................46 Front brake control........................47 Rear brake control........................47 Exhaust system........................48 Accessory parts and USB socket....................
- Page 4 目录 Inspecting the piston rings............ 143 Removing the piston............. 143 Automatic transmission............. 106 Choosing the gasket.............. 143 Transmission cover..............106 Refitting the piston rings............145 Air duct................... 106 Refitting the cylinder.............145 Air duct filter................107 Inspecting the cylinder head ..........146 Removing the driven pulley shaft bearing......107 Inspecting the timing system components......
-
Page 5: Overview
ITALJET Chapter 1 Overview... -
Page 6: Warning/Attention/Remark
You can buy all kinds of accessories to assemble your motorcycle. However, additional, improper accessories are very likely to bring unsafe factors to your driving. ITALJET can not check the quality and suitability of all the accessories in the market one by one for you, but your ITALJET authorized service shop can help you select high-quality accessories, and install them properly for you. -
Page 7: Important Notes
The first 1000km of motorcycle driving plays the most important role in the whole service life of the motorcycle. During this period, the correct running-in can not only ensure the longest service life, but also give full play to the performance of the new motorcycle. The parts of ITALJET motorcycles are made of high-quality materials and machined with precision. -
Page 8: Location Of Batch Number
In the case of ordering parts or requesting special service information, these Choose GB17930 lead-free oil with octane number 95 or higher. The use of batch numbers are also useful for ITALJET authorized service shops. lead-free gasoline can prolong the service life of spark plugs, exhaust system components and machinery, and protect the environment and reduce air pollution. -
Page 9: Brake Fluid
Do not use or mix different types of brake fluid. In case of rapid loss of Engine speed change brake fluid, it should be checked by an ITALJET dealer or a qualified technician. Engine speed should vary rather than remain constant, which concentrates Attention!... -
Page 10: Avoid Driving At A Constant Low Speed
Warning! ·Improper running-in of tyres can cause tyres to skid and run out of control. ·Be extra careful when you have new tyres. For proper running-in of tyres as described in this chapter, it is required to avoid great acceleration, sharp turning and slamming on the brakes during the first 50km. -
Page 11: Maintenance And Service
ITALJET Chapter 2 Maintenance and Service... -
Page 12: Maintenance And Regular Inspection
Maintenance and Regular Inspection Warning Warning Regular maintenance Regular inspection, If you use your vehicle on dusty, muddy or very wet adjustment and lubrication are required to keep the Poor or improper maintenance of a motorcycle will roads, it is necessary to shorten the maintenance motorcycle in the best safe and efficient condition. - Page 13 Time or mileage Maintenance time Time (months) Item Mileage (kilometer(s) ×1000) Motor Front clutch movable disk bushing Front clutch plastic feather key Rear clutch drum CVT belt CVT chamber filter Engine oil filter Valve clearance Hub oil Crankcase oil (*) CVT roller Front clutch movable disk Gearbox...
- Page 14 Time or mileage Maintenance time Time (months) Item Mileage (kilometer(s)×1000) EVAP (Evaporative System) Containers and pipes Cooling system Coolant level (**) Cooler Fuel supply system Fuel filter Fuel pipe (***) Electric system Battery voltage Headlight setting Vehicle road test Vehicle road test...
- Page 15 Time or mileage Maintenance interval Time (months) Item Mileage (kilometer(s) × 1000) Frame Safety fixture Brake Brake fluid(**) Suspension Wheels/tyres Steering system Exhaust system Idle speed control I:Inspection, cleaning, adjustment, and lubrication or (as required) replacement C:Cleaning R:Replacement A:Adjustment L:Lubrication (*)Check the liquid level every 3000 km (**)Replace every 2 years (***)Replace every 4 years...
-
Page 16: Oil Level Check
Oil Level Check Replacement of Engine Oil and Oil Filter Note: The oil check must be checked while the engine is Note: The engine oil must be changed while the engine still hot just after flameout is still hot just after flameout. Warning Warning Be careful not to burn yourself with the hot oil. - Page 17 - Reinstall the filter (5) (pay attention to the direction of - Place the oil receiving tray under the drain plug (2). - Remove the oil filter (5) and check its condition. insertion). - Unscrew the oil plug (2) to drain the oil. Replace it if necessary.
-
Page 18: Check Coolant Level
Check Coolant Level - Screw in the screw (3). Reassemble the dipstick by tightening it (1). Note: Check coolant level after engine cooling. Note: For the type of oil to be used, see the “Oiling” - Keep the motorcycle in driving position (place the section. -
Page 19: Clean The Air Filter Element
Clean the Air Filter Element - Clean the filter element (3) with appropriate filter - If filling is required, remove the tank cover (3) and element cleaning agent and make it completely dry. inject coolant from the hole (4) to check the level on the - Remove the screw (1) and remove the air filter (2). -
Page 20: Clean The Transmission Air Filter
Clean the Transmission Air Filter - Unscrew the screw (3) fixing the upper screen cover - Tighten the screw (1) and reinstall the air filter (2). (4) of the CVT air inlet filter element (5). - Unscrew the screw (1) and remove the CVT outer cover (2). -
Page 21: Spark Plug Check
Check Tyres and Relative Tyre Pressure Spark Plug Check - Remove the CVT inlet filter element (5) and clean it Always keep your tyres in good condition and at proper with appropriate detergent. intervals. Tyres should be replaced in accordance with Warning the relevant regulations. - Page 22 Check tyres This motorcycle has tubeless tyres. Warning Cold tyre pressure: - Check the condition of tyres, to ensure that there should 1 person: The brands and models of front and rear tyres must no crack or wear etc. on the surface; use a special Front tyre:190kPa(1.9Kgf/cm be the same.
-
Page 23: Check The Wear Of Brake Pads
Check the Wear of Brake Pads Always inspect the rim for any crack, bending, distortion Check the wear of the front brake pad (1) and rear brake Warning or other damage before each use. If any damage is found, pad (2). replace the wheel. - Page 24 - Brake pads are equipped with the wear indicator (3). To check for wear on the pads, check the position of the wear indicator (3) Warning during braking. If the brake pads are worn to the point where the wear indicator almost touches the brake disk, replace a pair of brake To replace the brake pads, you must contact your Jincheng dealer.
-
Page 25: Check The Front And Rear Brake Fluid Level
Check the Front and Rear Brake Fluid Level Attention Warning - Secure the motorcycle so that the upper part of the Do not pour brake fluid on plastic parts and lenses brake reservoir is parallel to the ground. (i.e. headlights) - The liquid level in the pump box must be at the center If the brake lever is too “soft”, there is air in the pipe of the rim (1). -
Page 26: Replace The Brake Fluid
Replace the Brake Fluid Let your Jincheng dealer change the brake fluid every Warning Warning two years. In addition, the seals on the main cylinder Brake fluid may damage painted surfaces or plastic and brake caliper, as well as the brake hoses, should be parts. -
Page 27: Regularly Check And Lubricate The Central Kickstand Or Side Kickstand (Optional)
Regularly Check and Lubricate the Central kickstand or Pretension Force Adjustment of Shock Absorber Springs Side Kickstand (Optional) Adjust the front shock absorber (1) and rear shock absorber (2) to adjust Always check the operation of the central kickstand or side kickstand. If the pretension force of springs. -
Page 28: Check The Front Steering System Periodically
Check the Front Steering System Periodically Check and Charge the Battery If the clearance is found excessively large, please contact The clearance of the front steering system should be your Jincheng dealer to check the steering motion (2). To open the battery case, follow the following steps: checked periodically. - Page 29 - Remove the two screws (3) and remove the cover (4) of - First remove the black negative cable (5) first, and then - To use the DC voltage for the battery charger, connect the battery case. remove the red positive cable (6) (first connect the red the red positive cable to the positive terminal of the positive cable, and then connect the black negative cable battery first, and then connect the black negative cable...
-
Page 30: Check/Replace Fuses
Fuses under the seat - Open the seat cushion to open the fuse box (1). Danger Warning Fuse 2(15A)=ABS motor The battery contains sulfuric acid. Avoid contact with Fuse 3(10A)=ABS valve Battery charging can produce explosive gas. Keep skin, eyes and clothing. Fuse 4(20A)= Main fuse ventilation when charging the battery indoors.When Remedial measures:... - Page 31 Fuses under the front panel - Lift the front panel (3) with both hands and pull outward - The fuse box (4) is located on the upper right side of - Unscrew the screws (1) and remove the instrument until it is removed from the large lampshade. the motorcycle.
- Page 32 - Reassemble all parts in the reverse order of the disassembly process. Carefully insert the plastic clips(8)on the front panel (3) into the square holes (9). Attention Do not use a fuse with the current bigger than the original fuse, or otherwise it may cause damage to the electrical system and cause fire.
-
Page 33: Steering Column
Steering Column Inspection should be carried out after 1000km first, and then every 10000km. The steering column bearing should be adjusted properly to make the steering handle rotate flexibly and ensure safe driving. Too tight steering column will lead to inflexible rotation of the steering handle. -
Page 34: Motorcycle Maintenance
ITALJET Chapter 3 Motorcycle Maintenance... -
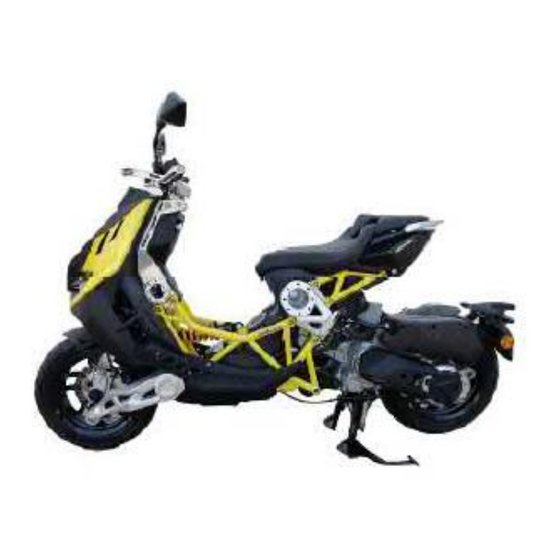
Page 35: Motorcycle Parts
Motorcycle Parts Right side view 1.Rider foot pedal 2. Rider seat cushion 3. Passenger seat cushion 4. Passenger armrest 5. Passenger foot pedal 6. Rear shock absorber 7. Exhaust muffler 8. Storage compartment... - Page 36 Left side view 1. Front wheel 2. Front brake disc 3. Front brake caliper 4. Front swing arm 5. Front shock absorber 6. Seat cushion lock 7. Voltage regulator 8. Engine 9. Air filter 10.Central kickstand 11. Gearbox air filter 12.
- Page 37 Front and rear views 1. Right mirror 2. Left mirror 3. Right turn indicator lamp 4. Left turn indicator lamp 5. Headlamp 6. Right radiator 7. Left radiator 8. Tail lamp 9. Rear left turn indicator 10. Rear right turn indicator 11.
-
Page 38: Controls And Instruments
Controls and Instruments 1. Rubber cover for left handle 2. Left handle switch assembly 3. Rear brake lever 4. Rubber cover for accelerator handle 5.Right handle switch assembly 6. Front brake lever 7. Ignition switch 8. USB socket 9. Instrument and external indicator lamp... -
Page 39: Instruments
Instruments Indicator lamps and alarm lamps 1 Left turn signal indicator lamp 2 Right turn signal indicator lamp 3 Engine oil pressure alarm lamp 4 High beam lamp 5 Coolant high temperature alarm lamp 6 Low fuel supply alarm lamp 7 ABS alarm lamp 8 EFI fault system indicator lamp Left turn signal indicator lamp “... - Page 40 - Wait for the cooling liquid to cool, then check the liquid - Please wait a few minutes and then reignite. If the level as described in the relevant paragraph (5.1.d) or ABS lamp lights up again, contact the nearest Warning contact your trustworthy dealer to check the fault.
-
Page 41: Digital Instruments
Digital Instruments 1 Speed indicator (speedometer) km/h - Mph. 2 Clock. 3 Fuel gauge. 4 Km/mile partial or total travel/total or partial hour display. 5 Service reminder indicator. 6 “Mode”button. 7 “Set” button. Clock(2) Km/mile partial or total travel/total or partial hour After maintenance, total mileage is displayed. -
Page 42: Adjust And Display Settings
Adjust and Display Settings All adjustments must be made while the motorcycle is stationary. Kilometer/mile setting and 24-hour / 12-hour system Mode clock Press “Mode” button until total kilometers/miles are displayed. Set time Set km/mile and partial time “Travel A or Travel B” - Press the “Set”... -
Page 43: Control
Control Ignition switch The ignition switch has three positions Start position of the motorcycle (Do not remove the key); Key removal position; “ ” Steering lock position (You can remove the key) - Key removal position “ ” By turning the key into the “ ”... -
Page 44: Lock"The Steering Lock
“Lock”the steering lock The operation of locking the steering gear is as follows: - Turn the handlebar to the far left - Insert the key (1) into the position of the ignition switch (2), press the key (1), and turn counterclockwise to the " "... -
Page 45: Left Handle Switch Assembly
Left Handle Switch Assembly Emergency switch “ ” The left handle switch assembly contains the If you press the switch (3), all direction indicator lamps will following commands: flash simultaneously, and the "left turn (symbol)" "right turn (symbol)" indicator lamps on the instrument panel will also flash. -
Page 46: Right Handle Switch Assembly
Right Handle Switch Assembly Emergency flameout switch Accelerator control The accelerator handle (1) is located on the right side of The right handle switch assembly contains the Warning the handlebar. following commands: Press the switch (1) to turn off the engine. Please turn off the engine only under true emergency. -
Page 47: Front Brake Control
Front brake control Rear brake control Handle (1) is located on the right side of the The brake handle (1) is located on the left side of the Warning handlebar. When braking, the brake switch will cause handlebar. When braking, the brake switch will cause the the tail lamp to light up. -
Page 48: Exhaust System
Exhaust system Accessory parts and USB socket - Check that the exhaust system is cooled before The exhaust system includes catalytic converters to maintenance. reduce harmful exhaust emissions. Warning - Never run the engine without driving the motorcycle, Do not connect accessories to the USB socket after even for a few minutes. -
Page 49: Storage Compartment Under The Seat Cushion
Storage compartment under the seat cushion - Lift the seat cushion (3) to open the storage compartment (4). - Prop up the side kickstand or central kickstand of the - Close the seat cushion, lower and push it down, and hook it motorcycle. -
Page 50: Side Kickstand (Optional)
Side kickstand (optional) Danger Attention Attention The side kickstand is designed to support only the The motorcycle is provided with a safety sensor. The Do not use the motorcycle with the side kickstand weight of the motorcycle. Do not sit on the motorcycle may not be started on the side kickstand lowered. -
Page 51: Central Kickstand
Central kickstand - Hold the left handlebar (1) and the left passenger armrest (2). - Press the lever (3) of the central kickstand (4) with your right foot and lift the motorcycle upward and backward at the same time until it is fully erected on the central kickstand. -
Page 52: Check Before Use
- Check for leaks in the cooling system. please have the vehicle inspected by the Italjet dealer. - Check for any damage. Before using this vehicle, please check the following items: Wheels and tyres - Check tyre condition and tread depth. - Page 53 Component Control - Check the operation of brakes. - If you feel them soft and pliable, please have the safety system checked at your Jincheng dealer. - Check the wear of brake pads. Brakes - Replace them when necessary (please contact your Jincheng dealer for replacement). - Check the liquid level in the oil tank and refill oil if necessary (please contact your Jincheng dealer for oiling).
-
Page 54: Instructions On The Use Of Motorcycles
Instructions on the Use of Motorcycles Identification of operational problems Spark plug fouling A list of any of the following operational problems is - Low spark plug ignition power, and changed engine Running-in instructions generally used to identify the source of the problem and lack of power In the first 1000km, the following rules must be strictly implement remedial action. -
Page 55: Oxygen Sensor
Oxygen Sensor 2. Manually pull out ① from ② upward Notes for disassembly: Do not allow grease, oil or other substances into the oxygen sensor. The oxygen sensor may be damaged if it is dropped. In such case, replace the oxygen sensor with a new one Be careful with the oxygen sensor. -
Page 56: Catalytic Converter
Catalytic Converter Removal/installation 1. Remove the screws ①② and hoop ③ using tools. 2. Remove the nuts ①② and oxygen sensor ③ using tools. -
Page 57: Canister Purge Solenoid
Canister Purge Solenoid Disassembly/Assembly EVAP purge control solenoid Disconnect the following parts: – EVAP purge control solenoid 2P plug [1] – Detachment hose [2] – Hose from the canister to the EVAP purge control solenoid [3] Remove the EVAP purge control solenoid [5] from the bracket [4]. Assemble it in the reverse order of disassembly. -
Page 58: On-Board Diagnostics
On-board Diagnostics Removal/installation 1. Open the seat cushion to expose ABS and OBD 3. Pull the other sides of ABS and OBD out from the rear of the frame 2. Remove the cover parts and pull out ① and ② from behind... -
Page 59: Electronic Control Unit (Ecu)
Electronic Control Unit (ECU) 1. Remove ① and ②), and remove the accelerator cable ③ before pull-out 3. Remove the rubber cover and pull out the ECU 2. Remove the hoops ① and ②... -
Page 60: Brake System
Brake System Schematic Diagram... -
Page 61: Rear Brake Disc
Main parts: Front brake lever Bolt Front and rear brake system assembly Rear brake lever Washer Half-covered bolt Bolt Rubber mat Starting motor lead wire clamp ABS unit Bushing Clip ABS unit mounting support ABS Bolt Bolt Rear brake caliper mounting support Rear Brake Disc Disassembly ·Remove the muffler. - Page 62 Inspection of Brake Discs ·Visually check the surface of brake discs. Replace the brake disc if it is scratched or damaged. · Check for disc wear by measuring the minimum thickness at different points with a dial indicator. If the minimum thickness (even at a single point on the brake disc) is less than the minimum value, replace the brake disc.
-
Page 63: Front Brake Disc
Front Brake Disc Disassembly ·Remove the front wheel. ·Remove the front hub. ·Remove the brake disc. Note Manually tighten all bolts. Warning After reassembly, use the recommended product onto the brake disc bolt threads. Inspection of Brake Discs ·Visually check the surface of brake discs. Replace the brake disc if it is scratched or damaged. - Page 64 · Check for disc wear by measuring the minimum thickness at different points with a dial indicator. If the minimum thickness (even at a single point on the brake disc) is less than the minimum value, replace the brake disc. Warning The brake disc must be mounted on the wheel before operation.
- Page 65 Front Brake Pad Disassembly ·Unscrew the two bolts «1» to remove the front brake caliper. Tightening torque(N * m) Tightening torque of the front brake caliper bolt «1» 25N*m ·Unscrew and remove the thread cap«2».
- Page 66 ·Unscrew and remove the brake pad to check the pin. ·Remove the brake pad. Warning Do not operate the brake handle after removing the brake pad. Otherwise, the caliper plunger may detach from its plunger bore, thus resulting in the leakage of brake fluid. Warning Replace both brake pads at the same time and make sure they are properly placed in the slots.
- Page 67 Tightening torque(N * m) Tightening torque of M8 screws fastening the rear brake caliper 25N*m ·Remove the clasp.
- Page 68 ·Slide down the pin ·Remove the spring Warning The arrow printed on the spring must always turn in the direction of travel. ·Slide down the brake pad.
- Page 69 ·Insert two new brake discs. ·Mount the spring. ·Remount the pin. ·Insert the clasp. Warning Do not operate the brake handle after removing the brake pad. Otherwise, the caliper plunger may detach from its plunger bore, thus resulting in the leakage of brake fluid.
- Page 70 Front brake ·Remove the rubber protective cover of the vent valve «1». ·Insert the transparent plastic hose into the exhaust valve “1” of the front brake caliper for emptying and insert the other end of the hose into the container to collect the brake fluid. ·Quickly and repeatedly press the brake handle, and then press it down completely.
- Page 71 Note When filling the hydraulic system, inject the required amount of brake fluid into the brake fluid. Check whether brake fluid is always present in the liquid storage tank during operation. ·Tighten the vent valve and remove the transparent hose. ·Fill with brake fluid until the correct brake fluid level is obtained.
- Page 72 Rear brake ·Remove the rubber protective cover of the vent valve «2». ·Insert the transparent plastic hose into the exhaust valve "2" of the rear brake caliper for emptying and insert the other end of the hose into the container to collect the fluid. ·Quickly and repeatedly press the brake handle, and then press it down completely.
- Page 73 Note When filling the hydraulic system, inject the required amount of brake fluid into the brake fluid. Check whether brake fluid is always present in the liquid storage tank during operation. ·Tighten the vent valve and remove the hose. ·Fill with brake fluid until the correct brake fluid level is obtained. ·Remount the rubber protective cover.
- Page 74 ·Check whether brake fluid is flowing out of the liquid storage tank, and close the vent valve 《2》 before emptying the tank. ·Fill up with brake fluid. ·Loosen the exhaust valve 《2》 about half turn again. ·Check brake fluid from the hose When the brake fluid color changes (from dark to light), it is required to tighten the exhaust valve 《2》...
-
Page 75: Cooling System
Cooling System Schematic Diagram... -
Page 76: Replacement Of Cooling Liquid
Keys: Radiator connecting pipe Water storage tank cover component Hoop Wire bundle fixing clip Right water-cooled radiator assembly Radiator mounting screw Hoop Self-locking double buckle tie strap Water filling nozzle connecting pipe Bolt Hoop Hoop strap Water injection nozzle component Spring nut Hoop Bolt... - Page 77 ·Loosen the pipe clamp. ·Pull out the water hose. ·Drain the coolant. Note Remove the tank cover to facilitate the discharge of coolant. Warning The line should be completely disconnected and the front wheel lifted at least 55 cm (21.65 in) off the ground.
- Page 78 ·Check the water level of water storage tank and radiator; fill them with water to the correct level if necessary. ·Remount the front baffle. Tightening torque(N * m) Coolant water pipe hoop:3N * m...
-
Page 79: Suspension
Suspension Schematic Diagram of Front Wheel Removal... - Page 80 Keys: Steering knuckle center trim cover Cycle valve Front gear ring Self-locking nut Front tyre Balancing weight Washer Bolt Needle bearing Retainer ring Front brake disc Front hub assembly Front hub Screw Front wheel rim Screw Warning The support device under the vehicle is provided so that the front wheel has free space to move and the vehicle can be safely released from the fall.
- Page 81 Park the vehicle on its center bearing bracket. ·Place a support under the chassis. ·Loosen the five fixing screws《1》. Warning After disassembly/modification, please be careful not to damage the brake line, disc and brake pad. Warning Do not step on the brake after removing the wheel. Otherwise, the caliper plunger may detach from its valve seat, resulting in the leakage of brake fluid.
- Page 82 Bearing Manually rotate the inner ring《1》. The inner ring must rotate smoothly without obstacles and/or noise. No axial clearance is allowed. The bearings with these problems must be replaced. Warning Check whether all parts are in good condition, especially the objects below.
- Page 83 Use a dial indicator to check whether the radial runout “A” and axial runout “B” of the rim «3» do not exceed the limit. Eccentricity is usually caused by bearing wear or damage. If the value is not within the specified range after replacing the bearing, please replace the rim «3».
- Page 84 Check tire condition. Warning Check the wear condition of tires. Severely worn tires can damage traction and maneuverability of the vehicle. Replace the tire when it is worn or the worn tread diameter is greater than 5 mm. Some tire types have been homologized for the vehicle's characteristic wear indicator.
- Page 85 Schematic Diagram of Rear Wheel Removal...
- Page 86 Screw Rear gear ring Balancing weight Outer bushing Buffer bushing Screw Engine fender Retainer ring Inner bushing Spring washer Hexagon socket stepped screw Bearing Cycle valve Gasket Buffer strip Bolt Rear rim Rear hub Muffler hanger bracket assembly Flat washer Rear brake disc Speed sensor rear mounting plate Muffler hanger bracket...
- Page 87 · Operate the rear brake with the help of the second operator; loosen and remove the rear axle nuts, and then collect bushings. · Unscrew and remove bolts from the muffler bracket and the rear fender bracket 《1》 《2》 《3》 《4》 《5》, and collect nuts and washers. ·...
-
Page 88: Rear Suspension Inspection
Shock Absorber Rear suspension inspection Check the shock absorber for any leakage. Check the fastening of all components and correct operation of rear suspension joints. Disassembly To remove the shock absorber, follow these steps: ·Remove the helmet box ·Operate from the right side of the vehicle to loosen the upper screw 《1》 holding the shock absorber. -
Page 89: Muffler Hanger Bracket
Tightening torque(N * m) Shock absorption after bolt fixation 50N * m · Operate from the right side of the vehicle to loosen the lower crew《1》holding the shock absorber. ·Remove the shock absorber. Tightening torque(N * m) Shock absorption after bolt fixation 50N * m Muffler hanger bracket To remove the muffler plate, follow these steps:... - Page 90 ·Unscrew and remove the bolts holding the right shock absorber, and then collect nuts. Tightening torque(N * m) Shock absorption after bolt fixation 50N * m ·Operate the rear brake with the help of the second operator; loosen and remove the rear nuts of fixing plates, and then collect gaskets. Tightening torque(N * m)...
-
Page 91: Central Kickstand
· Unscrew and remove mounting plate bolts《1》 《2》 《3》 , and collect nuts and washers. ·Remove the right suspension plate. Central Kickstand Warning Make sure the engine and exhaust muffler are cooled. Make sure the vehicle is completely safe and has no side frame. To remove the center bearing bracket and its support, follow these steps:... - Page 92 Tightening torque(N * m) Engine 25N * m M8 screw fixing screw bracket support To remove the center bearing bracket from the bracket, follow these steps: · Ensure that the vehicle can be supported without the help of the center bearing bracket.
-
Page 93: Electronic System
Electronic System 1. Starting relay - Starting relay resistor, power-on: terminals 1 and 2 connected - Starting relay resistor, power-off: terminals 1 and 2 disconnected 2. Horn - Horn activated voltage:battery voltage - Horn disabled voltage:0 volt... - Page 94 3. Headlamp - Front position lamp:12V-4.6W - High beam/low beam:12V-66W / 38W - Front turn indicator lamp:12V-4.6 W 4. Voltage regulator - Output voltage:13V to 15 V...
- Page 95 5. Starting motor - Relay voltage supply:battery voltage - Resistance: 0.5 Ω 6. Tail lamp - Rear position lamp/brake lamp:12V-5.9W / 7.5W - Rear turn indicator lamp:12V-1.9 W - Registration plate lamp:12V-0.7W...
- Page 96 7. Engine coolant temperature sensor Coolant temperature °C/resistance OHM Coolant temperature Characteristic injection exposure value Dashboard exposure value 50° 120° 80.6 8. Spark plug Standard:NGK PMR9B...
- Page 97 9. High-tension coil - Primary resistance:0.5 Ω - Secondary resistance:3.1 kΩ 10. Fuel level sensor Operational check of the fuel level sensor (removed from the vehicle). -①:Fuel pump black(-) -②:Fuel pump red(+) -③:Sensor black(-) -④:Sensor red(+)...
- Page 98 11.Battery 12V-8.6Ah 12. Auxiliary fuse - 15A fuse:from the ignition switch to all light loads, registration plate lamp, direction indicator lamps and horns. - 15A fuse:Ignition/injection and starting power source. - 15A fuse:spare parts.
- Page 99 13.Generator - Permanent magnet: battery voltage 12 V-300 W,6000 rpm. - Rated power:300 W - Resistance:0.36-0.44 Ω - Resistance between cable and stator bracket: infinite - Crankshaft angle sensor resistance:129 +/- 10%Ω 14. Flasher assembly - Voltage:13.5V(DC) - Current:13.5V I=0.15A+0.12A...
- Page 100 15. Velocity transducer 16.Dumping switch - Horizontal position:61.9 kΩ - Tilt position > 45°:0 Ω...
- Page 101 17. Control unit/accelerator body 18. Injection nozzle Resistance at ambient temperature:14.5 Ω 19. Relay - Cooling fan - Electronic fuel injection system (EFI)
-
Page 102: Electrical Diagram
Electrical Diagram... -
Page 103: Summary Table Of Torque (Unit N*M)
Summary Table of Torque (unit N*m) Process name Torque value Gluing Front brake disc assembly 25-30 Loctite 243 Front gear ring mounting Loctite 243 Rear brake disc assembly 25-30 Loctite 243 Central kickstand assembly 50-60 Rear wheel speed sensor platen Loctite 243 Rear wheel speed sensor Loctite 243... - Page 104 Summary Table of Torque (unit N*m) Front swing arm mounting (gluing the front swing arm connecting rod combined end face) 25-30 Loctite 243 Front shock absorber mounting 50-60 Central kickstand and engine mounting Loctite 243 Oxygen sensor mounting 50-60 Engine hanger mounting 80-96 Engine hanger buffer bushing mounting 50-60...
-
Page 105: Engine Maintenance
ITALJET Chapter 4 Engine Maintenance... -
Page 106: Automatic Transmission
This section describes the operations to be carried out on the engine and the tools required. Automatic transmission Transmission cover • Remove the air duct. • Undo and remove the twelve external screws of the cover. • Remove the transmission cover. •... -
Page 107: Air Duct Filter
Air duct filter • Remove the air duct. • Undo and remove the screw of the air- box cover. • Remove the air-box cover. • Remove the air filter. • Proceed to clean or replace the air fil- ter. Removing the driven pulley shaft bearing •... -
Page 108: Refitting The Driven Pulley Shaft Bearing
Refitting the driven pulley shaft bearing • Slightly heat the crankcase from the in- side so as not to damage the coated surface. • Insert the bearing in its housing. CAUTION REST THE COVER ON A SUITABLE SURFACE TO AVOID DAMAGING THE COVER COAT. -
Page 109: Inspecting The Clutch Drum
• Remove the driven pulley and the driv- ing belt. CAUTION CLEAN THE CLUTCH BELL AS INDICATED IN THE SCHED- ULED MAINTENANCE TABLE. Inspecting the clutch drum - Make sure that the clutch bell is not worn or dam- aged. - Measure the clutch bell inside diameter. -
Page 110: Inspecting The Clutch
Admissible limit eccentricity: 0.15 mm Inspecting the clutch - Check the thickness of the clutch mass friction material. - The masses must not show traces of lubricants; otherwise, check the driven pulley unit seals. NOTE UPON RUNNING-IN, THE MASSES MUST EXHIBIT A CEN- TRAL FAYING SURFACE AND MUST NOT BE DIFFERENT FROM ONE ANOTHER. -
Page 111: Removing The Driven Half-Pulley Bearing
AP8140665 Adapter for clutch assembly re- moval Pin retaining collar - Remove the collar with the aid of 2 screwdrivers. - Remove the 3 guide pins and the movable half- pulley. Removing the driven half-pulley bearing - Remove the retainer ring using two flat blade screwdrivers. -
Page 112: Inspecting The Driven Fixed Half-Pulley
Inspecting the driven fixed half-pulley - Measure the inside diameter of the pulley bush- ing. Characteristic Minimum diameter admitted Ø 40.96 mm Standard diameter Ø 40.965 mm Inspecting the driven sliding half-pulley - Remove the 2 inner sealing rings and the 2 O- rings. -
Page 113: Refitting The Driven Pulley
- To assemble the new ball bearing, insert it fully down in its seat with the specific punch and finally fit the seeger ring. Specific tooling 020375Y 28 x30 mm Punch 020376Y Adapter handle 020439Y 17-mm guide for oil seal Refitting the driven pulley - Check that the faying surfaces of the 2 half-pul- leys and the belt do not show any signs of wear,... -
Page 114: Inspecting The Clutch Spring
Inspecting the clutch spring - Measure the length of the movable driven half- pulley spring, when unloaded. Characteristic Standard length: (125 cm³) 112.7 mm (200 cm³) 122.7 mm Limit after use: (125 cm³) 108 mm (200 cm³) 118 mm Refitting the clutch - Assemble the spring, clutch and driven pulley. -
Page 115: Refitting The Driven Pulley
Refitting the driven pulley • Place the driven pulley assembly in its position. • Open the driven pulley and insert the belt according to the correct direction of rotation. • Fit the driven pulley plus the belt in their position. •... -
Page 116: Removing The Driving Pulley
Removing the driving pulley • Remove the transmission cover. • Unscrew the fixing nut with the specific tool. Specific tooling AP8140535 driving pulley lock wrench • Remove the fixing nut and collect the washer. • Remove the fixed driving half-pulley. •... - Page 117 • Detach the driving belt. • Remove the bushing. • Remove the movable half-pulley, take care that the free rollers fitted on it do not come off. • Remove the support plate and the rel- ative guide sliders. • Remove the spacer.
-
Page 118: Inspecting The Rollers Case
Inspecting the rollers case • Check that the internal bushing shown in the figure is not abnormally worn and measure its inside diameter. • Measure the outside diameter of the pulley sliding bushing shown in the fig- ure. • Check that the rollers are not damaged or worn. -
Page 119: Refitting The Driving Pulley
Refitting the driving pulley • Install the spacer. - Preassemble the movable half-pulley with the roller contrast plate by placing the rollers in their housings with the larger support surface touching the pulley according to the direction of rotation. - Check that the roller contact plate does not show flaws or is damaged on the grooved edge. -
Page 120: Refitting The Transmission Cover
• Fit the fixed driving half-pulley. WHEN FITTING THE FIXED DRIVING HALF-PULLEY, IT MUST BE TOTALLY FREE SO THAT IT IS NOT INCOR- RECTLY TAUTENED. • Fit the washer and tighten the nut. CAUTION CHECK THAT THE WASHER IS ADEQUATELY FITTED BE- FORE TIGHTENING THE NUT. -
Page 121: Removing The Hub Cover
• Fit the transmission cover and press it until it stops. • Operating diagonally, tighten the cover external screws (11 screws for 200 cm³ - 12 screws for 125 cm³). • Fit the air duct. Locking torques (N*m) CVT cover EI fixing screws - M6x35 10 Nm (7.38 lbf ft) End gear... -
Page 122: Removing The Wheel Axle
Removing the wheel axle • Remove the hub cover. • Remove the intermediate gear. • Remove the two shim washers from the intermediate gear. • Remove the wheel axle with the gear. • Extract the driven pulley shaft from the bearing. -
Page 123: Removing The Hub Bearings
Removing the hub bearings - Check the status of the bearings being examined (wear, clearance and noise). Removing the wheel axle bearings • Warm up the crankcase. • Remove the bearing using the specific extractor. Removing the driven pulley shaft bearing •... -
Page 124: Inspecting The Hub Shaft
Inspecting the hub shaft - Check the three shafts for wear or distortions on the toothed surfaces, on the bearing housings and the oil seal positions. - In faults are found, replace the damaged parts. Inspecting the hub cover - Check that the coupling surfaces are not dented or distorted. - Check the capacity of both the bearings and the wheel oil seal. -
Page 125: Refitting The Wheel Axle Bearing
Refitting the wheel axle bearing • Heat up the crankcase using the ther- mal gun. • Place the wheel axle bearing on the crankcase and fit it correctly using the specific tool. Specific tooling 020376Y Adapter handle 020359Y 42 x 47-mm adaptor 020439Y Shaft 2 oil seal punch 17 mm Refitting the hub cover bearings •... -
Page 126: Refitting The Hub Bearings
Refitting the hub bearings - Assemble the 3 shafts in the engine crankcase as shown in the figure. -
Page 127: Refitting The Ub Cover
Refitting the ub cover • Fit a new gasket. • Check that the two alignment dowels are adequately positioned. • Place the hub cover. • Tighten the eight screws operating di- agonally. • Fill with hub oil. Locking torques (N*m) Transmission cover EI fixing screws - M6x30 10 Nm (7.38 lbf ft) Flywheel cover... -
Page 128: Removing The Stator
• Remove the flywheel cover. • Remove the gasket. WARNING UPON REFITTING, REPLACE THE GASKET WITH A NEW ONE OF SIMILAR TYPE. FOLLOW THE REMOVAL STEPS BUT IN REVERSE ORDER. Removing the stator • Remove the flywheel cover. • Undo and remove the two pick-up screws. -
Page 129: Refitting The Stator
Refitting the stator • Install the stator following the removal steps but in reverse order. • Place the pick-up cable as indicated. WARNING FIT THE PICK-UP FIXING PLATE WITH THE SENSOR FAC- ING THE STATOR. • Refit the stator and the flywheel carry- ing out the removal steps but in reverse order;... -
Page 130: Removing The Starter Motor
• Place the water pump shaft with its grooves facing the reference point on the cover. • Refit the cover on the engine taking care the centring pins are adequately positioned. Locking torques (N*m) Ignition cover fixing screws - M6x110 (5) 11 Nm Ignition cover fixing screws - M6x140 (8.11 lbf ft) -
Page 131: Removing The Flywheel Magneto
• Remove the starter motor by sliding it off from one side. Removing the flywheel magneto • Remove the flywheel cover. • Lock the crankshaft with the specific special tool. Specific tooling 0240880 Threaded bolt for locking crankshaft at TDC •... -
Page 132: Intermediate Gear
• Remove the cotter. Intermediate gear FITTING • Fit the intermediate gear. REMOVAL... -
Page 133: Refitting The Free Wheel
• Remove the flywheel, the cotter and the freewheel. • Slide off the intermediate gear. See also Removing the flywheel magneto Refitting the free wheel • Fit the cotter in its seat, be careful to position it as indicated in the photo- graph. -
Page 134: Refitting The Flywheel Magneto
Refitting the flywheel magneto • Fit the flywheel paying attention to in- sert the cotter adequately. • Lock the flywheel nut to the prescribed torque. Locking torques (N*m) Rotor TEF fixing screw - M8x25 (1) 25 Nm (18.44 lbf ft) - Loctite 243 Refitting the starter motor - If the O-ring is damaged, fit a new one on the starter motor and lubricate it. -
Page 135: Removing The Timing System Drive
Removing the timing system drive • Remove the tappet cover. • Remove the flywheel. • Rotate the crankshaft until the front cyl- inder piston reaches the top dead cen- tre (TDC). • Undo and remove the screw on the crankcase and screw the specific tool to prevent crankshaft rotation. -
Page 136: Removing The Cam Shaft
See also Removing the rocker-arms cover Removing the flywheel magneto Removing the cam shaft • Remove the timing system control. • Remove the chain tensioner. • Undo and remove the eight screws. • Remove the cam tower cap. • Remove both camshafts. See also Removing the timing system drive... -
Page 137: Removing The Cylinder Head
Removing the cylinder head • Remove the camshafts. • Undo and remove the two side screws (1). • Loosen the screws (2- 3) operating di- agonally. • Undo and remove both central short screws (2) and collect the washers. • Undo and remove both central long screws (3) and collect the washers. - Page 138 • Remove the valve bucket tappets. • Compress the valve spring using the specific tool. Specific tooling AP8140179 Valve spring compressor AP9100838 Tool for valve pressure plate • Remove both cotter pins. • Release the valve springs. • Remove the cap and the valve spring.
-
Page 139: Removing The Cylinder - Piston Assy
• Remove the valves. - Remove the oil seals with a pair of pliers. See also Removing the cylinder head Removing the cylinder - piston assy. • Remove the head. • Remove the water delivery sleeve. • Remove the two dowels and the gasket between the cylinder and the head. -
Page 140: Inspecting The Small End
• Remove the retainer rings from the pin. • Slide off the pin. • Remove the piston. • Remove the three piston rings. See also Removing the cylinder head Inspecting the small end • Measure the inside diameter of the connecting rod small end using a spe- cific micrometer. -
Page 141: Inspecting The Wrist Pin
Inspecting the wrist pin • Check the pin outside diameter. Characteristic Pin (125 - 200) Minimum diameter: 14.995 mm (0.590 in) Standard diameter: 15.0000 +0/-0.0030 mm (0.00012 in) Inspecting the piston • Measure the pin seat diameter on the piston. •... -
Page 142: Inspecting The Cylinder
Maximum piston / cylinder coupling clearance after use (125/200) - top ring: 0.075 mm (0.0029 in) - middle ring: 0.065 mm (0.0025 in) - oil scraper: 0.25 mm (0.0098 in) Standard piston / cylinder coupling clearance (125/200) - top ring: +0.03 / 0.062 mm (0.0012 / 0.0024 in) - middle ring: +0.02 / 0.052 mm (0.0008 / 0.0020 in) - oil scraper: +0.01 / 0.19 mm (0.0004 / 0.007480 in) Inspecting the cylinder... -
Page 143: Inspecting The Piston Rings
Inspecting the piston rings SEALING RINGS (125 / 200) Specification Desc./Quantity Compression ring (top) 0.2 / 0.35 mm (0.0079 / 0.014 in) Compression ring (middle) 0.2 / 0.35 mm (0.0079 / 0.014 in) Oil scraper ring 0.2 / 0.7 mm (0.0079 / 0.027 in) Top ring maximum value 0.45 mm (0.18 in) Middle ring maximum value... - Page 144 • Rotate the crankshaft up to the TDC (the reversal point of the dial gauge ro- tation). • Lock the crankshaft at TDC using the specific tool. • Calculate the difference between the two measurements: using the chart be- low, identify the thickness of the cylin- der base gasket to be used upon refitting.
-
Page 145: Refitting The Piston Rings
Refitting the piston rings • Place the oil scraper spring on the pis- ton. • Fit the oil scraper ring keeping the gap opposed to the spring union. • Fit the middle piston ring with the iden- tification letter T facing the piston crown. -
Page 146: Inspecting The Cylinder Head
Inspecting the cylinder head • Using a trued bar, check that the head surface is not worn or distorted. • Check that the camshaft bushings are not worn. • Check that the head cover surface, the intake manifold and the exhaust manifold are not worn. -
Page 147: Inspecting The Valve Housings
- Measure the sealing surface width on the valve seats. VALVE SEALING SURFACE Specification Desc./Quantity Intake valve - sealing surface (125) 2.30 +/- 0.15 mm (0.0905 +/- 0.0059 in) Intake valve - sealing surface (200) 1.97 +/- 0.15 mm (1.0776 +/- 0.0059 in) Exhaust valve - sealing surface (125/200) 2.95 +/- 0.15 mm (0.1161 +/- 0.0059 in) Valve chamfering (all valves) -
Page 148: Inspecting The Valves
Inspecting the valves • Measure the width of the sealing surface on the valve seats and on the valves themselves. • If the sealing surface on the valve is wider than the specified limit, damaged in one or more points or curved, replace the valve with a new one. CAUTION DO NOT CHANGE THE VALVE FITTING POSITION (RH - LH). - Page 149 • Remove the head cover. • Cause the engine to reach the top dead centre and lock it at that position using the specific tool. NOTE FOR AN EASY REFIT, MARK TWO REFERENCES ON THE TIMING CHAIN AND THE GEARS OF THE TIMING SYSTEM IN THE COUPLING AREA.
- Page 150 • Remove the bucket tappet of the valve in question and read the calibration val- ue for that bowl, found inside the buck- et tappet itself. • Replace the bucket tappet with new one of a size suitable to restore the correct clearance.
-
Page 151: Inspecting The Springs And Half-Cones
Inspecting the springs and half-cones • Check that the spring upper supporting caps and the cotters show no signs of abnormal wear. • Check the unloaded spring length. Characteristic Valve spring length: 33.24 +/- 0.25 mm (1.3086 +/-0.0098 in) Refitting the valves •... -
Page 152: Refitting The Head And Timing System Components
30.864 mm (1.21511 in) • Check that the holes used for timing and their shoulders are not worn. • If values measured are not within the specified limits or there are signs of wear, replace the defective components with new ones. Characteristic Maximum axial clearance allowed: 0.4 mm (0.0157 in) - Page 153 • Tighten the four central screws (2 - 3) crosswise. Locking torques (N*m) Head EI fixing screws - M8x166 (4) 25 Nm + 90° (18.44 lbf ft + 90°) • Lastly, tighten the two side screws (1). Locking torques (N*m) Head EI fixing screws (chain side) - M6x130 (2) 11 Nm (8.11 lbf ft) •...
- Page 154 • Get two Ø 6.3 mm (0.25 in) pins. • Place the pins in their positions on the overhead camshafts. • Tighten the eight screws of the cam tower cap crosswise. Locking torques (N*m) Camshaft support EI fixing screws - M6x40 (8) 10 Nm (7.38 lbf ft) •...
-
Page 155: Crankcase - Crankshaft
• Remove the pins on the camshafts. • Remove the special crankshaft locking tool. • Tighten the screw on the crankcase. • Check the valve clearance and adjust it if required. • Refit the tappet cover. Specific tooling 0240880 Threaded bolt for locking crankshaft at TDC Locking torques (N*m) Transmission gear timing fixing screw - M8x20x1 (2) 27 Nm (19.91 lbf ft) - Loctite 243 Crankcase - crankshaft... -
Page 156: Removing The Crankshaft
Removing the crankshaft • Slide off the crankshaft from the fly- wheel side by giving short taps with a rubber hammer. See also Removing the flywheel magneto Intermediate gear Removing the crankshaft bearings • Remove the main bushing oil seal. •... -
Page 157: Inspecting The Crankshaft Alignment
Inspecting the crankshaft alignment • Install the crankshaft on the support and measure the misalignment at the two points indicated in the figure. • Check that the crankshaft cone, the tab fitting, the oil seal flow, the knurling and the threaded tangs are in good working order. -
Page 158: Inspecting The Crankcase Halves
A = 0.01 mm B = 0.01 mm C = 0.10 mm D = 0.06 mm Inspecting the crankcase halves • Before checking the crankcase halves, thoroughly clean all the surfaces and the oil pipes. • For the crankcase half on the transmission side, take particular care when handling the housing and hoses for the oil pump, the duct with the by-pass valve and the main bushings. -
Page 159: Refitting The Crankshaft
NOTE DO NOT TAKE THE MEASUREMENT ON THE TWO HALF-SHELLS COUPLING SURFACE SINCE THE ENDS ARE RELIEVED TO ALLOW BENDING DURING THE DRIVING OPERATION. Characteristic Ideal lubrication pressure 4 atm Driving depth 0.5 +/-0.1 mm from internal stop Refitting the crankshaft •... -
Page 160: Oil Pressure Check
• Place the crankshaft half by giving short taps with a rubber hammer. • Tighten the three screws to the pre- scribed torque. • Trim the gasket protruding from the cyl- inder plane. Locking torques (N*m) Crankcase EI fixing screws - M6x70 (1) 11 Nm Crankcase EI fixing screws - M6x50 (8.11 lbf ft) -
Page 161: Crankshaft Oil Seals
oil by-pass valve, the oil pump and the crankshaft seals. NOTE THIS CHECK MUST BE CARRIED OUT WITH OIL AT THE CORRECT LEVEL AND WITH AN OIL FILTER IN GOOD CONDITION. Characteristic Oil pressure Minimum pressure admitted at 6000 rpm: 3.5 atm. Crankshaft oil seals Removal •... - Page 162 Removal • Drain the engine oil. • Remove the flywheel cover. • Remove the flywheel. • Undo and remove the four screws and remove the plate. • Unscrew and remove the two screws. • Slide off the gears, the oil pump and the chain.
- Page 163 • Remove the external driving pin from the oil pump shaft. • Detach the shaft and remove the sec- ond external driving pin as well. • Take out the shaft and collect the com- ponents. - Measure distance between rotors with a feeler gauge at the position shown in the picture.
- Page 164 Measure the distance between the outer rotor and the pump body. Characteristic limit clearance allowed: 0.18 mm Check the rotor axial clearance using a trued bar as reference plane, as shown in the figure. Characteristic Limit value allowed: 0.09 mm See also Removal Refitting...
- Page 165 • Place the plate and tighten the four screws with Loctite 243 • Fit the flywheel and tighten the nut with Loctite 243 • Refit the flywheel cover. Locking torques (N*m) Oil pump plate EI screws - M5x12 (4) 6 Nm (4.42 lbf ft) - Loctite 243...
Need help?
Do you have a question about the Dragster 2022 and is the answer not in the manual?
Questions and answers