
Summary of Contents for ULTRA-LINK UL-PJ55
- Page 1 UL-PJ55 Compact Smart Projector Manual Please read the manual carefully before operating projector.
-
Page 2: Table Of Contents
Contents Important Safeguards..............1 Projector Knowledge ..............2 Remote Control ................4 Projector Installation ..............5 Standard Setting ..............5 Installation Method ..............6 Turn the Projector Operation On/Off ..........7 Focus Adjustment................7 Use the Projector .................8 How to Select the Source............8 How to Connect Bluetooth Audio Device......8 How to Use MaxhubShare .............9 How to Connect to WiFi............11 How to Read Files on U Disk ..........12... -
Page 3: Important Safeguards
Important Safeguards Installation • To get a better viewing experience, please use this projector with the curtain drawn or in a dark room. • Please use the projector carefully, dropping or knocking th projeector may damage parts; abnormal display or result in blurred images. Power •... -
Page 4: Projector Knowledge
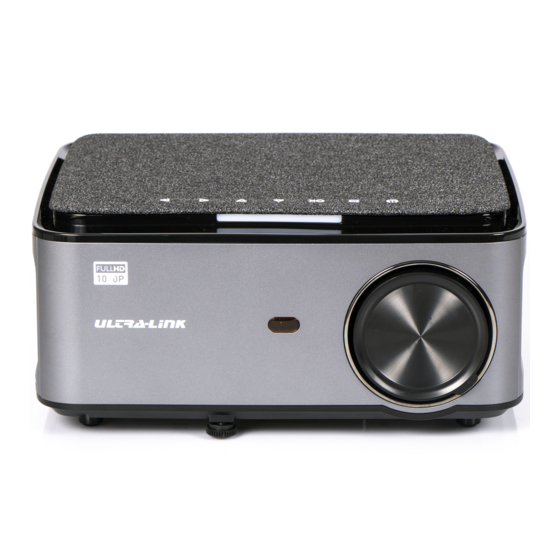
Projector Knowledge The projector can input high-definition video signal and composite video signal, and support stereo audio signal input and output. Please refer to the following figure to connect the projector and other audio equipment according to your own needs. 9 10 11 1. - Page 5 Projector Knowledge 1. Keystrokes(picture 1) 2. Rating label 3. Projector mount holes 4. Level-stand adjustment 1. Power Key 2. Exit 3. OK Key 4. Up Key 5. Down Key 6. Left Key (picture 1) 7. Right Key...
-
Page 6: Remote Control
Remote Control 1. Power 2. Source 3. Arrow keys 4. Menu 5. Homepape 6. Volume + 7. Volume - 8. Mute 9. Picture flip 10. Confirmation key (Play and Pause) 11. Return 12. Previous 13. Next... -
Page 7: Projector Installation
Projector Installation Standard Setting Please refer to the following table to adjust your picture size and distance. (from the lens to the screen). Aspect ratio 16:9 Picture size (inch) Projection distance (m) 1.70 2.38 3.30 3.97 Please allow ± 3% to the image sizes in the table above. If the distance is less than min data and more than max data, the image could be blurry. -
Page 8: Installation Method
Projector Installation Installation Method Contact a professional installer to mount this projector to a ceiling. Follow the instructions below for the correct projector positions. Projector Projector Screen Screen Front projection ceiling mount Rear projection ceiling mount Screen Projector Projector Screen Front projection table mount Rear projection table mount Warning:... -
Page 9: Turn The Projector Operation On/Off
Turn the Projector Operation On/Off When the projector is connected to a power source, the projector enters standby and the cover signal indicator is red. Operation on: Press the power key on the body or the power key on the remote control, the indicator will turn blue and enter the working state. -
Page 10: Use The Projector
Use the Projector How to Select the Source Step 1: Turn on the projector and this main interface will appear; Step 2: In the signal source option, select the signal source you need and confirm the connection. How to Connect Bluetooth Audio Device Step 1: Select "Settings"... -
Page 11: How To Use Maxhubshare
Use the Projector How to Use MaxhubShare Step 1: Select "MaxhubShare" in the main interface; Step 2: After entering the interface, scan the QR code on the right to download the "MHshare TV" APP. Miracast: Connect the projector and mobile phone to the same WiFi, open the "MHshare TV"... - Page 12 Use the Projector Miracast Steps: Step1 Step3 Step5 Step2 Step4 ※This interface is for reference only iOS Cast Steps: The operation method is similar to that of the mirroring for Android phones, and there is no need to download an APP for the mirroring. Windows &...
-
Page 13: How To Connect To Wifi
Use the Projector How to Connect to WiFi Step 1: Select "Network" → "Wireless" on the left side of the main interface; Step 2: Search for WiFi, select the WiFi that needs to be connected, enter the password on the front through the virtual button, and confirm. -
Page 14: How To Read Files On U Disk
Use the Projector How to Read Files on U Disk Select "Media" in the main interface, select your U disk, and find the file you need to view in the category. How to Download App Select App Store at the bottom of the main interface, enter the interface, and download the APP you need. -
Page 15: How To System Update
Use the Projector How to System Update Select "Settings" → "System Info" on the left side of the main interface, and select "System Upgrade" to update. How to Restore Factory Settings Select "Settings" → "Common" on the left side of the main interface, and select "System Recovery". -
Page 16: Projection Settings
Use the Projector Projection Settings Select "Settings" → "Projection setting" on the left side of the main interface, and select "System Recovery". Advanced keystone correction: Sides and Corners Sides: Four-sided trapezoid Corners: Square trapezoid The keystone correction can be adjusted according to the interface prompts. If you want to restore the original keystone correction settings, you can select Reset. -
Page 17: Multimedia Format Supported
Use the Projector Projection Method You can also customize the zoom interface according to your needs. Multimedia Format Supported Video Format: 3GP/AVI/FLV/MP4/MPG/VOB/TS/M2TS/DAT/MKV Audio Format: MP3/APE/AAC/FLAC/OGG/WAV/WMA/MID/DTS/M4A Image Format: BMP/JPG/PNG/JPEG This model does not support any Dolby audio decoding due to the copyright of Dolby patent. -
Page 18: Troubleshooting
Troubleshooting Problem Possible Causes 1. The indicator light ◎ Prower cable is not connected properly does not work when the power switch is turned on. ◎ The power switch is faulty . ◎ The power switch is turned off 2. The projector does ◎... -
Page 19: Specifications
Specifications Projection Technology: 5” LCD TFT display Native Resolution: 1920x1080 Image Flip: 360° Projection mode: Front-Desktop / Rear-Desktop / Front-Ceiling / Rear-Ceiling Lens: 5 pieces of glasses lens Aspect Ratio: 16:9 & 4:3 Lamp Type: LED lamp, 50,000 hours life Image Size: 40-150 inch Digital Zoom: 60%-100% Working Voltage: AC100-240V/50-60Hz... - Page 20 The terms HDMI and HDMI High-Definition Multimedia Interface, and the HDMI Logo are trademarks or registered trademarks of HDMI Licensing Administrator, Inc. in the United States and other countries.
Need help?
Do you have a question about the UL-PJ55 and is the answer not in the manual?
Questions and answers