Download Print this page
Moen MotionSense 7185EVC Installation Manual

Moen MotionSense 7185EVC Installation Manual

Hands-free kitchen faucet

Advertisement

Quick Links

Please contact Moen first
For Installation Help, Missing or
Replacement Parts
(USA)
1-800-BUY-MOEN (1-800-289-6636)
Mon - Fri 8:00 AM to 8:00 PM, Eastern
Sat. 9:00 AM to 5:30 PM Eastern
WWW.MOEN.COM/MOTIONSENSE/SUPPORT
(Canada)
1-800-465-6130
Mon - Fri 7:30 AM to 8:00 PM, Eastern
WWW.MOEN.CA
Por favor, contáctese primero con Moen
Para obtener ayuda de instalación, piezas
faltantes o de recambio
01-800-718-4345
Lunes a viernes de 8:00 a 20:00 hs.
(Costa Este)
Sáb. 8:00 a 18:30 hs. (Costa Este)
WWW.MOEN.MX
Veuillez appeler Moen d'abord
Pour l'aide d'installation, les Disparus ou les
Pièces de Rechange
1-800-465-6130
Du lundi au vendredi:
7h 30à 20h, HE
WWW.MOEN.CA
Don't forget to register and review your product by scanning the
code below or visiting moen.com/motionsense/support
Download reader at getscanlife.com
No olvide registrar y revisar su producto escaneando el código in-
cluido a continuación o visitando moen.com/motionsense/support
Descargue el programa de lectura en getscanlife.com
Ne pas oublier d'enregistrer et de passer en revue votre produit
en scannant le code ci-dessous ou en visitant le site
moen.com/motionsense/support.
Télécharger le lecteur sur le site getscanlife.com.
Download reader at
getscanlife.com
Installation Guide
Guía de Instalación
Guide d'installation
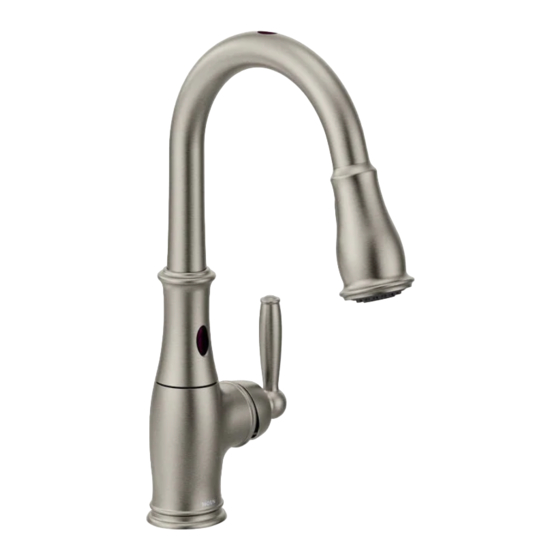
7594E
HANDS-FREE KITcHEN FAucET
cOcINA MOTIONSENSE™ HANDS-FREE
AVEc
RObINET DE cuISINE MAINS LIbRES
INS10188 - 4/13
7185E
MOTIONSENSE™
MOTIONSENSE™
MC

Advertisement

loading

Summary of Contents for Moen MotionSense 7185EVC

  • Page 1 WWW.MOEN.COM/MOTIONSENSE/SUPPORT (Canada) 1-800-465-6130 Mon - Fri 7:30 AM to 8:00 PM, Eastern WWW.MOEN.CA Por favor, contáctese primero con Moen Para obtener ayuda de instalación, piezas faltantes o de recambio 01-800-718-4345 Lunes a viernes de 8:00 a 20:00 hs. (Costa Este) Sáb.
  • Page 2 Deck gasket O. Control box HERRAMIENTAS ÚTILES D. Pulldown hose Zip ties Para que el cambio de la llave sea fácil y seguro, Moen le Data cable Q. Battery holder recomienda usar estas útiles herramientas. Hose weight locator R. Hook & loop fastener...
  • Page 3 INS10188 - 4/13 *Optional A/C Adapter 163712 (sold separately) *Optional A/C Adapter 163712 (sold separately) *Optional A/C Adapter 163712 (sold separately)
  • Page 4 IMPORTANT/IMPORTANT/IMPORTANT START uP OR RESET PROcEEDuRE/START uP OR RESET PROcEEDuRE/START uP OR RESET PROcEEDuRE When starting your MotionSense kitchen faucet, observe these three easy steps: When starting your MotionSense kitchen faucet, observe these three easy steps: When starting your MotionSense kitchen faucet, observe these three easy steps: 1.
  • Page 5 INS10188 - 4/13 Finished Installation/Instalación terminada/ Installation terminée After installing hoses, data cable or power cable can be secured in place using supplied zip ties. Después de instalar las mangueras, el cable de datos o el cable de alimentación puede asegurarse en su lugar con las abrazaderas plásticas provistas. Après avoir installé...
  • Page 6 Single hole/Un ori cio/Une ouverture Three hole/Tres ori cios/Trois ouvertures Align Alinee Alignez Install faucet body (A)–including hoses, data cable (E), and deck Install faucet body (A)–including hoses, data cable (E), gasket (c)–in hole on sink. Note: Installs with handle on right side only. deck plate (G) and deck plate gasket (H)–through center hole on sink.
  • Page 7 INS10188 - 4/13 Recommended/Recommended/Recommended Option/Option/Option IMPORTANT IMPORTANT IMPORTANTE IMPORTANTE IMPORTANT IMPORTANT Slide support bracket (I), then mounting washer (J) up onto faucet body The recommended mounting procedure is to use support bracket (I) (A) under sink and secure with mounting nut (K). Important: thread with mounting washer (J).
  • Page 8 2" Tighten mounting nut (K) with installation tool (T). Use screwdriver through hole in installation tool (T) to tighten firmly. Install pulldown connecting hose bracket (L) onto lower end of pulldown connecting hose (u), about 2” from end of pulldown Apriete la tuerca de montaje (K) con la herramienta de instalación connecting hose (u).
  • Page 9 INS10188 - 4/13 Slide pulldown connecting hose bracket (L) over threaded shank and secure with hose guide nut (M). Deslice la ménsula de la manguera extensible (L) sobre el vástago roscado y asegúrela con la tuerca de guía de la manguera (M). Faire glisser le support de tuyau de raccord du bec rétractable (L) sur la tige filetée et le fixer à...
  • Page 10 12" min. (305mm) Control box (O) location Ubicación de la caja de control (O) Emplacement du boîtier de contrôle (O) Attach pulldown hose (D) into quick connect on pulldown For easier serviceability, mount control box mininum 12" (305mm) connecting hose (u) . Push into connector as far as possible. above floor.
  • Page 11 INS10188 - 4/13 This side up Este lado hacia arriba Ce côté vers le haut Remove and discard protective caps from hoses (1, 2, 3). Secure control box (O) to wall with provided mounting screws (S). If installing into drywall use appropiate anchors and screws Retire y descarte las tapas protectoras de las mangueras (1, 2, 3).
  • Page 12 Cold Frio Froid Caliente Chaud Insert pulldown connecting hose (u) (number 4) into Connect hot and cold hoses to supply valves. corresponding push fi t connection on bottom of control box (O). Conecte las mangueras de agua fría y caliente a las válvulas de Gently pull on hose to ensure connection is secure.
  • Page 13 INS10188 - 4/13 Battery holder location Battery holder location Battery holder location Install Zone Zona de instalación Zone d’installation Select location for battery holder (Q). Before installation, verify that the Locate hose weight locator mark (F) on pulldown hose (D). Install hose weight (N) just above start of loop curvature in hose battery holder wire will reach connection on bottom of control box (O).
  • Page 14 Mounting Option 2/ Mounting Option 1/Opción de montaje 1/Option de montage 1 Opción de montaje 2/ Option de montage 2 Attach battery holder (Q) to wall with hook & loop fastener (R). First, attach one side of hook and loop fastener to wall. Then attach other piece to back of battery holder.
  • Page 15 INS10188 - 4/13 IMPORTANT/IMPORTANTE/IMPORTANT Before connecting battery holder, ensure that no objects are within 3 feet of faucet. Objects could interfere with start up process. Remove both protective labels from sensors on spout. Before connecting battery holder, ensure that no objects are within 3 feet of faucet. Objects could interfere with start up process.
  • Page 16 Check to ensure wave sensor is working properly. Move hand over Check to ensure ready sensor is working properly. Place hand in wave sensor to test that water will turn on. Move hand over wave front of ready sensor to test that water will run. sensor again to turn water off.
  • Page 17 INS10188 - 4/13 Option Option Opción Opción Option Option To disable both sensors: Hold your hand directly above the wave To disable Ready Sensor only: Open handle, hold hand above sensor for approximately five (5) seconds. Water will begin to run wave sensor for 5 seconds.
  • Page 18 For assistance, call 1-800-BUY-MOEN. required. For assistance, call 1-800-BUY-MOEN. required. For assistance, call 1-800-BUY-MOEN. Performance Check/Veri cación de Performance Check/Veri cación de...
  • Page 19 INS10188 - 4/13 Low Flow/Flujo bajo/Faible débit Pushdown Pushdown Empuje hacia abajo Empuje hacia abajo Pousser vers le bas Pousser vers le bas To remove in-line fi lter, push down on retainer If low fl ow, turn off water at stops before Hold #2 hose with a wrench at top of fi lter ring and pull up on outlet hose (#2).
  • Page 20 (O) at start-up. If no RED light was visible, call consumer service (1-800-BUY-MOEN, 1-800-289-6636). If ashing RED light was visible but water is still owing, unplug the battery holder cable (Q), wait 30 seconds, then plug in the battery If the water is still owing, unplug the battery holder cable (Q), wait holder cable and ensure it is pushed all the way into the control box (O).
  • Page 21 If water is still fl owing, turn off the cold water supply. So only HOT water is fl owing through the spray wand. Call Moen consumer service. Control box service kit 163713 is required. Caliente (1-800-BUY-MOEN, 1-800-289-6636).
  • Page 22 • Connect the equipment into an outlet on a circuit different from that to which the receiver is connected. • Consult the dealer or an experienced radio/TV technician for help. Changes or modifications not expressly approved by Moen Incorporated could void the user’s authority to operate the equipment.
  • Page 23 This Limited Warranty covers only those workmanship and material non-conformities specified above, and does cover non-conformities or damages arising from any other cause, including without limitation, defects or damage due to the use of other than genuine Moen parts, due to installation error, product abuse, or product misuse or due to the use of cleaners containing abrasives, alcohol or other organic solvents.
  • Page 24 Moen (le « Vendeur ») garantit que le système MotionSenseMC ne présentera aucun défaut de matériaux ni de fabrication. Moen garantit que le robinet sera libre de toute fuite ou d’égouttement pendant son usage normal et que le boîtier de contrôle du Produit (qui contient le système hydraulique) et le fini ne présenteront aucun défaut de matériel et...