
Subscribe to Our Youtube Channel
Related Manuals for Beko GN141622ZGB


Summary of Contents for Beko GN141622ZGB
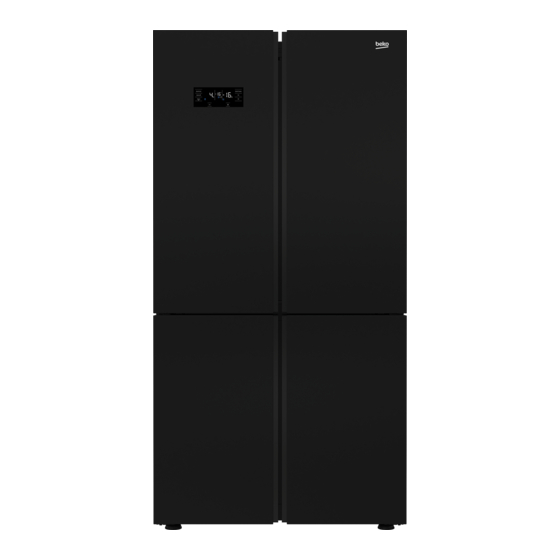
- Page 1 Refrigerator User Manual Réfrigérateur Manuel d’utilisation دليل المستخدم GN141622ZGB-RGNE4626XP EN/FR/AR 58 0478 0000/AE -EN-FR-AR...
- Page 2 Please read this manual before using the product! Dear Customer, We'd like you to make the best use of our product, which has been manufactured in modern facilities with care and meticulous quality controls. Thus, we advice you to read the entire user manual before you use the product. In case the product changes hands, do not forget to hand the guide to its new owner along with the product.
-
Page 3: Table Of Contents
1. Safety and environment instructions 3 5 Operating the product 5.1 Indicator panel ..... .14 2 Your Refrigerator 5.2 Indicator panel.....19 5.3 Freezing fresh food. -
Page 4: Safety And Environment Instructions
Safety and environment instructions This section provides the safety – staff kitchen areas in shops, instructions necessary to prevent offices and other working the risk of injury and material environments; damage. Failure to observe these – farm houses and by clients in instructions will invalidate all hotels, motels and other residential types of product warranty. - Page 5 Important instructions regarding safety and environment Plug the product into an earthed Unplug the product during socket. Earthing must be done by installation, maintenance, a qualified electrician. cleaning and repair. If the product has LED type If the product will not be used lighting, contact the authorised for a while, unplug the product service for replacing or in case of...
- Page 6 Important instructions regarding safety and environment pressure limiting valve in your Do not step or lean on the door, mains system. If you do not drawers and similar parts of know how to check your water the refrigerator. This will cause pressure, ask for the help of a the product to fall down and professional plumber.
- Page 7 Important instructions regarding safety and environment The manufacturer assumes no This product has been manufactured with high quality parts and materials responsibility for any damage which can be reused and are suitable due to misuse or mishandling. for recycling. Do not dispose of the Original spare parts will be waste product with normal domestic and other wastes at the end of its...
-
Page 8: Your Refrigerator
Your Refrigerator 1- Control and indicator panel 7- Chiller compartment 2- Butter & Cheese section 8- Icebox drawer 3- 70 mm moving door shelf 9- Multizone compartment glass shelf/cooler 4- Fridge compartment glass shelf 10- Freezer compartment drawers 5- Fridge compartment crisper 11- Multizone Compartment's drawer 6- Gallon door shelf * OPTIONAL... -
Page 9: Your Refrigerator
Your Refrigerator 1- Control and indicator panel 7- Chiller compartment 2- Butter & Cheese section 8- Icebox drawer 3- 70 mm moving door shelf 9- Multizone compartment glass shelf/cooler 4- Fridge compartment glass shelf 10- Freezer compartment drawers 5- Fridge compartment crisper * OPTIONAL 6- Gallon door shelf Figures in this user manual are schematic and may not match the product exactly. -
Page 10: Installation
Installation 1. To install the wedges, remove the screws on the 3.1 Appropriate location product and use the screws supplied together with the for installation wedges. Contact an Authorized Service for the installation of the product. In order to prepare the product for use, refer the information in the user manual and ensure that electrical installation and water installation are appropriate. -
Page 11: Adjusting The Feet
Installation To adjust the doors vertically, 3.3* Adjusting the feet Loosen the fixing nut located at the bottom. If the product stands unbalanced after installation, Rotate the adjusting nut according to the position adjust the feet on the front by rotating them to the of the door (clockwise/counter-clockwise). -
Page 12: Electric Connection
Installation 3.4 Electric connection -Upper hinge group is fixed with 3 screws. -The hinge cover is attached after the sockets are WARNING: Do not make connections via installed. extension cables or multi-plugs. - Then the hinge cover is fixed with two screws. WARNING: Damaged power cable must be replaced by the Authorized Service... -
Page 13: Preparation
Preparation 4.1 Things to be done for If two coolers are to be installed side saving energy by side, there should be at least 4 cm distance between them. Connecting your refrigerator to systems that save energy is dangerous as they may 4.2 Recommendations about the cause damage on the product. -
Page 14: Initial Use
Preparation 4.3 Initial use Before using the product, make sure that all preparations have been made in accordance with the instructions given in the "Important instructions regarding safety and environment" and "Installation" chapters. Clean the interior of the refrigerator as recommended in the “Maintenance and cleaning”... -
Page 15: Operating The Product
Operating the product 5.1 Indicator panel Touch-controlled indicator panel allows you to set the temperature and control the other functions related to the refrigerator without opening the door of the product. Just press the relevant buttons for function settings. 10 11 Quick Cool Quick Freeze 3 “... - Page 16 Operating the product 1. Quick cooling function indicator 8. Joker freezer icon It turns on when the quick fridge function is Hover over the Joker freezer icon using the FN button; the activated. icon will start to flash. When you press the OK key, joker 2.
- Page 17 Operating the product 21. Setting the Celsius and Fahrenheit 14. FN button indicator Using this key, you can switch between the Hover over this key using the FN key and select functions that you want to select. Upon pressing Fahrenheit and Celsius via the OK key. When this key, the icon, whose function is required to be the relevant temperature type is selected, the activated or deactivated, and this icon's indicator...
- Page 18 Operating the product 29. Temperature change cabin icon hover over the icon and the indicator again and press the OK key. Thus, both the eco fuzzy function Indicates the cabin whose temperature is to be icon and the indicator will start flashing. If you do changed.
- Page 19 Operating the product Use quick cooling function when you want to quickly cool the food placed in the fridge compartment. If you want to cool large amounts of fresh food, activate this function before putting the food into the product. If you do not cancel it, quick cooling will cancel itself automatically after 8 hours at the most or when the fridge...
-
Page 20: Indicator Panel
Operating the product 5.2 Indicator panel Touch-control indicator panel allows you to set the temperature and control the other functions related to the refrigerator. Just press the relevant buttons for function settings. 26 25 change, is selected. Then, you can change the set 1-On/Off function value by pressing the cabin set value Temperature Press the On/Off button for 3 seconds to turn off or... - Page 21 Operating the product 10. Joker cabin icon 17. OK button After navigating the functions using the FN button, It shows joker cabin icon. when the function is cancelled via the OK button, 11. Joker freezer icon the relevant indicator flashes. When the function is When you select the joker freezer icon using the activated, it remains on.
- Page 22 Operating the product Thus, the ice machine is switched off. In order to switch on the ice machine again, hover over the icon. The ice machine off icon will start flashing. If you press ok button, the icon will go off and thus the ice machine will be switched on again.
-
Page 23: Freezing Fresh Food
Operating the product Freezer Fridge Compartment Compartment Remarks Setting Setting -18°C 4°C This is the normal recommended setting. -20, -22 or These settings are recommended when the ambient temperature 4°C -24°C exceeds 30°C. Use when you wish to freeze your food in a short time. Your product Quick Freeze 4°C will return to its previous mode when the process is over. -
Page 24: Placing The Food
Operating the product Boil the vegetables and drain their water in order 5.8 Chiller compartment to store vegetables for a longer time as frozen. Chiller compartments allow you to prepare the food After draining their water, put them in air-proof for freezing. -
Page 25: Egg Tray
Operating the product Never leave the vegetables in their plastic bags in 3-Movable middle section is closed when the left the crisper. If they are left in their plastic bags, this door of the fridge compartment is opened. will cause them to rot in a little while. If you not 4-It must not be opened manually. -
Page 26: Wine Cellar Compartment
Operating the product 5.16 Wine cellar compartment (This feature is optional) 1 – Fill your cellar compartment Wine cellar was built to contain up to 28 front bottles + 3 bottles accessible using a telescopic rack. These maximum quantities declared are given for information purpose only and correspond to tests carried out with a “Bordelaise 75cl”... -
Page 27: Using Internal Water Dispenser
Operating the product 3- Suggestions relating to the opening of a wine bottle before tasting: White wines About 10 minutes before serving Young red wines About10 minutes before serving Thick and mature red wines About 30 to 60 minutes before serving 4- How long can an open bottle be preserved? Unfinished bottles of wine must be cocked properly and can be preserved in a cold and dry place during the following periods:... -
Page 28: For Using Water Dispenser
Operating the product During initial use, you will have to wait If your water dispenser is leaking just a few approximately 24 hours for the water to cool down. drops of water after you have dispensed some Take out the glass a little while after you pull the water, this is normal. -
Page 29: Icematic And Ice Storage Container
Operating the product 5.21 Icematic and ice This product is equipped with a lighting source of the "G" energy class. storage container The lighting source in this product shall only be (in some models) replaced by professional repairers. Using the Icematic Fill the Icematic with water and place it into its seat. -
Page 30: Maintenance And Cleaning
Maintenance and Cleaning Cleaning the product regularly will prolong its Do not use sharp, abrasive tools, service life. soap, household cleaning agents, detergents, kerosene, fuel oil, WARNING: Disconnect the power varnish etc. to prevent removal and before cleaning the refrigerator. deformation of the prints on the Do not use sharp and abrasive tools, plastic part. -
Page 31: Troubleshooting
Troubleshooting This is normal and not a malfunction. Check this list before contacting the service. The refrigerator runs too often or for too Doing so will save you time and money. This list long. includes frequent complaints that are not related to The new product may be larger than the faulty workmanship or materials. - Page 32 Troubleshooting The cooler compartment temperature is set The doors were opened frequently or kept open to a very low degree. >>> Set the freezer for long periods. >>> Do not open the doors too compartment temperature to a higher degree and frequently;...
- Page 33 Veuillez d’abord lire ce manuel d’utilisation ! Chère cliente, cher client, Nous espérons que votre produit, qui a été fabriqué dans des usines modernes et vérifié au terme des procédures de contrôle de qualité les plus méticuleuses, vous aidera efficacement. Le présent manuel vous permettra d'utiliser votre appareil rapidement et en toute sécurité.
- Page 34 Table des matières 1 Instructions en matière de sécurité et 5 Fonctionnement de l’appareil d’environnement 5.1 Ecran en façade....14 5.2 Ecran en façade....19 2 Votre réfrigérateur 5.3 Congélation des aliments frais .
-
Page 35: Instructions En Matière De Sécurité Et D'environnement
Instructions en matière de sécurité et d’environnement Cette section fournit les instructions de - Pour être utilisé par les clients dans les sécurité nécessaires à la prévention des maisons de campagne et hôtels et les risques de blessures ou de dommage autres environnements d’hébergement ;... - Page 36 Instructions importantes en matière de sécurité et d’environnement Évitez de toucher les aliments congelés avec des mains humides ! Ils La vapeur peut atteindre les zones pourraient coller à vos mains ! électrifiées et causer un court-circuit Ne placez pas de boissons en bouteille ou l’électrocution ! ou en canette dans le compartiment de Ne lavez pas l’appareil par pulvérisation...
- Page 37 Instructions importantes en matière de sécurité et d'environnement Il doit être exclusivement utilisé pour le 1.1.1 Avertissement HC stockage des denrées et des boissons. Si votre réfrigérateur possède un système de Les produits qui nécessitent un refroidissement utilisant le gaz R600a, évitez contrôle de température précis d’endommager le système de refroidisse- (vaccins, médicaments sensibles à...
- Page 38 Instructions importantes en matière de sécurité et d’environnement 1.5. Conformité Avec la Directive RoHS Cet appareil est conforme à la directive DEEE de l’Union européenne (2011/65/UE). Il ne comporte pas les matériaux dangereux et interdits mentionnés dans la directive. 1.6. Informations Relatives à...
-
Page 39: Votre Réfrigérateur
Votre réfrigérateur 1- Ecran de contrôle 6- Balconnet grande capacité 2- Balconnet pour bac à oeufs 7- Compartiment Zone fraîcheur 3- Balconnet ajustable de 70 mm 8- Twist ice maker 4- Clayette en verre du compartiment 9- Tiroirs du compartiment multizone réfrigérateur 10- Tiroirs du compartiment congélateur 5- Bac à... -
Page 40: Votre Réfrigérateur
Votre réfrigérateur* 1- Ecran de contrôle 6- Balconnet grande capacité 2- Balconnet pour bac à oeufs 7- Compartiment Zone fraîcheur 3- Balconnet ajustable de 70 mm 8- Tiroir de la fabrique automatique de glaçons 4- Clayette en verre du compartiment 9- Clayette en bois du compartiment cave à... -
Page 41: Installation
Installation 3.2 Installation des cales en plastique 3.1 Emplacement approprié Les cales en plastique fournies à la livraison pour l’installation permettent de créer une distance afin que l'air Contactez un service autorisé pour installer circule entre l'appareil et le mur arrière. l'appareil. - Page 42 Installation -Fixez la charnière supérieure à l'aide de 3 vis -Fixez ensuite les caches après l’installation des supports -Serrez alors les caches à l'aide de 2 vis. Pour le réglage vertical des portes, Desserrez l’écrou de fixation situé dans la partie inférieure.
-
Page 43: Branchement Électrique
Installation 3.4. Branchement électrique AVERTISSEMENT : Ne réalisez pas de branchements en utilisant des rallonges ou des multiprises. AVERTISSEMENT : Les câbles d’alimentation endommagés doivent être remplacés par des prestataires de services agréés. Si deux réfrigérateurs sont installés côte à côte, laissez une distance minimale de 4 cm entre les deux. -
Page 44: Préparation
Préparation 4.1 Mesures d’économie d’énergie La température ambiante de la pièce dans laquelle vous installez le réfrigérateur doit Il est dangereux de brancher votre 10 °C / 50 °F être au minimum de réfrigérateur aux systèmes électriques Pour des raisons d’efficacité, il n’est pas d'économie d'énergie, car ils pourraient recommandé... -
Page 45: Première Utilisation
Préparation 4.3 Première utilisation Avant d’utiliser cet appareil, rassurez-vous que toutes les préparations sont effectuées conformément aux instructions contenues dans les chapitres « Instructions importantes en matière de sécurité et d’environnement » et « Installation ». Nettoyez l’intérieur du réfrigérateur comme indiqué... -
Page 46: Fonctionnement De L'appareil
Fonctionnement de l’appareil 5.1 Ecran en façade L’écran de contrôle à commandes tactiles vous permet de régler la température et de contrôler les autres fonctions liées au réfrigérateur sans ouvrir la porte de l’appareil. Appuyez simplement sur le bouton approprié pour régler des fonctions. 10 11 Quick Cool Quick Freeze... - Page 47 Fonctionnement de l’appareil 1. Indicateur de fonction de refroidissement Veuillez consulter la section « Solutions conseillées rapide pour le dépannage » de votre manuel si vous Il s’allume lorsque la fonction de réfrigération constatez que cet indicateur est allumé. rapide est activée. 6.
- Page 48 Fonctionnement de l’appareil 17. Icône de changement de température du Utilisez la fonction de congélation compartiment congélateur* rapide lorsque vous souhaitez congeler Indique le compartiment dont la température doit rapidement les aliments placés dans être modifiée. Lorsque l’icône de changement de le compartiment congélateur.
- Page 49 Fonctionnement de l’appareil après 20 secondes, l’icône et l’indicateur restent la fonction Vacances reste allumée en permanence allumés. Et, la machine à glaçons s’arrête. Pour et la fonction Vacances s’active. L’indicateur remettre la machine en marche, effleurez l’icône et clignote pendant ce processus. Appuyez sur le l’indicateur ;...
- Page 50 Fonctionnement de l’appareil s’allume et le mode Verrouillage des commandes 33. Bouton de fonction de refroidissement rapide s’active. Les boutons ne fonctionnent pas lorsque Ce bouton est doté de deux fonctions. Appuyez le mode Verrouillage des commandes est actif. brièvement sur ce bouton pour activer ou Appuyez à...
-
Page 51: Ecran En Façade
Fonctionnement de l’appareil 5.2 Ecran en façade L’écran de contrôle à commandes tactiles vous permet de régler la température et de contrôler les autres fonctions liées au réfrigérateur sans ouvrir la porte de l’appareil. Appuyez simplement sur le bouton approprié pour régler des fonctions. 26 25 3. - Page 52 Fonctionnement de l’appareil 7. Indicateur de valeur de température dernier commence à clignoter. Cela permet de comprendre si la fonction de vacances est activée Affiche la valeur de température du compartiment ou désactivée. Appuyer sur le bouton OK active sélectionné. la fonction vacances et le voyant est allumé...
- Page 53 Fonctionnement de l’appareil 24. Indicateur Celsius L’icône de réinitialisation de filtre s’éteint. Il s’agit de l’indicateur Celsius. Lorsque l’indicateur 21. Icône de fonction eco fuzzy Celsius est activé, les valeurs de réglage de la Appuyer sur la touche FN (jusqu’à ce qu’elle température s’affichent en degrés Celsius et atteigne l’icône de lettre e) pour activer la fonction l’icône correspondant s’allume.
-
Page 54: Congélation Des Aliments Frais
Fonctionnement de l’appareil 5.3 Congélation des aliments frais 5.5 Informations concernant Pour préserver la qualité des aliments, il faut la congélation les congeler aussi rapidement que possible Conformément aux normes CEI 62552, le lorsqu’ils sont placés dans le compartiment réfrigérateur congèle au moins 4,5 kg d’aliments congélateur, pour cela, utilisez la fonction de par volume de 100 litres de congélation en moins congélation rapide. -
Page 55: Disposition Des Aliments
Fonctionnement de l’appareil Réglage du Réglage du compartiment compartiment Remarques congélateur réfrigérateur -18 °C 4°C Voici le réglage normal recommandé. -20, -22 ou Ces réglages sont recommandés lorsque la température 4°C -24 °C ambiante dépasse 30 °C. Cet indicateur est utilisé lorsque vous voulez congeler vos Congélation denrées pendant une courte période. -
Page 56: Compartiment Zone Fraîcheur
Fonctionnement de l’appareil 5.9 Compartiment Zone fraîcheur Retirez toujours les légumes du bac de leurs sacs Les compartiments zone fraîcheur vous permettent en plastique. Lorsqu’ils restent dans leurs sacs de conserver vos aliments fragiles (viande, en plastique, ils pourrissent rapidement. Si vous poisson, froimage, charcuterie) à... -
Page 57: Compartiment Multizone
Fonctionnement de l’appareil 5.15 Bluelight (Cette caractéristique est en option) Les bacs à légumes du réfrigérateur sont éclairés par un voyant lumineux bleu. Les denrées alimentaires conservées dans les bacs à légumes continuent leur photosynthèse grâce aux effets de sa longueur d’onde et conservent ainsi leur fraîcheur et leur teneur en vitamines plus lontemps. -
Page 58: Compartiment Cave À Vin
Fonctionnement de l’appareil 5.17 Compartiment cave à vin* (Cette caractéristique est en option) 1 – Charger votre cave Le compartiment cave à vins a été conçu pour charger jusqu’à 28 bouteilles de front + 3 bouteilles accessibles par une clayette télescopique. Ces quantités maximales annoncées sont données à titre indicatif et correspondent a des tests effectués avec une bouteille étalon, de type «... -
Page 59: Utilisation Du Distributeur D'eau Interne
Fonctionnement de l’appareil 3- Suggestions relatives à l’ouverture d’une bouteille de vin avant la dégustation : Vins blancs Environ 10 minutes avant de servir Vins rouges jeunes Environ 10 minutes avant de servir Vins rouges denses et matures Environ 30 à 60 minutes avant de servir 4- Combien de temps se conserve une bouteille ouverte ? Les bouteilles de vin que vous n’avez pas terminées doivent être fermées correctement et peuvent être conservées dans un endroit frais et sec pendant les périodes suivantes :... -
Page 60: Utilisation Du Distributeur D'eau
Fonctionnement de l’appareil 5.21 Distributeur de glaçons (pour certains modèles) Quick Cool Quick Freeze 3 “ Pour obtenir des glaçons grâce à cette machine, Select 3 “ remplissez le réservoir d'eau du compartiment réfrigérateur jusqu'au niveau maximum. Après environ 15 jours, les glaçons se trouvant à... -
Page 61: Distributeur Et Récipient De Conservation De
Fonctionnement de l’appareil 5.22 Distributeur et récipient de conservation de glaçons (dans certains modèles) Utilisation du distributeur Remplissez le distributeur de glaçons avec de l'eau et remettez-le à sa place. Vos glaçons seront prêts dans environ deux heures. Ne pas retirer le distributeur de glaçons de son logement pour prendre de la glace. -
Page 62: Entretien Et Nettoyage
Entretien et nettoyage Le nettoyage régulier du produit prolonge sa durée Évitez d’utiliser des objets tranchants ou de vie. abrasifs, du savon, des produits ménagers de nettoyage, des détergents, de l’essence, AVERTISSEMENT: Débranchez du benzène, de la cire, ect. ; autrement, les l’alimentation avant de nettoyer le marques sur les pièces en plastique pourraient réfrigérateur. - Page 63 Dépannage vivo Parcourez la liste ci-après avant de contacter le En cas de coupure soudaine de courant ou service de maintenance. Cela devrait vous éviter de débranchement intempestif, la pression de perdre du temps et de l'argent. Cette liste du gaz dans le système de réfrigération répertorie les plaintes fréquentes ne provenant pas de l'appareil n'est pas équilibrée, ce qui déclenche la fonction de conservation...
-
Page 64: Dépannage
Dépannage Il se peut que le nouvel appareil soit plus La température du réfrigérateur est très basse, alors que celle du congélateur est grand que l'ancien. Les appareils plus grands appropriée. fonctionnent plus longtemps. La température de la pièce est probablement La température du compartiment congélateur élevée. - Page 65 Dépannage La température du compartiment Un climat chaud ou humide accélère le réfrigérateur est réglée à un degré très processus de givrage et de condensation. élevé. >>> Le réglage de la température du Ceci est normal et ne constitue pas un compartiment réfrigérateur a un effet sur la dysfonctionnement.
- Page 66 Dépannage Cet appareil est doté d'une source d'éclairage Il est possible que les aliments soient en de classe énergétique "G". contact avec la section supérieure du tiroir. Seuls des réparateurs qualifiés sont autorisés >>> Reclassez les aliments dans le tiroir. à...
- Page 67 !يرجى قراءة دليل المستخدم هذا أوال ،عميلنا العزيز الغالي .نأمل أن هذا المنتج والذي تم إنتاجه في مصانع حديثة وفحصه بإجراءات صارمة لرقابة الجودة سيقدم لكم خدمة فعالة .سيساعدك دليل المستخدم على استخدام المنتج بسرعة وبطريقة مأمونة .تأكد من قراءة تعليمات السالمة .احتفظ...
- Page 68 المحتويات 5 تشغيل الجهاز 1 تعليمات السالمة والبيئة 13 ....1.5 لوحة المؤشر 2 ثالجتك 17 ....2.5 لوحة المؤشر 20 .
- Page 69 تعليمات السالمة والبيئة يوضح هذا الجزء تعليمات السالمة الالزمة لمنع خطر اإلصابة والضرر المادي. يؤدي اإلخفاق السالمة العامة في التقيد بهذه التعليمات إلى بطالن جميع ال يجوز استخدام هذا الجهاز بواسطة أشخاص .ضمانات الجهاز يعانون من عجز بدني أو حسي أو عقلي، دون الغرض...
- Page 70 تعليمات هامة للسالمة والبيئة .احذر أن يعلق كبل الطاقة HCتحذير إذا كان المنتج يشتمل على نظام تبريد ، احذر حتى تتجنبR600aباستخدام غاز أضرار نظام التبريد وأنبوبه أثناء استخدام .الجهاز وتحريكه. هذا الغاز سريع االشتعال أوصل المنتج بمقبس مؤرض. يجب إجراء إذا...
- Page 71 تعليمات هامة للسالمة والبيئة يجب استخدام الجهاز لتخزين الطعام والشراب .تجميع مواد التغليف المحددة من قبل السلطات المحلية .فقط ال تترك المواد الحساسة التي تتطلب درجات ،حرارة تحت السيطرة في الثالجة (اللقاحات .)األدوية الحساسة للحرارة، اللوازم الطبية، الخ ال يتحمل المصنع أية مسؤولية عن أي ضرر .بسبب...
- Page 72 ثالجتك حيز التبريد لوحة التحكم والمؤشرات درج صندوق الثلج قسم الزبد والجبن رف الصندوق الزجاجي متعدد المساحات/ المبرد تحريك رف الباب 07 ملم أدراج مقصورة الفريزر رف صندوق الثالجة الزجاجي أدراج مقصورة المنطقة المتعددة مقصورة الطعام الطازج بصندوق الثالجة جالون رف الباب * يرايتخا...
- Page 73 ثالجتك حيز التبريد لوحة التحكم والمؤشرات درج صندوق الثلج قسم الزبد والجبن رف الصندوق الزجاجي متعدد المساحات/ المبرد تحريك رف الباب 07 ملم أدراج مقصورة الفريزر رف صندوق الثالجة الزجاجي مقصورة الطعام الطازج بصندوق الثالجة * يرايتخا جالون رف الباب إن...
- Page 74 التركيب 1.3 موضع التركيب المناسب اتصل بمركز خدمة معتمد لتركيب الجهاز. حتى يمكن تحضير المنتج لالستخدام فارجع إلى المعلومات الواردة في دليل المستخدم هذا وتحقق من أن التوصيالت الكهربائية والمائية سليمة. إن لم يكن األمر كذلك، فقم .باالتصال بكهربائي مؤهل للقيام بكافة التجهيزات الالزمة :تحذير...
- Page 75 التركيب ،لغرض ضبط األبواب رأس ي ًا .حرر صامولة التثبيت الموجودة في القاعدة قم بتدوير صامولة الضبط بما يتوافق مع موضع الباب .)(في اتجاه/عكس اتجاه عقارب الساعة .أحكم ربط صامولة التثبيت لغرض تثبيت الموضع ،لغرض ضبط األبواب في مستوى أفقي .حرر...
- Page 76 التركيب 4.3 التوصيل الكهربائي :تحذير ال تقم بعمل الوصالت من خالل كابالت .إطالة أو قوابس متعددة :تحذير يجب أن يقوم مندوب خدمة معتمد .باستبدال كابل الطاقة التالف ،إذا كنت بصدد تركيب مبردين جن ب ًا إلى جنب .يجب المباعدة بينهما بمسافة 4 سم على األقل لن...
- Page 77 التحضير 1.4 أشياء يجب عملها لتوفير الطاقة توصيل ثالجتك باألنظمة الموفرة للطاقة أمر .خطير، حيث إنها يمكن أن تلحق الضرر بالمنتج .ال تترك أبواب الثالجة مفتوحً ا لفترة طويلة .ال تضع األطعمة أو الخضروات الساخنة في الثالجة ال تحمل الثالجة بشكل زائد. سوف تنخفض كفاءة .التبريد...
- Page 78 اإلعداد قم بتشغيل الثالجة دون وضع أي أطعمة بداخلها لمدة 6 ساعات وال تقم بفتح الباب ما لم تكن هناك .ضرورة سوف تسمع ضوضاء عند بدء عمل جهاز ضغط الهواء. قد تؤدي السوائل والغازات المتسربة من نظام التبريد إلى إحداث ضوضاء، حتى إن كان .جهاز...
- Page 79 تشغيل الجهاز 1.5 لوحة المؤشر تسمح لك لوحة مؤشر التحكم في اللمس بضبط درجة الحرارة والتحكم في الوظائف األخرى المتعلقة بالجهاز بدون فتح .باب المنتج. فقط اضغط على األزرار المناسبة إلعدادات الوظائف 10 11 Quick Cool Quick Freeze 3 “ Select 3 “...
- Page 80 تشغيل الجهاز 01. مؤشر وظيفة التجميد السريع 1. مؤشر وظيفة التبريد السريع .يعمل عند تفعيل وظيفة التجميد السريع .يعمل المؤشر عند تفعيل وظيفة التجميد السريع 11. مؤشر الفهرنهايت 2. مؤشر درجة حرارة مقصورة الثالجة يتم عرض درجة حرارة تجويف الثالجة، يمكن أن يتم ،هو...
- Page 81 تشغيل الجهاز سيتوقف تدفق المياه من خزان المياه المعنية ويومض المؤشر. عند تفعيل الوظيفة فإنها تظل عندما يتم اختيار هذه الوظيفة. و مع .مشغلة. يستمر المؤشر في الوميض لعرض األيقونة عليه ذلك، يمكن إخراج الثلج الموجود من 71. أيقونة تغيير درجة حرارة الكابينة .وحدة...
- Page 82 تشغيل الجهاز قيمة الضبط. باستمرار الضغط عليه فسوف ترجع قيمة استخدم وظيفة التبريد السريع عندما تحتاج .الضبط إلى وضع البداية لتجميد الطعام الموضوع في مقصورة الثالجة سري ع ًا. إذا أردت تبريد كمية كبيرة 82. أيقونة تغيير درجة حرارة الكابينة من...
- Page 83 تشغيل الجهاز 2.5 لوحة المؤشر تسمح لك لوحة مؤشر التحكم اللمسي بضبط درجة الحرارة والتحكم في الوظائف األخرى المتعلقة بالجهاز بدون فتح .باب الثالجة. فقط اضغط على األزرار المناسبة إلعدادات الوظائف 26 25 ،التي تريد تغيير قيمة درجة حرارتها المحددة. بعد ذلك 1.
- Page 84 تشغيل الجهاز 11. أيقونة فريزر الجوكر .التبريد السريع وتعود اإلعدادات إلى الوضع الطبيعي )16( FN باختيار أيقونة فريزر الجوكر باستخدام زر 91. تحذير إطفاء اإلنذار (71)، فسوف تتحول كابينةOK والضغط على زر في حال صدور إنذار قصور الطاقة/ارتفاع درجة .الجوكر...
- Page 85 تشغيل الجهاز سيتوقف تدفق المياه من خزان المياه عندما يتم اختيار هذه الوظيفة. و مع ذلك، يمكن إخراج الثلج الموجود من .وحدة التوزيع 32. أيقونة إعادة ضبط الفلتر .تعمل هذه األيقونة إذا كان الفلتر بحاجة إلى إعادة الضبط 42. مؤشر السليزيوس هو...
- Page 86 تشغيل الجهاز 4.5 توصيات بخصوص حفظ األطعمة المجمدة 3.5 تجميد األطعمة الطازجة يجب ضبط الصندوق على درجة حرارة °81- م على للحفاظ على جودة األطعمة، فيجب تجميدها بأسرع .األقل ما يمكن عند وضعها في صندوق الفريزر، واستخدام توضع العبوات في الفريزر بأسرع .خاصية...
- Page 87 تشغيل الجهاز إعداد صندوق إعداد صندوق مالحظات التبريد الفريزر .هذا هو الضبط الموصى به بشكل طبيعي 4 درجات مئوية 81- درجة مئوية هذه هي إعدادات الضبط الموصى بها عندما تتجاوز درجة الحرارة المحيطة 02- أو 22- أو 4 درجات مئوية .03 درجة...
- Page 88 تشغيل الجهاز وأ (ةيوئم ةجرد 8/6/4/2) ةدورب رثكألا ةرارحلا تاجرد أخرى. غاز اإلثيلين الذي ينبعث من هذه الفاكهة يتسبب كنكمي .(ةيوئم ةجرد 42-/22-/02-/81-) ا ً دمجت رثكألا في نضج الفاكهة األخرى بشكل أسرع والتحلل في وقت مادختساب اهبغرت يتلا قودنصلا ةرارح ةجرد ىلع ظافحلا .أقل...
- Page 89 تشغيل الجهاز 71.5 خزانة تعتيق العصائر )(هذه الخاصية اختيارية 1 - امأل خزانة التعتيق تم بناء خزانة تعتيق العصائر الحتواء ما يصل إلى 82 زجاجة أمامية + 3 زجاجات يمكن الوصول إليها باستخدام رف تلسكوبي. هذه الكميات القصوى معلنة بغرض المعلومات فقط وتتوافق مع االختبارات التي أجريت باستخدام زجاجة .57”...
- Page 90 تشغيل الجهاز : 3- قوذتلا لبق رمخ ةجاجز حتفب ةقلعتم تاحارتقا 60 03 إلى 4- كم تستغرق فترة االحتفاظ بالزجاجة وهي مفتوحة؟ زجاجات الخمر التي لم يتم بعد االنتهاء من استهالكها يجب أن يتم غلق محبسها بشكل مناسب، ويمكن االحتفاظ بها في :مكان...
- Page 91 تشغيل الجهاز 81.5استخدام موزع المياه الداخلي وموزع المياه عند الباب .أمسك بوعاء أسفل الموزع أثناء الضغط على دواسة الموزع )(* في بعض ال ط ُ ر ُ ز .قم بتحرير دواسة الموزع إليقاف التوزيع بعد توصيل الثالجة بمصدر مياه أو استبدال فلتر المياه، اغسل النظام...
- Page 92 تشغيل الجهاز 91.5 بالنسبة الستخدام موزع المياه 02.5. درج الثلج قبل استخدام الثالجة ألول مرة وبعد استبدال )(في بعض الموديالت فلتر المياه، قد تسقط قطرات ماء من موزع للحصول على ثلج من درج الثلج، امأل خزان المياه في المياه. ولمنع سقوط قطرات المياه أو تسربها مقصورة...
- Page 93 والصيانة 1.6. منع الروائح الكريهة تم تصنيع المنتج من مواد خالية من الروائح. إال أن .يعمل تنظيف الجهاز بانتظام على إطالة عمره االحتفاظ بالطعام في أقسام غير مالئمة وتنظيف األسطح .الداخلية بطريقة خاطئة قد يتسبب بالروائح الكريهة تحذير: افصل التيار الكهربائي قبل تنظيف 15 لتجنب...
- Page 94 استكشاف األعطال وإصالحها قم بمراجعة هذه القائمة قبل االتصال بمركز الخدمة. القيام بذلك سوف يوفر عليك وق ت ً ا وما ال ً . تشمل هذه القائمة الشكاوى .التي لم تنتج عن عيوب صناعة أو المواد المستخدمة. بعض الخصائص المذكورة هنا يمكن أال تنطبق على منتجك .الثالجة...
- Page 95 اهحالصإو لاطعألا فاشكتسا .درجة حرارة الثالجة منخفضة ج د ًا، لكن درجة حرارة الفريزر مناسبة تم ضبط درجة حرارة مقصورة الفريزر على درجة منخفضة للغاية. >>> اضبط درجة حرارة مقصورة .الفريزر على درجة أعلى وأعد الفحص .عناصر الطعام المحفوظة في أرفف مقصورة التبريد مجمدة تم...
- Page 96 اهحالصإو لاطعألا فاشكتسا .المقصورة الداخلية رائحتها كريهة >>> .المنتج ال يتم تنظيفه بانتظام نظف الواجهة الداخلية بانتظام باستخدام االسفنجة وماء دافيء وماء .ببيكربونات بعض األوعية وخامات العبوات قد تتسبب في إصدار روائح كريهة. >>> استخدم العبوات واألوعية الخالية من .الروائح األطعمة...
Need help?
Do you have a question about the GN141622ZGB and is the answer not in the manual?
Questions and answers