
Related Manuals for Wunder Audio Wunderbar Super D

Summary of Contents for Wunder Audio Wunderbar Super D
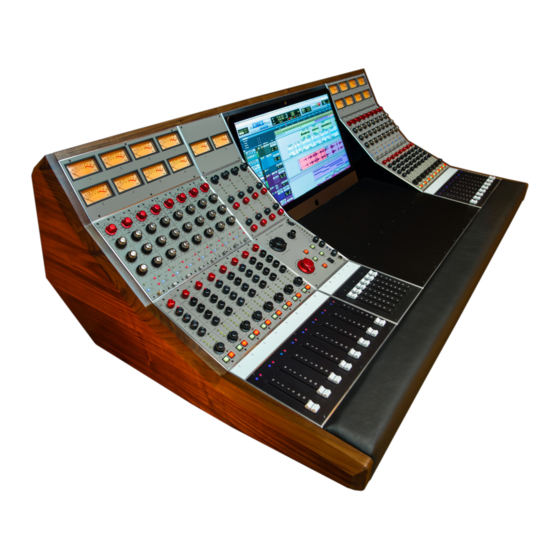
- Page 1 Wunderbar Super D Operations Manual Wunderbar Super D User's Manual Rev. 1, Dec. 2018...
-
Page 2: Table Of Contents
Servicing ..... . . 30 Warranty ..... . . 31 Wunderbar Super D User's Manual Rev. 1, Dec. 2018... -
Page 3: Introduction
1073 module. The 18-way gold plated Amphenol connector will mate with vintage "80 Series" consoles or racks designed for a 1073 or equivalent. The key to the sound of the Wunder Audio modules are the Western Electric 618- style transformers. The PEQ2 incorporates Upgraded "NICO" transformers (Nickle/Iron/Cobalt). - Page 4 PEQ2 gives the module character. The boost and cut knobs are solid brass with shiny nickel plating. The knob markers are embedded with white plastic dowels, so the white mark will never wear off. Wunderbar Super D User's Manual Rev. 1, Dec. 2018...
- Page 5 Configuration The Wunderbar Super D can be configured to any size in channels of multiples of eight, up to 56 channels. Master section, cinema display, and patchbay can be located in any position from left to right. Any number of channels can be added to an existing console at a later date, as the desk is completely modular.
-
Page 6: Peq2 Input Module
BOOST or CUT from 0 to +/- 20 dB of the selected frequency. This knob should be set to the 6 o’clock position to achieve no boost or cut. Wunderbar Super D User's Manual Rev. 1, Dec. 2018... - Page 7 Signal/Clip LED – This dual purpose LED will turn green when any signal is detected and red when signal approaches clipping. Phase Switch - The Output Polarity is Shifted 180 degrees by depressing this switch. Wunderbar Super D User's Manual Rev. 1, Dec. 2018...
-
Page 8: Routing Module
During a mix, setting this fader to post mode will conform its output to an effects device in proportion to the fade being used in the mix. Wunderbar Super D User's Manual Rev. 1, Dec. 2018... - Page 9 Listen in After Fade Listen mode to make level changes on the fader and adjustments on the eq. Mute Switch - Silences the output of the channel using an opto for completely silent switching. Wunderbar Super D User's Manual Rev. 1, Dec. 2018...
-
Page 10: Control Room Master Section
Control Room Master Section Wunderbar Super D User's Manual Rev. 1, Dec. 2018... - Page 11 Mono Switch – Sums the output of the left and right buses, handy for checking phase relations during mixing. Master Mute Switch – When engaged, silences all output from the console. Master Volume Knob – Controls all output from the console. Wunderbar Super D User's Manual Rev. 1, Dec. 2018...
-
Page 12: Aux Send And Return Master Section
Example: May be used to bring effected signal back into the console from outboard devices. These inputs also have 10 db of gain above unity, just like the routing modules, but without transformer inputs. Wunderbar Super D User's Manual Rev. 1, Dec. 2018... -
Page 13: Track-Mix And Insert Bypass Option
When in Tracking mode, white , it is assumed that the PEQ is in Mic Pre mode and the signal is sent via the PEQ OUTPUT to the input of the DAW while the output of the DAW feeds the Routing Module input via INSERT RETURN. Wunderbar Super D User's Manual Rev. 1, Dec. 2018... - Page 14 It is a convenience connection point. If you are plugged into one, the signal is copied to the other connector so you do not have to make any “Y” cables from the patchbay. Wunderbar Super D User's Manual Rev. 1, Dec. 2018...
-
Page 15: Simplified Block Diagram
It is not necessary that you leave this console permanently switched on. If you decide to leave your equipment powered up or turn it off when not in use, the console should run problem free. Wunderbar Super D User's Manual Rev. 1, Dec. 2018... -
Page 16: Tracking And Mixing Tips
The Wunderbar is an extremely easy console to use. When using the mic-pre, a good starting gain is 36 dB, right next to the Wunder Audio logo at the top of the PEQ2. The output trim, which is the top small red knob of the routing module and located below the PEQ2 on the console, should be between the 2 and 3 o’clock... -
Page 17: Unpacking
When loading the PEQ2 modules, always start at one end using the aluminum side of the 8 channel PEQ2 bucket to align the 1st module and gently slide it down the Wunderbar Super D User's Manual Rev. 1, Dec. 2018... - Page 18 The patch points on the back plane may be connected directly to other sources and destinations, however we recommend that you have a professional patch bay, to add convenience and avoid wear on the Wunderbar’s connection jacks. Wunderbar Super D User's Manual Rev. 1, Dec. 2018...
-
Page 19: Installing The Wunderbar Stand
6) Tighten all long bolts in the frame struts and left end foot. 7) Install the 2" x 3" bottom frame strut. 8) Install the right stand foot and tighten bolts. Wunderbar Super D User's Manual Rev. 1, Dec. 2018... -
Page 20: Stand Illustrations
10) After the desk is tilted up then use the wood blocks to raise the rear of the stand skids so that you can re-install the adjustable feet. 11) Adjust the leveling feet to the desk is level. See illustrations below. Wunderbar Super D User's Manual Rev. 1, Dec. 2018... - Page 21 Wunderbar Super D User's Manual Rev. 1, Dec. 2018...
-
Page 22: Dimensions
Dimensions An 8 Channel Wunderbar Super D is 25” wide. Each extra bucket of 8 channels adds 14 5/8” to the width. A 24” Cinema Display section and a Patchbay section add 21 7/8” each. A 27” cinema Display section will add 26 1/8”... -
Page 23: Depth And Height Of Console
Depth and Height of Console Wunderbar Super D User's Manual Rev. 1, Dec. 2018... -
Page 24: Audio Connections
The patch points on back plane may be connected directly to other sources and destinations, however we recommend that you have a professional integrate the console with a patchbay to add convenience. Wunderbar Super D User's Manual Rev. 1, Dec. 2018... - Page 25 Master Section Rear Panel: 14 x XLR-in: Monitor 1-8, two track inputs 1-3 16 x XLR out: Stereo Bus L&R, 1&2, 3&4, Aux Out 1-4, Control Room Speakers A, B & C Wunderbar Super D User's Manual Rev. 1, Dec. 2018...
- Page 26 • INSERT SEND: D- sub 25 • INSERT RETURN: D- sub 25 • OUTPUT FROM DAW: D- sub 25 • OUTPUT FROM DAW MULT: D-sub 25. Detail of Rear of I/O Panel Wunderbar Super D User's Manual Rev. 1, Dec. 2018...
-
Page 27: Typical Patch Bay Layout
Typical Patch Bay Layout for 24 Channel Wunderbar When designing the patchbay, one will need to “half-normal” the INSERT SEND to the INSERT RETURN. Wunderbar Super D User's Manual Rev. 1, Dec. 2018... -
Page 28: Peq2 Module Connection
Connections: Microphone Input + Microphone Input - 0 volts Ground Line Input + Line input - external fader input external fader output Line Output + Line Output - 24 volts+ Chassis Wunderbar Super D User's Manual Rev. 1, Dec. 2018... -
Page 29: Connecting The Power Supply
Water and Moisture As with any electrical equipment, Wunder Audio products should not be exposed to water or excess moisture. If any liquid enters the enclosure, it should be returned to your dealer for servicing. -
Page 30: Servicing
Please refer all servicing to Wunder Audio. If you have a malfunctioning module that needs service, call 512-338-6777 or email Wunder Audio. Once we have verified the issue, arrange for an RMA and return shipping label. To remove a PEQ2 module from your console, power down the Wunderbar, unscrew the thumbscrew at the bottom of the module, and carefully slide the module out by pulling on the top gain knob and thumbscrew. -
Page 31: Warranty
Warranty Wunder Audio warrants this product to be free from defects in materials and workmanship for a period of one (1) year from date of purchase, and agrees to remedy any defect identified within such one year period by, at our option, repairing, or replacing the product.
Need help?
Do you have a question about the Wunderbar Super D and is the answer not in the manual?
Questions and answers