Table of Contents
Advertisement
Available languages
Available languages
Advertisement
Chapters
Table of Contents

Summary of Contents for Cetron TMF Series
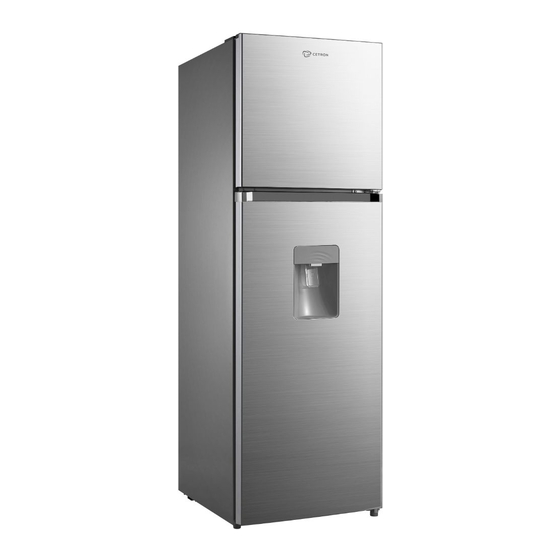
- Page 1 Service Manual_2017-V1 Service Manual TMF SERIES Applicable Models RMN252PYNRX0 RCN252PYNRX0 (The picture in this service manual is only for reference, and specific appearance and configuration are subject to the real product)
- Page 2 Service Manual_2017-V1 CFCs have been used in refrigerant as refrigerator and the insulation materials for many years. But it is now known that these compounds which once seemed so ideal for use as cleaning agents and in refrigeration systems, destroy the earth’s ozone layer as a result, an international body decided on a total worldwide ban of harmful CFCs by the end of 1995.
-
Page 3: Table Of Contents
Service Manual_2017-V1 Contents 1. SAFETY WARNING CODE ........................5 1.1 W ARNING FOR OPERATION SAFETY ..............................1.2 S AFETY INSTRUCTION FOR REFRIGERANT............................. 2. DESCRIPTION FOR PRODUCT FEATURES .....................8 3. INSTALLATION AND COMMISSIONING ....................9 3.1 H ANDLING ......................................3.2 D ISASSEMBLY AND SSEMBLY ............................ - Page 4 Service Manual_2017-V1 8.7 C OMPRESSOR CASE ..................................8.8 D ISPLAY CONTROL BOARD ................................8.9 M AIN CONTROL BOARD ..................................8.10 B AR COUNTER ........................................8.11 W ATER DISPENSER ..................................8.12 I CE MAKER ......................................9. FUNCTION AND OPERATION ......................... 28 9.1 O PERATION PANEL ...................................
-
Page 5: Safety Warning Code
Service Manual_2017-V1 1. Safety Warning Code 1.1 Warning for operation safety Important Safety Instructions CAUTION RISK OF ELECTRIC SHOCK DO NOT OPEN This symbol indicates that dangerous voltage constituting a risk of electric shock is present within your freezer. This symbol indicates that there are important operating and maintenance instructions in the literature accompanying your freezer. - Page 6 Service Manual_2017-V1 CONNECTING ELECTRICITY Electrical Shock Hazard. Failure to follow these instructions can Plug into a grounded 3-prong outlet. result in death, fire, or electrical shock. Do not remove the ground prong. Do not use an adapter. WARNING Electric Shock Hazard Failure to follow these instructions can result in electric shock, fire, or death.
-
Page 7: Safety Instruction For Refrigerant
Service Manual_2017-V1 13) Do not store or use gasoline or any flammable liquids inside or in the vicinity of this freezer. 14) Do not use extension cords or ungrounded (two-prong) adapters with this freezer. If the power cord is too short, have a qualified electrician install an outlet near the freezer. Use of an extension cord can negatively affect the freezer’s performance. -
Page 8: Description For Product Features
Service Manual_2017-V1 2. Description for product features This product is provided with following features: 1) Refrigerator / freezer with hidden side duct outlet design, the overall style is more simple and beautiful inside the box Electronic temperature control, temperature control more accurate 2)... -
Page 9: Installation And Commissioning
Service Manual_2017-V1 3. Installation and commissioning 3.1 Handling Handling 1)Protect the refrigerator in moving it,Same as shown as left photo, please move it by handcart with cushion 2)Remove all packing materials and bottom cushion, the n move into house for placement 3)After moving it to appropriate location, wait for 2 hours before power on. -
Page 10: Leveling Of The Refrigerator
Service Manual_2017-V1 3.4 Leveling of the refrigerator Leveling of the refrigerator If the refrigerator cannot be placed steadily, adjust the footing to level it. 3.5 Door reversal Door reversal 1) Unplug your refrigerator and remove all food from the door shelves. 2) Remove the left cover plate and the right top hinge cover, then unscrew and remove the right top hinge. -
Page 11: Installation Of Handle
Service Manual_2017-V1 7) fix the lower hinge on the left side of the refrigerator w ith the bolts and adjust the foot to the right side. 8) place the refrigerator door vertically on the lower hing e shaft in the open door state. 9) fix the middle hinge in the middle hinge position on the left side of the refrigerator by using the two bolts, and sc rew the middle hinge shaft through the middle hinge and... -
Page 12: Terms
Service Manual_2017-V1 4. Terms 4.1 Definition of model (None) 4.2 Location of nameplate... -
Page 13: Product Specification
Service Manual_2017-V1 5. Product specification 5.1 Type specification(None) 5.2 Electrical parameters Product Name None RMN252PYNRX0 RCN252PYNRX0 None Product Code None None None None Item Specification Specification Specification Specification Compressor Compressor HYB60MHU42 HYB60MHU42 None None QP2-4R7/QP2-4. QP2-4R7/QP2-4. None Starter(PTC) None Overload DRB24T61A1/BT DRB24T61A1/BT None... -
Page 14: Inside Temperature
Service Manual_2017-V1 5.3 Inside temperature Temperature tolerance ≤ 2 Compartment The highest ( Lowest ( Freezing Refrigerating Variable temperature 5.4 Defrosting parts Item Initial defrosting period Normal defrosting period Defrosting period Temperature is lower than 0 6~24 hours Defrosting sensor B3839 Defrosting temperature controller... -
Page 15: Internal View And Dimension
Service Manual_2017-V1 6. Internal view and dimension 6.1 Main parts and their names Freezer chamber Refrigerator chamber ❶ Air duct components in freezing chamber ❹ Small Bottle frame in refrigerating ❷ F Glass shelve ❺ Big Bottle frame in refrigerating ❸... -
Page 16: External Dimension
Service Manual_2017-V1 6.2 External dimension Size (mm) Description Code RMN252 Height to Top of Case 1650 Width 550.5 Depth w/Handles Depth (Total with Door Open) 1129 Width (door open 90 eg. w/ handle) None... -
Page 17: Refrigerating Piping System And Circulating Route Of Cooling Air
Service Manual_2017-V1 7. Refrigerating piping system and circulating route of cooling air 7.1 Refrigerating piping system RMN252PYNRX0 ❶Compressor→❷Right condenser→❸Anti-condensation tube→❹Left Condenser→❺Dry filter→❻Capillary tube→❼Evaporator→❽Suction tube→❶Compressor... -
Page 18: Circulating Route Of Cooling Air
Service Manual_2017-V1 7.2 Circulating route of cooling air... -
Page 19: Dismantling Of Parts
Service Manual_2017-V1 8. Dismantling of parts 8.1 Parts on the door Door seal Door seal is installed into door liner groove. 1)Open the refrigerator door; 2)Take the door seal ① out of door liner; Door tray While squeezing it inward, lift up the baffle and take it out from refrigerator liner. -
Page 20: Air Duct Components Refrigerating Chamber
Service Manual_2017-V1 The cold room lamp is in the cold room air duct compon ent1) Pry open the lampshade with a blade 2) Remove 1 fixed screw with a cross screwdriver Light switch There is a light switch on the side wall of the refrigerating chamber. -
Page 21: Evaporator And Temperature Sensing System
Service Manual_2017-V1 All accessories in the freezing chamber should be dismantled before removing the air duct components. 1) Remove 2 screws on the cover plate of the freezing air duct using a cross screwdriver; 2)Pull out the connector terminal of the fan motor; Fan motor of air duct 1)... - Page 22 Service Manual_2017-V1 Evaporator in freezing chamber 1)Remove the air duct components in freezing chamber. 2)Disconnect all connectors. 3)Remove the welding on inlet and outlet tubes. 4)Remove two screws which are used to fix the evaporator and remove the evaporator. Components on the evaporator Defrost thermostat None Fuse 1)Disconnect the fuse connector.
- Page 23 Service Manual_2017-V1 Defrost heater The defrost heater is located at bottom of the evaporator. 1)Disconnect the connector of defrost heater. Cut off the band which fixes the defrost heater. 2) Take off the defrost heater from the evaporator. 3) *Don’t break the welding of the evaporator in case that only the defrost heater needs to be replaced.
-
Page 24: Compressor Case
Service Manual_2017-V1 8.6 Compressor case 8.7 Compressor case Rear cover and compressor case Rear cover None Starter and protector of the compressor 1)Cut off the power, remove the goods in the refrigerator, with the tape to make the door fixed firmly and prevent the door dropping when the refrigerator dumping. - Page 25 Service Manual_2017-V1 6) Remove the protective cover -Pry the protective cover slowly from the upper part, -Pull it out and remove it. 7) Remove the starter and protector Unplug the starter and protector (you can use a screwdriver to pry it slowly) 8)Loosen the screw of the compressor bottom plate , remove the floor together with the compressor from the box.
-
Page 26: Display Control Board
Service Manual_2017-V1 8.8 Display control board Display control board Refer to the method of disassembling. Light 8.9 Main control board Main control board Loosen the 2 screws on the mounting box with a Phillips screwdriver; Open the cover with a flat screwdriver; Press the latch outward to remove Main control boardl 8.10 Bar counter Bar counter... -
Page 27: Water Dispenser
Service Manual_2017-V1 8.11 Water dispenser Water dispenser Disassembly and installation of water valve None Disassembly and installation of water tank None 8.12 Ice maker disassembly of ice maker Disassembly and installation of ice maker None Disassembly and installation of water system None Disassembly and installation ice machine sensor None... -
Page 28: Function And Operation
Service Manual_2017-V1 9. Function and operation 9.1 Operation panel Icons Button Ⓐ Gear set button ❶ One gear ❷ Two gear ❸ Three gear ❹ Four gear ❺ Five gear 9.2 Display At the first time of power-on, the display screen (including button light) will be bright for 3 seconds and then press the middle gear to show operation Normal operation display: 1)When failure occurs, the corresponding LED light group will display fault code (circular display);... -
Page 29: Control Of Standby Function
Service Manual_2017-V1 9.4 Control of standby function 1)When the refrigerator is working, keep pressing the gear setting button “SET” for 3 seconds (takes effect when releasing the button), the refrigerator will be in standby mode, the standby indicator will light up and all loads will stop working; 2 )... -
Page 30: Test Mode
Service Manual_2017-V1 e frost time is less than 30min, then the next frost cycle will run 20h. Otherwise, two consecutive 3h post-defrost will continue. Entering the frosting state begins with the complete withdrawal of the frost state, which is called a frost cycle 2) The process of entering the frost cycle: - compressor shut down - >... - Page 31 Service Manual_2017-V1 defrosting heater has been working for 1 hour, Select to exit Enter into test mode and press then the refrigerator will exit the test mode and the test button for the third time return to normal operation mode mode...
-
Page 32: Circuit Description
Service Manual_2017-V1 10. Circuit description 10.1 Power Supply The AC input power is reduced in voltage by SMPS control chip and filtered off wave by the inductance- capacitance filter, then output the DC 12V power which will mainly power the relay that controls strong current. -
Page 33: Fan Motor Circuit Of The Freezing Chamber
Service Manual_2017-V1 temperature. The characteristic that resistance value reduces as the temperature increases is deemed to have negative slope or negative temperature coefficient (NTC), and such thermistor is called as NTC thermistor. The resistance value changes sensitively with temperature and typically changes 7% ~ 3% per degree centigrade. - Page 34 Service Manual_2017-V1 20.01 8.841 4.167 2.094 1.115 18.9 8.392 3.972 2.005 1.071 17.87 7.968 3.788 1.919 1.029 16.9 7.568 3.613 1.838 0.9885 15.98 7.19 3.447 1.761 0.9506 15.12 6.833 3.29 1.687 0.914...
-
Page 35: Troubleshooting Method
Service Manual_2017-V1 11. Troubleshooting Method 11.1 No cooling(Air cooling-Electronic) -
Page 36: No Working Of Compressor
Service Manual_2017-V1 11.2 No working of compressor 11.3 Inside frosting, no defrosting... -
Page 37: Inside Frosting, No Defrosting-Maintenance Guidelines
Service Manual_2017-V1 11.4 Inside frosting, no defrosting-Maintenance guidelines... -
Page 38: Light Is Not On
Service Manual_2017-V1 11.5 Light is not on 11.6 Air duct not operated(electronically) -
Page 39: Fan Failure
Service Manual_2017-V1 11.7 Fan failure 11.8 Defective defrost circuit... -
Page 40: Noise
Service Manual_2017-V1 11.9 Noise... -
Page 41: Figures(None)
Service Manual_2017-V1 12. Figures and details of repair parts(Documents are provided separately) 12.1 Figures(none) 12.2 List of parts and components(none) -
Page 42: Appendix
Service Manual_2017-V1 13. Appendix 13.1 Refrigerator maintenance tooling and equipment and material Tooling Name Main Usage Photo screw assemble and Phillips screwdriver disassemble slotted screw and rivet assemble and screwdriver/scraper disassemble hinge and compressor screw Socket spanner 5/16″ assemble and disassemble display panel and air duct cover Sucker disassemble... - Page 43 Service Manual_2017-V1 Capillary tube scissors Shear capillary Knife assistive tool Pipe cutter, Flaring Pipe cutting,flaring device Electronic digital Test temperature thermometer Measurement with resistance, Multi meter voltage , current and so on. Equipment Name Main Usage Photo Vacuum pump with vacuum pumping gauge Electronic scale...
- Page 44 Service Manual_2017-V1 Connection process pipeline, Quick coupling acuum or charge refrigerant will be used. Soldering gun heating and welding welding point leakage detect, if hand leak detector no, use soap-suds Material Name Main Usage Photo Process pipeline Chargetherefrigerant Involving a system failure to be Dry filter replaced...
- Page 45 Service Manual_2017-V1 Aluminium-Aluminium tubes Transition copper pipe welding, maintain lengthen tubes...
- Page 46 Service Manual_2017-V1 The symbol on the product or its packaging indicates that this product must not be disposed of with your other household waste. Instead, it is your responsibility to dispose of your waste equipment by handing it over to a designated collection point for the recycling of waste electrical and electronic equipment.
- Page 47 Manual de Servicio_2017-V1 Manual de servicio SERIE TMF Modelos aplicables RMN252PYNRX0 RCN252PYNRX0 (Las imágenes de este manual de servicio son sólo para referencia. El aspecto y la configuración espe- cíficos están sujetos al producto real).
- Page 48 Manual de Servicio_2017-V1 Se han usado CFCs como refrigerante y aislante durante muchos años. Pero ahora se sabe que estos compuestos, que alguna vez parecieron ideales para su uso como agentes de limpieza y en sistemas de refrigeración, destruyen la capa de ozono de la Tierra. Como resultado, un organismo internacional decidió...
- Page 49 Manual de Servicio_2017-V1 Contenido 1. CÓDIGO DE ADVERTENCIAS DE SEGURIDAD ......................5 1.1 ADVERTENCIAS PARA LA SEGURIDAD DURANTE LA OPERACIÓN ..............5 1.2 INSTRUCCIONES DE SEGURIDAD PARA EL REFRIGERANTE ................7 2. DESCRIPCIÓN DE LAS CARACTERÍSTICAS DEL PRODUCTO ................8 3. INSTALACIÓN Y PUESTA EN MARCHA ........................9 3.1 MANIPULACIÓN ..............................9 3.2 DESMONTAJE Y MONTAJE DE LA PUERTA ........................
- Page 50 Manual de Servicio_2017-V1 8.7 CAJA DEL COMPRESOR ............................24 8.8 TARJETA DE CONTROL DE LA PANTALLA ........................26 8.9 TARJETA DE CONTROL PRINCIPAL ........................26 8.10 CONTADOR DE BARRAS ..........................26 8.11 DISPENSADOR DE AGUA ..........................27 8.12 FÁBRICA DE HIELO ............................27 9.
-
Page 51: Código De Advertencias De Seguridad
Manual de Servicio_2017-V1 1. Códigos de advertencias de seguridad 1.1 Advertencias para una operación segura Instrucciones importantes de seguridad PRECAUCIÓN RIESGO DE DESCARGA ELÉCTRICA NO ABRIR. Este símbolo indica que en el interior del aparato hay un voltaje peligroso que constituye un riesgo de descarga eléctrica. - Page 52 Manual de Servicio_2017-V1 CONEXIÓN A LA ELECTRICIDAD Peligro de choque eléctrico. Conecte en una toma de corriente de 3 entradas El incumplimiento de estas instrucciones puede resul- con conexión a tierra. tar en muerte, incendio o una descarga eléctrica. No remueva la pata de conexión a tierra. No utilice adaptadores.
- Page 53 Manual de Servicio_2017-V1 Requerimientos de conexión a tierra Este aparato debe estar conectado a tierra. Su refrigerador está equipado con un cordón eléctrico que tiene una conexión a tierra con una clavija para conexión a tierra. La clavija debe ser insertada en una toma de co- rriente que esté...
- Page 54 Manual de Servicio_2017-V1 2. Descripción de características del producto Este producto está provisto de las siguientes características: 1. Refrigerador/congelador con diseño de conducto de descarga lateral oculto. El estilo general es más simple y hermoso dentro de la caja. 2. Control electrónico de temperatura. El control de temperatura es más preciso. 3.
-
Page 55: Instalación Y Puesta En Marcha
Manual de Servicio_2017-V1 3. Instalación y puesta en marcha 3.1 Manejo Manejo 1. Proteja el refrigerador mientras lo mueve, como se muestra en la imagen. Mueva el aparato elec- trodoméstico utilizando un carro de mano acol- chado. 2. Retire todo el material de embalaje y el acojina- miento de la parte inferior. -
Page 56: Nivelación Del Refrigerador
Manual de Servicio_2017-V1 3.4 Nivelación del refrigerador Nivelación del refrigerador Si el refrigerador no se puede colocar de forma esta- ble, ajuste las patas para nivelarlo. 3.5 Invirtiendo la apertura de la puerta Inversión de la puerta 1. Desconecte su refrigerador y retire todos los ali- mentos de los anaqueles de la puerta. -
Page 57: Instalación De La Jaladera
Manual de Servicio_2017-V1 7. Fije la bisagra inferior del lado izquierdo del refri- gerador con los tornillos y ajuste la pata del lado derecho. 8. Coloque la puerta del refrigerador verticalmente sobre el eje de la bisagra inferior de la puerta abierta. -
Page 58: Términos
Manual de Servicio_2017-V1 4. Términos 4.1 Definición de modelo (Ninguna) 4.2 Ubicación de la placa de características Placa de características... -
Page 59: Especificaciones Del Producto
Manual de Servicio_2017-V1 5. Especificaciones del producto 5.1 Especificaciones de tipo (Ninguna) 5.2 Parámetros eléctricos Nombre de producto RMN252PYNRX0 RCN252PYNRX0 Código del producto Artículo Especificación Especificación Compresor Compresor HYB60MHU42 HYB60MHU42 Arranque (PTC) QP2-4R7/QP2-4.7 QP2-4R7/QP2-4.7 Protector de sobrecarga DRB24T61A1/BT DRB24T61A1/BT (OLP) 68-125 68-125 Resistencia del devanado de Rmc: 8.9 ±7%... -
Page 60: Temperatura Interior
Manual de Servicio_2017-V1 5.3 Temperatura interior Tolerancia de temperatura <2°C Compartimiento La más alta La más baja Congelador -16°C -20°C Refrigerador 7°C 3°C Variable 5.4 Partes de deshielo Artículo Periodo inicial de deshielo Periodo normal de deshielo Periodo de deshielo Temp. -
Page 61: Vista Interna Y Dimensiones
Manual de Servicio_2017-V1 6. Vista interna y dimensiones 6.1 Partes principales y sus nombres Compartimiento del congelador Compartimiento del refrigerador 1. Componentes del conducto de aire en el compar- 4. Marco pequeño para botellas del refrigerador. timiento del congelador. 5. Marco grande para botellas del refrigerador. 2. -
Page 62: Dimensiones Externas
Manual de Servicio_2017-V1 6.2 Dimensiones externas Tamaño (mm) Descripción Código RMN252 Altura hasta la parte superior de la caja 1650 Ancho 550.5 Profundidad con jaladera(s) Profundidad (total con puerta abierta) 1129 Ancho (puerta abierta 90 con jaladera Ninguno... -
Page 63: Sistema De Tuberías De Refrigeración Y Ruta De Circulación Del Aire Frío
Manual de Servicio_2017-V1 7. Sistema de tuberías de refrigeración y ruta de circulación de aire frío. 7.1 Sistema de tuberías de refrigeración. RMN252PYNRX0 1. Compresor. 6. Tubo capilar. 2. Condensador derecho. 7. Evaporador. 3. Tubo anticondensación. 8. Tubo de succión. 4. -
Page 64: Ruta De Circulación Del Aire Frío
Manual de Servicio_2017-V1 7.2 Ruta de circulación del aire frío... -
Page 65: Desmontaje De Partes
Manual de Servicio_2017-V1 8. Desmontaje de partes 8.1 Partes de la puerta Sello de la puerta El sello de la puerta se instala en la ranura del revesti- miento de la puerta. 1. Abra la puerta del refrigerador. 2. Retire el sello de la puerta (1) del revestimiento de la puerta. -
Page 66: Sistema De Iluminación
Manual de Servicio_2017-V1 8.3 Sistema de iluminación 1. La lámpara de la cámara fría está en el componen- te del conducto de aire de la cámara fría. Usando una navaja, haga palanca para abrir la pantalla de la lámpara. 2. Retire un tornillo fijo con un destornillador de punta de cruz. -
Page 67: Componentes De Los Conductos De Aire Del Congelador Y Motor Del Ventilador
Manual de Servicio_2017-V1 8.5 Componentes de los conductos de aire del congelador y motor del ventilador Desmontaje e instalación del conducto de aire Todos los accesorios del congelador deben ser des- montados antes de retirar los componentes del con- ducto de aire. 1. -
Page 68: Evaporador Y Sistema De Detección De Temperatura
Manual de Servicio_2017-V1 8.6 Evaporador y sistema de detección de temperatura Evaporador en el congelador Evaporador en el congelador 1. Retire los componentes del conducto de aire del compartimento del congelador. 2. Desconecte todos los conectores. 3. Retire la soldadura de los tubos de entrada y sali- 4. - Page 69 Manual de Servicio_2017-V1 Calentador de deshielo El calentador de deshielo está situado en la parte infe- rior del evaporador. 1. Desconecte el conector del calentador de deshielo. 2. Corte la banda que fija al calentador de deshielo. 3. Retire el calentador de deshielo del evaporador. *No rompa la soldadura del evaporador en caso de que sea necesario reemplazar el calentador de des- hielo solamente.
-
Page 70: Caja Del Compresor
Manual de Servicio_2017-V1 8.6 Caja del compresor 8.7 Caja del compresor Cubierta trasera y caja del compresor Cubierta trasera Ninguno. Arrancador y protector del compresor 1. Corte el suministro de energía, saque todos los ali- mentos del refrigerador. Utilice cinta adhesiva para fijar la puerta firmemente y evitar que la puerta se caiga cuando el refrigerador se vacíe. - Page 71 Manual de Servicio_2017-V1 6. Retire la cubierta protectora - Haga palanca para levantar la cubierta protectora lentamente desde la parte superior. - Tire de ella y retírela. 7. Retire el arrancador y protector. Desconecte el motor de arranque y el protector (puede usar un destornillador para hacer palanca lentamente) 8.
-
Page 72: Tarjeta De Control De La Pantalla
Manual de Servicio_2017-V1 8.8 Tarjeta de control de la pantalla Tarjeta de control de la pantalla Consulte el método de desmontaje. Luz. 8.9 Tarjeta de control principal Tarjeta de control principal 1. Afloje los 2 tornillos de la caja de montaje con un destornillador de punta Phillips. -
Page 73: Dispensador De Agua
Manual de Servicio_2017-V1 8.11 Dispensador de agua Dispensador de agua Desmontaje e instalación de la válvula de agua. Ninguno. Desmontaje e instalación del tanque de agua. Ninguno. 8.12 Fábrica de hielo Desmontaje de la fábrica de hielo Desmontaje e instalación de la fábrica de hielo. Ninguno. -
Page 74: Funciones Y Operación
Manual de Servicio_2017-V1 9. Función y operación 9.1 Panel de operación Iconos Botón 1. Potencia uno A. Botón de ajuste de potencia. 2. Potencia dos 3. Potencia tres 4. Potencia cuatro 5. Potencia cinco 9.2 Pantalla En el primer momento del encendido, la pantalla (incluyendo la luz de los botones) se enciende durante 3 se- gundos, y después presione la potencia media para mostrar la operación. -
Page 75: Control De La Función De Espera
Manual de Servicio_2017-V1 9.4 Control de la función de espera 1. Cuando el refrigerador está trabajando, mantenga presionado el botón de ajuste de potencia "SET" durante 3 segundos (tiene efecto al soltar el botón), el refrigerador estará en modo de espera. El indicador de espe- ra se encenderá... -
Page 76: Función De Deshielo
Manual de Servicio_2017-V1 9.7 Función de deshielo 1. Para cumplir una de las siguientes condiciones, entre al ciclo de escarcha: - Juicio prioritario después del sensor de temperatura de escarcha de la electricidad, si la temperatura del sen- sor es > 8°C, la primera acumulación de escarcha 6 horas. Si la temperatura del sensor de escarcha es infe- rior a 8°C, la potencia de la memoria antes de la acumulación de tiempo de funcionamiento, hasta la opera- ción acumulada 6 primera helada como un niño. -
Page 77: Modo De Prueba
Manual de Servicio_2017-V1 9.8 Modo de prueba Artículos de Método de prueba Resultado esperado prueba Ingrese al modo Mantenga presionado el botón Los indicadores LED de las potencias 1, 2, 3, 4 y 5 se de prueba. SET durante 15 segundos y encienden y parpadean a una frecuencia de 0,5 s, en- suéltelo. -
Page 78: Suministro De Energía
Manual de Servicio_2017-V1 10. Descripción de circuito 10.1 Suministro de energía La potencia de entrada c.a. se reduce en voltaje por el chip de control SMPS y se filtra en onda por el filtro de inductancia-capacidad, y luego sale la potencia de 12 V de c.c. que alimenta principalmente al relevador que controla la corriente fuerte. -
Page 79: Circuito Del Motor Del Ventilador Del Refrigerador (Ninguno)
Manual de Servicio_2017-V1 10.4 Circuito del motor de ventilador del compartimento del congelador El ventilador del compartimento del congelador trabaja cuando el compresor está en operación. Revise 12V y el ventilador para ver si hay un voltaje de 12V. Cuando está en operación normal, el ventilador está en nivel bajo y el voltaje entre 12V y VENTILADOR es más de 11V. - Page 80 Manual de Servicio_2017-V1 10.8 Resistencia del sensor (R/T) Tx(°C) R (K Tx(°C) R (K Tx(°C) R (K Tx(°C) R (K Tx(°C) R (K 33.81 14.31 6.495 3.141 1.617 31.85 13.55 6.175 2.999 1.55 30.01 12.83 5.873 2.865 1.486 28.29 12.16 5.587 2.737 1.426...
-
Page 81: Método De Solución De Problemas
Manual de Servicio_2017-V1 11. Método de solución de problemas 11.1 No hay enfriamiento (enfriamiento electrónico del aire) No hay enfriamiento en los compartimientos del refrigerador y congelador Enfriamiento en el compartimientos del congelador, no hay enfriamiento en el compartimiento del refrigerador... - Page 82 Manual de Servicio_2017-V1 11.2 El compresor no funciona. 11.3 Congelamiento en el interior, no hay deshielo.
- Page 83 Manual de Servicio_2017-V1 11.4 Congelamiento en el interior, no hay deshielo - Directrices de mantenimiento...
-
Page 84: La Luz No Está Encendida
Manual de Servicio_2017-V1 11.5 La luz no está encendida 11.6 El conducto de aire no funciona (electrónicamente) -
Page 85: Falla Del Ventilador
Manual de Servicio_2017-V1 11.7 Falla del ventilador 11.8 Circuito de deshielo defectuoso... -
Page 86: Ruido
Manual de Servicio_2017-V1 11.9 Ruido... -
Page 87: Cifras (Ninguna)
Manual de Servicio_2017-V1 12. Cifras y detalles de las refacciones (los documentos se proporcionan por separado) 12.1 Cifras (ninguna) 12.2 Lista de partes y componentes (ninguna) -
Page 88: Apéndice
Manual de Servicio_2017-V1 13. Apéndice 13.1 Herramientas, equipo y material para el mantenimiento del refrigerador Herramientas Nombre Uso principal Ilustración Destornillador Phillips. Atornillar, montar y desmontar. Destornillador/rascador Ensamble y desensamble de de cabeza plana. tornillos y remaches. Dado hexagonal de 5/16" Ensamble y desensamble de bi- y matraca. - Page 89 Manual de Servicio_2017-V1 Tijeras para tubo capilar. Tubo capilar. Cuchilla Herramienta de ayuda. Cortador de tubos, avella- Corte y avellanado de tubería. nador. Termómetro digital elec- Medición de temperatura. trónico. Multímetro. Medición de la resistencia, vol- taje, corriente y demás. Equipo Nombre Uso principal...
- Page 90 Manual de Servicio_2017-V1 Acoplamiento rápido. Conexión de la tubería de pro- ceso, vacío o carga de refrige- rante. Pistola de soldar. Calefacción y soldadura. Detector de fugas. Detección de fugas en el punto de soldadura, si no está disponi- ble, use espuma de jabón. Material Nombre Uso principal...
- Page 91 Manual de Servicio_2017-V1 Tubo de cobre de transi- Soldadura de tubos de aluminio ción. a aluminio, alargar los tubos.
- Page 92 Manual de Servicio_2017-V1 Este símbolo en el producto o en su material de embalaje indica que el producto no debe eliminarse junto con residuos domésticos. En su lugar, es su responsabilidad des- echar este equipo manipulándolo en un punto de recogida designado para el reciclaje de residuos de equipos eléctricos y electrónicos.
Need help?
Do you have a question about the TMF Series and is the answer not in the manual?
Questions and answers