Table of Contents
Advertisement
Quick Links
Advertisement
Table of Contents

Related Manuals for FAHRBIKE ROADSTER73


Summary of Contents for FAHRBIKE ROADSTER73
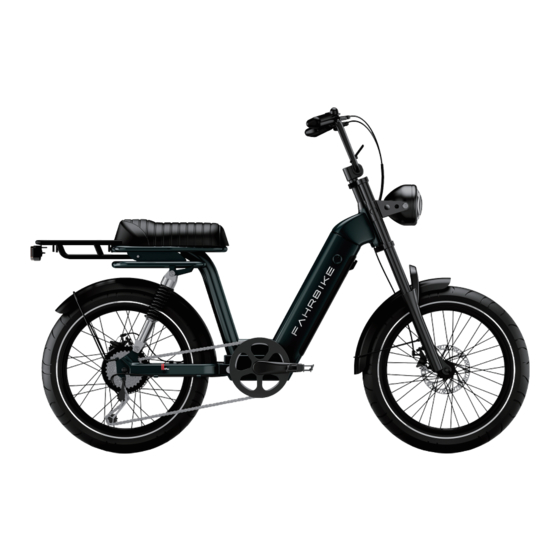
- Page 1 OWNER’S MANUAL FAHRBIKE-ROADSTER73...
-
Page 2: Table Of Contents
Contents Introduction LCD Display Safety Check Switch Power ON / OFF General Information Power Assist Level Disclaimer Throttle and Cruise Control Product Specification Headlight and Taillight Assembly Walk Mode Data Mode Handlebars Settings Mode Front Wheel Rear Wheel Error Code Definition Tire Pressure Maintenance Fender... -
Page 3: Introduction
Introduction Congratulations on the purchase of your Fahrbike! You have chosen a bike that will give you an unparalleled riding experience and you have made a wise choice. Please read this Owner's Manual carefully before using your new e-bike. It is your reference for assembly, maintenance, and safety. -
Page 4: Safety Check
"0". It is recommended that the above safety checks be performed every 200 - 300 km (120 - 180 miles) or when the bicycle has not been used for three weeks. FAHRBIKE-ROADSTER73... - Page 5 When walking or carrying your bike, turn off the power to avoid accidentally turning on the motor. If the motor is accidentally turned on, immediately apply the brakes to cut the power to the motor. FAHRBIKE-ROADSTER73...
-
Page 6: General Information
The use of an e-bike involves risks, and it is the user's responsibility to understand those risks. You are respon- sible for your own actions when using an electric bike. Fahrbike is not responsible or liable for any accidents or injuries (whether caused by you or others) that may occur during use. We recommend that you contact your insurance company to find out whether or not your current insurance policy covers you in the event of an accident. -
Page 7: Product Specification
Nickel Plated 11-32T 8-Speed 28MPH Shimano Rapid Fire Plus Pedal Shifter Wellgo Aluminum Platform 8-Speed Tires Crankset 20.0" x 4.0" Kenda Fat Tire 52T Single Guard Recommended Designed for Riders 5'2" to Product Weight 83 lbs Rider Heights 6'4" Tall FAHRBIKE-ROADSTER73... - Page 8 FAHRBIKE-ROADSTER73...
-
Page 9: Assembly
Insert the retainer into the head tube and tighten (recommended tightening torque 8 Nm). Unfold the handlebar by closing the lever. Align the handlebar with the front wheel and tighten the two bolts on the side of the stem (recommended tightening torque 12 Nm). FAHRBIKE-ROADSTER73... -
Page 10: Front Wheel
Insert the quick release with spring (B) facing inward into the right side of the wheel axle. Insert spring (A) pointing inward into the left side of the quick release skewer and tighten the nut. Close the quick release lever and tighten it by turning clockwise. FAHRBIKE-ROADSTER73... -
Page 11: Rear Wheel
Place the fender hook on the front side of the fork arch at the highest position. Insert the bolt into the headlight holder and fender hook, and tighten on the fork arch. Use the bolts mounted on the fork to tighten the fender stays. FAHRBIKE-ROADSTER73... -
Page 12: Pedals
WARNING Inserting the pedal in the wrong way, installing it at the wrong angle, or improper tightening will strip the crank arm threads and cause the pedal to come off. FAHRBIKE-ROADSTER73... -
Page 13: Seat
Use the screws mounted on the frame tube seat to install the bottle holder. (I)Hydraulic Brake Lever Adjustment (required tools: 2mm hex key) Tighten the indicated bolt to extend the brake lever reach. Loosen the indicated bolt to shorten the brake lever reach. FAHRBIKE-ROADSTER73... -
Page 14: Removing The Battery
WARNING Failure to observe assembly, operation, and/or maintenance can result in serious injury. (K)Luggage carriers (required tools: 6mm hex key, recommended torque 10 N.m) (L) Headlight Required tools: 12mm wrench, lock screw Connect the lamp line. FAHRBIKE-ROADSTER73... -
Page 15: Battery Care
Always charge the battery at temperatures between 10 and 25 °C. Charge the battery using the supplied charger. Do not attempt to use any other charger as this may damage the battery or cause a fire or explosion. Do not leave the battery unattended while charging. FAHRBIKE-ROADSTER73... -
Page 16: Battery Storage
Avoid storing the battery in places of high temperature or high humidity. Charge the battery to 70% if not used for two months. The battery will slowly discharge over time. When the battery reaches 20% charge it again to 70%. FAHRBIKE-ROADSTER73... -
Page 17: Lcd Display
Throttle (Accelerator) and Cruise Control The throttle is activated as soon as the LCD display is turned on. If you want to switch off the throttle, and select support level “0”. To activate cruise control, see LCD advanced settings (option 19). FAHRBIKE-ROADSTER73... -
Page 18: Headlight And Taillight
Odometer > Single trip > Current voltage > Current running > Time Press the M and + buttons briefly to change the data mode display. Press again to change to the next mode. The sequence of modes: Average speed > Maximum speed FAHRBIKE-ROADSTER73... -
Page 19: Settings Mode
P08: Speed limit (default 32 km / 20 miles) Set the maximum speed limit. 41=No speed limit P12: Motor responsiveness (default 2) Enables you to adjust motor responsiveness from 0 - 3 (gradual to quick response). FAHRBIKE-ROADSTER73... -
Page 20: Error Code Definition
When an error is detected, the display LCD will show an error code. The error codes range from: Error 01: Controller overheating Error 07: Motor phase lost Error 22: Throttle error Error 24: Motor hall error Error 30: Controller communication error FAHRBIKE-ROADSTER73... -
Page 21: Maintenance
Always remove the battery when cleaning or servicing your bike. Clean the battery and battery case with a slightly damp cloth as needed. Do not spray with water as this may damage the battery or cause a short circuit. FAHRBIKE-ROADSTER73... -
Page 22: Tips
Park your bike indoors when wet. Proper maintenance is necessary to ensure that all electrical systems are working properly and to prevent your bike from rusting and corroding. Avoid transporting your bicycle on a rack when it is raining, as this can allow water to enter the electrical components. FAHRBIKE-ROADSTER73... -
Page 23: Legal Requirements
Serial Number It is important to keep your serial number as it will be required by the police in the event of theft. Fahrbike does not keep the serial numbers of the bikes it sells. The serial number is located on the bottom of the frame at the bottom bracket (pedals) and is in the form of a bar code. -
Page 24: Warranty
Claims of out-of-the-box defects must be reported within 2 weeks of receipt of the bicycle and after no more than 5 kilometers (3 miles) of use. Any defects claimed after the specified time or distance are not covered by the term "out-of-the-box defects". However, this does not affect the validity of the 12-month warranty. FAHRBIKE-ROADSTER73... - Page 25 This also covers the cost of shipping and handling. Fahrbike will only cover work or services performed at Fahrbike authorized repair shops. Work performed at workshops not authorized by Fahrbike will not be covered.
- Page 26 What are the electrical components? LCD Screen & Button Pad Throttle Brake Inhibitors Main Cable Wire Controller Pedal Assist Sensor Speed Sensor Motor Battery and Stand Front and Rear Lights FAHRBIKE-ROADSTER73...
- Page 27 Damage resulting from the improper assembly of the bike. Damage or failure resulting from misuse, neglect, lack of maintenance, improper use, or accidents. Damage resulting from improper charging of the battery or use of a charger not supplied by Fahrbike. Cosmetic damage caused by use.
- Page 29 The installation of electrical components not supplied by Fahrbike. In some cases, the installation of mechani- cal components not supplied by Fahrbike may cause damage to electrical components. If this is the case, the warranty will not cover the damage.
- Page 30 If you have any other questions, please refer to the Fahrbike Help Center. Official Website: www.fahrbike.com Email: service@fahrbike.com. , This owner s manual is subject to change without notice Please visit www.fahrbike.com to download the latest version.
Need help?
Do you have a question about the ROADSTER73 and is the answer not in the manual?
Questions and answers