Advertisement
Mayfair Fence Letterbox
Tools
Contents
Required
Your carton should contain the
- Drill
following parts:
- Timber Drill Bits
1 x Front Panel
- Tape Measure
1 x Back Box
1 x Accessories Bag
- Jigsaw
Choosing a Suitable Location
The letterbox can be mounted into a timber fence up to
20mm thick.
You will need to install it in a location that is
easily accessible to Australia Post and couriers.
The recommended height for the mail slot is 90 to 120cm
from the ground.
Installation
1. Remove the front panel by undoing the two mounting nuts
from inside the back box.
2. Using the enclosed template provided, mark and cut out
the mail opening using a jigsaw. Drill two 8mm holes for
the front panel studs.
3. Fit the front panel so its mounting studs pass through the
holes just drilled.
Attach the back box to the mounting studs through the
upper mounting holes.
4. Secure the front panel from inside the letterbox with the
washers and nuts provided.
Screw the back box to the fence through the lower
mounting holes with the screws provided (for hardwood
fences, it is easier to pre-drill the screw holes).
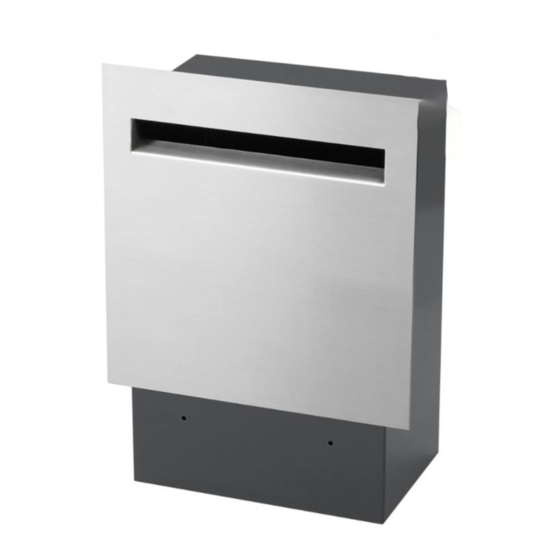
Front
Panel
Mounting
Stud
56 Northgate Drive,
Thomastown VIC 3043
www.milkcan.com.au
support@milkcan.com.au
(03) 9464 6964
231 / 232
Back
Box
Upper
Mounting
Holes
Lower
Mounting
Holes
1.1
Advertisement
Table of Contents

Summary of Contents for Milkcan Mayfair 231
- Page 1 56 Northgate Drive, Thomastown VIC 3043 www.milkcan.com.au Mayfair Fence Letterbox support@milkcan.com.au (03) 9464 6964 231 / 232 Tools Contents Back Required Your carton should contain the - Drill following parts: Front Panel - Timber Drill Bits 1 x Front Panel...
- Page 2 TOP EDGE OF FRONT PANEL MOUNTING GUIDE 242mm Cut out this section of fence Cut out this section of fence Drill 8mm holes 140mm 1. Place this guide in the desired location on fence. 2. Push through the guide with a pencil to mark area to be cut and holes drilled. 3.
Need help?
Do you have a question about the Mayfair 231 and is the answer not in the manual?
Questions and answers