
Related Manuals for LeapFrog LF915HD


Summary of Contents for LeapFrog LF915HD
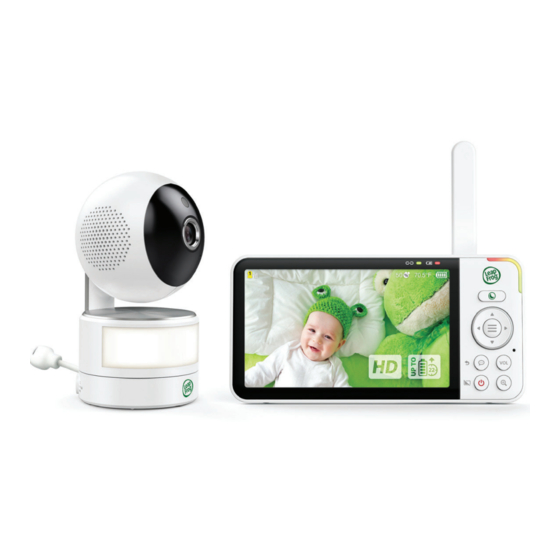
- Page 1 7” 5” High Definition LF915HD LF915HD-2 PAN & TILT MONITOR Parent Guide This guide contains important information. Please keep it for future reference.
-
Page 2: Table Of Contents
Index Important safety instruction Getting started Whatˇs Included Connect and Charge Power On or Off Position the Baby Monitor Menu Icons Overview Baby Unit Overview Parent Unit Overview Features Night Vision Night Light Sound Detection Motion Detection Talk to Your Baby Pan, Tilt and Zoom Dim Mode Melodies and Sounds... -
Page 3: Important Safety Instruction
Do not place this product on an unstable table, shelf, stand or other Electromagnetic fields (EMF) unstable surfaces. This LeapFrog product complies with all standards regarding This product should not be placed in any area where proper electromagnetic fields (EMF). If handled properly and according ventilation is not provided. -
Page 4: Whatˇs Included
What’s Included - LF915HD | LF915HD-2 Quick Start Guide 1 set for LF915HD 2 sets for LF915HD-2... - Page 5 Connect and Charge - LF915HD | LF915HD-2 Connect the Baby Monitor Notes: The rechargeable battery in the Parent Unit is built-in. Use only the power adapters supplied with this product. Make sure the Parent Unit and the Baby Unit are not connected to the switch controlled electric outlets.
-
Page 6: Connect And Charge
The battery icon on the screen indicates the battery status (see the following table). Battery Indicators Battery Status Action The screen displays The battery has very little Charge without interruption power left and may only be (about 30 minutes). used for a short time. The battery icon To keep the battery charged, becomes solid... -
Page 7: Power On Or Off
Power On or Off - LF915HD | LF915HD-2 1. Slide the On/Off switch to ON to power on your Baby Unit. Note: The POWER LED Light is OFF by default. - Page 8 until the welcome screen 2. After the Parent Unit is fully charged, press and hold appears. 3. Once your Baby Unit and Parent Unit are powered on, your Parent Unit displays image from the Baby Unit, and the LINK LED light turns on. The Baby Unit’s POWER LED light also turns on.
-
Page 9: Position The Baby Monitor
Position the Baby Monitor - LF915HD | LF915HD-2 Note: To avoid interference from other electronic devices, place your baby monitor at least 3 feet (1 meter) away from devices such as wireless routers, microwaves, cell phones and computers. Caution: The default volume of your Parent Unit is level 3, and the maximum volume is level 5. If you experience a high-... - Page 10 Wall Mount (Optional) Notes: Check for reception strength and the Baby Unit's viewing angle before drilling the holes. The types of screws and anchors you need depend on the composition of the wall. You may need to purchase the screws and anchors separately to mount your Baby Units. 1.
- Page 11 3. Insert the screws into the holes and tighten the screws until only 6.5 mm of the screws are exposed. 4. Place the Baby Unit on the wall mount bracket. Tighten the screw into the threaded socket at the bottom to secure the Baby Unit. Align the holes on the wall mount bracket with the screws on the wall, and slide the wall mount bracket down until it locks into place.
- Page 12 5. You can maximize your Baby Unit’s viewing angles by tilting the wall mount bracket. Hold the Baby Unit, and then rotate the knob in an anti-clockwise direction. This will loosen the joint of the wall mount bracket. Tilt your Baby Unit up or down to adjust to your preferred angle.
-
Page 13: Menu Icons Overview
Menu Icons Overview - LF915HD | LF915HD-2 Main Menu Icons Monitoring mode (For LF915HD-2 only) Baby Unit 1 in Single mode. Baby Unit 2 in Single mode. Patrol mode Viewer displays video feeds from all paired Baby Units at the same time in split view. - Page 14 Melodies and sounds Start playing. Stop playing. Play and view all Melodies and Soothing Sounds. Choose from 5 melodies and 5 soothing sounds. Set a timer to stop playing melodies after 15, 30, or 60 minutes, or let them play non-stop. Adjust the sound volume.
- Page 15 Detection Select sound Sensitivity level. Turn on or turn off Sound Detection Alert. Parent Unit beeps when the Baby Unit detects sounds above the chosen sound sensitivity level. Sound Turn on or turn off Auto Wake Up function. Once the Baby Unit detects sounds that are louder than the chosen sound sensitivity level, the Parent Unit screen and speaker turn on automatically.
- Page 16 Brightness Adjust Parent Unit screen Brightness. Low Battery Adjust Low Battery Alert Tone Volume. Alert Tone No Link Adjust No Link Alert Tone Volume. Alert Tone Dim Mode Turn on or turn off Dim Mode. Camera Settings Turn on or turn off LED Status indicator. When on, LED Status the POWER LED light on the Baby Unit turns on, turn off or flash to indicate the camera’s conditions.
- Page 17 Status Bar Icons Icon Description Current view status The Baby Unit number that is being viewed when in: Single Baby Unit mode Patrol mode (For LF915HD-2 only) Split mode (For LF915HD-2 only) Split mode (For LF915HD-2 only) Patrol mode (For LF915HD-2 only) Black and white night vision is activated.
- Page 18 Status Bar Icons Parent Unit speaker is muted. Temperature alert is turned on. Humidity Temperature Battery level indicator Alert Icons Displays when the Parent Unit is connected to AC power. Displays when the Parent Unit is connected to AC power.
-
Page 19: Baby Unit Overview
Baby Unit Overview - LF915HD | LF915HD-2... - Page 20 Light sensor Camera Infrared LEDs Microphone Night light Night light control key Press to turn the night light on or off. Press and hold to adjust night light brightness level. Speaker POWER LED Light On / Off switch Temperature and humidity sensor Position horizontally for optimal usage.
-
Page 21: Parent Unit Overview
Parent Unit Overview - LF915HD | LF915HD-2... - Page 22 Link LED light On when the parent unit is linked to the baby unit. Flashes when the link to the baby unit is lost. Battery LED light 3-level sound indicator light Night Mode quick set key Select black-and-white or colour night vision viewing mode. Adjust night light brightness.
-
Page 23: Features
Night Vision - LF915HD | LF915HD-2 Night Vision (B&W and Colour) The Baby Unit has infrared LEDs that allow you to see your baby clearly at night or in a dark room. When the Baby Unit being viewed detects low light levels, the infrared LEDs switch on automatically. -
Page 24: Night Light
Night Light - LF915HD | LF915HD-2 On the Baby Unit Turn on or turn off the night light Tap the Night light control key located on the top of the Baby Unit to turn on or turn off the night light. - Page 25 (Red, Orange, Yellow, Green, Pink, White, Blue, Rainbow, Warm colour or Cool colour ), then press MENU/SELECT Tip: Customized colour is available if your Baby Unit is paired with LeapFrog Baby Care App. Adjust the night light brightness Press the Night Mode quick set key to view the Night Mode menu.
- Page 26 Set the night light timer Press MENU/SELECT to enter the main menu. Press MENU/SELECT again to enter the Night Light Menu to select Timer, press MENU/SELECT Press Choose your desired timer (15 mins, 30 mins, 60 mins or Non-stop), then press MENU/SELECT...
-
Page 27: Sound Detection
Sound Detection You can turn on Sound Detection Alert and adjust the Baby Unit’s Sound Sensitivity to only detect your desired level of sounds. When the Baby Unit detects sounds that exceed the chosen level, the Parent Unit screen turns on if it has been switched off or dimmed, and the Baby Unit transmits the detected sounds to the Parent Unit. - Page 28 Auto Wake-Up When Auto Wake-Up is turned on, the Parent Unit screen stays off to save power when the Baby Unit detects no sound. Once the Baby Unit detects sounds that are louder than the chosen sound sensitivity level, the Parent Unit screen and speaker turn on automatically.
-
Page 29: Motion Detection
Motion Detection You can turn on Motion Alert and adjust the Baby Unit’s Motion Sensitivity to only detect your desired level of motion. When the Baby Unit detects motions that exceed the chosen level, the Parent Unit screen turns on if it has been switched off or dimmed, and the Baby Unit displays the live video feed. - Page 30 On the Parent Unit Turn on or turn off motion alert 1. Press MENU/SELECT to enter the main menu. to select Detection Menu , press MENU/SELECT 2. Press to enter Motion Menu, press MENU/SELECT 3. Press to turn on or turn off Motion Alert. 4.
-
Page 31: Talk To Your Baby
Talk to Your Baby - LF915HD | LF915HD-2 On the Parent Unit Press and hold When the icon displays on the screen, speak to your Parent Unit. Your voice is transmitted to the Baby Unit. When finished talking, release and hear your baby again. -
Page 32: Pan, Tilt And Zoom
Pan, Tilt and Zoom - LF915HD | LF915HD-2 Zoom Press to zoom in or out. The zoom sequence is Pan and Tilt Press on the parent unit to move the camera leftward; or press and hold to move the camera leftward continuously. -
Page 33: Dim Mode
Dim Mode - LF915HD | LF915HD-2 Dim Mode The Parent Unit display will dim to conserve energy after 5 minutes of inactivity, in which there were neither any key pressed nor alert received from the Baby Unit. Press any button to exit from the dim mode. -
Page 34: Melodies And Sounds
Melodies and Sounds - LF915HD | LF915HD-2 On the Parent Unit Play melodies or sounds Press MENU/SELECT to enter the main menu. to select Melodies and Sounds Menu Press press MENU/SELECT to select Play, press MENU/SELECT Press Stop melodies or sounds Press MENU/SELECT to enter the main menu. - Page 35 Set melodies or sounds timer Press MENU/SELECT to enter the main menu. to select Melodies and Sounds Menu Press press MENU/SELECT to select Timer, press MENU/SELECT Press to choose your desired timer (15 mins, 30 mins, 60 mins, Non- Press stop), then press MENU/SELECT Adjust the volume Press MENU/SELECT...
-
Page 36: Comfort Zone For Your Baby
Comfort Zone for Your Baby - LF915HD | LF915HD-2 Babies need to stay in the comfort zone LeapFrog Baby Monitors help you keep track of your baby's room temperature and humidity in order to ensure that your baby stays in the comfort zone at all times. - Page 37 Observe the humidity level Humidity sensor starts working once the units are switched on. Humidity level is shown on the Parent Unit status bar. Colour Indication Orange Humidity is lower than 30%. White Humidity is within 30-60%. Blue Humidity is higher than 60%.
-
Page 38: Temperature And Humidity
Temperature and Humidity - LF915HD | LF915HD-2 On the Parent Unit Turn on or turn off the temperature alert 1. Press MENU/SELECT to enter the main menu. to select Detection Menu,press MENU/SELECT 2. Press to enter Temperature Menu, press MENU/SELECT 3. -
Page 39: Settings
LCD Settings - LF915HD | LF915HD-2 On the Parent Unit LCD Screen Off You can turn on or turn off the Parent Unit screen without powering off the Parent Unit. You will still be able to hear sounds from the Baby Unit. - Page 40 Adjust the LCD brightness Press MENU/SELECT to enter the main menu. to select PU Settings Menu , press MENU/SELECT Press to adjust the LCD brightness (Level 1 - Lowest to Level 5 - Press Highest).
-
Page 41: Alert Tone Settings
Alert Tone Settings - LF915HD | LF915HD-2 On the Parent Unit Turn on/off low battery alert tone Press MENU/SELECT to enter the main menu. to select General Settings Menu Press press MENU/SELECT to select Low Battery Alert Tone. Press to turn the Low Battery Alert Ton on/off. -
Page 42: Parent Unit Settings
Parent Unit Settings - LF915HD | LF915HD-2 On the Parent Unit Adjust the speaker volume of Parent Unit Press VOL to enter the volume adjustment bar. to adjust the Parent Unit speaker volume (Level 1 - Press Lowest to Level 5 - Highest). -
Page 43: Baby Unit Settings
Baby Unit Settings - LF915HD | LF915HD-2 On the Parent Unit LED light Turn on or off Baby Unit Press MENU/SELECT to enter the main menu. to select the Camera Settings Menu Press press MENU/SELECT select LED Status. Press Press to turn the LED status light on or off. -
Page 44: Multiple Baby Units
Monitoring Mode - LF915HD-2 1. Single CAM mode Select Baby Unit 1 or Baby Unit 2 to view the image from the selected Baby Unit. 2. Patrol mode Select Patrol mode as your monitoring mode to alternately view the image from Baby Units every 10 seconds. - Page 45 On the Parent Unit Select your desired monitoring mode Press MENU/SELECT to enter the main menu. Press MENU/SELECT again to enter Monitoring Mode Menu to select your desired monitoring mode (Baby Unit 1, Baby Unit Press 2, Patrol mode, Split mode), then press MENU/SELECT to confirm.
-
Page 46: Product Information
Help & Info - LF915HD | LF915HD-2 On the Parent Unit Product Info & Support Press MENU/SELECT to enter the main menu. to enter Help & Info page. Press to select Product info & Support, then press MENU/SELECT Press to get the product support QR code and system information. -
Page 47: Technical Information
Technical Specifications Frequency control Crystal controlled PLL synthesizer Channels 32 (2.405-2.475GHz) Minimum Requirement: 1.5 Mbps @ 720p or 2.5 Mbps @ 1080p Internet Connection upload bandwidth per Baby Unit 5” Colour LCD (IPS 1280x720 pixels) Nominal Actual operating range may vary according to environmental effective range conditions at the time of use. -
Page 48: Customer Service And Product Warranty
Customer service and product warranty IMPORTANT Please retain this booklet with your sales receipt as proof of the date of purchase. Customer Service If you require assistance in operating this product, please call the TecHelp Information Line on 1300 369 193 or contact VTech by e-mail at: tcpsupport_au@vtech.com. Voluntary Product Enquiry In addition to your Statutory Rights and subject to the conditions below, VTech warrants that this product will be free from any defect in materials or workmanship under conditions of normal use for a period of 24 months from date of purchase.
Need help?
Do you have a question about the LF915HD and is the answer not in the manual?
Questions and answers