Table of Contents
Advertisement
Quick Links
Model
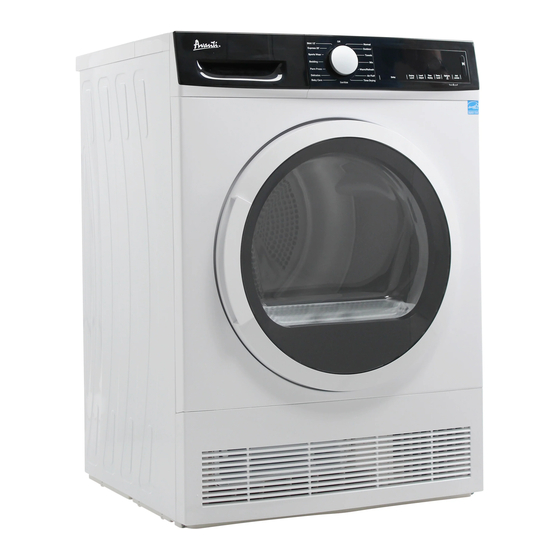
FLD40V0W
Ventless Condensing
INSTRUCTION MANUAL
Clothes Dryer
BEFORE USE, PLEASE READ AND FOLLOW ALL SAFETY RULES AND
OPERATING INSTRUCTIONS.
Avanti has a policy of continuous improvement on its products and
reserves the right to change materials and specifications without notice.
Avanti Products LLC
3265 Meridian Pkwy # 114
Weston, FL 33331
www.avantiproducts.com
Advertisement
Table of Contents

Related Manuals for Avanti FLD40V0W


Summary of Contents for Avanti FLD40V0W
- Page 1 Clothes Dryer BEFORE USE, PLEASE READ AND FOLLOW ALL SAFETY RULES AND OPERATING INSTRUCTIONS. Avanti has a policy of continuous improvement on its products and reserves the right to change materials and specifications without notice. Avanti Products LLC 3265 Meridian Pkwy # 114 Weston, FL 33331 www.avantiproducts.com...
- Page 2 Thank you for choosing this product. This User Manual contains important safety information and instructions on the operation and maintenance of your appliance. Please take the time to read this User Manual before using your appliance and keep this book for future reference. Icon Caption Description...
-
Page 3: Table Of Contents
CONTENTS Help Us Help You .....................V 1. QUICK START ....................VI 2. SAFETY INSTRUCTIONS ................. 3 2.1. Electrical Safety ....................3 2.2. Important Safety Instructions ................4 2.3. Grounding Instructions ..................5 2.4. Children's Safety ..................... 6 2.5. Product Safety ....................7 2.6. - Page 4 5. CLEANING AND CARE ................... 26 5.1. Cleaning the Lint Filter................... 26 5.2. Emptying the Water Tank................26 5.3. Cleaning the Condenser ................27 5.4. Cleaning the Humidity Sensor ............... 27 5.5. Cleaning the Inner Surface of the Loading Door ........... 28 6.
-
Page 5: Help Us Help You
---------------------------------- Avanti Customer Service Date of Purchase 800-220-5570 - - - - - - - - - - - - - - - - - - - - - - - - - - - - - - - - - -... -
Page 6: Quick Start
1. QUICK START Please check the user manual for detailed information. Separate your clothes according to their types, place into the machine and close the door. Select the suitable program for your laundry by rotating the adjustment knob. You can select additional functions for drying. You can run the program by pushing Start / Pause button. - Page 7 PRIMARY CONSIDERATIONS • This appliance can be used by children aged from 8 years and above and persons with reduced physical, sensory or mental capabilities or lack of experience and knowledge if they have been given supervision or instruction concerning use of the appliance in a safe way and understand the hazards involved.
- Page 8 • Keep pets away from the dryer. • Fabric softeners, or similar products, should be used in accordance with the manufacturers instructions. • Remove all objects from pockets such as lighters and matches. • The appliance must not be installed behind a lockable door, a sliding door or a door with a hinge on the opposite side to that of the tumble dryer, if it prevents the door from being fully opened.
-
Page 9: Safety Instructions
2. SAFETY INSTRUCTIONS This section contains safety instructions that will help protect you from risk of personal injury or property damage. Failure to follow these instructions will void any warranty. 2.1. Electrical Safety • The appliance must not be supplied through an external switching device, such as a timer, or connected to a circuit that is regularly switched on and off by a utility. -
Page 10: Important Safety Instructions
A damaged power cord/plug can cause fire or give you an electric shock. When damaged it must be replaced, this should only be done by qualified personnel. To avoid the risk or fire or electric shock, do not use extension cords, multi sockets or adapters to connect the dryer to mains power. -
Page 11: Grounding Instructions
• Do not use fabric softeners or products to eliminate static unless recommended by the manufacturer of the fabric softener or product. • Do not use heat to dry articles containing foam rubber or similarly textured rubber-like materials. • Clean lint screen before or after each load. •... -
Page 12: Children's Safety
least resistance for electric current. This appliance is equipped with a cord having an equipment- grounding conductor and a grounding plug. The plug must be plugged into an appropriate outlet that is properly installed and grounded in accordance with all local codes and ordinances. •... -
Page 13: Product Safety
may cause skin damage. • Keep packaging material away from children. • Poisoning and irritation may occur if detergent and cleaning materials are consumed or come into contact with the skin and eyes. • Keep cleaning materials out of the reach of children Electrical products are dangerous for children. -
Page 14: Correct Use
fabrics, fitted clothes and foam pillows. • Items with filling and damaged items (pillows or jackets). Foam protruding from these items might catch fire during the drying process. • Operating the dryer in environments that contain flour or coal dust may cause explosion. ATTENTION: Underwear that contains metal reinforcements should not be put in the dryer. -
Page 15: Installing On Top Of A Washing Machine
• Do not lean against or sit on the door of the dryer. The dryer may tip over. • To maintain a temperature that will not harm the laundry (e.g. to prevent the laundry from catching fire), a cooling process starts after the heating process. - Page 16 • To use the dryer on the washing machine, a fixing part must be used between the two products. The fixing part must be attached by an Authorised Service Provider. • When the dryer is placed on the washing machine, the total weight of these products may reach almost 330 lbs (when loaded).
-
Page 17: Installation Instructions
3. INSTALLATION INSTRUCTIONS • The operating temperature of the dryer is +5°C to +35°C. If operated out of this temperature range, the performance of Install the clothes dryer according to the the dryer will be affected negatively and manufacturer’s instructions and local codes. the product will be damaged. -
Page 18: Connecting The Water Discharge Hose
3.1.1. Connecting the Water Discharge IMPORTANT: Operating your machine Hose at low voltage values will shorten the 1. Pull and take out the end of the hose at the service life and decrease the performance back of the dryer. Do not use any tools to of your machine. -
Page 19: 4-Wire Power Supply Cord Connection
3.5. 4-Wire Power Supply Cord Connection WARNING •Before the connection, disconnect the power. •Use UL listed 240V / 30A power supply cord. Your dryer was equipped with strain relief. Use this strain relief in connection. Remove the screw and terminal box cover. Remove the clamp of the strain relief which has already attached on your machine. -
Page 20: 3-Wire Power Supply Cord Connection
Connect the ground conductor (green wire) under the terminal B. Then connect the neutral wire (white wire) to center of the terminal. Nuetral ground conductor of the dryer should remain on the center terminal. Be sure that neutral ground conductor of dryer and neutral wire of supply cord connected to center terminal together. - Page 21 Remove the terminal block screws which are indicated by A and grounding screw which is indicated by B. Nuetral ground conductor (central terminal) is provided in the dryer as a closed loop. Remove the neutral ground conductor from central terminal and connect the neutral wire of the supply cord under the central terminal of the block.
-
Page 22: Under Counter Installation
3.7. Under Counter Installation • Leave at least 3 cm of space between the side and rear walls of the product and the underside of the worktop when installing your product under a counter. • Assembly / disassembly under the counter if neccessary must be done by authorized service. -
Page 23: Operating Instructions
4. OPERATING INSTRUCTIONS WARNING: To reduce the risk of fire, electric shock, or injury to persons, read the IMPORTANT SAFETY INSTRUCTIONS before operating this appliance. 4.1. OVERVIEW Shown visual is representative and is for informational purposes only on parts of the device. -
Page 24: Preparing The Laundry
4.2. PREPARING THE LAUNDRY 4.2.1. Sorting the Laundry to be Dried Follow the instructions on the labels of the laundry to be dried. Only dry items that have a statement/symbol that indicates "they can be dried in a dryer". • Do not operate the product with load amounts and laundry types other than those given in 4.3. -
Page 25: Preparing The Laundry To Be Dried
4.3. Preparing the Laundry to be Dried 4.4. Load Capacity Risk of explosion and fire! Follow the instructions in the "Program selection and consumption table". (See: Remove all objects from pockets such as 5.2 Program selection and consumption lighters and matches. table). -
Page 26: Using The Tumble Dryer
4.5. USING THE TUMBLE DRYER 4.6. Control Panel 1. Program Selection Knob • Use the program selection knob to select the desired drying program 2. Electronic Indicator and Display Symbol Symbol Meaning Symbol Symbol Meaning Water tank warning indicator Delay Timer Lint filter cleaning warning indicator Anti-crease 60‘... -
Page 27: Program Selection And Consumption Table
4.7. Program Selection and Consumption Table Press the Start/Pause button to start the program. The Start/Pause LED that indicates that the program has started and the Drying LED will come on. Approximate Waching machine amount of Duration Program Load (kg/lb) spin speed remaining (minutes) -
Page 28: Auxiliary Functions
4.7.1. Auxiliary Functions The table that summarises the options that can be selected in programs is given below. Option Description "Select the drying target suitable for your laundry to be dried. Select Extra Dry for thick and multilayer laundry that takes time to dry. Select Drying Level Regular Dry for regular, single-layer laundry. -
Page 29: Starting The Program
4.7.2. Starting the Program The Start/Pause LED will flash during program selection.Press the Start/Pause button to start the program. The Start/Pause LED that indicates that the program has started and the drying LED will come on. Program Description This program dries cotton laundry including bedsheets, pillowcases, pyjamas, Normal + Regular Dry underwear, tablecloths etc. -
Page 30: Selection Stand By
4.7.3. Selection Stand By 4.8. Drum Light Information “After 15 minutes without user action in • This product includes LED Drum Light.The selection mode, machine goes to energy- light works automatically when youopen saving mode due to decrease energy the door. And closes itself after awhile consumption. - Page 31 OPTIONS ProgramS Drying Delay Buzzer Child Time Level Anti- Temperature Delicate Level Start Cancel Lock Drying Adjust wrinkle Level Normal Outdoor Towels Warm Refresh Air Fluff Time Drying Sanitize Baby Care Delicates Perm Press Bulky Sports Wear Express 29' Shirts 12' Not selectable Selectable EN - 25...
-
Page 32: Cleaning And Care
5. CLEANING AND CARE After the dryer has been used for a certain period of time, if you encounter a layer that will cause obstruction on the filter surface, IMPORTANT: Do not use industrial wash the filter with warm water to clean the chemicals to clean your dryer. -
Page 33: Cleaning The Condenser
5.4. Cleaning the Humidity Sensor IMPORTANT: Never remove the water tank when the program is running. The water condensed in the water tank is not suitable for human consumption. IMPORTANT: DO NOT FORGET TO EMPTY THE WATER TANK AFTER EACH USE. -
Page 34: Cleaning The Inner Surface Of The Loading Door
5.5. Cleaning the Inner Surface of the Loading Door IMPORTANT: DO NOT FORGET TO CLEAN THE INNER SURFACE OF THE LOADING DOOR AFTER EACH DRYING PROCESS. Open the loading door of the dryer and clean all of the inner surfaces and the gasket with a soft, damp cloth. -
Page 35: Technical Specifications
6. TECHNICAL SPECIFICATIONS Brand AVANTI Model name FLD40V0W *Height (A) Min: 845 mm / Max: 855 mm* Width (B) 596 mm Depth (C) 609 mm Door open dept (D) 1090 mm **Capacity (max.) 9 kg** Net weight (with plastic door) -
Page 36: Troubleshooting
7. TROUBLESHOOTING Your dryer is fitted with systems that continuously perform checks during the drying process to take the necessary measures and warn you in case of any malfunction. WARNING: If the problem persists even if you have applied the steps in this section, please contact the your dealer or an Authorised Service Provider. - Page 37 PROBLEM REASON SOLUTION Check the care labels on the Clothes have shrunk, felted or The program used might not be laundry items, select a suitable deteriorated. suitable for the type of laundry. program for the type of laundry. There might be lint accumulated on Clean the inner surfaces of the the inner surfaces of the loading Water leaking from the loading door.
-
Page 38: Automatic Fault Warnings And What To Do
We are proud of our customer service organization and the network of professional service technicians that provide service on your Avanti dryer. With the purchase of your Avanti dryer, you can be confident that if you ever need additional information or assistance, the Avanti Products Customer Service Team will be here for you. -
Page 39: Product Warranty
For one year from the date of purchase by the original owner, Avanti products will, at its option, repair or replace any part of the product which proves to be defective in material or workmanship under normal use. -
Page 40: Environmental Protection And Packaging Information
10. ENVIRONMENTAL 10.2. Energy Efficiency PROTECTION AND PACKAGING • You should operate the dryer to full INFORMATION capacity, but make sure that it is not overloaded. • When the laundry is being washed, 10.1. Packaging Information the spin speed should be at the The packaging of this product is made highest level possible. - Page 41 FLD40V0W 01122022 Printed in Turkey 52381570-220311-00...
Need help?
Do you have a question about the FLD40V0W and is the answer not in the manual?
Questions and answers