Mackie DXB.200 Dissambly Instruction
Digital mixing console
Hide thumbs
Also See for DXB.200:
- Quick start manual (16 pages) ,
- Hook-up instructions (3 pages) ,
- Connections (2 pages)
Advertisement
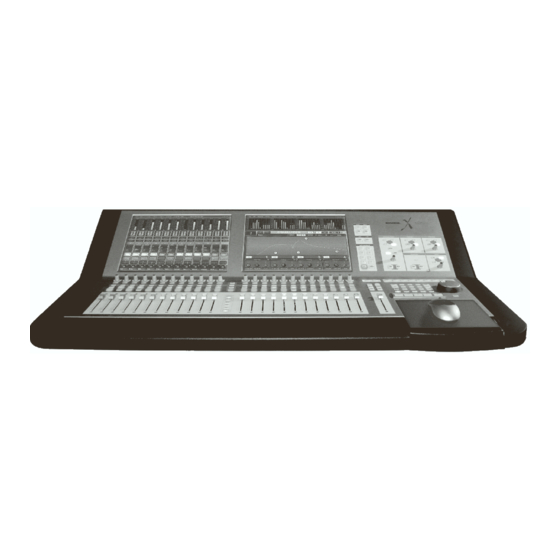
Mackie Digital X Bus
Disclaimer:
Use of this guide is entirely at the sole risk of the user. LOUD Technologies Inc. is not liable
or responsible in any way for problems or failures that arise within the Digital X Bus as a direct
result of the user disassembling the Digital X Bus. Even though the Digital X Bus has been de-
signed to be compatible with "off the shelf" computer parts and components, the user assumes
all risks associated with the action of changing or replacing such components or parts. Only an
Authorized Mackie Service Center can perform such action and still be covered under the terms
of the product warranty. Mackie Technical Support is available for assistance with this proce-
dure at +1 800.898.3211 (toll free in the USA and Canada) or at +1 425.487.4333 from anywhere
in the world.
IMPORTANT: The Digital X Bus contains static-sensitive components. Anti-static precautions
must be taken before touching anything inside the Digital X Bus. Use an anti-static wrist
strap when performing the procedures described here. These are available at most com-
puter supply stores. The use of an anti-static mat is also recommended.
The DXB is one of the world's first digital mixing consoles that can be opened, accessed, ser-
viced, and/or have its hardware components upgraded by the end user. It is designed to utilize
standard "off the shelf" personal computer components and parts that can be purchased over
the counter at a wide variety of locations around the world. The Digital X Bus is also designed
to support third party accessory products, the most notable of which being the Universal Au-
dio™ UAD-1™ Powered Plugins™ Card that can provide additional DSP resources to the Digi-
tal X Bus processing power.
While this poses an enormous benefit in keeping the Digital X Bus current with rapidly ad-
vancing computer technology, it also poses a major risk to the customer if specific procedures
are not followed beforehand and during that process. As a Digital X Bus user, you must under-
stand and agree to assume all risks associated with this before you begin.
The purpose of the guide is to provide a detailed explanation and step-by-step instructions of
how to get inside the Digital X Bus so the internal parts can be accessed. This Guide does not
make any specific reference to any one part or component in particular...it is only an instruc-
tion of how to get inside the mixer, and close it back up after you have completed whatever it is
you are trying to do internally.
Getting Inside
The Digital X Bus
Introduction
1
Getting Inside the Digital X Bus
Advertisement
Table of Contents

Related Manuals for Mackie DXB.200


Summary of Contents for Mackie DXB.200
- Page 1 Only an Authorized Mackie Service Center can perform such action and still be covered under the terms of the product warranty. Mackie Technical Support is available for assistance with this proce- dure at +1 800.898.3211 (toll free in the USA and Canada) or at +1 425.487.4333 from anywhere...
- Page 2 Mackie Digital X Bus You only require three tools to perform this procedure: • A new condition #2 Philips head Screwdriver (Figure A, below left). • Flathead “Jeweler’s” Screwdriver (Figure B, below right) • Anti-static Wrist Strap Figure A You’ll need to do the following things before starting to open up your Digital X Bus: •...
- Page 3 Mackie Digital X Bus Removing the Motherboard Access Plate The first step is to remove the rectangular Motherboard Access Plate that is located on the left side of the rear panel of the Digital X Bus. • Locate the ten small black Phillips Head screws that hold the Motherboard Access Plate to the rear chassis, as shown in Figure D (below) •...
- Page 4 Mackie Digital X Bus Removing the COM Cable Once you can see the Motherboard Access Area, look for a small rainbow or grey colored ribbon cable (called the COM Cable) attached to the motherboard’s COM port in the lower left hand corner of the Motherboard Access Area.
- Page 5 Mackie Digital X Bus Removing the Talkback Mic Cable Just to the right of where you just removed the COM Cable, you’ll notice a small mini (1/8- inch) cable plugged into a mini jack on the motherboard. That is the Talkback Mic Cable. Pull it...
- Page 6 Mackie Digital X Bus Unscrew both the top and bottom holding screws for each video cable connector. Make sure that both video cable ends are loose and free from obstruction. Removing the Rear Chassis Locate all the black Philips Head screws that lie along the outer-most edge of the rear chassis,...
- Page 7 Mackie Digital X Bus Once all the screws have been removed, start to slide out the entire rear chassis from the rest of the mixer. You may need to thread both the COM and the Talkback Mic cables through the metal plate that separates the motherboard from the Motherboard Access Area.
- Page 8 Getting Inside the Digital X Bus “Mackie.” “Digital X Bus,” and the “Running Man” are trademarks or registered trademarks of LOUD Technologies Inc. All other brand names mentioned are trademarks or registered trademarks of their respective holders, and are hereby acknowledged.
Need help?
Do you have a question about the DXB.200 and is the answer not in the manual?
Questions and answers