Table of Contents
Advertisement
Quick Links
Advertisement
Table of Contents

Subscribe to Our Youtube Channel
Related Manuals for NDI BirdDog P200


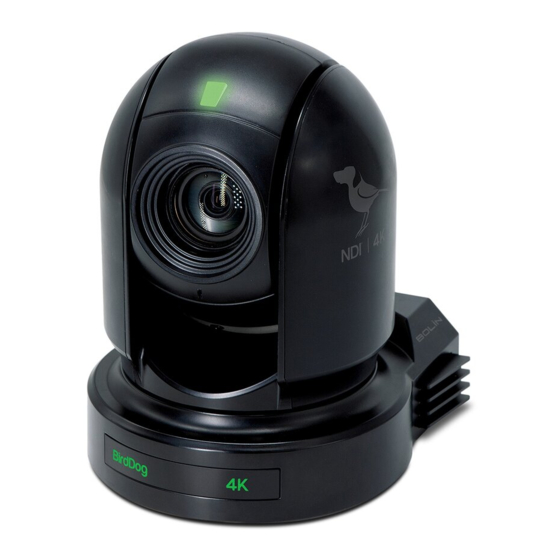
Summary of Contents for NDI BirdDog P200
- Page 1 USER GUIDE NDI 5 2022...
-
Page 2: Table Of Contents
Table of Contents Welcome to BirdDog! ....................3 Using This Manual ......................3 First Step ......................... 3 BirdDog P200 Overview ...................4 Specifications ........................4 What’s in the Box? ....................... 6 Optional Accessories ....................6 Quick Start Guide ......................7 Basic Connections........................7 Power Up............................ - Page 3 Operating Multiple Cameras with the Infrared Remote Controller ...... 24 Web Configuration Panel ..................25 Password Management ......................25 BirdUI Layout ........................26 Dashboard ........................27 Network ..........................27 NDI Network Settings ......................28 System ..........................29 System Update .......................... 30 Access Manager Configuration ................... 30 System Reboot........................... 30 AV Setup ........................31 NDI Encode Settings .........................
- Page 4 NDI® Camera Control ....................41 IP Connection ..........................41 Remote Controller ...................... 41 Controlling Your Camera Via Other Protocols ..........42 Camera Initial setting status Information ................ 42 VISCA over IP Control......................43 Using RS-232 (VISCA) ......................46 Using RS422(VISCA) / RS485 (PELCO P/D) ..............49 PELCO P/D Keyboard RS485 Connection ...............52...
- Page 5 Other trademarks, company names and product names contained in this manual are the property of • their respective owners. • NDI® is a registered trademark of NewTek, Inc. Important Information Legal Notice To ensure account security, please change passwords after your first login. You are recommended to set a strong password (no less than eight characters).
- Page 6 Maintenance Precautions • If there is dust on the front glass surface, remove the dust gently using an oil-free brush or a rubber dust blowing ball. If there is grease or a dust stain on the front glass surface, clean the glass surface gently from the •...
-
Page 7: Welcome To Birddog
Your P200 is a powerful and sophisticated device, so please read this manual before use and retain for future reference. If you are new to the world of NDI® or BirdDog cameras, begin with the Quick Start Guide. This will give you a good introduction to the setup of your new camera. -
Page 8: Birddog P200 Overview
Resolution: Up to 1080P60, 1080i60 • • Zoom: Optical 30X Image stabilizer and true WDR 130dB • Video Output: Simultaneous HDMI, 3G-SDI, CVBS and NDI • ®. ±350-degree continuous pan, ±120-degree continuous tilt • 128 presets, Speed up to 150 degrees/sec •... - Page 9 BirdDog has been on the NDI® journey since the very beginning, and your camera is just one of our products designed to take advantage of the features and potential of NDI®.
-
Page 10: What's In The Box
What’s in the Box? NOTE: The camera color may be white or black in color depending on the item purchased. 1x BirdDog P200 1x IR Remote Controller (3V CR2032 Coin Lithium Battery Required) 1x Camera Power Adaptor 1x Bag of Camera Mounting Screws... -
Page 11: Quick Start Guide
Quick Start Guide If you are new to the world of NDI® or BirdDog cameras, please follow this quick start guide to become familar with the basic setup of your new camera. You can also view a similar online video. -
Page 12: Basic Configuration
Basic Configuration NDI® Tools NDI® Tools is a free suite of applications designed to introduce you to the world of IP video and is available here. Once installed, launch the Studio Monitor (Video Monitor, if using a Mac) application. This simple application allows you to view all NDI® sources on your network. Right- click on the Studio Monitor window to view your camera as an NDI®... - Page 13 NDI Group Enable NDI® supports Grouping which allows you to hide the visibility of video sources to viewers that are not part of the group. If disabled, the video source is public and viewable by any receiver on your network.
- Page 14 BirdDog Name You can give your camera a meaningful name to make identification easier when viewing NDI® sources on a receiver such as a TriCaster, vMix or Studio Monitor. Be sure to make the name unique, as no two devices on the network should have the same name.
-
Page 15: Camera Connections
Camera ID for IR remote controller. RJ45 Port For VISCA over IP control and NDI® output. Supports PoE+(IEEE802.3at). 8. Audio Output/Input Analog 3.5mm audio In\Out ports. The Audio Out will output any audio that is captured on the Audio In port. - Page 16 12. IR Remote Controller Sensors The sensors receive commands from the infrared remote controller. 13. Lens 30X magnification optical zoom lens. 14. Power LED Indicator The indicator displays green when the camera is connected to power outlet. 15. Fixed Mounting Holes For attaching to the wall/ceiling mount bracket.
-
Page 17: Remote Controller
Remote Controller 1. Power Power ON the camera to set the camera to operational • status. • Power OFF the camera to set the camera to standby status. When the camera is powered OFF, the camera turns to the • rear. -
Page 18: Powering P200
Powering P200 P200 can be powered by two methods. PoE+ (Power over Ethernet) • PoE+ is a convenient way to power P200 as it allows both data and power to be sent through the same standard Ethernet cable. The network switch must support PoE+ (802.3at). •... -
Page 19: Video Output
Video Output The camera can simultaneously produce SDI, HDMI, NDI® and CVBS video output. HDMI Signal Connect the camera to a HD monitor/TV using HDMI cable. Turn on the camera. After initialization, video will display on the monitor. Information of the camera initial setting status will display on the monitor for 5 seconds. -
Page 20: Using The Camera Menus
Web Configuration Panel (BirdUI) affords greater control of your camera with more parameters as well as allowing remote access of camera settings over NDI®, and is the recommended method of adjusting your camera. This section explains how to navigate the menus. The menu parameters may vary according to the different product model numbers. -
Page 21: Camera Menus
Camera Menus Exposure Menu Mode Full Auto: The exposure is adjusted automatically using the value set for EX-COMP. Manual Allows manual adjustment of the GAIN, GAIN LIMIT, shutter speed (SPEED), iris (IRIS), and HIGH SENSITIVITY. Iris Pri: Iris Priority mode. This mode allows you to set a fixed IRIS with exposure achieved by automatic setting of SPEED, GAIN LIMIT, and EX-COMP. -
Page 22: White Balance Menu
Ex-Comp (Exposure Compensation) When MODE is set to FULL AUTO, SHUTTER PRI or IRIS PRI, setting EX-COMP to ON allows exposure compensation levels to be set from the following values: –10.5, –9, –7.5, –6, –4.5, –3, –1.5, 0, +1.5, +3, +4.5, +6, +7.5, +9, +10.5. •... -
Page 23: Picture 2 Menu
Mirror Displays a mirror image of the video image. De-Flicker Turning this on can help reduce the image flicker that can occur if the camera frame rate is different to the frequency of the local electricity supply that is powering the scene lighting. WDR (Wide dynamic range mode) The WDR feature is available on certain product models. -
Page 24: System Menu
MF Speed Choose between eight manual focus speeds. Near Limit You can set the camera to ignore focusing on subjects that are closer than a designated distance. Can be set in a range from OVER, 1cm, 11cm, 30cm, 80cm, 1.2m, 1.4m, 1.6m, 2.0m, 2.5m, 3.1m, 4.2m, 6m, 10m, 20m. Adaptive P/T (pan/tilt) When set to ON, P/T speed are adaptive to the zoom range. -
Page 25: Controlling The Camera Using The Remote Controller
press the HOME button again to restore it. The camera will reboot by itself and the new video format is activated. You can cancel it by pressing the MENU button. • Depending on the video client software you are using, some video software may need to be restarted •... -
Page 26: Zooming
If the camera moves in a different direction than intended, be aware that the camera is set so that the image output from the camera is rotated toward the right whenever you press the " →” button. To set the remote to move the camera toward the opposite direction from that of the button you pressed, press the 2 (REV) button while holding down the L/R DIRECTION SET button. -
Page 27: Shooting With Backlighting
Shooting with Backlighting When you shoot a subject with a light source behind it, the subject becomes dark. In such a case, press the BACK LIGHT button. To cancel the function, press the BACKLIGHT button again. NOTE: The BACKLIGHT function is effective if MODE is set to FULL AUTO in the EXPOSURE menu of the camera. Changing Resolution Press the RESOLUTION button. -
Page 28: Operating Multiple Cameras With The Infrared Remote Controller
Recalling the stored settings Press any of the POSITION buttons, 1 to 6, in which you have stored the settings. Cancelling the preset memory While holding down the RESET button, press the POSITION button from which you want to cancel the settings. CAMERA SELECT Press a POSITION button PRESET... -
Page 29: Web Configuration Panel
Web Configuration Panel The web configuration panel (BirdUI) allows you to alter key settings of P200, such as A/V settings, video frame rates, restarting the video processing engine, changing networking parameters, recalling PTZ presets and applying firmware updates. Access via web browser (URL) P200 is configured to automatically receive a network IP address from the computer network via DHCP (Dynamic Host Configuration Protocol). -
Page 30: Birdui Layout
2. Network General network settings such as DHCP IP Address details, timeout fallback address and camera network name, as well as NDI® specific network settings 3. System System admin functions such as updates, password change, designation of group access and camera reboot. -
Page 31: Dashboard
Video Frame Rate as set here The audio output sample rate of the camera. Video chroma subsample rate and average NDI® bitrate of the camera. P200 has a fixed chroma subsample rate. 6. System Details. Camera name as set here. -
Page 32: Ndi Network Settings
BirdDog Name You can give your camera a meaningful name to make identification easier when viewing NDI® sources on a receiver such as a TriCaster, vMix or Studio Monitor. Be sure to make the name unique, as no two devices on the network should have the same name. -
Page 33: System
NDI Discovery If you choose to use a NDI® discovery server, you can configure it in this tab. By default, NDI® utilizes mDNS (multicast Domain Name System) to create the zero configuration environment for discovery. Unless the network is specifically configured to not allow mDNS, NDI®... -
Page 34: System Update
NDI® Tools. To upload a list: Click the CHOOSE FILE button to load your NDI® Group List in UTF-8 encoded string format. Click the UPDATE button. Do not upload a blank list. System Reboot Click the Reboot button to perform a camera reboot. -
Page 35: Av Setup
NDI Groups NDI® supports Grouping which allows you to hide the visibility of video sources to viewers that are not part of the group. If disabled (default), the video source is public and viewable by any receiver on your network. Click on the... -
Page 36: Camcontrol
P200 is capable of outputting independent video formats for both NDI® and SDI/HDMI. This setting affects only the NDI® video output. Please note that the video rate you select here must be of the same family as the SDI/HDMI video output, for example 720p50 aligns with 1080i50/1080p50 but will not co-exist with any 29.97/30fps based camera setting. -
Page 37: Freed Tab
Click the IN button to focus on nearer subjects and the OUT button to focus on subjects further from the camera. Pan / Tilt / Zoom Speed When controlling P200 over NDI® you can individually set the maximum speed of PTZ movements. Higher numbers produce faster and more sensitive movements of the camera. -
Page 38: Exposure Tab
Exposure Tab Mode Full Auto: The exposure is adjusted automatically using the values set for EXPOSURE COMPENSATION. Manual: Allows manual adjustment of the GAIN, IRIS and SPEED (shutter speed). Shutter Priority: The shutter speed can be set freely by the user, and the iris and gain are set automatically, according to the brightness of the subject. -
Page 39: White Balance Tab
High Sensitivity In this mode, the maximum gain increases, enabling to obtain a brighter output even in a darker en- vironment. However, if the gain reaches high level, the image will have a large amount of noise. Bright Level The bright control adjusts both gain and iris using an internal algorithm, according to a brightness level freely set by the user. -
Page 40: Picture 1 Tab
Level (color level) You can adjust the color density of the picture. Choose a value in the range from 0 to 14. The greater the number, the denser the colors, and vice versa. This becomes disabled when MATRIX is turned OFF. Phase You can adjust the color tone of the entire picture. -
Page 41: Color Matrix Tab
Highlight Light Compensation (HLC) Attempts to adjust AE and AF to compensate for when high intensity spot lights are detected. Highlight Light Compensation Mask This setting determines how much of the spotlight is removed when making the compensation calculation. Backlight Comp Compensates for strong scene backlighting that can otherwise lead to the subject being too dimly exposed when shooting in auto exposure mode. -
Page 42: Advanced Tab
Controls the Shadow and Blacks of an image by changing the brightness/color levels while leaving midtones and highlight areas unaffected. Scopes Since there is variation in both the eyesight of individuals and video monitors, CamControl offers NDI video scopes to ® assist in evaluating the color and tonal qualities of your image. - Page 43 Position Select the position of the overlayed scope in the image. Select from Top Left, Top Right, Bottom Left and Bottom Right. Gamma Gain Adjust the brightness of the displayed scopes. Mode Histogram: The Histogram shows the distribution of luminance (brightness) in the image, from darker pixels on the left of the scope, to brighter pixels on the right.
-
Page 44: Receiving Ndi® Video
NewTek Studio Monitor NDI® Tools is a free suite of applications designed to introduce you to the world of IP video and is available here. The included Studio Monitor application allows you to monitor many NDI® sources on a standard Windows computer. -
Page 45: Ndi® Camera Control
IP Connection IP Port to Network Switch Connect the camera NDI® Ethernet port to a port in a Ethernet switch on your network. The switch must provide PoE+ if you are not using the power adaptor. Connect the PTZ Keyboard’s IP port to a port on the Ethernet switch (or other connected switch on the same network subnet). -
Page 46: Controlling Your Camera Via Other Protocols
Controlling Your Camera Via Other Protocols P200 also supports control via VISCA-over-IP, RS-232 and RS-422/485. This section details how to configure control under these protocols. When the camera is connected to a computer and joystick keyboard with a VISCA cable (cross type, RS-232), you can operate the camera with the computer and the joystick keyboard. -
Page 47: Visca Over Ip Control
VISCA over IP Control With VISCA over IP, you can control the camera using the VISCA protocol on a controller equipped with IP communication capabilities via LAN. HDMI Video Signal 3G-SDI Video Signal PoE Power VISCA Over IP Control VISCA over IP communication specifications: Interface: RJ-45 10/100/1000 Mbps •... - Page 48 DIP Switch Settings The DIP switches are for setting the camera configuration for following items. The Camera ID address and video resolution settings (below) can be also be set via the camera OSD menu. The camera can be set either using the OSD menu or DIP switches. They override each other - after the camera is turned on, the most recent setting is used.
- Page 49 The Rear Panel Rotary Switch The rotary switch selects the video format. Use small screw driver to turn the switch to the desired number or letter. It is recommended to set this to the most frequently used resolution and thereafter use the BirdUI to make changes.
-
Page 50: Using Rs-232 (Visca)
Using RS-232 (VISCA) You can use the RS-232 port to connect to optional controllers, such as joystick control keyboard, control PC station, to operate the camera, perform pan, tilt and zoom operations using the joystick of the control keyboard, and to use the Preset function using the control buttons. An application software that supports this unit is needed if you use a PC station. - Page 51 Use the included RJ45 to RS232 cable with an 8 pin Mini Din adaptor to make an RS232 connection for your control device. RS232 Serial Port 1. DTR connection on 3. TX controller side 4. GND 5. RX 7. IR_OUT 8 pin Mini DIN cable connector PTZ Keyboard...
- Page 52 Use a CAT5/6 cable (T-568B standard pinout) to make an RS232 connection by following the pin definition below: CAT5/6 1. IR_OUT (Orange/White) Network Cable 2. DTR (Orange) 3. GND (Green/White) 4. DSR (Blue) 5. TX_OUT (Blue/White) 6. RX_OUT (Green) 7. TX_IN (Brown/White) 8.
-
Page 53: Using Rs422(Visca) / Rs485 (Pelco P/D)
Using RS422(VISCA) / RS485 (PELCO P/D) You can use the RS-232 port to connect to optional controllers, such as a joystick control keyboard, or control PC station, to operate the camera, perform pan, tilt and zoom operations and to use the Preset function using the control buttons. - Page 54 SONY Keyboard RS422 Connection The connection of a SONY keyboard is different than other VISCA (non-Sony) keyboards. If using a SONY controller and Daisy Chaining multiple cameras via RS422 connection: SONY Keyboard RS422 (VISCA) Daisy Chain Connection Multiple Cameras Connection (SONY Keyboard) KEYBOARD Keyboard...
- Page 55 Use the included RJ45 to RS422 cable with a Phoenix connecter adaptor to make an RS422 connection for your control device. RS422 Serial Port connection on controller side 5. R – Multicore 4. R + 3. T – Control VCC-CC45RS 2.
-
Page 56: Pelco P/D Keyboard Rs485 Connection
You can make an RS422 Daisy Chain multiple camera connection with a RS422 standard serial port controller. 5. R – 4. R + 3. T – VCC-CC45RS 2. T + RJ45 TO RS422/485 1. GND CONTROL CABLE ADAPTOR RS422 5. R – 4. - Page 57 PELCO RS485 Connection RS485 RS422 (VISCA) Daisy Chain PELCO P/D Keyboard Multiple Cameras Connection Connection (VISCA Keyboard) KEYBOARD Keyboard Camera 1. TDX IN –2 . TDX IN + 6. RS485 + 1. TXD IN – CAM 1 7. RS485 – 2.
- Page 58 Use a CAT5/6 T-568B cable to make an RS485 direct connection between the camera and the controller by following the pin definition below. CAT5/6 1. RX – (Orange/White) Network Cable 2. RX + (Orange) 3. GND (Green/White) RS485 4. --- (Blue) Port 5.
-
Page 59: Operating Multiple Cameras Using Rs-232 And 422/485
Operating Multiple Cameras using RS-232 and 422/485 Using RS-232 (VISCA), you can connect to 7 cameras • Using RS-422 (VISCA), you can connect to 7 cameras. • Using RS-485 (PELCO), you can connect to 255 cameras. • Using RS-485 (PELCO), all camera addresses must be set up before the connection. You can set the •... -
Page 60: Camera Dimensions
Camera Dimensions Unit: mm 139.8 178.75 94.9... -
Page 61: Glossary
NDI® (Network Device Interface) is a standard allowing for transmission of video using standard LAN networking. NDI® comes in two flavours, NDI® and NDI®|HX. NDI® is a variable bit rate, I-Frame codec that reaches rates of around 140Mbps at 1080p60 and is visually lossless. NDI®|HX is a compressed, long-GOP, H.264 variant that achieves rates around 12Mbps at 1080p60. - Page 62 Pan, Tilt and Zoom. RJ45 A form of standard interface commonly used to connect computers onto Ethernet-based local area networks (LAN). RS422, RS485, RS232 Physical layer, serial communication protocols. Subnet Subnet or subnetwork is a segmented piece of a larger network. Tally A system that indicates the on-air status of video signals usually by the use of a red illuminated lamp.
- Page 63 WELCOME TO THE FUTURE.
- Page 64 birddog.tv hello@birddog.tv...
Need help?
Do you have a question about the BirdDog P200 and is the answer not in the manual?
Questions and answers