Table of Contents
Advertisement
Available languages
Available languages
Quick Links
Advertisement
Table of Contents

Related Manuals for VATTON 48306


Summary of Contents for VATTON 48306
-
Page 2: List Of Components
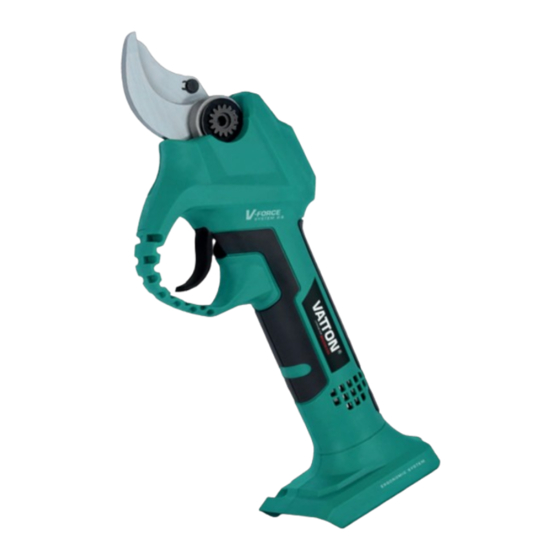
Ø 3 0 M M C ORT E M ÁX . LIST OF COMPONENTS TECHNICAL DATA 01 // Ignition trigger Rated voltage: DC 20V Diameter: 30 mm 02 // Stainless steel blade, cut Ø30 mm Max. Power : 540W 03 // Improved ergonomic system Size (Bare Machine): 300 x 115 x 70 (L x W x H) 04 // BRUSHLESS brushless motor... -
Page 3: Charging Procedure
CHARGING PROCEDURE 2. TO REMOVE OR INSTALL THE BATTERY PACK (SEE B) NOTE: Before using the tool, read the instruc- Locate button on front of the battery pack. Depress the bu- tion book carefully. tton to release and slide it out from the tool. After recharge, insert back into the tool. -
Page 4: General Safety Rules
INSTRUCTIONS tools create sparks that can ignite dust or fumes. 1. Open the package and insert the battery into the battery 3) Keep children and bystanders away during use. Distrac- insertion port of the electric scissors. tions can cause you to lose control. 2 Electrical Safety 1) Never modify the plug. -
Page 5: Additional Safety Rules
power tool or these instructions to use it. Power 6. Make sure the switch is off when making any adjust- tools are dangerous in the hands of untrained users. ments, such as replacing accessories or storing the machi- 5) Check for misalignment or binding of moving parts, ne. -
Page 6: Problem Solution
HOW TO CHANGE THE BLADE 4. Tighten the countersunk head screws. Disconnect the battery pack from the machine before this operation. 1. Remove the screw. 2. Use the special tool provided to loosen the custom screw nut. 3. Use the special tool provided to loosen the hex head bolts. - Page 7 SYMBOLS Read the manual Warning Wear ear protection Wear eye protection Wear dust mask Indoor use only Do not expose to rain or water Do not burn Do not dispose of batteries. Return exhausted batteries to your local collection or recycling point.
-
Page 8: Lista De Componentes
Ø 3 0 M M C ORT E M ÁX . LISTA DE COMPONENTES DATOS TÉCNICOS 01 // Gatillo de encendido Voltaje nominal: DC 20V Diámetro: 30 mm 02 // Cuchilla inox., corte Ø30 mm Potencia máxima: 540W 03 // Sistema ergonómico mejorado Tamaño (máquina descubierta): 300 x 115 x 70 (L x W x H) 04 // Motor BRUSHLESS sin escobillas... -
Page 9: Procedimiento De Carga
PROCEDIMIENTO DE CARGA 2. PARA RETIRAR O INSTALAR EL PAQUETE DE BATERÍAS (VER B) NOTA: Antes de usar la herramienta, lea Ubique el botón en la parte frontal de la batería. Presione cuidadosamente el libro de instrucciones. el botón y deslícela fuera de la herramienta. Después de recargar, inserte nuevamente en la herramienta. -
Page 10: Reglas Generales De Seguridad
INSTRUCCIONES 2) No se debe usar en atmósferas explosivas, como en presencia 1. Abra el paquete e inserte la batería en el puerto de de líquidos inflamables, gases o polvo. Las herramientas eléctricas inserción de la batería de las tijeras eléctricas. crean chispas que pueden encender el polvo o los humos. -
Page 11: Mantenimiento
con el interruptor son peligrosas y deben repararse. medidas de seguridad preventivas reducen el riesgo de arrancar la herramienta eléctrica accidentalmente. 6. Asegúrese de que el interruptor esté apagado al realizar 4) Almacene las herramientas eléctricas fuera del alcance de cualquier ajuste, como reemplazar accesorios o almacenar la máquina. -
Page 12: Solución De Problemas
COMO CAMBIAR LA CUCHILLA 3. Opere la máquina descargada varias veces para distri- buir el lubricante de manera uniforme. Desconecte el paquete de baterías de la máquina antes de 4. Apriete los tornillos de cabeza avellanada. esta operación. 1. Quite el tornillo. 2. - Page 13 SÍMBOLOS Lea el manual Advertencia Use protección para los oídos Use protección para los ojos Use mascarilla antipolvo Solamente para uso en interiores No exponer a la lluvia o al agua No quemar No deseche las baterías. Devuelva las baterías agotadas a su punto de recolección o reciclaje local.
- Page 14 Ø 3 0 M M C ORT E M ÁX . LISTA DE COMPONENTES ESPECIFICAÇÕES 01 // Gatilho de ligar Voltagem nominal: DC 20V Diâmetro: 30 mm 02 // Lâmina inox, corte Ø30 mm Força maxima : 540W 03 // Sistema ergonómico melhorado Tamanho (máquina descoberta): 300 x 115 x 70 (L x W x H) 04 // Motor BRUSHLESS sem escovas...
-
Page 15: Procedimento De Carregamento
PROCEDIMENTO DE CARREGAMENTO 2. PARA REMOVER OU INSTALAR O CONJUNTO DE BATERIAS (VER B) NOTA: Antes de utilizar a ferramenta, leia Localizar o botão na parte da frente da bateria. Premir o atentamente o folheto de instruções. botão e deslizá-lo para fora da ferramenta. Depois de re- carregado, voltar a inseri-lo na ferramenta. -
Page 16: Regras Gerais De Segurança
INSTRUÇÕES 3) Manter as crianças e os transeuntes afastados durante 1. Abra a embalagem e insira a bateria na porta de in- a utilização. As distracções podem causar-lhe perda de serção da bateria da tesoura elétrica. controlo. 2 Segurança eléctrica 1) Nunca modificar a ficha. - Page 17 à base de solvente) e use uma escova macia ou rou- controlada com o interruptor é perigosa e deve ser reparada. pas secas para limpar a poeira no cabeça de tesoura. 3) Desligar da fonte de energia e/ou remover a bate- 3.
-
Page 18: Solução De Problemas
COMO TROCAR A LÂMINA As lâminas precisam ser reabastecidas duas vezes ao dia. Mantenha as lâminas abertas durante o reabastecimento. 1. Remova o parafuso escareado antes de reabastecer. Desconecte a bateria da máquina antes desta operação. 1. Remova o parafuso. 2. - Page 19 SIMBOLOS Leia o manual Advertência Use proteção auditiva Use proteção ocular Use proteção respiratória anti-pó Somente para utilização em interiores Não expor à chuva ou à água Não queimar Não descarte as baterias. Devolva as baterias gastas ao seu ponto de reciclagem local.
- Page 20 Alfa Dyser S.L. Pol. Ind. Anoia · C/Cooperativa, 2 · 08635 Sant Esteve Sesrovires (Barcelona) España · B-60163441 · T. 937831011· F. 937838487 www.alfadyser.com · alfa@alfadyser.com FABRICADO EN CHINA / DISEÑO PACKAGING EN U.E.
Need help?
Do you have a question about the 48306 and is the answer not in the manual?
Questions and answers