Table of Contents
Advertisement
Advertisement
Table of Contents

Summary of Contents for TieJus Bell-J9
- Page 1 Make your life smarter and safer QUICK START GUIDE Bell-J9...
- Page 2 E-mail. We will solve your problems within 24 hours. In addition, your advice or suggestions will be much appreciated and welcomed. Product Service Email: Tech@tiejus.com Distributor: distributor@tiejus.com More About Us Web: www.tiejus.com Facebook: www.facebook.com/zumimalloffice...
- Page 3 Brand Story TieJus is a young and fresh security brand that has attracted millions of technology enthusiasts in just 6 months of establishment. TieJus is committed to creating a smarter and easier modern lifestyle for consumers. Let more consumers enjoy convenient modern life without worrying about information security.
-
Page 4: Table Of Contents
INDEX PAGE 1. What’s in the Box ------------------------ P1 2. Meet the Doorbell -----------------------P2 3. Meet the Chime ------------------------ P3 4. Download and Install App ----------------P4 5. Account Registration -------------------- P5 6. Add Camera to App -------------------- P5 6.1 Preparations for Connection ------------ P5 6.2 Connect Camera to App -------------- P6 7. -
Page 5: What's In The Box
1. What’s in the Box Doorbell*1 DingDong*1 Quick User Guide*1 USB Cable*1 Screws Set*1 3M Tape*3 AAA Batteries*3 Unlock Pin*1 NOTE: Micro SD card and power adapter are not included. -
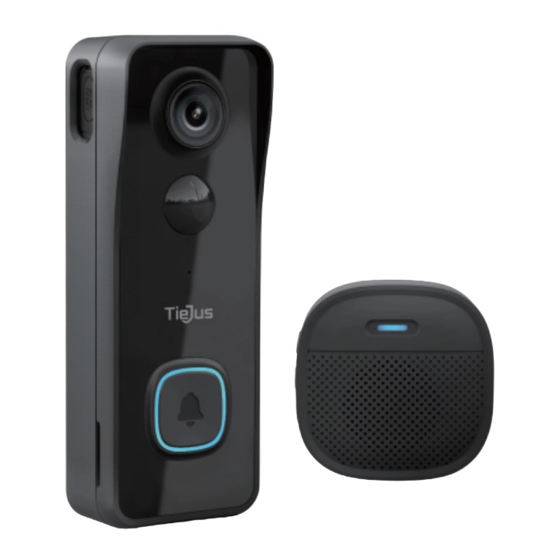
Page 6: Meet The Doorbell
2. Meet the Doorbell 1080P Camera PIR Motion Sensor Microphone Doorbell Button LED Indicator Speaker Unlock Pin Li-ion Battery Built-in Reset Button Micro USB Port Charging Indicator Micro-SD Card Slot Unlock hole... -
Page 7: Meet The Chime
3. Meet the Chime LED Indicator Settings Volume Control Select Ringtone AAA Batteries Please mind the battery polarities when installing. -
Page 8: Download And Install App
4. Download and Install App Download ZUMIMALL App from Google Play™ or App Store™. Or scan the QR codes as below, with your smart phone. NOTE: Google Play™ is a trademark of Google Inc. App Store™ is a service mark of Apple Inc. Android ZUMIMALL NOTE:... -
Page 9: Account Registration
5. Account Registration New user needs to sign up ZUMIMALL App with email address. Click 'Sign up' to create a New Account and follow the steps to complete registration. 5:51 5:51 5:51 < < Sign Up Sign Up Welcome United States Account 2365894254@qq.com United States... -
Page 10: Connect Camera To App
6.2 Connect Camera to App 5:49 5:48 5:48 < Select Device Home Add Battery Camera All Devices Living room Bedroom Battery Camera Smart Smart Video Doorbell Doorbell Power Plug Camera Baby Camera Hold the device power button to start Floodlight Add Device the device. - Page 11 5:50 5:50 < < Connect Network Scan QR Code 02:06 Make sure the device in an energized state Make sure the device is connected to the router Scan the QR code below with the device Make sure the device and the phone are on the same network at a distance of 5-8 inches.
-
Page 12: Charge Your Doorbell
7. Charge your doorbell Prior to the doorbell installation, please charge up your doorbell for about 8-10 hours till the charging LED turns BLUE from RED. LED STATUS INDICATION Solid red Battery charging Solid blue Fully charged Compatible charger ( not provided ): USB compatible mobile phone charger (DC 5V 1A~2A). -
Page 13: Set Up Doorbell
8. Set up Doorbell Press your doorbell to activate, and you will see the LED indicator flashes red (once per second). If not, press and hold reset button for 5 seconds to restore factory defaults. LED Indicator Start setting up your doorbell following the in-app instructions. -
Page 14: Pair With Your Indoor Chime
9. Pair With Your Indoor Chime Click the SETTING button on the chime, and the chime will be in pairing mode for 20 seconds, with its red LED flashing. LED indicator Settings Press the doorbell button to send a pairing signal, and your chime will sound to react, together with its blue LED flashing. - Page 15 Chime settings. Settings. Click to enter/quit pairing mode; Press & hold for 5 seconds to restore factory defaults. Volume control button. Click to control volume: level 1: 110 dB; level 2: 100 dB level 3: 90 dB; level 4: 80 dB Ringtone selection.
-
Page 16: Install Your Doorbell
10. Install Your doorbell Select location for your doorbell. Select a location. It is suggested to mount the doorbell at least 4 feet (120 cm) above the ground for optimal angle of view and best motion detection performance. Mount your doorbell. Release the rear mount Mark the screw holes using the unlock pin. - Page 17 Adhesive tapes are Mount the rear mount to optional to mount the your wall with screws and doorbell on flat surfaces. tools. Attach the doorbell to its All set! Press the doorbell rear mount, and push the button to run a test. doorbell to lock up.
- Page 18 11. Accessory (Optional) Doorbell Angle Mounts You can purchase the following angled brackets so as to point your doorbell to a specific view angle. Horizontal Angle ∠25° ~ 50° (Adjustable) Install with Corner Mount Sold separately Vertical Angle∠8° (Stackable) Install with Wedge Mount...
- Page 19 12. Trouble Shooting Q1: Is the video doorbell powered by battery? A1: Yes, there is a Li-ion battery built-in. Thanks to the low power consumption technology, a full charge lasts for more than 2 to 3 months in our lab test environment (Lab test condition: 10 events per day, 15 seconds video recording per event).
Need help?
Do you have a question about the Bell-J9 and is the answer not in the manual?
Questions and answers