Advertisement
Available languages
Available languages
Quick Links
Advertisement

Subscribe to Our Youtube Channel
Related Manuals for Kucht Professional KMD24S

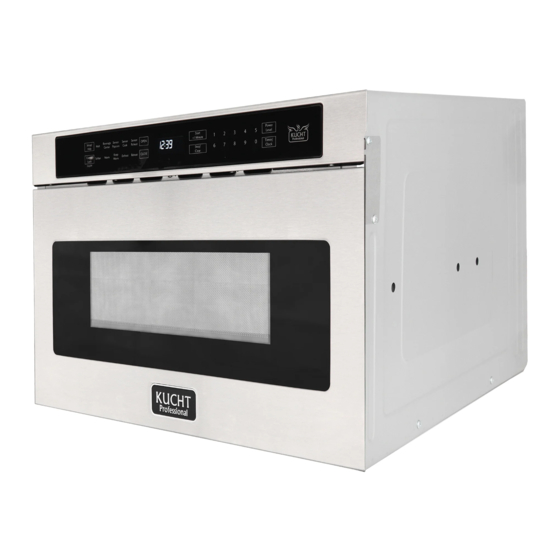
Summary of Contents for Kucht Professional KMD24S
- Page 1 24" BE A PRO IN YOUR KITCHEN DRAWER MICROWAVE INSTALLATION GUIDE MODEL: KMD24S TINSKB307MRR0 TINSKB307MRR0_Kucht_24" Drawer KMD24S Install Guide.indd 1 TINSKB307MRR0_Kucht_24" Drawer KMD24S Install Guide.indd 1 10/2/20 11:15 AM 10/2/20 11:15 AM...
-
Page 2: Important Safety Instructions
IMPORTANT SAFETY IMPORTANT–PLEASE READ AND FOLLOW INSTRUCTIONS • Before beginning, read these instructions thoroughly and carefully. • WARNING: If the information in this manual is not followed • Because the kit includes metal parts, caution should be used exactly, a fire or electrical shock may result that could cause property damage, personal injury or death. -
Page 3: Grounding Instructions
Ground ed properly by a qualified installer or service technician. Receptacle Box Grounding Pin FOR MORE DETAILS AND INFORMATION, PLEASE VISIT OUR WEBSITE WWW.KUCHT.COM TINSKB307MRR0_Kucht_24" Drawer KMD24S Install Guide.indd 3 TINSKB307MRR0_Kucht_24" Drawer KMD24S Install Guide.indd 3 10/2/20 11:15 AM 10/2/20 11:15 AM... - Page 4 DRAWER MICROWAVE MEASUREMENTS FIGURE 2 FIGURE 1 A. 21-5/8" (549.28 mm) B. 4-11/16" (119.06 mm) A. 6" (152.40 mm) C. 1-3/4" (44.45 mm) B. Suggested electrical outlet location* D. 21-7/8" (555.60 mm) C. Anti-Tip block E. 23-7/8" (606.43 mm) D. 5" (127 mm) F.
- Page 5 (101.6 mm) 3 1/2" (89 mm) 4" FIGURE 4 (101.6 mm) FIGURE 3 FOR MORE DETAILS AND INFORMATION, PLEASE VISIT OUR WEBSITE WWW.KUCHT.COM TINSKB307MRR0_Kucht_24" Drawer KMD24S Install Guide.indd 5 TINSKB307MRR0_Kucht_24" Drawer KMD24S Install Guide.indd 5 10/2/20 11:15 AM 10/2/20 11:15 AM...
- Page 6 Microwave. For more details and information, please visit our website www. FIGURE 5 Kucht.Com. 1. Place the drawer adjacent to the wall or cabinet opening. Plug the power supply cord into the electrical outlet. 2. Carefully guide the drawer into the prepared opening. Avoid pinching the cord between the oven and the wall.
-
Page 7: Instructions De Sûreté Importantes
APPAREIL. IL POURRAIT EN RÉSULTER UN INCENDIE, UN CHOC ÉLECTRIQUE OU AUTRE SSURE . POUR PLUS DE DÉTAILS ET D'INFORMATIONS, VEUILLEZ VISITER NOTRE SITE WEB WWW.KUCHT.COM TINSKB307MRR0_Kucht_24" Drawer KMD24S Install Guide.indd 1 TINSKB307MRR0_Kucht_24" Drawer KMD24S Install Guide.indd 1 10/2/20 11:15 AM... -
Page 8: Instructions Pour La Mise À La Terre
DÉBALLAGE DU FOUR DRAWER DÉGAGEMENTS ET DIMENSIONS MICROWAVE • Les dimensions indiquées au Schéma 1 doivent être observées. Ces dimensions offrent un dégagement minimal. Repérer la • Retirez tout le matériau d’emballage du Drawer Microwave. prise électrique dans l’aire ombrée dans le coin gauche su- N’ENLEVEZ PAS LE COUVERCLE DU GUIDE D’ONDES, périeur de la découpe. - Page 9 Q Ouverture 15-9/16 po (395,27 mm) tendu. Vérifiez toujours les normes et le code électriques de votre région. POUR PLUS DE DÉTAILS ET D'INFORMATIONS, VEUILLEZ VISITER NOTRE SITE WEB WWW.KUCHT.COM TINSKB307MRR0_Kucht_24" Drawer KMD24S Install Guide.indd 3 TINSKB307MRR0_Kucht_24" Drawer KMD24S Install Guide.indd 3 10/2/20 11:15 AM...
- Page 10 BLOC ANTI-BASCULEMENT PRISE DE COURANT Le courant alimentation est 120 volts, 60 Hz, CA seulement, 15 ÉTAP ES D’INSTA LLATION NORMA LE A ou plus et doit être protégé. Il est recommandé d’alimenter cet Directives d’install ation du bloc appareil par un circuit séparé. anti-basculement Le four est équipé...
- Page 11 1/16 po. Voir Schéma 5A. 5. Fixer le tiroir avec les 4 vis fournies. Voir Schéma 5B. POUR PLUS DE DÉTAILS ET D'INFORMATIONS, VEUILLEZ VISITER NOTRE SITE WEB WWW.KUCHT.COM TINSKB307MRR0_Kucht_24" Drawer KMD24S Install Guide.indd 5 TINSKB307MRR0_Kucht_24" Drawer KMD24S Install Guide.indd 5...
- Page 12 THIS IS WHY WE CARE ABOUT MAKING VERY HIGH PERFORMANCE APPLIANCES, TO MAKE YOU FEEL LIKE A PRO AND STYLISH COOKER. FOR MORE DETAILS AND INFORMATION, PLEASE VISIT OUR WEBSITE WWW.KUCHT.COM TINSKB307MRR0_Kucht_24" Drawer KMD24S Install Guide.indd 6 TINSKB307MRR0_Kucht_24" Drawer KMD24S Install Guide.indd 6...
Need help?
Do you have a question about the Professional KMD24S and is the answer not in the manual?
Questions and answers