Advertisement
Quick Links
Advertisement

Summary of Contents for ASTRODEVICE TC 900
- Page 1 Tilt Corrector TC 900 User Manual rev. 2022-11-09 ASTRODEVICE...
- Page 2 Package contents: 1. Tilt Corrector 2. M4x8 screws (6 pcs) 3. M4x4 headless screws (4 pcs) 4. M2.5x10 screws with washers (4 pcs) - 3 -...
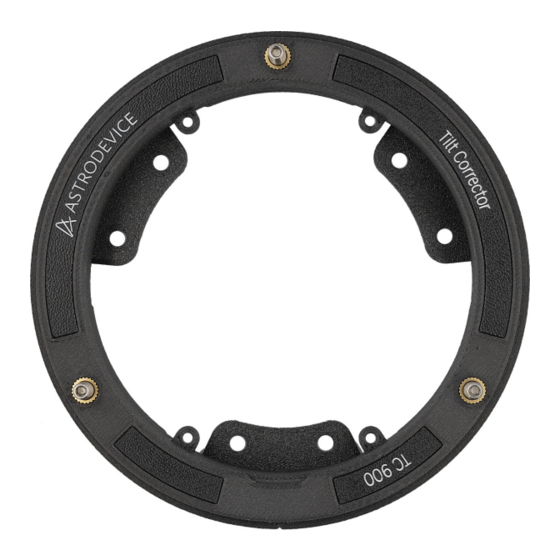
- Page 3 First read the en• re manual and make sure that everything is clear to you. Only then start working with TIlt Corrector. If you have any ques• ons, please contact Astrodevice. Introduction Tilt Corrector is a device for adjusting tilt angle of the camera in the optical path of the telescope.
- Page 4 condensation. If water freezes in the crevices of the structure, ice can damage the accessory and lead to its destruction. Therefore, if you intend to use the Correctorin freezing weather at your own risk, make sure that the environment is dry. Under all conditions, work with the device should be personally supervised.
- Page 5 Each tab is bolted with two removable TS screws. In place of the tabs, other brackets can also be screwed on, for mounting the Astrodevice FD 900 M87 fi lter drawer. As you will no• ce, this manual repeatedly points out that this work should not use force.
- Page 6 fi g. 1 - 7 -...
-
Page 7: Installation
1. mounting the Tilt Corrector on the camera 2. mounting to the camera with the Tilt Corrector: A. original black tilt plate B. Astrodevice fi lter drawer FD 900 M87 After completing steps 1 and 2, the camera can be mounted on a telescope. STEP 1... - Page 8 fi g. 2 fi g. 3 fi g. 4 - 9 -...
- Page 9 4. Remove tilt adjustment bolts. Remove three M4x4 headless screws from the tilt plate. They are originally used for tilt adjustment. They are very small. Secure them in a safe place so they don’t get lost. See fi g. 5. After this step, the original black tilt plate should be free of any screws.
- Page 10 fi g. 5 fi g. 6 fi g. 7 - 11 - - 11 -...
- Page 11 fi g. 8 fi g. 9 - 12 -...
- Page 12 7. Mount Tilt Corrector on the camera Place the Tilt Corrector in front of you in the position as shown in fi g. 10. Note the vertical line visible in front of you and the notch located on the top plane of the Tilt Corrector.
- Page 13 fi g. 10 fi g. 11 - 14 -...
- Page 14 fi g. 12 fi g. 13 - 15 -...
- Page 15 - 3 mm fi g. 14 fi g. 15 - 16 -...
- Page 16 As already mentioned, the Tilt Corrector can work with both the camera’s original black tilt plate and the Astrodevice FD 900 M87 fi lter drawer. Since the camera with the plate is the most basic set that can work with any telescope, this confi guration will be discussed fi...
- Page 17 fi g. 16 fi g. 17 - 18 -...
- Page 18 fi g. 18 fi g. 19 - 19 -...
- Page 19 STEP 2B Installation of the FD 900 M87 fi lter drawer in the Tilt Corrector This step is for those with a Celestron RASA 8 telescope and an Astrodevice FD 900 M87 fi lter drawer. • Due to the geometry of the Tilt Corrector, working with the Astrodevice FD 900 M87 drawer is somewhat limited.
- Page 20 fi g. 20 fi g. 21 - 21 -...
- Page 21 fi g. 22 fi g. 23 - 22 -...
- Page 22 fi g. 24 fi g. 25 - 23 -...
- Page 23 fi lter drawer. These brackets are not part of the set and must be purchased separately. For more details, visit: https://astrodevice.com/product/ adapter-fd-900-fi lter-drawer-to-tilt-corrector Each of the brackets has a diff erent shape, adapted to the place where it will be located.
- Page 24 fi g. 26 Note that once the drawer is mounted in the Tilt Corrector, it is very hard or even impossible to rotate the M87 nut. Therefore, in order to get the correct angle of rotation of the camera relative to the telescope, you should do the following: 1.
-
Page 25: Tilt Adjustment
Tilt adjustment Mechanically, the tilt adjustment process is very simple and obvious. All you have to do is turn the screws S1, S2 and S3 (fi g. 1), thereby moving the camera away from or closer to the telescope. Using a 2 mm hex wrench and turning the respective screw clockwise, you move the camera away from the telescope, while turning it counterclockwise brings it closer. - Page 26 2. Very rarely tilt occurs directly in the camera; if the camera has not been hit hard, for example, has not fallen from a height. The sensor is permanently welded to the circuit board and this is tightened to the solid housing with screws.
- Page 27 If your tilt rotates with the camera, you will be able to transfer the correction set with the Tilt Corrector to a tilt plate or Astrodevice fi lter drawer and later use the camera without the Tilt Corrector. If, on the other hand, the tilt stays in place...
- Page 28 sharpen the star located in one of the corners. Use the coeffi cient obtained earlier to calculate what the physical diff erence in distance in millimeters is about the diff erence in sharpening between the center and corner star. Similarly, measure the distances for the other corners.
- Page 29 4. Take the picture again, sharpen the image in the center and check the result. If the shape in the corner has improved, continue adjusting until the result is satisfactory. If the shape has worsened, go back half a turn (90 degrees) and see if a smaller step improved the result.
- Page 30 - 31 - fi g. 30...
-
Page 31: Transferring Settings
Transferring settings Under certain conditions, it is possible to transfer the Tilt Corrector settings to the original tilt plate or fi lter drawer of the FD 900 M87. This process makes sense in two cases: 1. if the tilt originated in the camera (the tilt rotates with the camera), 2. - Page 32 Transferring settings to the original tilt plate Before proceeding, prepare a small piece of adhesive tape, and a cup, glass or similar cylindrical shaped object with a diameter of about 50 mm - 60 mm (a little more than 2 inches). 1.
- Page 33 fi g. 31 fi g. 32 - 34 -...
- Page 34 8. Remove the second M4x8 screw from the fi rst tab and screw in the fourth headless screw in its place. 9. Remove the second M4x8 screw from the second tab and screw the fi fth headless screw in its place. 10.
- Page 35 when you made the corrections with the Tilt Corrector. fi g. 33 fi g. 34 - 36 -...
- Page 36 fi g. 35 fi g. 36 - 37 -...
- Page 37 fi g. 37 fi g. 38 - 38 -...
- Page 38 Three headless screws for adjusting the tilt are permanently embedded in the Astrodevice fi lter drawer. The threads in which they are located are much tighter than in the original black tilt plate. If you have read the procedure for transferring settings to the tilt plate, you know that the headless screws should be screwed in so that they touch the camera surface.
- Page 39 fi g. 39 fi g. 40 - 40 -...
- Page 40 Note: In fi g. 40, the outline of the white strip under the drawer has been artifi cially applied to the photo to better illustrate its placement. 5. Adjust the position so that you can feel the resistance, but still be able to still slide the strip out from under the screw.
-
Page 41: Backlash Adjustment
Backlash adjustment In the Tilt Corrector, the S1, S2 and S2 screws used to adjust tilt are pressed by adjustment pins whose hex heads can be seen in the center of the B1, B2 and B3 bridges. At the factory, they are set so that the S1-S3 bolts can rotate about their own axis, but show no longitudinal play. - Page 42 Copyright 2022. All Right Reserved. Astrodevice is a registered trademark. www.astrodevice.com...
Need help?
Do you have a question about the TC 900 and is the answer not in the manual?
Questions and answers