Table of Contents
Advertisement
Available languages
Available languages
Quick Links
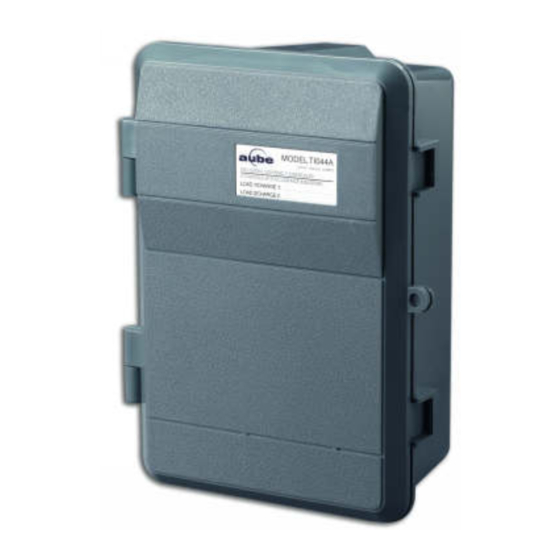
About your new timer
• Provides normally-open (NO) dry contacts to independently
control two loads:
• Load 1 follows a user-programmed schedule when placed in
automatic mode. The load can also be activated or
deactivated manually similar to the operation of a regular
switch. A single-pole switch can be connected to the timer to
control Load 1 similar to a 3-way installation. For example,
the timer can be installed outside whereas the switch can be
located remotely (e.g., inside the house).
• Load 2 always follows the sunset/sunrise program; i.e., it is
activated at sunset and deactivated at sunrise. It is usually
used for night lighting.
• Can be used in various applications (see table below)
Load type
Maximum load
3600 W
Resistive load
(30 A @ 120 V)
1200 W
Inductive load
(10 A @ 120 V)
Motor
1.5 hp @ 120 V
Installation
Cut power at the main electrical panel to avoid electric shock.
Open the TI044 door and remove the plastic cover to access the
mounting holes and wire terminals.
Install the TI044 to a vertical surface such as a wall by means of
three screws (not supplied).
WARNING: To prevent rain infiltration or any other liquid from
the top, the TI044 must be installed in the upright position as
shown above.
Remove the necessary knockouts at the bottom of the housing.
Install strain-relief bushings over the knockouts, pass the wires
through the bushings and secure them in place.
TI044
Examples
•
incandescent lights
•
halogen lights
•
block heaters
•
fluorescent lights
•
compact fluorescent lights (CFL)
•
sodium lamps
•
electronic ballasts
•
pumps
•
fans
Knock-out
Perform the connections as shown on the wiring diagram.
1.
NOTE: For a 3-way installation only, connect a regular single-
pole switch to the 3-way terminals of the timer as shown on the
wiring diagram.
Reinstall the plastic cover and apply power at the main electrical
panel.
Single-pole switch
(for 3-way installation)
Operation
Mode display
(applies to Load 1 only)
2.
Program number
3.1
First power-up
At power-on, 0:00 should flash. Otherwise, press reset using a paper
clip. If the display is blank, verify the power supply.
3.2
Load 1
Load 1 can operate in Manual or Automatic mode. To switch between
the two modes, press and hold the
Manual Mode
In Manual mode, the TI044 operates like a regular switch to control
Load 1. Briefly press the MODE button to activate or deactivate the
load. (If you have connected a remote switch to the timer for a 3-way
installation, the switch can also be used to activate or deactivate
Load 1.) The mode indicator (MAN) and the state (ON or OFF) are
displayed.
Installation and User Guide
Industrial Indoor/Outdoor Solar Timer
manual or
120 V
automatic
power
operation
supply
On/Off display
(applies to Load 1 only)
• Briefly press the button
to turn the load On or Off
(applies to Load 1 only).
• Press the button for 3
seconds to switch
between Automatic
mode and Manual mode
(applies to Load 1 only).
Insert a paperclip
to reset the timer.
sunset/sunrise program
MODE
button for 3 seconds.
TI044
night
lighting
3.
1/4
Advertisement
Table of Contents

Related Manuals for Aube Technologies TI044/U


Summary of Contents for Aube Technologies TI044/U
- Page 1 TI044 Installation and User Guide Industrial Indoor/Outdoor Solar Timer Perform the connections as shown on the wiring diagram. About your new timer NOTE: For a 3-way installation only, connect a regular single- pole switch to the 3-way terminals of the timer as shown on the •...
-
Page 2: Daylight Savings Time
Automatic Mode table is applicable, this information is usually available on the Inter- net. In Automatic mode, the TI044 controls Load 1 according to the programmed schedule (see section 6). The mode indicator (AUTO), NOTE: Add a minus sign when entering a south latitude coordinate or the state (ON or OFF) and the current program number are a west longitude coordinate. -
Page 3: Technical Specifications
Warranty P1 ON : 20:38 (sunset) P1 OFF : --:-- (blank) Honeywell warrants this product, excluding battery, to be free from defects in the workmanship or materials, under normal use and service, for a period of P2 ON : --:-- (blank) three (3) years from the date of purchase by the consumer. -
Page 4: Puerto Rico
CANADA MEXICO CITY LONG CITY LONG CITY LONG CITY LONG ABILENE LOUISVILLE BANFF -115 TIJUANA -117 ALBUQUERQUE -106 LUBBOCK -101 NOGALES -111 BURNABY -122 ALLENTOWN MACON CIUDAD JUAREZ -106 CALGARY -114 AMARILLO -101 MADISON MATAMOROS ANCHORAGE -149 MEMPHIS CAPE - DORSET NUEVO LAREDO ATLANTA MIAMI... -
Page 5: Opération
TI044 Mode d’installation et d’emploi Minuterie solaire et industrielle pour l’intérieure et l’extérieure Retirer les disques défonçables (knockouts) nécessaires sur la Applications partie inférieure du boîtier Poser des bagues anti-traction sur les entrées défonçables, • Munie des contacts normalement ouverts (NO) pour commander passer les fils dans les bagues et les fixer en place. -
Page 6: Régler L'horloge
Charge 1 (Load 1) Programmation de coucher et lever du soleil La charge 1 ( peut fonctionner en mode manuel ou en mode Load 1) automatique. Pour basculer entre les deux modes, appuyer sur la NOTA 1 : La charge 2 (Load 2) suit toujours l’horaire de coucher et touche pendant 3 secondes. -
Page 7: Fiche Technique
Programmation de l’horaire Fiche technique NOTA : Ne s’applique qu’à la charge 1. L’horaire programmé Alimentation : 120 Vca, 50/60 Hz n’affecte pas la charge 2. Celle-ci suit uniquement l’horaire de cou- Charge maximale : Voir la section 1 cher et lever du soleil. - Page 8 États-Unis États-Unis CANADA Mexique VILLE LONG VILLE LONG VILLE LONG VILLE LONG ABILENE LOUISVILLE BANFF -115 TIJUANA -117 ALBUQUERQUE -106 LUBBOCK -101 NOGALES -111 BURNABY -122 ALLENTOWN MACON CIUDAD JUAREZ -106 CALGARY -114 AMARILLO -101 MADISON MATAMOROS ANCHORAGE -149 MEMPHIS CAPE - DORSET NUEVO LAREDO ATLANTA...
Need help?
Do you have a question about the TI044/U and is the answer not in the manual?
Questions and answers
does the T1044 have a battery to keep the correct time in the event of a power failure, if so, what type of battery is needed and a how to change battery instructions?