Advertisement
Introduction
Input/Output: 12VDC to 24VDC, Ø2.1 DC Socket
Input: Max 5A - Output CH1:Max 2.5A /Output CH2:Max 2.5A
This product and all its components and accessories underwent multiple testing to ensure their quality and functionality. Please, before installation, make sure that all of the components of this product are available and undamaged.
For more information, visit our website www.aquatlantis.com.
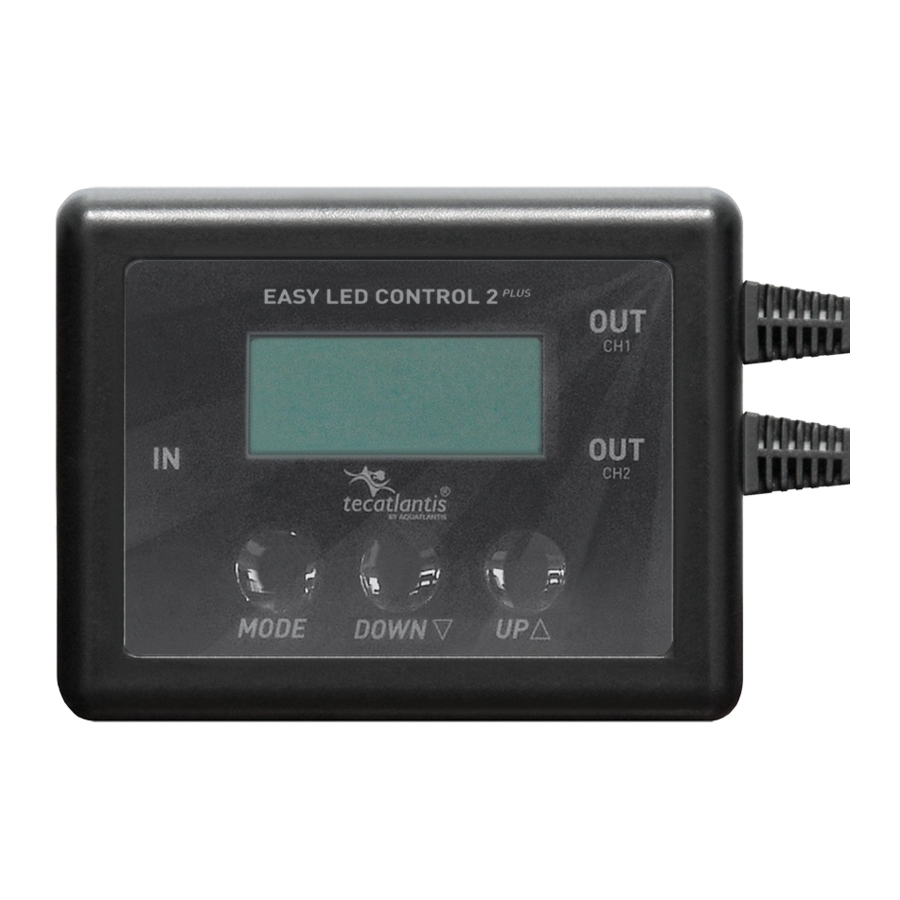
EASY LED CONTROL 2PLUS has 2 OUTput channels which can:
Connect independently two or more light units (with a Splitter cable*); OR connect an independent colours system up to a maximum of 2.5A per channel.
Examples, can control:
- 1 lamp with 2 colour circuits, each system up to 2,5A;
- 2 lamps, 1 per channel, up to 2,5A each;
- 3 lamps, 2 in a channel, up to 2,5A*+ 1 in a channel, up to 2,5A;
- Or 4 lamps, 2 per channel, up to 2,5A*.
* it must be used a Splitter cable (cod. 11146).
The Controller EASY LED 2 PLUS has two channels, each one with two programs.
Connect the cable of the lamp to the OUTput of the controller and then connect the cable of the transformer to the INput of the controller.
 ATTENTION!
The current intensity of the transformer must match the current intensity necessary for the lamps. For example: For two lamps of 2,5A each, it is necessary a transformer of 5A.
- The battery must be a lithium, rechargeable and LIR2032 3.6V.
- When the controller is running, it will charge the battery. Using a non-rechargeable battery, can lead serious problems, such as fluid leaks, fire or explosion hazard.
- Disconnect the controller from the outlet if it is not being used. If not, the controller continues operating, which means that the tension in the circuit is higher than in normal operation. In the long run, this extra tension may damage the components.
CONTROLLER CONFIGURATION
- Time setting
After connecting the interrupter, the screen of the controller shows the time. Perform the following steps to setup:- Pressing the "MODE" button, the display shows "SET TIME". Set the hour using the "DOWN" and "UP" keys. To set the minutes, press "MODE".
Always proceed this way on the following steps – pressing the "MODE" button after each operation.
- Pressing the "MODE" button, the display shows "SET TIME". Set the hour using the "DOWN" and "UP" keys. To set the minutes, press "MODE".
- Configuration of the programs
Channel 1- The display shows "CH 1 ON 1". Set the hour to turn on the program 1 of the first channel.
- The display shows "CH 1 OFF 1". Set the hour to turn off the program 1 of the first channel.
- The display shows "CH 1 ON 2". Set the hour to turn on the program 2 of the first channel.
- The display shows "CH 1 OFF 2". Set the hour to turn off the program 2 of the first channel.
Channel 2
- The display shows "CH 2 ON 1". Set the hour to turn on the program 1 of the second channel.
- The display shows "CH 2 OFF 1". Set the hour to turn off the program 1 of the second channel.
- The display shows "CH 2 ON 2". Set the hour to turn on the program 2 of the second channel.
- The display shows "CH 2 OFF 2". Set the hour to turn off the program 2 of the second channel.
- Regulation of the light intensity
- The display shows "LIGHT". Use the "DOWN" and "UP" keys for regulating the light intensity.
- Press "MODE". "SET END" indicates that the programming has been completed.
At the scheduled time, the light tube switches on gradually in proportion to the intensity of the light, up to one hour limit when the intensity is 100%.
Note: When using an EASY LED controller, the light unit will always turn on and turn off gradually, even in the event of interruption of the power supply. In this case, the setting is safeguarded.
By changing the light intensity during the defined cycle, the controller immediately assumes the schedule. By changing the light intensity outside the defined cycle, the light unit will turn off gradually in proportion with the defined intensity. We recommend you to switch off the controller and reconnect it to start the new programming immediately. The light unit will turn on gradually at the scheduled time.
Disposal
Dispose the product in accordance with the laws in force. Protect the environment.
Warranty
Aquatlantis ensures the product within the limits of the present clause and of the current legal regulation. This warranty is applied for 24 months from purchase only against any manufacturing faults. No compensation for any damage or loss will be granted. Any damage that occurs due to a misuse of the product or any of its parts invalidates the warranty. The returning cost of the faulty product is to be borne by the purchaser. In case of claiming your rights under the warranty, take the faulty product to the shop along with this certificate duly completed and the purchase receipt.

SCAN THIS CODE VISIT OUR WEBSITE
AQUATLANTIS SA
Rua Vasco da Gama 2Ap 42
4816-908 Lordelo GMR PORTUGAL

www.aquatlantis.com

info@aquatlantis.com

/aquatlantis

/aquatlantis

/aquariumaquatlantis

Documents / Resources
References
Download manual
Here you can download full pdf version of manual, it may contain additional safety instructions, warranty information, FCC rules, etc.
Download Aquatlantis Easy LED Control 2 PLUS - Tecatlantis Dimmer Switch Manual
Advertisement
Need help?
Do you have a question about the tecatlantis EASY LED CONTROL 2 PLUS and is the answer not in the manual?
Questions and answers