Advertisement
Introduction
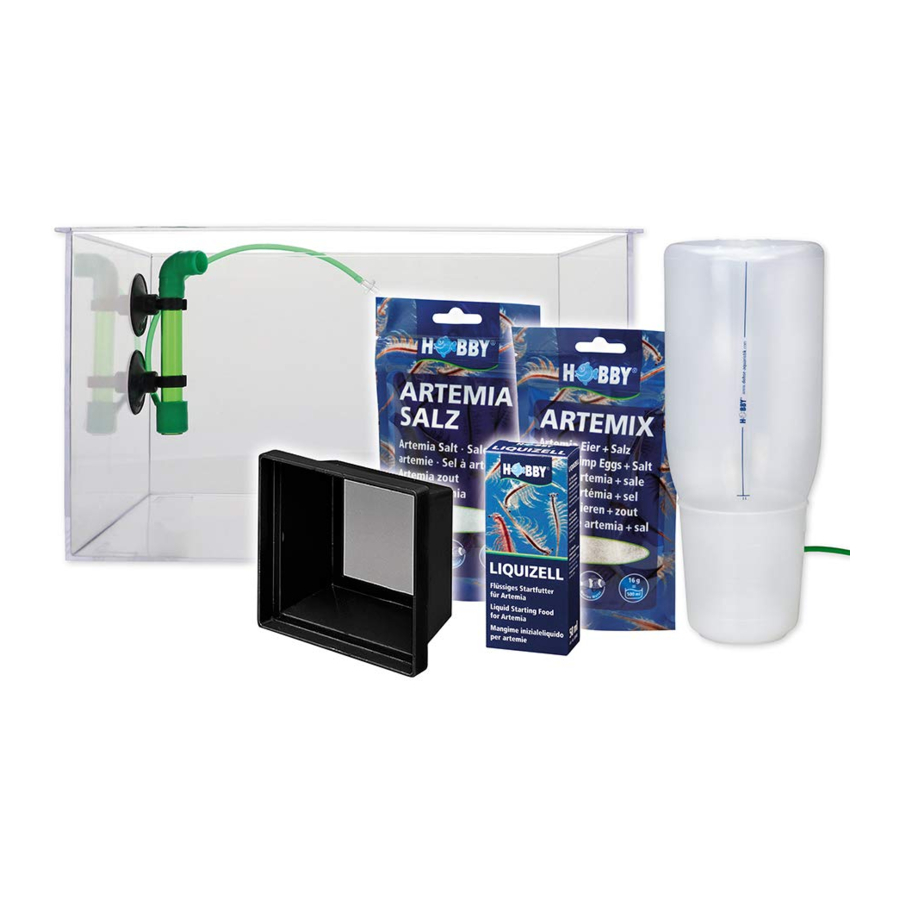
The Incubator Set  consists of: 1 Incubator, 1 container of Artemix, 1 container of Artemia Salt, 1 breeding container, 1 delivery pump, 1 container of Liquizell starting food and 1 Artemia siev. Both the Incubator and the Incubator Set are designed for use with an air pump (not supplied).
The lncubator ensures the successful hatching of your brine-shrimp eggs. Start by placing the incubator bottle on the bottle base. When doing so, ensure that the stopper is attached to the drain outlet. Now measure out two teaspoonfuls Artemix mixture of salt and eggs  and top up the bottle to the red line with tap water
  . Seal the Incubator bottle with the screw-in plug and push the air hose through the hole in the Incubator cup supplied
  . Attach the cup to the neck of the bottle. Now turn the bottle over and place it on the base of the cup, while lifting the air hose to prevent any water escaping.
Open the drain outlet stopper to permit the subsequent escape of air, and connect the air hose to the air pump. This should be suspended, or in any case kept higher than the lncubator to prevent water running into the pump when it is switched off  The nauplii, as young brine shrimps are known, hatch out after being kept at 24°C after approx. 24 – 36 hours (or after 30 – 40 hours at 20°C). Switch the pump off once the artemia nauplii have hatched and shut off the drain outlet once more with the stopper. Now turn the bottle over and unscrew the adapter.
Set up the incubator bottle at an angle in the breeding container, as shown in  , and let the remains of the artemia eggs sink to the bottom of the bottle. After letting the bottle stand for five minutes, open the stopper at the base and drain the nauplii off into the container
  . The hatched nauplii separate out automatically as the remains of the eggs accumulate on the conically-shaped walls of the bottle. The bottle containing sediment can now be removed
  .
.
Attach the delivery pump to the short side wall of the breeding basin using the suction cups and clips  . Ensure the feed pump does not touch the bottom of the breeding basin. Use the hose to connect the feed pump to the aquarium air pump, e.g. Bubble Air Pump 100, but do not connect to power yet.
Dissolve 4/5(ca. 130 g) of the container of Artemia Salt in 4 l of tap water and fill the breeding container with this solution. You can now connect the air pump. This helps keep the minute particles of nutrient algae in suspension, as even the finest particles will eventually sink under their own weight to the bottom of the tank, where the artemia nauplii would not be able to feed as easily.
The Incubator Set permits easy breeding of artemia at room temperature (note however that they grow more slowly when kept at below 15 – 20°C). Brine shrimps thrive successfully under either natural daylight or artificial light. Wait three days before adding the artemia starter-food Liquizell, adding it drop-by-drop only, as the water can otherwise easily tip over (see instructions supplied with Liquizell). Once the nauplii have been growing for a further five days – and their ability to masticate food is sufficiently developed – you can change their feed for Mikrozell.
Recommended Supplement


BUBBLE AIR PUMP
Bubble Air Pump 100 · Art.-Nr. # 00690
Bubble Air Pump 150 · Art.-Nr. # 00691
Bubble Air Pump 300 · Art.-Nr. # 00692
Bubble Air Pump 400 · Art.-Nr. # 00693
Dohse Aquaristik GmbH & Co. KG
Otto-Hahn-Str. 9 · 53501 Gelsdorf · Germany
Fon: +49 2225 94150 · Fax: +49 2225 946494
info@dohse-aquaristik.de · www.hobby-aquaristik.com
Dohse Aquaristik GmbH & Co. KG · www.hobby-aquaristik.com

Documents / Resources
References
Download manual
Here you can download full pdf version of manual, it may contain additional safety instructions, warranty information, FCC rules, etc.
Advertisement


Need help?
Do you have a question about the ARTEMIA and is the answer not in the manual?
Questions and answers