Advertisement
Overview


Note: Before installing carrier, clean all surfaces of vehicle which may come in contact with the carrier or its straps. Make sure foam pads are free of debris as it could scratch vehicle's finish.
Open Rack

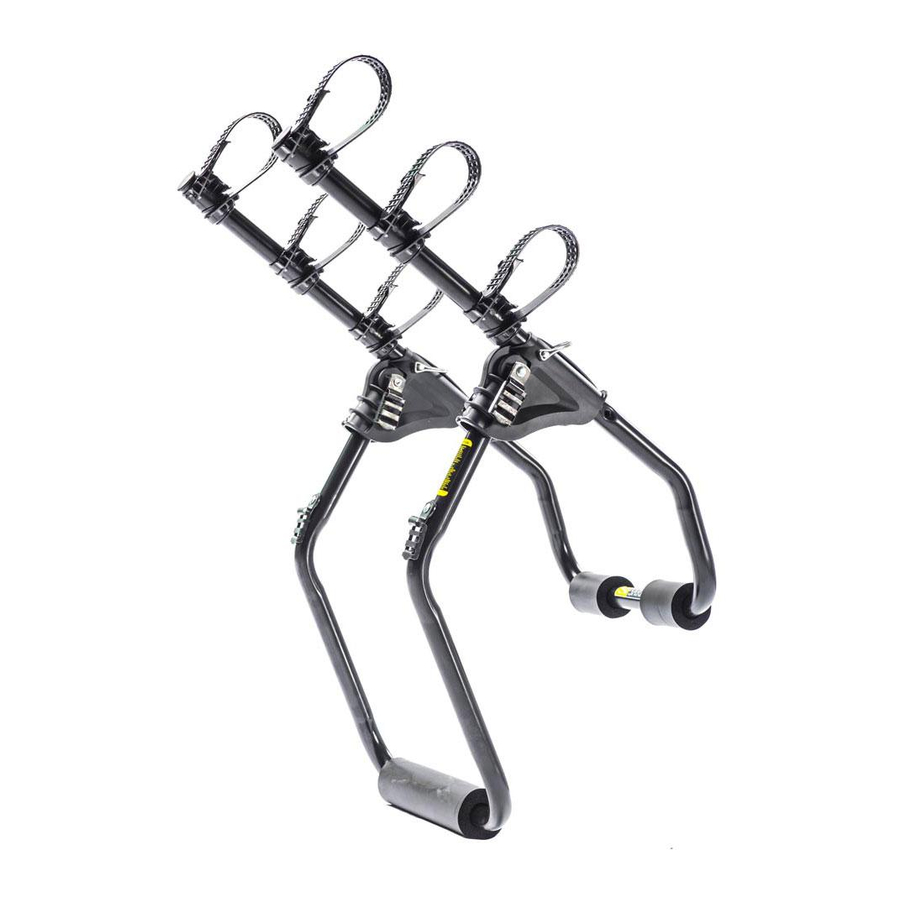
Selecting Proper Arm Position

Following the illustration, adjust upper leg using 1 of 3 available positions, such that the bike holding arms are level or angled slightly upward. Secure with clevis pin and place carrier on rear deck. Adjust holddowns for maximum clearance between bikes and car.
Adjusting Straps

Note: Hook attachment must be to a supported hinge line - NEVER glass, plastic, or roof rack.
S-hook application:

Attach S-hook straps to top hinge line of vehicle as shown in Fig. 4a. Always place strap between car surface and hook. NEVER bring strap over the top of hook (Fig. 4b).
S-hook special application:

If top hinge line has a rubber seal, use large bend in S-hook. To do so: remove strap from buckle, thread end of strap into either slot in the hook and pull through (Fig. 4c). Rethread strap as shown in Fig. 4d.

*Lower Strap Hook special application: ONLY IF SPECIFIED IN CURRENT FIT CHART:
Some vehicles required placing the lower strap hook completely inside the trunk. To do so: Loosen straps, place hooks in trunk, close trunk, pull straps until hooks brace against trunk wall and tighten as usual (Fig. 4e). Tighten all straps evenly, removing any slack. When straps are taut, shake carrier to check for movement. Retighten if necessary.
Load and Secure Bikes


Note: To aid in positioning of bicycles, hold-downs can be slid along arm tube.
Slide Bike hold-downs so they are spaced evenly on bike arms. Place bikes on carrier arms, alternating direction of handlebars(fig 5a). Rest cross tube in hold-down saddles.
- Pull hold-downs around cross tube and secure to tabs as shown in Fig. 5b.
- Retighten straps with bicycles on carrier.
- Knot all straps against buckles to prevent slipping(fig 5c).
To avoid damaging bicycles or vehicle, be certain potential contact areas are protected. We reccomend using part number 2060 (sold separately) see below.
Checking Bike Clearance / Fitting Unique & Women's Bikes

Check clearance. Carrier must rest high enough to allow bike tires at least 12" of ground clearance. If proper clearance cannot be attained, mount bicycles under the "V" in the frame for women and juvenile bikes.
Check Carrier Straps & Stability
- While in use, recheck your installation
- During first use (break-in period) check after 30 minutes or 30 miles
- Thereafter check every 200 miles
- Check more frequently on bumpy roads
- If bicycles shift or move, check IMMEDIATELY
Be sure all straps are taut and knotted firmly against buckles.
Accessories
Sold Separately, call 800-783-7257 for information.

2060 Protect-O-Pads
- Foam blocks separate and protect bikes and vehicles
- Set of 4 per package

3037 Bike Beam
Attaches from the seat post to stem of the bike creating the standard top tube of a men's style frame. Ideal for unique, women's & kid's small frames and bikes with over-sized tubes

3033 Wheel Stabilizing Strap
- Keeps handlebars from turning while in transit
- Keeps wheel from spinning
- Easy buckle closure (Two per package)

3035 Hatch Huggers
- Replaces our regular straps for vehicles with glass hinge lines and vehicles with narrow gaps around the trunk
Cautions

- All requirements for compatibility/ fit printed on box must be followed. If your vehicle is not listed, or you no longer have the box, call 800-783-7257 for assistance.
- Read and follow instructions carefully. Save owner's manual for future reference or parts information.
- Replace any mounting strap at the first sign of wear.
- S-hook straps must be in line with upper leg to prevent shifting.
- Make sure bike tires are not directly behind exhaust pipe.
- Never place more than two bicycles, total weight not to exceed 70 lbs. on Sentinel 2 or 3 bicycles not to exceed 105 lbs on Sentinel 3 on carrier. Secure properly and adjust for even load distribution. Mount heaviest bikes nearest car.
- Do not mount to any type of trailer.
- No part of carrier, including straps, should ever come in contact with spoiler.
- Do not open rear deck (trunk) with carrier installed.
- Make sure to secure front tire of bicycles to prevent them from coming in contact with vehicle or other bikes.
- Not intended for off-road use, and not to exceed 65mph.
- For questions, miscellaneous parts or vehicle fit information, call 800-783-7257.
Warning and Disclaimer

This carrier has been designed to carry bicycles on specific vehicles. Before installation, user must read and follow enclosed instructions. Fit recommendations are based on vehicle's standard features; optional features may affect the fit recommendations. User must attach carrier correctly to the vehicle, check its attachment before each use, and inspect carrier parts for wear. Carrier's attachment to the vehicle is critical and beyond the control of the manufacturer. Manufacturer and seller expressly disclaim any and all liability for personal injury, property damage or loss, whether direct, indirect, or incidental, resulting from the incorrect attachment, improper use, inadequate maintenance, or neglect of this carrier.
Warranty
We warrant this product to the first consumer to be free from defect in material and workmanship for a period of a lifetime. (Please retain your sales slip for your records.) Any product or part thereof found to be defective within that period will be replaced without charge provided that:
- the product was not misused;
- no alterations or modifications were made;
- its failure resulted from a defect in material or workmanship and not from normal wear expected in the use of the product;
- the product or part is delivered, freight prepaid, to Saris. Manufacturers only obligation shall be to replace such products or parts proved to be defective.

Documents / ResourcesDownload manual
Here you can download full pdf version of manual, it may contain additional safety instructions, warranty information, FCC rules, etc.
Advertisement


Need help?
Do you have a question about the Sentinel and is the answer not in the manual?
Questions and answers