Table of Contents
Advertisement
Advertisement
Table of Contents

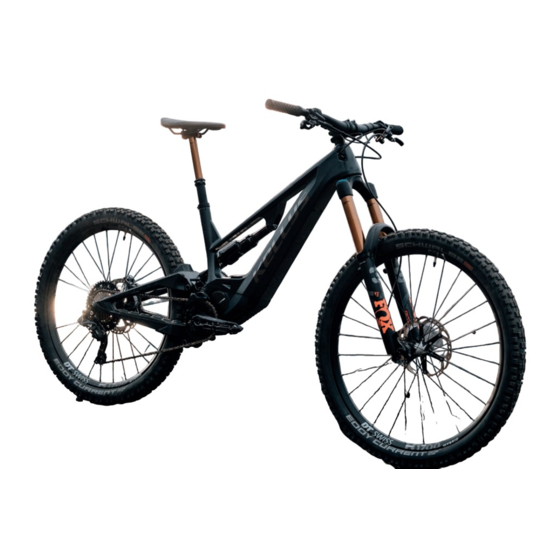
Summary of Contents for Kellys THEOS F100
- Page 1 OWNER’S MANUAL E-BIKE...
- Page 2 EXTEND WARRANTY OF YOUR KELLYS FRAME...
-
Page 3: What Is An E-Bike
KELLYS e-bikes can thus be used in Thank you for choosing a Kellys e-bike. To make sure you are happy with your e-bike and it is safe to road traffic just like other bicycles. - Page 4 OWNER'S MANUAL EBIKE CITY Saddle Shock 14. Head Parts 22. Rim Seatpost Battery 15. Handlebar 23. Carrier Seatpost Clamp Engine 16. Shifters 24. Fender (Quick-Release) 10. Crank 17. Brake Lever 25. Pedal Freewheel 11. Chainwheel 18. Stem 26. Display (Cassete Sprocket) 12.
- Page 5 EBIKE OWNER'S MANUAL Improper use or misuse can result in serious injury, death and material or other damage! TELESCOPIC SEATPOST If your e-bike is equipped with a Shimano Di2 electronic system, please refer to the Shimano website The adjustable (telescopic) seatpost is used to quickly adjust the saddle height according to the for technical information on this system: www.si.shimano.com.
-
Page 6: Important Notice
OWNER'S MANUAL EBIKE 1. Grease the dust caps and seals with Teflon oil. Check before tightening: • whether the individual parts of the head assembly fit together correctly 2. Check if any parts of the seatpost are damaged. If you find that any parts are worn or damaged, •... - Page 7 EBIKE OWNER'S MANUAL ASSEMBLY OF PEDALS If necessary, use KLS mounting paste for carbon components. Observe the tightening torques of the stem and handlebar bolts in case of over-tightening, there is a risk of damage to the frame and/ or clamp. The pedals are usually marked with the letters R – right pedal and L – left pedal on the axle of each pedal.
-
Page 8: Rear Derailleur
OWNER'S MANUAL EBIKE DERAILLEUR from the freewheel and counter-clockwise rotation moves the wheel closer to the freewheel. The proper distance is 5 – 6 mm. Check the correct setting by shifting from the second largest freewheel The derailleur shifts the chain on the rear hub freewheels, thus changing the gear ratio between the to the largest one. - Page 9 EBIKE OWNER'S MANUAL rear brake, press the left brake lever to operate the front brake. Turn the adjusting or Allen screw to bring the brake lever closer to the handlebars or, conversely, to increase its distance from the handlebars. The brakes are set by the manufacturer, so unless necessary, do not interfere with the braking system for your safety! Regularly check friction surfaces for wear, keep brake pads, calipers, and discs clean.
- Page 10 OWNER'S MANUAL EBIKE NOTICE DISC BRAKE The disc brake hydraulic system is filled with standard brake fluid or mineral oil. These brake fluids must not mix with each other. To add or replace brake fluid in the hydraulic brake system, only use the type of brake fluid recommended by the manufacturer! Changing the brake fluid, or replacing the hydraulic brake hose, requires skill and the right tools, so have this work carried out by qualified mechanics in a professional workshop.
-
Page 11: Suspension Fork
EBIKE OWNER'S MANUAL should rotate without any friction and play. If this is not the case even after adjustment with the help your e-bike excellent rideability. Despite these properties, under excessive overloading or impact, the of cones and lock nuts, it is necessary to disassemble the hub, clean the sliding paths of the balls and carbon structure can be damaged –... - Page 12 OWNER'S MANUAL EBIKE 2. AIR FORK The adjustment unit for locking the fork suspension is located at the top of the right fork leg. The lockout is controlled by a lever (marked Lockout). Turning clockwise will lock the fork suspension, The suspension hardness of air forks is set by inflating the air in the air chamber of the fork. The air turning anti-clockwise will unlock the suspension and the fork will operate in normal mode.
- Page 13 EBIKE OWNER'S MANUAL • Every 25 hours of operation (or always after riding in extreme conditions in wet environments such The damper pressure is adjusted according to the rider's operating weight. If it is an air shock as mud, wet sand): absorber, then the same setting parameters apply to the pressure as with air forks.
- Page 14 Never use high-pressure tools for cleaning! Kellys e-bikes are not specifically adapted for the use of a sidecar or trailer bikes. When using the above or similar accessories, follow the instructions of the manufacturer of the sidecar or trailer bike.
- Page 15 EBIKE OWNER'S MANUAL specification recommended by the manufacturer. If the bolts and nuts remain loose or if the product may occur. becomes damaged, the e-bike may suddenly fail during the ride, resulting in serious injury. 2. Select your preferred assist mode. Do not disassemble the product.
-
Page 16: Switching The Battery On And Off
OWNER'S MANUAL EBIKE operating instructions for the use of batteries and chargers. Make sure that children do not play with the battery. For your safety, please read this instruction manual thoroughly before use and follow it for proper use. Battery information: BATTERY Do not throw in the fire The battery is used to supply power to the drive system. -
Page 17: Safety Regulations
EBIKE OWNER'S MANUAL Do not use a battery with a faulty connection cable or faulty contacts. Do not charge the battery in places with high humidity or outdoors. Otherwise, electric shock may If you do not use the e-bike for a long time, remove the battery. occur. - Page 18 When not charging, always put the cover on the charging socket of the battery holder. TRANSPORT Kellys e-bikes use Shimano batteries or Kellys Re-charge batteries from BMZ Instructions and detailed information about the Shimano battery can be found on the si.shimano website.
- Page 19 EBIKE OWNER'S MANUAL KELLYS RE-CHARGE V10/K1 batteries CHARGE STATUS INDICATOR Capacity (nominal) 22,8 Ah Press to display the charge status. In the case of a rechargeable battery, the status can only be read on the control panel. Energy 820 Wh Rated voltage...
-
Page 20: Installation Of Battery
OWNER'S MANUAL EBIKE LABELLING INSTALLATION OF BATTERY Rechargeable Li-on Battery 10INR21/71-4 Max. Charge Current: 10 A Nominal Voltage: 36 V 1. Lock the lock 2. Insert the battery socket into the connector on Max. Charge Voltage: 42 V Nominal Enargy: 725 Wh BMZ Batherien-Montage-Zentrum GmbH Min. - Page 21 EBIKE OWNER'S MANUAL REMOVING THE BATTERY BATTERY FAULTS AND ERRORS 2. Lift the battery in the recess and then remove it 1. Unlock the lock Error: All LEDs flash and an error code is displayed towards the rear Solution: Damaged battery. Contact your specialist dealer. Error: One LED is flashing Solution: Charge the battery.
-
Page 22: Fire Prevention Measures
OWNER'S MANUAL EBIKE AFTER SWALLOWING conditions. Failure to do so may cause the battery to overheat, rupture or catch fire. If the contents of an open battery cell are swallowed, do not put anything in the mouth if the person WARNING quickly faints, is unconscious or has seizures. -
Page 23: Battery Charging
EBIKE OWNER'S MANUAL If the plug is wet, do not insert or remove it. Failure to do so may result in electric shock. If the plug is Do not use outdoors or in environments with high humidity. leaking water, dry it thoroughly before plugging it in. Do not charge the battery in places with high To avoid exposure to rain or wind, charge the battery indoors. - Page 24 Different chargers are used for Shimano and Kellys re-charge batteries. They differ in the light To verify that the charger is working properly, plug the charger into the mains. The green LED indicator indication of charging, charge and errors.
- Page 25 EBIKE OWNER'S MANUAL Shimano display Battery level indicator Bluetooth LE icon Appears when an external device is connected via Bluetooth Maintenance warning Indicates the need for maintenance. If this icon is displayed, please contact the place of purchase. Automatic/manual gear shifting [A][Automatic]: Displayed for automatic gear shifting, [M][Manual]: Displayed for manual gear shifting Display of gear position...
-
Page 26: System Start-Up
OWNER'S MANUAL EBIKE ASSIST MODE Use the buttons on the assist mode switcher on the left side of the handlebars to perform operations on the cycle computer screen and switch modes. HIGH (BOOST) NORMAL (TRAIL) Shimano control Left switch Right switch (default: to assist) (default: for electronic shifting) While riding: increase assistance... -
Page 27: Walk Assist Mode
EBIKE OWNER'S MANUAL NOTICE If you do not use the DOWN button for more than 1 minute, the mode will change to OFF. If the e-bike does not move when the walk assist function is switched on, the function will stop The riding range is only an approximate distance and may not correspond to the actual distance you automatically. -
Page 28: Battery Level Display
OWNER'S MANUAL EBIKE NOTICE 3. Info button Switches between displayed values (e.g. distance travelled) 4. Button with e-bike symbol (push assist) Do not switch the system on/off while riding. If you do not need assistance, select the OFF/NO ASSIST/ Switches on the e-bike push assist mode. To help push a e-bike with a heavy load up to level using the assist selection buttons. -
Page 29: Info Button
EBIKE OWNER'S MANUAL [CADENCE]: displays the crank speed while riding numerically (the charge drop display will be displayed in 1 % increments) Resetting the [TRIP], [AVG] and [MAX] values is possible by pressing and holding the information BUTTONS TO SELECT ASSISTANCE button until these values change to 0. - Page 30 OWNER'S MANUAL EBIKE option to change the value in the 1 000 place. The procedure is valid until you get to 1. Komoot smartphone setup • [BLUETOOTH] Type: Bluetooth version 5.0 o CPP o NAVIGATION If you have a compatible Bluetooth-enabled device connected to the display and the navigation function is supported, set [ON] to activate it and it will be displayed on the main screen.
- Page 31 EBIKE OWNER'S MANUAL Connecting a cycle computer In the Komoot app, in the "My devices" section, select the device with the name Panasonic and 6 numbers. Once clicked, device pairing starts. Select "Panasonic e-bike" from the options. Your device will start searching for an available device. When the connection is successful, "PAIRING SUCCESSFUL"...
-
Page 32: Preparing Your Device
OWNER'S MANUAL EBIKE Route setup Navigation display CONNECTION TO THE STRAVA APP The STRAVA: Run, Ride, Hike app is one of the largest social networks for recording and sharing sports activities. It is primarily used to record and share riding information. You can share your ride data among your friends and track your personal progress in your profile. - Page 33 When connecting, make sure that the plug to be connected is oriented correctly. Wi-Fi provider for information on pricing and mobile internet data volumes. KELLYS is not responsible If the device is connected to the cycle computer while riding the e-bike, keep the device securely for any discrepancies in the billing of these services.
-
Page 34: Restriction Of Use
Bluetooth® standards, but security may not be sufficient depending on the usage environment and setup details. Panasonic and Kellys bike company are not responsible for data and information leakage that occurs during wireless communication. - Page 35 EBIKE OWNER'S MANUAL Were you standing on the pedal when you pressed the power button? This is an error with the drive unit. • Turn off then turn on the Side Display on by pressing the power button • Contact your dealer for repair. without standing on the pedal.
-
Page 36: Diagnosis And Troubleshooting
If you receive an error message, you can resolve it by performing the corrections listed in the table. The error table can be found on the KELLYS website in the SUPPORT & MEDIA section. wheels are turned while walking, this will result in the e-bike having the rotation sensor activated. This can cause dangerous situations. - Page 37 All KELLYS e-bike paints are treated with an appropriate form of UV protection to ensure the highest possible colour fastness. The method of protection may vary depending on the material on which...
-
Page 38: Warranty Conditions
• The bicycle will be registered in the system of the company KELLYS BICYCLES s.r.o. on the web page caused by change of original components, other technical intervention to the bike’s frame;... - Page 39 This above-standard prolonged warranty period is a v oluntary act of the company KELLYS BICYCLES s. r. o. and any regulations of Civil Code or other commonly established legal enactments refer to it, but exclusively the conditions listed in this certificate of warranty, in the chapter „Prolonged warranty for...
- Page 40 OWNER'S MANUAL EBIKE RECOMMENDED ATIGHTENING COMPONENT BOLTS Component – position Torque [Nm] Rear wheel axle 8 - 12 Front wheel axle 8 - 12 Seatpost clamp (carbon fibre frame) 5 - 6 Stem (2 bolts of fork clamp) 5 - 6 Handlebar stem (handlebar clamp) 5 - 6 Shimano cranks (star bolt)
- Page 41 EBIKE OWNER'S MANUAL...
- Page 42 WARRANTY CARD / GARANTIEURKUNDE / SCHEDA DI GARANZIA / GARANTÍA / CARTE DE GARANTIE / KARTA GWARANCYJNA / ZÁRUČNÍ LIST / ZÁRUČNÝ LIST / JÓTÁLLÁSI JEGY PRICE MODEL NAME PREIS MODELBEZEICHNUNG PREZZO NOME MODELLO PRECIO MODELO PRIX NOM DU MODELE CENA NAZWA MODELU ÁR...
- Page 43 Warranty Checks Garantiekontrolle Controlli di garanzia Revisión de garantía OWNER (NAME, ADDRESS) Contrôles de garantie BESITZER (NAME, ADRESSE) Przegląd gwarancyjny PROPIETARIO (NOMBRE, APELLIDO, DIRECCIÓN) Garanční prohlídka PROPRIETARIO (NOME, INDIRIZZO) Záručná prehliadka PROPRIÉTAIRE (NOM, ADRESSE) Garanciális vizsga WŁAŚCICIEL (NAZWYSKO I IMIĘ, ADRES ZAMIESZKANIA) MAJITEL (JMÉNO, PŘÍJMENÍ, BYDLIŠTE) Summary of performed actions / Kurze Beschreibung der ausgeführten Leistungen / Riepilogo delle MAJITEĽ...
- Page 44 Warranty Checks Warranty Checks Garantiekontrolle Garantiekontrolle Controlli di garanzia Controlli di garanzia Revisión de garantía Revisión de garantía Contrôles de garantie Contrôles de garantie Przegląd gwarancyjny Przegląd gwarancyjny Garanční prohlídka Garanční prohlídka Záručná prehliadka Záručná prehliadka Garanciális vizsga Garanciális vizsga S ummary of performed actions / Kurze Beschreibung der ausgeführten Leistungen / Riepilogo delle Summary of performed actions / Kurze Beschreibung der ausgeführten Leistungen / Riepilogo delle operazioni eseguite / Resumen de las operaciones realizadas / Résumé...
- Page 45 Warranty Checks Warranty Checks Garantiekontrolle Garantiekontrolle Controlli di garanzia Controlli di garanzia Revisión de garantía Revisión de garantía Contrôles de garantie Contrôles de garantie Przegląd gwarancyjny Przegląd gwarancyjny Garanční prohlídka Garanční prohlídka Záručná prehliadka Záručná prehliadka Garanciális vizsga Garanciális vizsga S ummary of performed actions / Kurze Beschreibung der ausgeführten Leistungen / Riepilogo delle Summary of performed actions / Kurze Beschreibung der ausgeführten Leistungen / Riepilogo delle operazioni eseguite / Resumen de las operaciones realizadas / Résumé...
- Page 46 REPAIR RECORDS / AUFZEICHNUNGEN REPARIEREN / REGISTRI DI RIPARAZIONE / REGISTROS DE REPARACIÓN / DOSSIERS DE RÉPARATION / PROTOKOŁY NAPRAW / ZÁZNAMY O OPRAVÁCH / SZERVIZNAPLÓ...
- Page 47 WARRANTY CARD / GARANTIEURKUNDE / SCHEDA DI GARANZIA / GARANTÍA / CARTE DE GARANTIE / KARTA GWARANCYJNA / ZÁRUČNÍ LIST / ZÁRUČNÝ LIST / JÓTÁLLÁSI JEGY...
- Page 48 REPAIR RECORDS / AUFZEICHNUNGEN REPARIEREN / REGISTRI DI RIPARAZIONE / REGISTROS DE REPARACIÓN / DOSSIERS DE RÉPARATION / PROTOKOŁY NAPRAW / ZÁZNAMY O OPRAVÁCH / SZERVIZNAPLÓ...
- Page 49 WARRANTY CARD / GARANTIEURKUNDE / SCHEDA DI GARANZIA / GARANTÍA / CARTE DE GARANTIE / KARTA GWARANCYJNA / ZÁRUČNÍ LIST / ZÁRUČNÝ LIST / JÓTÁLLÁSI JEGY...
- Page 50 REPAIR RECORDS / AUFZEICHNUNGEN REPARIEREN / REGISTRI DI RIPARAZIONE / REGISTROS DE REPARACIÓN / DOSSIERS DE RÉPARATION / PROTOKOŁY NAPRAW / ZÁZNAMY O OPRAVÁCH / SZERVIZNAPLÓ...
- Page 51 WARRANTY CARD / GARANTIEURKUNDE / SCHEDA DI GARANZIA / GARANTÍA / CARTE DE GARANTIE / KARTA GWARANCYJNA / ZÁRUČNÍ LIST / ZÁRUČNÝ LIST / JÓTÁLLÁSI JEGY...
- Page 52 Product name: Electric bicycle PEDELEC EN 15194:2017 Cycles. Electrically power assisted cycles. EPAC bicycles; Model: ISO 4210-2 Cycles. Safety requirements for THEOS F100 THEOS RX100 THEOS R100 ESTIMA COMP 100 THEOS F90 THEOS RX90 THEOS R90 ESTIMA COMP 90 bicycles...
- Page 54 OWNER’S MANUAL E-BIKE ©KELLYS BICYCLES All rights reserved. KELLYS and KELLYS BICYCLES are protected trademarks of Kellys group. KELLYSBIKE.COM I kellys@kellysbike.com...
Need help?
Do you have a question about the THEOS F100 and is the answer not in the manual?
Questions and answers