Table of Contents
Advertisement
Quick Links
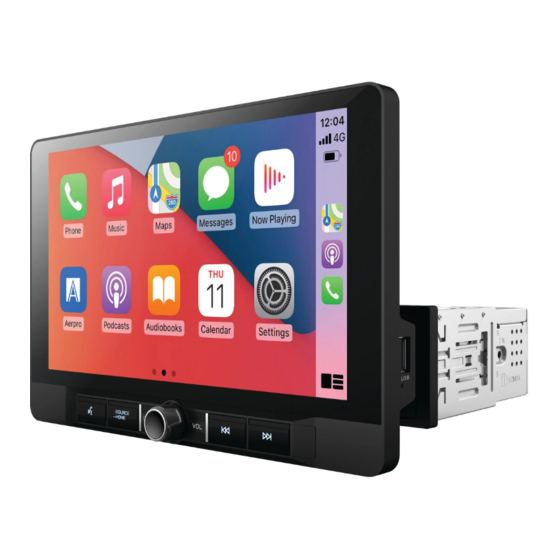
9" FLOATING MULTIMEDIA RECEIVER
Wireless Apple CarPlay & Android Auto
INSTALL/USER MANUAL
Android Auto and Apple CarPlay is not owned or controlled by any car manufacturer and are not
responsible for the privacy practices of third parties or the terms and conditions under which they offer
such products. We strongly encourage you to read the Android Auto or Apple CarPlay privacy policies
and terms and conditions to make sure they are acceptable to you.
INCLUSIONS: Head unit, GPS antenna, microphone, wiring harness,
mounting sleeve, trim ring, release keys, side panel covers, AV cable & screws
DISCLAIMER: We recommend using an Authorised Dealer that offers an installation service
to install this product. Never cut or modify a harness as this could damage the head unit and
vehicle, as well as void the warranty of the product.
AM9XFW
Android Auto, Google Play, Android, are registered trademarks of
Google, Inc. Bluetooth is a registered trademark of Bluetooth SIG, Inc.
Apple, Apple Car Play, Apple iPhone, Apple Music and Siri are registered
trademarks of Apple, Inc.
TM
Advertisement
Table of Contents

Related Manuals for Aerpro AM9XFW

Summary of Contents for Aerpro AM9XFW
- Page 1 9” FLOATING MULTIMEDIA RECEIVER Wireless Apple CarPlay & Android Auto INSTALL/USER MANUAL AM9XFW Android Auto, Google Play, Android, are registered trademarks of Google, Inc. Bluetooth is a registered trademark of Bluetooth SIG, Inc. Apple, Apple Car Play, Apple iPhone, Apple Music and Siri are registered trademarks of Apple, Inc.
-
Page 2: Installation
INSTALLATION Step #1 Adjusting the LCD Extension (optional) • Depending on the vehicle, it may be necessary to use the LCD extension to adjust the screen position when mounting the unit. The default setting is all the way forward, but if adjustment is necessary, the following steps show how to adjust it to the desired position. - Page 3 INSTALLATION Step #2 Install Mounting Sleeve and Trim Ring 1) Install the mounting sleeve into a dash kit (sold separately) or dash opening, bending the tabs to secure the mounting sleeve. 2) Connect the wiring harness, microphone and antenna to the chassis of the headunit. 3) Snap trim ring into place making sure the notched area is on the bottom.
- Page 4 INSTALLATION Step #3 Connecting the LCD to the Head Unit • To connect the LCD to the unit, carefully push the LCD wiring harness into the LCD connector of receiver's chassis as shown below. • Use the hinge hooks on the back of the monitor to hold the LCD in place.
- Page 5 INSTALLATION Step #4 Securing the LCD • Once the LCD is on the hinge hooks (step #3), use 2 hands to rotate the LCD 90° to the left, and secure one side using 2 LCD mounting screws. Then rotate the LCD to right 90° and secure the other side using the additional 2 LCD mounting screws.
- Page 6 INSTALLATION Step #4 Side Panel Covers • Once all four screws have been fastened, cover the LCD extension areas with the side panel covers to complete youre installation. Note: There are three cover options. One to fit each of the three LCD depth extension settings.
- Page 7 WIRING DIAGRAM - INPUTS/OUTPUTS GPS antenna...
-
Page 8: Interface Icons
• Steering wheel control ready • Rear A/V input • External microphone included • 4V / 6CH RCA Preout • Hema Maps Ready, Aerpro AMHXD3 Integrated Navigation Module required • MP3 / AAC / FLAC / MPEG 1,2,4 Media formats (sold separately) ©... -
Page 9: Radio Mode
RADIO MODE To enter Radio Mode, touch “Radio” icon on the Main Menu Home screen/back button Seek down Radio frequency Seek up Display On/Off AF and TA settings FM Band button AM Band button Auto Store button EQ Mode button Keypad button Preset station list Auto Tuning... - Page 10 MEDIA PLAYING MODE This operation allows you to play various compatible formats. Touch the icon to return to previous track or press and hold the icon to fast rewind Touch the icon to play or pause the track Touch the icon to go to next track or press and hold the icon to fast forward Touch the end of the progress bar line and drag it left or right to the desired track time Touch the icon to repeat a folder or track...
-
Page 11: Bluetooth Mode
• This unit can be paired with 5 mobile phones, but only one can be active at a time. • The unit Bluetooth name is AERPRO 5 5 5 5 5 5 6 Touch the icon to enter pairing mode... - Page 12 CONNECTED DEVICES SCREEN Touch the icon to access the connected devices screen This screen displays paired devices and allows the user to turn Android Auto/Apple Carplay or other bluetooth features on or off. (If applicable to the device) Paired devices Apple Carplay activate/deactivate Android Auto activate/deactivate Bluetooth calling activate/deactivate...
-
Page 13: Setup Menu
SETUP MENU Setup menu allows you to change the settings within unit, General, Display, Audio and Others General Touch “General” on the Setup Menu • display for general settings Setting Options Functions Date Day / Month / Year Select to adjust calendar date Time Time Time... - Page 14 SETUP MENU Audio • Touch “Audio” on the Setup Menu display for audio adjustment settings Setting Options Functions Equalizer Balance and EQ setting Time Alignment Default / Presets / Reset Speaker delay Sub filter settings Subwoofer Filter On / Off On / Off Sound boost Loudness...
- Page 15 SETUP MENU Display • Touch “Display” on the Setup Menu display, then select a feature you want to adjust. * Requires an illumination wire to be present in the vehicle (Usually orange wire in ISO harness needs to have a connection) Setting Options Functions...
- Page 16 3. A pair message and a pairing request code may appear on your compatible device and head unit. Click allow to accept 4. An ‘Allow CarPlay with Aerpro while phone is locked’ message may appear on your device. Click allow to accept 5.
- Page 17 1. Before using Android Auto wirelessly, turn on the Bluetooth and WiFi function on the compatible device. 2. Navigate to the Bluetooth settings on your compatible device and select Aerpro for pairing 3. A pair message and a pairing request code may appear on your compatible device and head unit.
- Page 18 HOW TO USE CARPLAY ® Requirements • Lightning Data Cable • iPhone 5 or later • iPhone with iOS 7.1 or later • Data Plan for in app content • Siri activated Phone Setup (Before you begin): 1. Apple CarPlay ® features may operate differently than on your Apple iPhone ® 2.
-
Page 19: Using Siri
USING SIRI ® Apple CarPlay uses Siri to perform many actions like sending messages, placing calls, and looking up/setting POI/Destinations. A Siri session can be initiated on any screen • Touching and holding the Home icon on the CarPlay screen or •... - Page 20 HOW TO USE ANDROID AUTO ® Requirements • USB Data Cable • Compatible Android® phone with OS Android 6.0 or higher • Data Plan for in app content • Wireless Android Auto requires 5GHz(802.11/ac) Wi-Fi support (refer to page 18 of this manual) •...
-
Page 21: Specifications
8 Band Loudness LPF - Frequencies (Sub) 8 Preset EQs Other Features Steering Wheel Control Yes, with Aerpro SWC Adaptor Accessories Power Harness Yes with ISO / 3.5mm jack AV-In Cable (RCA with Audio L/R, Video In) Reverse Camera Input 4.2CH Audio Out Cable... -
Page 22: Faq & Troubleshooting
FAQ/TROUBLESHOOTING My Android phone will not connect wirelessly to the head unit • Your mobile phone must be a compatible Android phone with an active data plan, 5 GHz Wi-Fi support (802.11/ac), and the latest version of the Android Auto app. •... -
Page 23: Safety Information And Warnings
TECHNICAL ASSISTANCE Please retain this user guide for future reference. If you would like to download a digital copy of this manual, or other Aerpro manuals/software, please visit the Aerpro.com website and search for information on your model. This quick start guide is considered correct at time of printing but is subject to change.
Need help?
Do you have a question about the AM9XFW and is the answer not in the manual?
Questions and answers