Table of Contents
Advertisement
Quick Links
Advertisement
Table of Contents

Related Manuals for Z-CAM ZOLAR Vega 30C

Summary of Contents for Z-CAM ZOLAR Vega 30C
- Page 1 Vega 30C User Manual...
-
Page 2: Preface
Please read this document carefully in order to understand the ZOLAR™ Vega 30C (hereinafter referred to as Product) and use it reasonably. Refer to the o cial website (www.z-cam.com/zolar) for the latest version of this document and updated product information. -
Page 3: Table Of Contents
MENU Preface Safety Guideline Safety Warning Disclaimar Product Description Product Description Product Highlight Product Overview Main Unit Main Unit Controller Remote Controller Packing List Ready To Use Installation Power Supply Start Up Menu Operation Remote Controller Connection Mobile App Bluetooth® Connection Wi-Fi Connection Firmware Upgarde Operation Guide... - Page 4 Light Control ZolarLink Multi Light Sync Indicator Status Settings Accessories ZOLAR™ Stylist 32x32 ZOLAR™ Barndoor 32x32(Optional Accessory) ZOLAR™ SoftBox Accessory Kit 32x32(Optional Accessories) Product Specifications Photometric data Warranty Policy Warranty Scope Warranty Period Warranty Arrangement Limited Warranty FCC Compliance Statement RF Warning Statement Version 1.0.0 Copyright ©...
-
Page 5: Product Description
ZOLAR™ Vega 30C User Manual Product Description Product Description ZOLAR™ professional LED lighting system is developed by Shenzhen ImagineVision Technology Limited, the same successful team that created Z CAM Cinema Cameras. ZOLAR™ products are de- veloped with profound color science knowledge, leading image processing algorithms, as well as camera lens and sensor calibration expertise. -
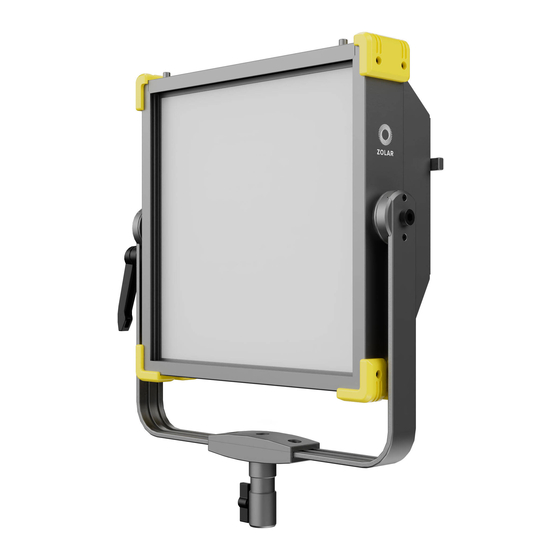
Page 6: Product Overview
ZOLAR™ Vega 30C User Manual Product Overview Main Unit Front Rear 1 . Corner Guard 2. 3x ZOLAR Stylist Slot Tilt Lock Clamping Lever 4. Yoke Mount Hand Knob Swivel Screw Clamp Spigot Vent Holes Quick Release Button V-Mount Plate 10. -
Page 7: Main Unit Controller
ZOLAR™ Vega 30C User Manual Main Unit Controller [16] Main Unit Controller 24. Main Unit Controller LCD Screen 25. Indicator 26. Rotary Encoder 27 . Mode Button 28 . Menu Button 29. Favorite Button 30. F3 Button 31 . F2 Button 32. -
Page 8: Psu
ZOLAR™ Vega 30C User Manual Power Supply Unit Front Left Bottom 33. PSU Handle 34. Corner Guard 35. V-Mount Battery Plate 36. Quick Release Button 37 . V-Mount Clip 38. AC Input 39. AC Loop Out 40 . Battery Power Output 41 . -
Page 9: Remote Controller
ZOLAR™ Vega 30C User Manual Remote Controller Front Right Bottom 43. Remote Controller LCD Screen 44. Rotary Encoder 45. Left Button 46. F1 Button 47 . F2 Button 48. Mode Button 49. Right Button 50. F3 Button 51 . Menu Button 52 . -
Page 10: Packing List
ZOLAR™ Vega 30C User Manual Packing List Before using this product, please check that the package contains all of the following items. If not, please contact your sellers immediately. ZOLAR Stylist W - Side A ZOLAR Stylist W 32x32 Main Unit 1 pc CN Plug UK Plug... -
Page 11: Ready To Use
ZOLAR™ Vega 30C User Manual Ready To Use Installation 1 . Rotate Tilt Lock Clamping Lever [03] to adjust the inclination between Main Unit and Yoke Mount [04]. Rotate anti-clockwise to loosen and clockwise to tighten. Angle of inclination is adjustable ±360°;... -
Page 12: Power Supply
ZOLAR™ Vega 30C User Manual Power Supply Power Supply Unit PSU can be mounted onto the Main Unit through V-Mount Clip [37] and V-Mount Plate [09] . Graphic: PSU Installation Using AC Power 1. Connect one end of the DC Power Cable (3-Pin) [56] to the DC Power Output [42] of the PSU, and the other end to the Power Input [19] of the Main Unit;... - Page 13 ZOLAR™ Vega 30C User Manual Using Battery* 1. Mount V-Mount battery onto V-Mount Battery Plate [35] of the PSU, one on each side; 2. Push gently downwards and lock into position; 3. Connect one end of the Battery Power Cable (4-Pin) [57] to the Battery Power Output [40] of the PSU, the other end to the Battery Input [18] of the Main Unit;...
-
Page 14: Start Up
ZOLAR™ Vega 30C User Manual Start Up 1. Verify power supply connection; 2. Turn Power Switch [41] on the PSU to “ | ” position; 3. Turn Power Switch [17] on the Main Unit to “ | ” position; 4. To power o , simply turn Power Switch [17] on the Main Unit to “ O ” position; 5. -
Page 15: Mobile App
ZOLAR™ Vega 30C User Manual Mobile App ZOLAR™ Mobile App (iOS & Android) Scan the corresponding QR code below to download and install ZOLAR™ Mobile app, then use Bluetooth or Wi-Fi to connect and control the Main Unit. App Store (iOS) Google Play (Android) Bluetooth®... -
Page 16: Wi-Fi Connection
ZOLAR™ Vega 30C User Manual Wi-Fi Connection Screw in the antenna clockwise to the Antenna Port [22]. Download and install ZOLAR™ Mobile App. 1 . Connect Main Unit to wireless router (2.4GHz frequency band only) a) Press Menu Button [28] on the Main Unit Controller [16] during standby mode to enter menu; b) Rotate Rotary Encoder [26] to select “Wi-Fi”... -
Page 17: Operation Guide
ZOLAR™ Vega 30C User Manual Operation Guide (CCT) Mode Correlated Color Temperature CCT Mode is a simple white light control mode that controls CCT and Intensity, also provides a balance adjustment of the Green-Magenta hue. Correlated Color Temperature Adjustment 1. Press Mode Button [27] on the Main Unit Controller [16] during standby mode, rotate Rotary Encoder [26] to select CCT, press to enter CCT menu;... - Page 18 ZOLAR™ Vega 30C User Manual Intensity Adjustment 1. Press F3 Button [30] on the Main Unit Controller [16] during CCT Mode to enter Intensity adjustment mode; 2. Rotate Rotary Encoder [26] clockwise to increase intensity. Each click increases 0.1%. Highest value is 100%;...
-
Page 19: Hsi Mode
ZOLAR™ Vega 30C User Manual HSI Mode HSI Mode is used to control Hue, Saturation and Intensity. Hue Adjustment 1. Press Mode Button [27] on the Main Unit Controller [16] during standby mode, rotate Rotary Encoder [26] to select HSI, press to enter HSI menu; 2. -
Page 20: Xy Coordinate Mode
ZOLAR™ Vega 30C User Manual xy Coordinate Mode xy Coordinate Mode determines the color displayed in the CIE 1931 color gamut by adjusting the xy coordinate value. The Intensity can be adjusted as usual. x Coordinate Adjustment 1. Press Mode Button [27] on the Main Unit Controller [16] during standby mode, rotate Rotary Encoder [26] to select xy Coordinate Mode, press to enter xy Coordinate menu;... -
Page 21: Gel Mode
ZOLAR™ Vega 30C User Manual Gel Mode Gel mode provide a rich list of gels. There are two settings for color temperature, 3,200K and 5,600K. The Intensity can be adjusted as usual. Gel Selection 1. Press Mode Button [27] on the Main Unit Controller [16] during standby mode, rotate Rotary Encoder [26] to select Gel Mode, press to enter Gel menu;... -
Page 22: Source Matching
ZOLAR™ Vega 30C User Manual Source Matching Mode Source Matching Mode provide a rich list of specific light sources to quickly simulate the color and spectrum of the light source. The Intensity can be adjusted as usual. Light Source Selection 1. -
Page 23: Rgbw Mode
ZOLAR™ Vega 30C User Manual RGBW Mode RGBW Mode is used to adjust the ratio of the four channels of red, green, blue and white. The Intensity can be adjusted as usual. RGBW Adjustment 1. Press Mode Button [27] on the Main Unit Controller [16] during standby mode, rotate Rotary Encoder [26] to select RGBW, press to enter RGBW menu;... -
Page 24: Light E Ect
ZOLAR™ Vega 30C User Manual Light E ect ZOLAR™ built in light e ect library consists of commonly used light e ects on-set production and in TV broadcast studios. Ideal substitute for special light e ect equipment. List of light e ects: ·... - Page 25 ZOLAR™ Vega 30C User Manual Select light e ect either directly on the Main Unit Controller menu, or through Art-Net / sACN. Each light e ect can be set individually. Settings of e ect can be saved in Favorite for quick retrieval. 1.
-
Page 26: Light Control
ZOLAR™ Vega 30C User Manual Light Control Dimming Curve ZOLAR™ Vega 30C supports four Dimming Curves, the Dimming Curves are overall situation and can be controlled through the main unit menu, Art-Net / sACN or DMX. · Exponential (default setting): The dimming precision is higher at lower intensity and lower at higher intensity. -
Page 27: Zolarlink Multi Light Sync
ZOLAR™ Vega 30C User Manual ZolarLink - Multi Light Sync ZolarLink multi light wireless sync technology adopts the self-developed intelligent response synchronization structure, which does not need to be connected to the network one by one, and does not need to use any computer or mobile phone device. It can set up to 16 groups of ID tags, each ID tag supports up to 60 slaves, providing an unprecedented e cient and new convenient experience for the synchronous interconnection of multiple lights. - Page 28 ZOLAR™ Vega 30C User Manual Tip: If all slaves (without changing the default group ID) are power on at the same time for initial pairing: 10 units: about 48 seconds* 20 units: about 1 minute 52 seconds* 30 units: about 2 minutes 55 seconds* 40 units: about 5 minutes and 10 seconds* 50 units: about 6 minutes* It is recommended that the number of paired slaves should not exceed 10 at the same time in each round,...
- Page 29 ZOLAR™ Vega 30C User Manual 4. ZolarLink Group Management Support up to 16 "group IDs" for master-slave connection for group management; a) Make sure that when the master and the slave are connected, they are kept within 3 m; b) Select one as the master, turn o the power, the M-I-S Selector [21] to select the M position; turn o the power, the Indicator [25] flashes in magenta;...
- Page 30 ZOLAR™ Vega 30C User Manual Slave Slave Group ID: 0 Master Master More Slaves Slave Slave Group ID: 1 Master More Slaves Group ID: 2~14 Slave Slave Group ID: 15 Master More Slaves Graphic: ZolarLink - Group Management Version 1.0.0 Copyright ©...
-
Page 31: Indicator Status
ZOLAR™ Vega 30C User Manual 5. ZolarLink Signal Check If there is a significant delay in slave synchronization when the master changes settings, please refer to the following steps: a) Press the Menu Button [28] on the Main Unit Controller [16] of the master to enter the menu list, rotate Rotary Encoder [26], select "ZolarLink", press it to enter the "ZolarLink"... -
Page 32: Settings
ZOLAR™ Vega 30C User Manual Settings View Information You can view various information about the current device. Include power voltage, temperature, device usage, light usage, calibrated, firmware version, and serial number. Check it out as follows: 1. On the standby interface of the Main Unit Controller [16], press the Menu Button [28] to enter the menu list;... - Page 33 ZOLAR™ Vega 30C User Manual Fan Setting 1. On the standby interface of the Main Unit Controller [16], press the Menu Button [28] to enter the menu list; 2. Rotate Rotary Encoder [26], select "Settings", and press to enter the "Settings" menu; 3.
-
Page 34: Accessories
ZOLAR™ Vega 30C User Manual Accessory ZOLAR™ Stylist 32x32 ZOLAR™ Stylist accessories are precision directional light-transmitting super-penetrating panels that can be easily placed in front of the LEDs to control the beam angle, while providing a soft light e ect without color shift. After installed, accessories such as ZOLAR™ Barndoor or ZOLAR™ Softbox can be added to further shape the light to achieve the desired e ect. - Page 35 ZOLAR™ Vega 30C User Manual Insert ZOLAR™ Stylist 32x32 1. Gently push the slide latch [23] inwards to the unlocked position; 2. Flip the top frame up to reveal the 3x ZOLAR™ Stylist Slots [02]; 3. Slowly insert the ZOLAR™ Stylist accessories along the slot, and pay attention to whether the side A and B are in the correct direction;...
-
Page 36: Zolar™ Barndoor 32X32(Optional Accessory
ZOLAR™ Vega 30C User Manual ZOLAR™ Barndoor 32x32 (Optional Accessory) ZOLAR™ Barndoor is a professional cinema-grade blackout accessory, which is placed in front of the main unit. It uses the opening angles of the four leaves to e ectively control the light spread and beam direction, providing users with convenient and professional light control e ects. - Page 37 ZOLAR™ Vega 30C User Manual Install the ZOLAR™ Barndoor velcro 1. Cut the Velcro to the specified length and paste it as shown;; 2. Tear o the velcro sticker on the Barndoor; 3. Connect the Blackout Cloth to the Main Unit and the Barndoor to prevent light leak. Left - 100mm Top - 210mm Right - 100mm...
-
Page 38: Zolar™ Softbox Accessory Kit 32X32(Optional Accessories
ZOLAR™ Vega 30C User Manual ZOLAR™ SoftBox Accessory Kit 32x32 (Optional Accessories) ZOLAR™ SoftBox Accessory Set is a set of professional cinema-grade di user accessories, including SoftBox Holder, SoftCloth and SoftGrid, which are fixed in front of the main unit. Use the SoftBox Holder with the SoftCloth to increase the light-emitting area, the light is soft and uniform, and high color saturation;... - Page 39 ZOLAR™ Vega 30C User Manual Install ZOLAR™ SoftCloth 32x32 1. Unfold the ZOLAR™ SoftCloth and attach the Velcro straps on the front side of the ZOLAR™ SoftBox Holder and make the surface flat. 2. The installation is complete. Install ZOLAR™ SoftGrid 40° 32x32 1.
-
Page 40: Product Specifications
ZOLAR™ Vega 30C User Manual Product Specifications Brand ZOLAR™ Series Vega Model LED Type 5-color, Full Spectrum White Light 2,000K ~ 20,000K continuously variable correlated color temperature Light Di usion System Reflective Membrane + ZOLAR Stylist Color Rendition CRI:Ra ≥ 97 (R9 & R12 up to 97),TLCI ≥ 98 Spectral Similarity Index SSI up to 90 Light Aperture... - Page 41 ZOLAR™ Vega 30C User Manual Low Noise Fan mode (Auto, High, Mid, Low) Cooling System -20°C ~ +45°C Ambient Temperature Operation Estimated LED Lifetime 50,000 hours (L70) Estimated Color Shift ± 5% Over ±5% Lifetime (CCT) 3.67 kg / 8.09 lb (Main Unit + ZOLAR™ Stylist W) Weight (Main Unit) 4.53 kgg / 9.99 lb (Main Unit + ZOLAR™...
-
Page 42: Photometric Data
ZOLAR™ Vega 30C User Manual Photometric data** Beam Angle: Side A 90°, Side B 127° 1 m / 3.3 ft 3 m / 9.8ft ZOLAR™ Beam Vega 30C Angle 5,600K 3,200K 4,000K 5,600K 3,200K 4,000K 2,552 lx 2,499 lx 350 lx 347 lx 344 lx 2,508 lx... -
Page 43: Warranty Policy
ZOLAR™ Vega 30C User Manual Warranty Policy Warranty Scope Warranty Service covers defects in material and workmanship of ZOLAR™ Vega 30C product and its accessories and annexes contained therein (hereinafter collectively referred to as “this Product” ). Warranty Period Warranty Period is 12 months from the date of original purchase. Warranty period will start 90 days from date of production shown on the product, or 90 days from date of shipment according to internal record of ImagineVision, whichever is later, in case of failure to produce valid purchase invoice or other valid proof showing date of original purchase. -
Page 44: Fcc Compliance Statement
ZOLAR™ Vega 30C User Manual FCC Compliance Statement This device complies with Part 15 of the FCC Rules. Operation is subject to the following two conditions: 1. This device may not cause harmful interference, and 2. This device must accept any interference received, including interference that may cause undesired operation. - Page 45 This manual is subject to update without notice. You can check the latest version of the User Manual on the ZOLAR o cial website https://www.zcam.com/zolar/vega-30c/ If you have any questions or suggestions about the User Manual, please contact us via the following email: marketing@imvt.com Copyright ©...
Need help?
Do you have a question about the ZOLAR Vega 30C and is the answer not in the manual?
Questions and answers