Table of Contents
Advertisement
Quick Links
Manual: Lens Driver 4
Date: 28.06.2019
Copyright © 2019 Optotune
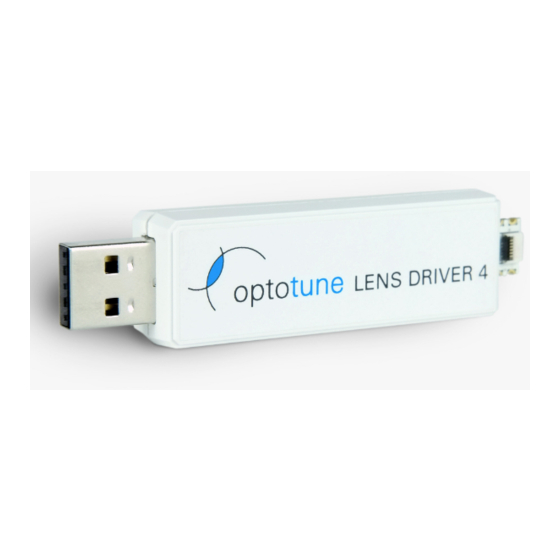
Electrical Lens Driver 4
Lens Driver Manual
Page 1 of 22
No representation or warranty, either expressed or implied, is made
Optotune AG
|
Bernstrasse 388
|
CH-8953 Dietikon
|
Switzerland
as to the reliability, completeness or accuracy of this paper.
Phone +41 58 856 3000
|
www.optotune.com
|
info@optotune.com
Advertisement
Table of Contents

Summary of Contents for Optotune Lens Driver 4
- Page 1 Manual: Lens Driver 4 Date: 28.06.2019 Copyright © 2019 Optotune Electrical Lens Driver 4 Lens Driver Manual Page 1 of 22 No representation or warranty, either expressed or implied, is made Optotune AG Bernstrasse 388 CH-8953 Dietikon Switzerland as to the reliability, completeness or accuracy of this paper.
-
Page 2: Table Of Contents
Lens Driver Controller Software ......................... 7 Software Installation ........................7 Installation of the Windows driver in Windows 7, Windows 8.1 and Windows 10......7 Preparing Lens Driver 4 ..........................7 Operating Lens Driver Controller ....................... 7 Controls ................................ 8 Limiting the Maximum Current ......................8 Temperature Compensation ...................... -
Page 3: Overview
The Electrical Lens Driver offers a simple yet precise way to control Optotune’s electrical lenses. There are two types of lens drivers available. The Electrical Lens Driver 4 is used to drive Optotune’s OEM-type lenses with 6- pin FPC cables and comes in a plastic housing. The second Lens Driver 4i is suited to drive the industrial ver- sions with 6-pin Hirose connectors and is contained in a steel housing. -
Page 4: System Requirements
Manual: Lens Driver 4 Date: 28.06.2019 Copyright © 2019 Optotune System requirements • Windows 7 or Windows 8.1, 32/64 bit • Lens driver: USB 2.0 port • uEye camera: USB 2.0 port (preferably 3.0) 2. Hardware Operation Connecting to a lens with FPC cable The Molex flex cable can be plugged directly into the connector of the lens driver. -
Page 5: Connecting Industrial-Style Lenses To The Lens Driver 4I
Manual: Lens Driver 4 Date: 28.06.2019 Copyright © 2019 Optotune Connecting industrial-style lenses to the Lens Driver 4i The connection of the industrial EL-10-30-Ci to the Lens Driver 4i is straight forward. Simply connect the cable to the plug, the position of the pins is unambiguous. -
Page 6: Connector Pinout
Manual: Lens Driver 4 Date: 28.06.2019 Copyright © 2019 Optotune Connector Pinout Figure 4: Connector pinout of the Lens Driver 4 (left) and Lens Driver 4i (right). Lens Driver 4 Lens Driver 4i Position Function Position Function I2C Gnd Lens (+ pole) -
Page 7: Lens Driver Controller Software
4. Preparing Lens Driver 4 In order for the Lens Driver 4 to operate correctly, a product specific firmware needs to flashed. Please refer to the manual of the Lens Driver Flash Utility on how to flash the firmware. The following list gives an overview of the different firmware types. -
Page 8: Controls
Manual: Lens Driver 4 Date: 28.06.2019 Copyright © 2019 Optotune Controls Figure 5 shows the main window. The output current can be changed, either by shifting the arrow or by using the +/- buttons. Using the +/- buttons together with the Shift key increases the step size. Alternatively, the desired value can be written in the gray box. -
Page 9: Temperature Compensation
Manual: Lens Driver 4 Date: 28.06.2019 Copyright © 2019 Optotune The maximum current of the driver is limited to either 290mA, see Figure 8, or 2.8V divided by the resistance applied. 300.0 250.0 200.0 150.0 100.0 50.0 Coil resistance Figure 8: Dependence of maximum current on coil resistance. -
Page 10: Drift Compensation
Manual: Lens Driver 4 Date: 28.06.2019 Copyright © 2019 Optotune rent and the minimum diopter limit is located at the lowest encoded temperature and the minimum current. This is explained in Figure 10. The highest and lowest temperature define a sector for the linear relation of focal power versus current, indicated by the light and dark gray line. -
Page 11: Autofocus
Manual: Lens Driver 4 Date: 28.06.2019 Copyright © 2019 Optotune yellow/green boundary, and therefore slightly reduces the guaranteed diopter range. The maximum drift is determined by the gain variable and a larger gain variable will result in a larger maximum drift. - Page 12 When using the Lens Driver in combination with a uEye camera, it also offers an autofocus feature. Please note that this feature is for testing purposes only and Optotune does not offer support for this part of the software. The autofocus software is only tested yet with the camera model IDS UI-3580CP-C-HQ. To use the autofocus, go to Extras →...
-
Page 13: Trigger Output Signal
Manual: Lens Driver 4 Date: 28.06.2019 Copyright © 2019 Optotune button (arrow with an underline). Repeat the steps for the upper limit (arrow with an over line). If you than enable the button with the two arrows, the current will switch between the two values. The frequency is changed in the Controls window. - Page 14 Manual: Lens Driver 4 Date: 28.06.2019 Copyright © 2019 Optotune Figure 18: Hardware Configuration (example shows mapping between -100mA and 150mA) Figure 19: Analog mode enabled in Lens Driver Controller Page 14 of 22 No representation or warranty, either expressed or implied, is made...
-
Page 15: Sensor Control
Manual: Lens Driver 4 Date: 28.06.2019 Copyright © 2019 Optotune Sensor Control Through an analog signal that is read by the lens driver, an ex- ternal voltage from an analog sensor can be used to control the focal power of the lens. Sensor control can be used in either Current or Focal Power mode, and is enabled under Services ->... -
Page 16: Current Set Commands
Manual: Lens Driver 4 Date: 28.06.2019 Copyright © 2019 Optotune PC sends Driver answer Driver action Comment "Start" "Ready\r\n" reset current to zero, flush input buffer optional command Current Set Commands A current set command sets a new output current for a channel. A current set command is constructed as AwxxLH. -
Page 17: Focal Power Set Command
Manual: Lens Driver 4 Date: 28.06.2019 Copyright © 2019 Optotune For verification of the command, the CRC checksum (see details below) over the whole 6 bytes of the command can be calculated which should be zero. Focal Power Set Command A focal power set command sets the focal power of the lens. -
Page 18: Mode Commands
Manual: Lens Driver 4 Date: 28.06.2019 Copyright © 2019 Optotune Byte 8: 0x31 (low CRC byte) Byte 9: 0xfd (high CRC byte) Mode Commands Mode commands allow to access frequency modes (see table). A mode change command always starts with "M", followed by a "w"... -
Page 19: Calibration Commands
Manual: Lens Driver 4 Date: 28.06.2019 Copyright © 2019 Optotune Firmware type F (EL-16-40): fp = x /200 „PwFAyyyyLH“ nothing set channel A frequency to yyyy (in mHz, 32bit value) „PwUAyyddLH“ nothing set channel A upper signal current to (12 bit value) (dd are two dummy stuffing bytes and can be 0) Setting focal power mode sends a command back containing the usable limits for the focal power values. -
Page 20: Crc Algorithm
Manual: Lens Driver 4 Date: 28.06.2019 Copyright © 2019 Optotune Possible temperature commands: PC sends Driver answer Driver action Comment “TCALH” “TCAddLH\r\n” Get temperature reading “dd” is the temperature data as 16 bit signed integer. of lens on channel A CRC Algorithm A 16-bit CRC checksum (CRC-16-IBM) is used to check for communication errors. - Page 21 Manual: Lens Driver 4 Date: 28.06.2019 Copyright © 2019 Optotune If this is done correctly, a consecutive CRC checksum calculation over the whole array needs to result in a CRC checksum equal to zero (see method AddAndCheckCRC). The following example written in c# shows the implementation in the Lens Driver Controller software: private byte[] AddAndCheckCRC(byte[] command) UInt16 CRC = 0;...
-
Page 22: Uart Communication (Only Applicable For El-10-30-C Firmware Type A)
Manual: Lens Driver 4 Date: 28.06.2019 Copyright © 2019 Optotune 7. UART Communication (only Applicable for EL-10-30-C Firmware Type A) The Lens Driver V4 consists of an ATMEGA 32U4 Atmel chip that can utilize an UART interface for serial com- munication.
Need help?
Do you have a question about the Lens Driver 4 and is the answer not in the manual?
Questions and answers