Advertisement
Advertisement

Subscribe to Our Youtube Channel
Related Manuals for Alpha Technologies iQ Charger Wi-Fi

Summary of Contents for Alpha Technologies iQ Charger Wi-Fi
- Page 1 ALPHA TECH iQ Charger Wi-Fi USER GUIDE...
-
Page 2: Table Of Contents
CONTENT Video Guide Overview Quick Setup Tips from customers Record photos and videos without a microSD card Record videos on a microSD card Watch videos recorded on a microSD card Motion Detection View detected movements Record only detected movements Multi view from up to 16 cameras Сhange location and Wi-Fi network Reset the camera Watch videos on a PC or Mac... -
Page 3: Video Guide
VIDEO GUIDE Open your phone camera, focus on the QR code and open the link 03 - IQ Charger Wireless User Manual... -
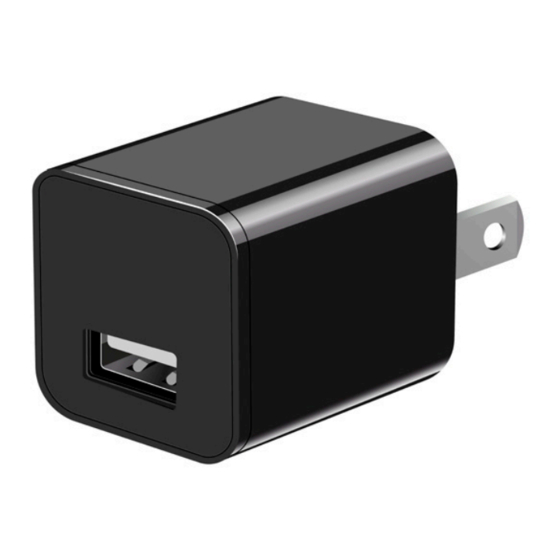
Page 4: Overview
Overview Remove a protective film before use Note: the protective film is very thin Back Side of the Camera Front Side of the Camera This type of camera doesn't have an audio recording feature as it is against Amazon policy and prohibited. No retailer sells this type of camera with an audio recording feature. -
Page 5: Quick Setup
Quick Setup To make setup as smooth as possible, do the following: 1. Make sure that the camera’s microSD slot is empty. 2. Do not connect devices to the camera's USB port for charging to avoid overheating. It's a camera first, and it only imitates a charger. - Page 6 Get started 1. Plug your camera into a wall or a powerbank. Wait 3-4 minutes for the camera to load. The camera doesn't have a battery inside. It needs to be connected to a power source to work. Note: Place the camera as close as possible to the router for initial setup.
- Page 7 2. Make sure that the camera is loaded: 2.1 On your phone go to Settings > Wi-Fi to view the list of wifi networks available. 2.2 Wait until you see a network SmartLife-XXXX. If you can't see it in the list, reset the camera.
- Page 8 3. Install Tuya Smart app or Smart Life app. Get the app in the App Store or Google Play. The following steps are the same in both apps. 08 - IQ Charger Wireless User Manual...
- Page 9 4. Create a new account in the app or Sign in with an Apple or Google account. 09 - IQ Charger Wireless User Manual...
- Page 10 5. Add the camera to the app 5.1 Tap Add Device or near the top right. Note: The app will ask for access to your location. It’s needed to find your Wi-Fi network. You can turn off access to your location after the setup.
- Page 11 5.2 Tap Camera & Lock > Smart Camera (Wi-Fi) 11 - IQ Charger Wireless User Manual...
- Page 12 5.3 Tap QR Code, then choose Wi-Fi Mode and tap Next step Note: The camera doesn't have any indicators on the front and doesn't make prompt tones. Ignore any messages about it in the app. 5.4 Tap AP Mode 11 - 12 - IQ Charger Wireless User Manual IQ Charger Wireless User Manual...
- Page 13 6. Connect the camera to your Wi-Fi Network 6.1 Select your 2.4G Wi-Fi Network, enter your password and tap Next. Please note the following: The camera works only with 2.4G Wi-Fi If you have 5G Wi-Fi, turn on 2.4G Wi-Fi Network in your router. Go to https://alpha-technics.com/5G for additional help.
- Page 14 If your network is hidden, make it visible. Connect the camera and hide it again. The camera doesn't work with networks without passwords like hotels, airports, etc. The camera needs a secure network to protect your data. With portable Wi-Fi Hotspots you can use the camera anywhere.
- Page 15 6.2 Tap Go to connect. It will open the Wi-Fi networks list on your phone. 15 - IQ Charger Wireless User Manual...
- Page 16 6.3 Choose the SmartLife-XXXX network. On iPhone: wait for the check icon. On Android: Wait 10-15 seconds for the connection to be made. Some versions say ‘Connected, no internet.’ Tap Keep to confirm the connection. Then go back to the app. 16 - IQ Charger Wireless User Manual...
- Page 17 Note: If you see the screen with the "Reconnect" button tap “Confirm hotspot connection, next” below the ‘Reconnect’ button. 17 - IQ Charger Wireless User Manual...
- Page 18 6.4 Wait for 2-4 minutes until adding the camera will be finished. 18 - IQ Charger Wireless User Manual...
- Page 19 for renaming the camera, then tap Done. If you get an error, do the following : 1. Reset the camera (see Page 39). 2. Place the camera closer to your Wi-Fi router. 3. Check your Wi-Fi password. 4. Then try to set it up again. 19 - IQ Charger Wireless User Manual...
- Page 20 Tips from customers 1. Use a Wi-Fi range extender to install the camera in the farthest corner of the house or garage. 2. Use an extension cord or corded surge protector to place it in an ideal location. You can also use an outlet expander or a swivel adapter.
- Page 21 Record photos and videos without a microSD card If you don't have a microSD card yet, you can record photos and videos on your phone. Tap your camera, you will find the buttons ‘Screenshot’ and ‘Record’ below the camera feed. Tap Screenshot to save a picture.
- Page 22 Go to in the app to see recorded videos. to delete or to share and save to your phone album. 22 - IQ Charger Wireless User Manual...
- Page 23 Record videos on a microSD card With a microSD card the camera will continue recording even if the app is closed. 1. Unplug the camera and insert your microSD card. 2. Plug the camera back in, and wait for 2-3 minutes. 3.
- Page 24 5. Tap Storage settings. If you see the capacity, your microSD card is ready for recording. If you see an error and it asks you to Format, tap Format. 24 - IQ Charger Wireless User Manual...
- Page 25 6. Go back to Settings > Recording Settings, then turn on Local Recording. Note: The camera supports the microSD's from 8Gb to 512Gb. A microSD card is not included. We recommend using: Sandisk, Sony MicroSD UHS-I 16, 32, 64, 128, 256GB.
- Page 26 Watch videos recorded on a microSD card 1. Tap your Сamera > 26 - IQ Charger Wireless User Manual...
- Page 27 2. Do any of the following: 2.1 Tap to select a date. 2.2 Swipe the timeline to choose the exact time. 2.3 Make screenshots on your phone to capture critical movements. 27 - IQ Charger Wireless User Manual...
-
Page 28: Motion Detection
Motion Detection Set notifications Turn on alerts and immediately know what’s happening. 1. Tap your Camera. 2. Tap on the top right. 28 - IQ Charger Wireless User Manual... - Page 29 3. Tap Detection Alarm Settings, then turn on Motion Detection Alarm. Note: Make sure Notifications are turned on in the Settings of your phone. 29 - IQ Charger Wireless User Manual...
- Page 30 View detected movements 1. Open the Home screen of the app. on the bottom 2. Tap Me 3. Tap the Message center to see the list of alarms. 30 - IQ Charger Wireless User Manual...
- Page 31 4. Tap the message to see a list of all alarms during the day. 31 - IQ Charger Wireless User Manual...
- Page 32 5. Tap View to see what is happening in real-time. If the camera was recording on a microSD card, you can watch the previously recorded video at the time when it's triggered (see page 26) 32 - IQ Charger Wireless User Manual...
- Page 33 Record only detected movements 1. Tap your Camera. 2. Tap on the top right. 3. Tap Recording Settings > Recording Mode. 33 - IQ Charger Wireless User Manual...
- Page 34 4. Select Event Recording The camera will record only detected movements. You can save disk space and avoid watching tons of videos with no content. 34 - IQ Charger Wireless User Manual...
- Page 35 Multi view from up to 16 cameras 1. Open the Home screen of the app. 2. Tap Smart on the bottom. 35 - IQ Charger Wireless User Manual...
- Page 36 3. Tap View multiple camera videos in one screen 36 - IQ Charger Wireless User Manual...
- Page 37 Сhange location and Wi-Fi network To move the camera to another location or change the Wi-Fi network: reset it, and set it up again with the new Wi-Fi network. The easiest way to do this is with the camera online and still connected to the previous Wi-Fi network: 1.
- Page 38 3. Tap Confirm The app will remove the camera and reset it to default settings. 4. Wait for 4-6 minutes and set it up again with the new Wi-Fi network. If you don't have access to the previous Wi-Fi network, remove the camera from the app and reset the camera manually (See Page 39).
-
Page 39: Reset The Camera
Reset the camera 1. Unplug the camera from the wall, and remove the microSD card from the camera. Note: To remove the card, press it into the slot with your fingernail, and it will pop out. 2. Connect the camera using the provided male-male USB cable to any charger/power bank. - Page 40 4. Press and hold the reset button until the lights go off. The reset button is between the L and M switch on the back. Use a paper clip or a reset pin from a box. 5. Disconnect the camera from the USB cable and plug it into a wall.
- Page 41 Watch videos on a PC or Mac 1. Eject the microSD card from the camera. Note: To remove the card, press it into the slot with your fingernail and it will pop out. 2. Connect the microSD to your PC or Mас using the adapter from the box.
- Page 42 FAQ and Troubleshooting Q How to get access to the camera with a second device? A Install the app on the second device and use the same login. Q Can anyone see this camera in the Wi-Fi networks list? A The camera will be hidden after setup. You can’t see a network SmartLife-XXXX in your Wi-Fi list after setup.
- Page 43 Q The camera is offline after a few hours. A Try to unplug the camera from an outlet and plug it back in. Place it closer to your Wi-Fi router. Q Couldn’t connect the camera, can’t see the SmartLife network in the Wi-Fi network list. A Reset the camera (See Page 39).
-
Page 44: Year Warranty
2 Year Warranty Warranty registration time period expires after 7 days. Use a link: www.alpha-technics.com/warranty 44 - IQ Charger Wireless User Manual...
Need help?
Do you have a question about the iQ Charger Wi-Fi and is the answer not in the manual?
Questions and answers