Table of Contents
Advertisement
Quick Links
W e strive to ensure that our produc t s are of the highest quality
and free of manufacturing defec t s or missing p ar t s. Howeve r , if
you have any problems with your new product,
DO NOT RETURN IT T O THE S T OR E
F AX: 1-866-873-3535
gameroom@escaladesports.com
Mailing Address: (Correspondence Only)
Escalade Sports
PO Box 889
Evansville, Indiana 47706-0889
Please have your model number when inquiring about parts.
When con t ac ting Escalade S por t s please provide your model numbe r , date code (i f
appli cable ), and pa rt nu mbe r i f reque sting a repla c e men t pa rt. The s e nu mbe rs a re
lo c a ted on the p rodu ct, pa ckaging , and in thi s owne rs manual .
Y our Model Number :
2-AL6069 -
Date Code:
Purchase Date:
PLEASE RETAIN THIS INSTRUCTION MANUAL FOR FUTURE REFERENCE
All Rights Reserved.
© 202 2 Escalad e Sports
please contact us toll free @:
1-88 8 - 9 9 6 - 2 7 2 9
Or w r i t e t o :
AL6069F
Physical Location:
Escalade Sports
817 Maxwell Ave.
Evansville, Indiana 47711
-WJ
Fo r Custome r Servic e Cal l 1-888-996-2729
1
,
V.1
Advertisement
Table of Contents

Related Manuals for American Legend AL6069F


Summary of Contents for American Legend AL6069F
- Page 1 ), and pa rt nu mbe r i f reque sting a repla c e men t pa rt. The s e nu mbe rs a re lo c a ted on the p rodu ct, pa ckaging , and in thi s owne rs manual . AL6069F Y our Model Number :...
-
Page 2: Assembly Tips
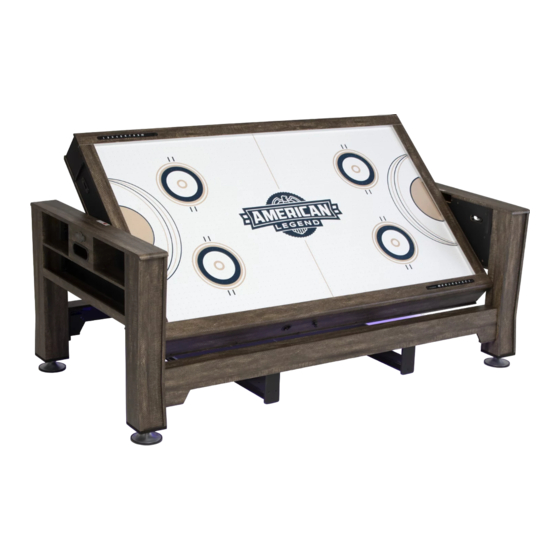
IMPORTANT! READ EACH STEP IN THIS MANUAL BEFORE YOU BEGIN THE ASSEMBLY. TWO ADULTS ARE REQUIRED TO ASSEMBLE THIS AMERICAN LEGEND 3-IN-1 SWIVEL TABLE WITH UNDER-GLOW LED LIGHTS Tools Required: Allen Wrench (included), Furniture Polish and Soft Cloth, Phillips Screw Driver,... -
Page 3: Hardware Identifier
HARDWARE IDENTIFIER (To Scale) 1-1/4” Phillips Washer 3/4” Phillips Flat 1-3/4” Phillips Flat 1/2” Phillips Round Round Head Screw Countersunk Head Screw Countersunk Head Screw Head Screw (20 pcs) (16 pcs) (82 pcs) (8 pcs) (Not to Scale) (Not to Scale) 5/16”... -
Page 4: Parts Identifier
PARTS IDENTIFIER (Not to Scale) 18-5/8”×5-3/4” 33-5/8”×11-3/4” Miter Cut With Air Motor (Packed in Hardware Kit) 33-5/8”×4-1/4” 33-5/8”×5” 28-5/8”×15-1/4” 28-5/8”×15-1/4” Mitre Cut Mitre Cut #13-R #14-R Used together 28-1/4”×4-3/16” 5”×5” 74”×3-1/2” 6”×2-7/8” 42-1/2”×5” Outside Lower Apron Leg slip in panel With LED Strip +Battery Box (2 Pieces) 23-3/4”×1-7/8”... - Page 5 7-3/8”×3” 39-3/8”×3” 39-3/8”×2” TT playfield holder TT playfield holder TT holder connector Table Tennis Playfield Stick on Cord Holder board support board Block Cushion 12 Pieces 2 Pieces 2 Pieces 4 Pieces Used together Step 1 NOTE: READ + STUDY ALL ASSEMBLY TEXT, DIAGRAMS AND DIAGRAM NOTES. IMPORTANT NOTE: BEFORE INSTALLING PLAYFIELD SCREWS - PLEASE BE SURE ALL PARTS HAVE BEEN REMOVED FROM INNER CABINET AND AIR MOTOR CORD IS BROUGHT THROUGH THE HOLE IN SIDE PANEL.
- Page 6 Step 2 FIG:2A FIG:2A Attach 2 Latch/locks (#5) into the Leg Top End Remove backing and stick the end panel inner Panel (#3) pre-cut holes with Screws(#19). cushions (#44) to the each of the end panels (#3). Carefully fold and attach the puck catcher box (#4) Peel and Stick with Screws (#20) using the predrilled holes.
- Page 7 NOTE: 4 Holes in part 12 NOTE: Be sure mitered grooves are free of base board must align any dust or debris before folding. with the leg’s predrilled holes NOTE: Handle each leg with care Laminate IMPORTANT side out Right hand here NOTE:...
- Page 8 Counter sinks in predrilled holes must face outwards 13-R Battery box 14-R This screw 13-R hole to top 13-R 14-R 14-R 13-R Note: Do not worry about unused screw holes Countersinks this side Step 7 Remove the screw using a small phillips screwdriver and open the battery box, Insert (4) AA batteries (not included) in the order of polarity as shown on the inside of the battery box.
- Page 9 Step 8 , Using the #47 Allen Wrench WITH THE HELP OF ANOTHER ADULT Lock washer 14-R Note: When this assembly is complete, it would be best to place it where it will set in your room. Keep in mind an A/C outlet for the air hockey air motor cord.
- Page 10 Step 9 Assemble TT playfield holder board #49 and TT holder support board #50 using screws #20. Attach TT holder connectors #51 using screw #52. Assemble 2 identical assemblies Do not strip out screws. Predrilled holes Predrilled holes Step 10 WITH THE HELP OF A SECOND ADULT: Attach the TT playfield holders to the frame by threading the #53 bolts with #54 washers and #56 lock washer tighten tight.
- Page 11 Step 11 Preparing the pool / air hockey main cabinet for placement into the frame. The factory installed threaded inserts in the main cabinet inside of each end (#1) cannot be removed, First, slide 2 pcs 20mm washers (#24) and plastic washer (#45) onto the 20mm hex bolt (#23) as seen below. Second, install pivot bolts (#23) into the metal threaded inserts in the ends of the main cabinet.
- Page 12 Step 12 , Peel the backing off the Cord Clip (#48) and attach to a side of the table. Puck opening here Note: On/off fan switch is located on the fan cord PEEL & ATTACH Note: Push excess cord back into hole when not in use.
- Page 13 Step 13 cabinet top. Table main cabinet! Use #46 table tennis top cushions as required Clip on Battery box with on/off switch for under-glow LED lights. Always turn LED lights off when play is completed. Note: Most all table accessories can be stored inside the ends of the table.
- Page 14 Notice: NOTE: Remove all billiard balls from the playfield pockets before rotating the billiards table. Plug in and turn on air motor to play. Turn off and unplug when not playing. Never allow cord to become a trip hazard. Always unplng + store the air motor cord before rotating main cabinet. All Rights Reserved.
- Page 15 Notice: Always remove and store the table tennis playfields before rotating the main cabinet. Congratulations! You have now assembled your Swivel Table. Please note the Care and Use instructions below to ensure many years of trouble free use of your Swivel Table. CARE AND USE OF YOUR SWIVEL TABLE .
- Page 16 First Time Battery Installation: Locate battery compartment for this product . Use alkaline batteries for maximum performance . Using a small Phillips head screwdriver – loosen and remove the battery compartment cover screw(s). Remove battery compartment cover . Install new batteries only after reading the “ Battery Information NOTICE“ ! Replace compartment cover and secure cover with the cover screw .
-
Page 17: Spare Parts List
Spare Parts List AL6069 AL6069WJ1 Cabinet- Billards AL6069WJ2 Playfield-Hockey with air motor AL6069WJ3 Leg Top End Panel AL6069WJ4 Puck Catcher Box AL6069WJ5 Latch/ Lock AL6069WJ6 End Panel Support Board AL6069WJ7 Ball Storage Board AL6069WJ8 Steel L-Bracket Right Leg AL6069WJ9 AL6069WJ10 Left Leg AL6069WJ11 Leg Panel... - Page 18 Spare Parts List AL6069 AL6069WJ49 TT playfield holder board AL6069WJ50 TT playfield holder support board AL6069WJ51 TT holder connector Block AL6069WJ52 1-3/4” Phillips Washer Head Screw AL6069WJ53 1/4"*1"Allen key bolt AL6069WJ54 1/4"*19mm Washer 1/2”*9mm AL6069WJ55 Lock Washer 13/32” AL6069WJ56 ”*7mm Lock Washer All Rights Reserved.
-
Page 19: 90-Day Limited Warranty
90 DAY LIMITED WARRANTY This consumer warranty extends to the original consumer purchase of any ESCALADESPORTS Product (hereinafter referred as the "Product"). WARRANTY DURATION: This Product is warranted to the original consumer purchase of a pe- riod of 90 days from the original purchase. WARRANTY COVERAGE: ESCALADE SPORTS warrants to the original Consumer Purchaser that any Product of its manufacture is free from defects in material and workmanship when used for the intended purpose under normal use and conditions.
Need help?
Do you have a question about the AL6069F and is the answer not in the manual?
Questions and answers