Advertisement
Kit de autoconsumo instantáneo para
ES
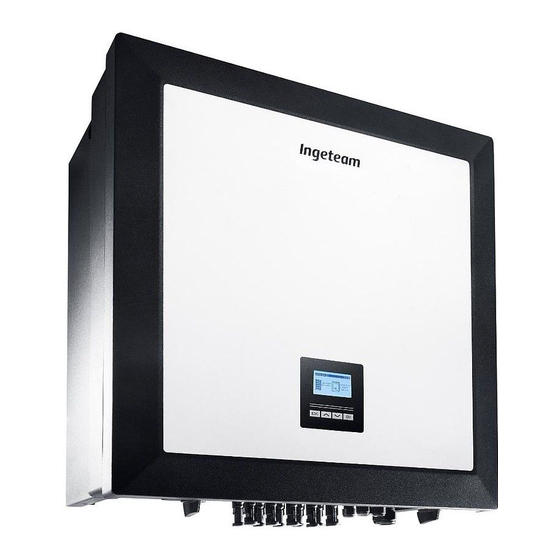
INGECON SUN 3Play
Instant self-consumption kit for
EN
INGECON SUN 3Play
Ingeteam Power Technology, S.A.
Tel: +34 948 28 80 00
Energy
Fax: +34 948 28 80 01
Avda. Ciudad de la Innovación, 13
e mail: solar.energy@ingeteam.com
AAX2018IQM03_B
31621 SARRIGUREN Navarra (Spain)
Service Call Center: +34 948 69 87 15
02/2015
W
A
B
C
D
Cargas/Loads
Cargas/Loads
ES
EN
A.
Red
A.
Grid
B.
Interruptor de Control de Potencia (ICP)
B.
Circuit breaker switch
C.
Diferencial
C.
Residual current device
D.
Vatímetro A65/A65+
D.
Wattmeter A65/A65+
E.
INGECON SUN 3Play
E.
INGECON SUN 3Play
F.
Paneles solares
F.
Solar panels
W
ES
Conexión del vatímetro
Todas las conexiones se deberán realizar sin tensión.
El vatímetro se debe instalar sobre carril DIN. Es importante instalar el
vatímetro en el punto de conexión de la instalación después del Interruptor
de Control de Potencia (ICP) y del resto de protecciones, y antes de que el
cableado se bifurque a todas las cargas y al inversor, tal y como muestra el
esquema anterior.
Para realizar las conexiones quitar las dos tapas protectoras de las
conexiones para tener acceso a las mismas.
Conectar el vatímetro, según la configuración escogida, tal y como muestran
los esquemas de este apartado.
Con el vatímetro se adjunta la tarjeta de comunicaciones necesaria, las guías
para instalar la tarjeta y un prensaestopa. Insertar las guías en la tarjeta de
potencia en el lugar indicado con la inscripción INGECON Connect, conectar
la tarjeta de comunicaciones y realizar el cableado según la tabla T1 (ver
figura F1).
EN
Connecting the Wattmeter
All the connections must be made without voltage.
The Wattmeter must be installed on the DIN rail. The Wattmeter should be
installed at the connecting point of the installation after the circuit breaker
switch and the remaining protections, and before the wiring of the installation
is branched off to all the loads and to the inverter, as shown in the previous
diagram.
To make the connections, get access to the connections by removing the two
protective caps.
Connect the Wattmeter, in accordance with the selected configuration, as
shown in the diagrams of this section.
Attach the required communications card, the guides to install the card and
a packing gland to the Wattmeter. Insert the guides into the power card in
the place indicated with the inscription INGECON Connect. Connect the
communcations card and connect the wiring in accordance with the table T1
(see Figure F1).
Config
PASS?
0
PRG
D1
RS-485
ES
Configuración del vatímetro
El vatímetro está configurado de serie para funcionar junto a inversores INGECON SUN 1Play, por lo que será necesario configurarlo para
su uso con inversores INGECON SUN 3Play.
Para configurar el vatímetro seguir los siguientes pasos:
1.
Alimentar el vatímetro desde la red eléctrica.
2.
Mediante el selector elegir la posición 1.
E
3.
Acceder al menú de configuración presionando el joystick durante 3 segundos. Se solicitará una clave de acceso. Por defecto,
esta clave es 0. Una vez introducida la clave pulsar una vez el joystick para aceptar. Ver D1.
4.
Al aceptar se accede a la pantalla de configuración de la contraseña CNG PASS. Se recomienda no modificar el valor y desplazar
el joystick hacia la derecha para pasar a la siguiente pantalla.
5.
Pantalla de tipo de aplicación APPLICAT. En esta pantalla se debe seleccionar la aplicación tipo H. Para ello pulsar el joystick una
vez. En la parte inferior del display aparece PRG, indicativo de que es posible modificar el valor. Desplazar el joystick en cualquiera de
F
los 4 sentidos hasta que aparezca TYP.H. Presionar una vez el joystick para aceptar. Ver D2.
6.
Avanzar hasta la pantalla de selección del tipo de sistema SYS mediante el joystick. Presionar el joystick una vez (aparecerá en
la parte inferior del display la indicación PRG). Desplazar el joystick en cualquiera de los cuatro sentidos hasta llegar a 3PN. Pulsar el
joystick una vez para aceptar. Ver D3.
7.
Avanzar hasta la pantalla de número de nodo ADDRESS mediante el joystick. Presionar el joystick una vez (aparecerá en la parte
inferior del display la indicación PRG). Desplazar el joystick en cualquiera de los 4 sentidos para que el número seleccionado sea el
mismo que el número de nodo del inversor asociado (este número se puede consultar en el display del inversor; más información en el
manual de instalación de INGECON SUN 3Play). Pulsar el joystick una vez para aceptar. Ver D4.
Al aceptar se accede a la pantalla de configuración del BAUD RATE. Pulsar nuevamente el joystick (aparecerá en la parte inferior del
display la indicación PRG). Desplazar el joystick en cualquiera de los cuatro sentidos para seleccionar 9600 bps. Pulsar el joystick una
vez para aceptar. Ver D5.
8.
Avanzar hasta la pantalla END. Presionar el joystick una vez para salir a la pantalla principal.
9.
Volver a elegir la posición de bloqueo mediante el selector.
A65
11
1
4
7
i
ii
iii
iv
v
41 42 43
3
6
9
i
31 32 33
i.
Conexiones
ii.
Joystick
iii. LED
Connections
Joystick
A65+
i
1
2
3
4
5
6
7
8
9 10 11 12 13
ii
iii
iv
v
i
31 32 33 41 42 43 51 52 53 54 55 56 57
Applicat
SYS
typ.H
3PN
PRG
PRG
D2
D3
11
1
3
4
6
7
9
L1
L2
L3
N
Instalación trifásica
3-phase installation
iv. Selector
v.
Display
LED
Selector
Display
55
57
1
3
5
7
8
9
10
11
12
13
L1
230 VAC
L2
N
L3
L
N
Alimentación
Instalación trifásica con transformadores de corriente
Power supply
3-phase installation with current transformers
Tarjeta de comunicaciones
Communications card
Pin
Señal
Pin
Signal
1
RS-485 (B+)
2
RS-485 (A-)
Pantalla de protección
3
Protection shield
4
(GND)
T1
ADDRESS
BAUD RATE
1
9600
PRG
PRG
D4
D5
EN
Wattmeter configuration
The Wattmeter is factory configured to work alongside INGECON SUN 1Play inverters so it is necessary to reconfigure it in order to work
with INGECON SUN 3Play inverters.
Follow these steps to configure the Wattmeter:
1.
Supply power to the Wattmeter from the electrical grid.
2.
Choose position 1 using the selector.
3.
Access the Configuration menu by pressing the joystick for 3 seconds. A passkey will be requested. By default, this key is 0.
Once you have entered the key press the joystick once to accept. See D1.
4.
Accepting this gains access to the password configuration screen CNG PASS. It is recommended that you do not modify the
value and move the joystick right to move to the next screen.
5.
APPLICAT application type Screen. Select the application type H in this screen. To do this press the joystick once. At the
bottom of the display PRG appears, indicating that it is possible to modify the value. Move the joystick in any of the 4 directions until
TYP.H appears. Press the joystick once to accept. See D2.
6.
Move to the SYS system type selection screen using the joystick. Press the joystick once (the PRG indication will appear on the
bottom of the display). Move the joystick in any of the 4 directions until 3PN appears. Press the joystick once to accept. See D3.
7.
Move to the ADDRESS node number screen using the joystick. Press the joystick once (the PRG indication will appear on the
bottom of the display). Move the joystick in any of the 4 directions so that the selected number is the same as the node number of
the associated inverter (you can see this number on the inverter display. More information is available in the INGECON SUN 3Play
installation manual). Press the joystick once to accept. See D4.
Accepting this gains access to the BAUD RATE configuration screen. Press the joystick again (the PRG indication will appear on the
bottom of the display). Move the joystick in any of the 4 directions to select 9600 bps. Press the joystick once to accept. See D5.
8.
Move to the ENG screen. Press the joystick once to exit to the main screen.
9.
Set the lock position using the selector.
B(+)
42
A(-)
41
GND
43
Comunicación RS-485
RS-485 communications
B(+)
42
A(-)
41
GND
43
Comunicación RS-485
RS-485 communications
F1
end
D6
Advertisement
Table of Contents

Subscribe to Our Youtube Channel
Related Manuals for Ingeteam INGECON SUN 3Play

Summary of Contents for Ingeteam INGECON SUN 3Play
- Page 1 PRG). Desplazar el joystick en cualquiera de los 4 sentidos para que el número seleccionado sea el the associated inverter (you can see this number on the inverter display. More information is available in the INGECON SUN 3Play...
- Page 2 Para transformadores cuya corriente nominal secundaria Is sea inferior a 5 A, Ingeteam no asegura la precisión y correcto funcionamiento del sistema de autoconsumo instantáneo instalado. After installing and connecting the Wattmeter it is necessary to set up the INGECON SUN 3Play inverter for it to operate correctly. The : Transformation ratio (A) inverter must be powered to carry out this configuration.
Need help?
Do you have a question about the INGECON SUN 3Play and is the answer not in the manual?
Questions and answers