
Related Manuals for JVA WA190


Summary of Contents for JVA WA190
- Page 1 JVA Solar Wi-Fi Anywhere Quick Start Guide WA190 PTE2705 The JVA Logo is a registered trademark of JVA Technologies © JVA Technologies...
-
Page 2: Specifications
The Wi-Fi can then be used to connect an IP device or Internet of Things (IoT) device to the Cloud (Internet). The JVA Solar Wi-Fi Anywhere is installed with an ALDI SIM card at the factory, all you need to do is: 1. -
Page 3: Troubleshooting
Check that the Solar + goes to the left-hand screw terminal Broken cables Check that the battery cables are not dam- aged Solar panel broken Check solar panel for physical damage (bro- ken glass, bent frame etc.) JVA WA190 Page 3... -
Page 4: Before You Start
(~10m) SIM card not inserted Re-insert SIM card correctly If the unit is still not working correctly, contact your nearest JVA distribu- tor for technical support. Before you start Activate the SIM card Activate your SIM card and test it in a mobile phone. The Wi-Fi network allows a data-only connection, the number of devices connected to the module will determine how much data will be used. - Page 5 2. Remove the U-Bolts from the zip lock bag and mount it to the top and bot- tom panel of the bracket. (A) U-Bolt x 2 (B) Top or Bottom Panel (C) Washers x 4 (D) Spring Washers x 4 (E) Hex Nut x 4 JVA WA190 Page 5...
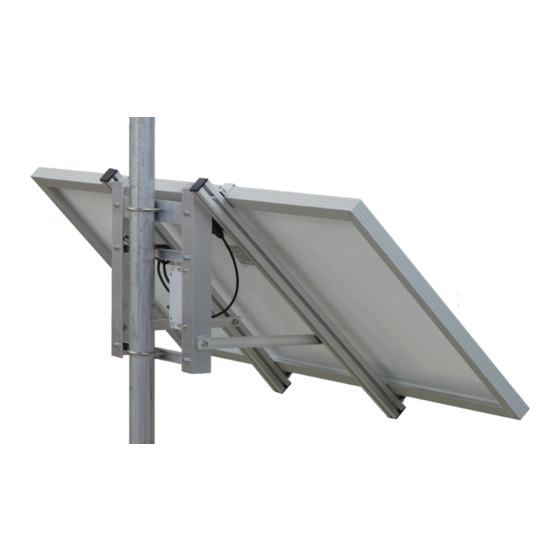
- Page 6 4. Loosen the 6 bolts on the inside of the frame. DO NOT completely re- move these bolts. Lift the bottom of the solar panel until the attached arms holding it are angled at 90 degrees. Tighten all 6 bolts again and face the panel north. Page 6 © JVA Technologies www.jva-fence.com...
- Page 7 5. If you have a JVA energiser it can be installed between the solar panel and the pole. There are 2 mounting screws that can be used to hang the energiser up. 6. If your JVA energiser is fitted, plug it into the solar regulator lead. The energiser aligator leads and plug pack will be unused (left over).
- Page 8 Alternatively, the energiser can be connected to the battery directly using the alligator leads that came with the energiser. ** The Solar regulator lead will remain unused. The plug pack provided with the energiser will also be unused. Page 8 © JVA Technologies www.jva-fence.com...
- Page 9 Overview JVA WA190 Page 9...
- Page 10 LED Indicators D6 (USB_5V) Solid on when USB Power is turned on Batt Level Shows battery level from bottom to top: 25% to 100% Bottom LED flashes if battery is disconnected or bad Page 10 © JVA Technologies www.jva-fence.com...
- Page 11 Region Number Australia 0731 030 582 South Africa 0861 782 349 World Wide +61 731 030 582 For more information on our complete range of electric fencing products please see the JVA website at https://www.jva-fence.com.au JVA WA190 Page 11...
- Page 12 Tel : +61 (0)499 000 455 Email : sales@jva-fence.com.au www.jva-fence.com The JVA Logo is a registered trademark of JVA Technologies © JVA Technologies...
Need help?
Do you have a question about the WA190 and is the answer not in the manual?
Questions and answers