
Related Manuals for arietta AVN430SSB


Summary of Contents for arietta AVN430SSB
- Page 1 READ AND SAVE THESE INSTRUCTIONS LEA Y GUARDE ESTAS INSTRUCCIONES LIRE ET CONSERVER CES INSTRUCTIONS English page Français page Español página LIB0178816...
-
Page 2: Table Of Contents
Table of Contents APPROVED FOR RESIDENTIAL APPLIANCES FOR RESIDENTIAL USE ONLY READ AND SAVE THESE INSTRUCTIONS Tools and Parts Dimensions and Clearances PLEASE READ ENTIRE INSTRUCTIONS BEFORE PROCEEDING. Electrical Requirements INSTALLATION MUST COMPLY WITH ALL LOCAL CODES. Ducting Options Installation instructions IMPORTANT: Save these Instructions for the Local Electrical Mounting the Hood Inspector’s use. -
Page 3: Tools And Parts
Tools and Parts Tools/Materials required • Level Parts supplied • Drill with 1¼” (3.0 cm), ⁄ ” (3.0 mm), and ⁄ ” (4,8 mm) drill bits Removing the packaging • Pencil CAUTION! • Wire stripper or utility knife Remove carton carefully, wear gloves to protect against sharp •... -
Page 4: Dimensions And Clearances
Do not have a fuse in the neutral or ground circuit. A copy of the above code standards can be obtained from: National Fire Protection Association 1 Batterymarch Park Quincy, MA 02169-7471 CSA International AVN430SSB AVN436SSB 8501 East Pleasant Valley Road 30” (76 cm) 36” (91.54 cm) Cleveland, OH 44131-5575 IMPORTANT ⁄... -
Page 5: Ducting Options
The hood is equipped with a 6” (15.2 cm) round transition for capturing of cooking odors, grease and smoke. discharge of fumes to the outside. CAUTION Roof Venting Wall Venting Hood AVN430SSB AVN436SSB models 27" (66.6 cm) 30" (76.2 cm) cooktops ELECTRIC 24"... -
Page 6: Installation Instructions
Installation instructions Vent cover bracket installation 1. Attach vent cover bracket to wall flush to the ceiling using 2-5 x 45 mm screws. Prepare location A. 8 x 40 mm anchors • It is recommended that the vent system is installed before the B. -
Page 7: Electrical Connection
For vented installations only Install duct covers 1. Fit vent system over the exhaust outlet. • When using both upper and lower vent covers, push lower cover down onto hood and lift upper cover to ceiling and 2. Measure from the bottom of the air deflector to the bottom of install with two mounting screws. -
Page 8: Description Of The Hood
Description of the Hood Range Hood Care Cleaning Do not spray cleaners directly to the control while cleaning the Hood. The cooker hood should be cleaned regularly (at least with the same frequency with which you carry out maintenance of the grease filters) internally and externally. -
Page 10: Warranty
WARRANTY WARRANTY TO OBTAIN SERVICE UNDER WARRANTY: Staple your receipt here. or any Service Related Questions, please call: Proof of the original purchase 1-888-732-8018 date is needed to obtain service under the warranty. TO OBTAIN SERVICE UNDER WARRANTY: You must present proof of original purchase date. Please keep a copy of your dated proof of purchase (sales slip) in order to obtain service under warranty. - Page 11 Sommaire APPROUVÉ COMME APPAREIL DOMESTIQUE POUR UNE UTILISATION RÉSIDENTIELLE SEULEMENT Dimensions et Dégagement LISEZ CES INSTRUCTIONS ET CONSERVEZ-LES Exigences électriques Instructions d'installation VEUILLEZ LIRE CES INSTRUCTIONS AU COMPLET AVANT Montage du capot DE COMMENCER. Connexion électrique L’INSTALLATION DE L’APPAREIL DOIT RESPECTER TOUS Installation complète LES CODES EN VIGUEUR.
- Page 12 IMPORTANTES INSTRUCTIONS DE SÉCURITÉ AVERTISSEMENT: POUR RÉDUIRE LE RISQUE D’INCENDIE, tre de service autorisé pour examen et / ou réparation. CHOC ÉLECTRIQUE OU DOMMAGES CORPORELS, AVERTISSEMENT: POUR MINIMISER LE RISQUE D’UN FEU DE GRAISSE SUR LA CUISINIÈRE: RESPECTER LES INSTRUCTIONS SUIVANTES: ■...
- Page 13 Outils et pièces Outils/Matériaux nécessaires • Niveau Pièces fournies • Perceuse avec des mèches de 1¼" (3,0 cm),1⁄8" (3,0 mm) et 1⁄16" (4,8 mm) mèches Enlever l'emballage ATTENTION! • Crayon Retirez le carton avec précaution, portez des gants pour vous •...
-
Page 14: Dimensions Et Dégagement
02269 ** La CSA International, 8501 East Pleasant Valley Road, Cleveland, Ohio, 44131-5575 AVANT D’INSTALLER LA HOTTE 1. Pour assurer la ventilation la plus efficace possible,installez AVN430SSB AVN436SSB la conduite en ligne droite ou avec le moins de coudes possibles. -
Page 15: Instructions D'installation
Plus la hotte est basse au-dessus de la table de cuisson, plus elle est efficace pour capturer les odeurs de cuisson, la graisse et la fumée. I ATTENTION Capot AVN430SSB AVN436SSB modèles 27" (66.6 cm) 30" (76.2 cm) tables de cuisson ELECTRIC 24"... -
Page 16: Montage Du Capot
Montage du capot Montage du support du couvercle du conduit 1. Déterminez et marquez la ligne centrale sur le mur où la 1. À l'aide de 2 personnes ou plus, suspendez la hotte de hotte à baldaquin sera installée. Débranchez l'alimentation électrique. -
Page 17: Connexion Électrique
Connexion électrique REMARQUE: Pour les installations ventilées, le couvercle supérieur de l'évent peut être inversé pour cacher les fentes. AVERTISSEMENT : Risque d'électrocution Débranchez l'alimentation avant de procéder à l'entretien. A. Couvercle de l'évent supérieur Remplacez toutes les pièces et tous les panneaux avant B. -
Page 18: Description De La Hotte
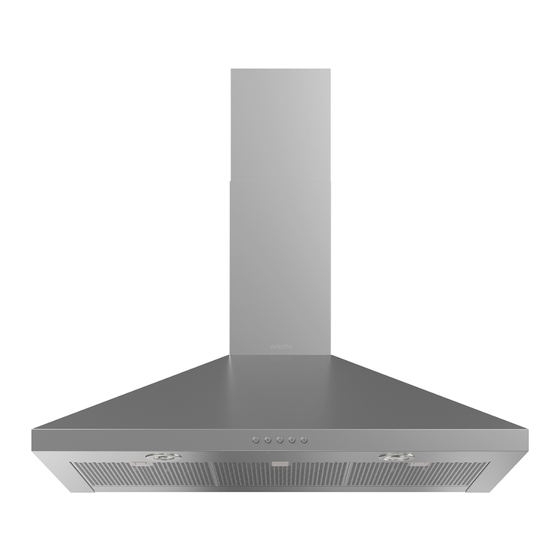
Description de la Hotte Entretien des Hottes de Cuisine 1. Commandes de la soufflerie et de la Nettoyage lumière 2. Lampes LED Ne vaporisez pas de nettoyants directement sur la commande 3. Poignée du filtre à graisse 4. Fltre à graisse pendant le nettoyage de la hotte. -
Page 20: Garantie
GARANTIE GARANTIE Agrafez votre reçu ici. POUR OBTENIR UN DEPANNAGE SOUS GARANTIE: Preuve de la date d’achat originale est ou des questions concernant les services, composez le: nécessaire pour obtenir le service sous 1-888-732-8018 garantie. POUR OBTENIR UN DEPANNAGE SOUS GARANTIE: Le propriétaire doit présenter une preuve de la date d’achat. - Page 21 Tabla de Contenidos APROBADO PARA APARATOS DE USO DOMÉSTICO SÓLO PARA USO DOMÉSTICO Herramientas y piezas LEA Y GUARDE ESTAS INSTRUCCIONES Dimensiones del Producto ANTES DE CONTINUAR, LEA LAS INSTRUCCIONES POR Requisitos eléctricos COMPLETO. Instrucciones de Instalación LA INSTALACIÓN DEBE CUMPLIR CON TODA LA Montaje de la Campana NORMATIVA LOCAL.
- Page 22 INSTRUCCIONES IMPORTANTES DE SEGURIDAD ADVERTENCIA: PARA REDUCIR EL RIESGO DE INCENDIOS, ADVERTENCIA: PARA REDUCIR EL RIESGO DE INCENDIO CHOQUE ELÉCTRICO O LESIONES A PERSONAS, OBSERVE PROVOCADO POR GRASA EN LA SUPERFICIE DE LA ESTUFA: ■ Nunca deje las unidades de superfi cie sin vigilancia cuando LO SIGUIENTE: ■...
-
Page 23: Herramientas Y Piezas
Herramientas y piezas Herramientas/Materiales requeridos • Nivel Piezas suministradas • Taladro de brocas 1¼” (3.0 cm),1⁄8” (3.0 mm), and 1⁄16” (4,8 Remoción del empaque • Lápiz CUIDADO • Pelacables o cuchillo de uso general Quite la caja cuidadosamente, use guantes para protegerse •... -
Page 24: Dimensiones Del Producto
Se pueden obtener copias de los estándares enumerados en: * National Fire Protection Association Batterymarch Park Quincy, Massachusetts 02269 ** CSA International 8501 East Pleasant Valley Road Cleveland, Ohio 44131-5575 AVN430SSB AVN436SSB ANTES DE INSTALAR LA CAMPANA 30” (76 cm) 36” (91.54 cm) 1. - Page 25 Ventilación a través de techo Ventilación a través de pared la grasa y el humo. PRECAUCIÓN ALTURAS DE INSTALACIÓN Modelos de AVN430SSB AVN436SSB campana Estufas de GAS 27" (66.6 cm) 30" (76.2 cm) Estufas 24"...
-
Page 26: Instrucciones De Instalación
Instrucciones de Instalación del soporte de la tapa de ventilación 1. Fije el soporte de la tapa de ventilación a la pared a nivel del Instalación techo con tornillos de 2-5 x 45 mm. A. Anclajes de 8 x 40 mm Prepare su ubicación B. -
Page 27: Conecte El Sistema De Ventilación
Conecte el sistema de 5. Utilice conectores de cables listados por UL y conecte los cables negros entre sí. ventilación 6. Utilice conectores de cables listados por UL y conecte los cables blancos entre sí. 1. Instale la transición en la parte superior de la campana (si se ADVERTENCIA: Peligro de Choque Eléctrico retiró... -
Page 28: Complete La Instalación
Complete la Instalación 1. Para encender el ventilador, pulse el botón de encendido/ apagado del mismo (2) y el botón de la velocidad deseada • Sólo para instalaciones sin ventilación (recirculante), instale (3,4 y 5). filtros de carbón activado sobre el filtro de grasa metálico. Para apagar el ventilador, pulse el botón de encendido/ Véase la sección "Mantenimiento". - Page 29 Reemplazo de lámpara LED Las luces LED sólo pueden ser sustituidas por un técnico de servicio. Consulte la información de contacto del servicio técnico en la página siguiente. Filtro de carbón Si el modelo no tiene salida al exterior, el aire se recircula a través de filtros de carbón desechables que ayudan a eliminar el humo y los olores.
-
Page 30: Garantía
GARANTÍA GARANTÍA OBTENER SERVICIOS BAJO GARANTÍA: Engrape su recibo aquí. Como demostración de la adquisición,es O cualquier Pregunta Relacionada con los necesaria la fecha, para cualquier servicio Servicios, por favor, llame: 1-888-732-8018 bajo garantía. OBTENER SERVICIOS BAJO GARANTÍA: Usted debe presentar una prueba de la fecha original de adquisición.
Need help?
Do you have a question about the AVN430SSB and is the answer not in the manual?
Questions and answers