Table of Contents

Related Manuals for Airvana AV200HUM


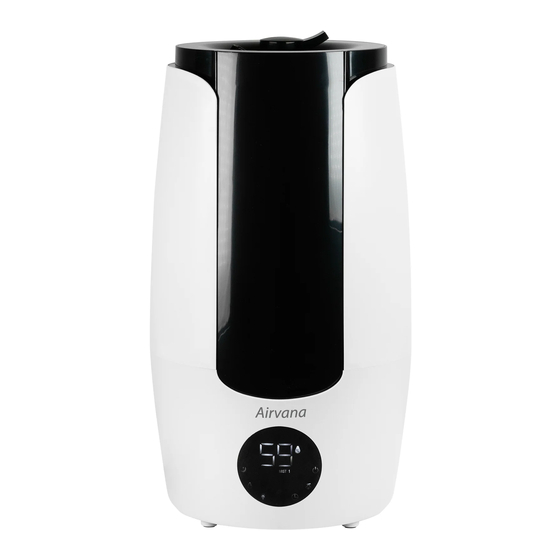
Summary of Contents for Airvana AV200HUM
- Page 1 Ultrasonic Humidifier Owner’s Manual Models: AV200HUM AV200HUM-SG AV200HUM-B AV200HUM-W Form #AV200HUM AV200HUM-G 20220422 ©2022 Registered Trademark/TM Trademark of Airvana Manufactured exclusively for Airvana All rights reserved...
-
Page 2: Table Of Contents
Table of Contents At A Glance Safety Warnings........Using Your Humidifier Initial Set Up........... Operation..........Control Panel........Remote Control........Extension Wand Installation....Dual-Port Nozzle Installation....Maintenance Daily Maintenance....... Cleaning the Unit........Cleaning the Purifying Cartridge..Cleaning the Aroma Port..... End of Season Storage......Humidifier Assistance Troubleshooting........ -
Page 3: Safety Warnings
Safety Warnings READ AND SAVE THESE INSTRUCTIONS! Important Safety Instructions: Read all instructions before using this humidifier ● This humidifier may not work properly on an uneven surface. ALWAYS place this humidifier on a firm, level, and water resistant surface. ●... -
Page 4: Initial Set Up
Initial Set Up Remove the humidifier from packaging and place on a sturdy, flat surface. Unravel and straighten the cord before use. Remove the top cover from the humidifier. Add fresh, clean tap water to tank FIGURE 1 Reattach top cover. WARNING: Never fill the humidifier with hot water. -
Page 5: Operation
Operation Power ON: Follow the initial setup instructions. Plug humidifier into wall outlet. On humidifier, press power switch to ON. Humidifier will beep and light up as indication that it is working. Current humidity will automatically display. Power OFF: On humidifier, press power switch to OFF. Humidifier will beep as indication. -
Page 6: Control Panel
Control Panel Sleep Mode: Press once to turn off the display lights and run the humidifier on low mist. Press again to turn off sleep mode. Humidity Level: Humidity can be adjusted between 40%-75% RH (relative humidity). To set desired humidity level, press the button. -
Page 7: Remote Control
Remote Control Using the Remote: Your remote comes with a battery installed and does not need to be programmed. Before using your remote for the first time, you must take out the pull tab. To use remote, make sure to point it at the front of the unit. - Page 8 Remote Control Replacing the Remote Battery: It is recommended to replace the battery when the product takes a long time to respond or stops responding when the buttons are pressed. Turn over remote control. Press tab A toward the right and pull. Pull out battery holder B and replace the battery.
-
Page 9: Extension Wand Installation
Extension Wand Extension Wand Installation: Amplify your humidifier’s reach and capabilities with the optional extension wand and dual-port nozzle. Follow these steps to use the extension wand correctly: Turn off humidifier and unplug from wall outlet. Take the daul-port nozzle and attach it to the upper part of the extension tube. -
Page 10: Dual-Port Nozzle Installation
Dual-Port Nozzle Dual-Port Nozzle Installation: For a closer mist, your humidifier can run with only the dual-port nozzle. Follow these steps to use the dual-port nozzle correctly: Turn off humidifier and unplug from wall outlet. Take the dual-port nozzle and attach it to the top cover of the humidifier. -
Page 11: Maintenance
Maintenance Note: ALWAYS unplug the humidifier from electrical outlet before cleaning. NEVER allow water to sit in water tank when not in use. Note: Hard water can cause calcium and magnesium to build up in a "white powder" on base of unit, transducer and inner surface of water tank. -
Page 12: Cleaning The Purifying Cartridge
Maintenance Cleaning the Water Purifying Cartridge: It is recommended to clean the water purifying cartridge every 1-3 months, depending on the water hardness. Turn off humidifier and unplug from wall outlet. Remove top cover. Grab handle and lift water tank out of the unit and empty. Unscrew the water purifying cartridge from the tank (FIGURE 4) Submerge cartridge in white vinegar for 10 minutes. -
Page 13: Cleaning The Aroma Port
Maintenance Cleaning the Aroma Port: It is recommended to clean the aroma port and pad after every essential oil use. Turn off humidifier and unplug from wall outlet. Press in on aroma port to release the tray. (FIGURE 5) Remove the aroma pad, rinse it out or replace with a new one. Use a damp, soft cloth to clean the inside of the tray. -
Page 14: Troubleshooting
Troubleshooting Problem: Excessive noise Solution: The water tank is not attached correctly. Properly secure water tank to base of unit. The humidifier is on an unstable surface. Place humidifier on a sturdy, flat surface. The water tank does not have enough water. Fill water tank with water. -
Page 15: Technical Support
Customer Support If you need any assistance with setup, operation, or parts for your new Airvana® Humidifier, please call us. Our technical support staff is ready to help! 888-704-2112 USA/Canada: Email: info@airvanaair.com Hours of operation are from 8:00 AM to 6:00 PM EST. -
Page 16: Warranty
Warranty Airvana® makes the following warranty to the original residential user or consumer purchaser of the ultrasonic humidifier: If any part of The ultrasonic humidifier fails during the first (1) year from the date of purchase due to a defect in material or workmanship, we will provide a replacement part free of charge. - Page 17 Warranty IN NO EVENT SHALL AIRVANA COMPANY BE LIABLE FOR DIRECT, INDIRECT, SPECIAL, CONSEQUENTIAL OR INCIDENTAL DAMAGES IN EXCESS OF THE PURCHASE PRICE OF THE HUMIDIFIER. YOUR SOLE REMEDY WILL BE REPAIR OR REPLACEMENT AS PROVIDED ABOVE. SOME AMERICAN STATES AND CANADIAN PROVINCES DO NOT ALLOW: LIMITATIONS ON HOW LONG AN IMPLIED WARRANTY LASTS;...
Need help?
Do you have a question about the AV200HUM and is the answer not in the manual?
Questions and answers