
Related Manuals for smartmotion Hypersonic


Summary of Contents for smartmotion Hypersonic
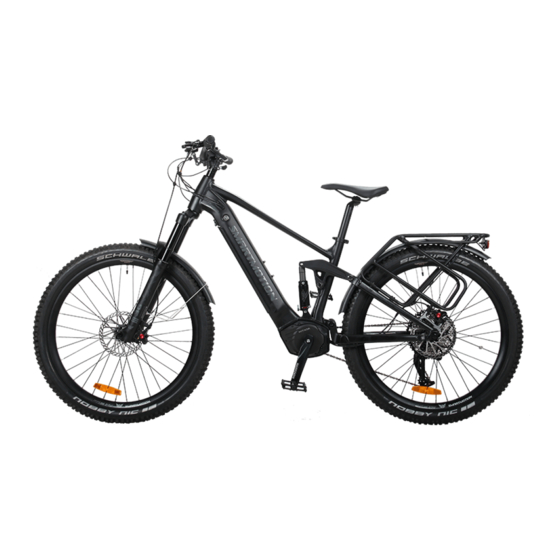
- Page 1 User Manual With LFC (Light/fender/carrier) Sonic user manual.indd 1 9/4/2017 3:50:41 PM...
-
Page 2: Table Of Contents
User Manual Congratulations for purchasing a Smartmotion electric In the Hypersonic box you will find the following items: bicycle! 1. Smartmotion electric bicycle Please read this guide fully BEFORE using your electric 2. Battery charger bike. 3. 2X Pedals 4. 2X keys for battery lock 5. -
Page 3: Service Record
1. Service Record Model: Dealer: Serial Numbers: Purchase Date: Check for damage 6 Weeks/200km Date: Frame & Fork Rims Shop: Cables & connections Mechanic: Lubricate 6 Months Chain Date: Derailleur Shop: Seatpost Mechanic: Adjust and Tension 12 Months Spokes Date: Gears Shop: Seat... -
Page 4: Assembly Instructions
Remove the recyclable protective materials be taken to ensure it is ready and safe to ride rst, then carefully lift the Hypersonic upwards from To Prepare the carton (this is best done by two people). Carefully... - Page 5 Prepare and inspect the thru-axle supplied with your Hypersonic. Ask a friend to carefully lift the front mudguard hanger mount on the inside of bike up by the handlebars and lower the forks the fork then put the front light bracket on.
- Page 6 2. Assembly Instructions 4. Handlebar and Stem 5. Front light* The stem connects the handlebar to the fork and Loosen the front screw of the stem with 2pcs 4mm alley key, front wheel, and it is very important that these install the front light bracket into the stem, and fasten the bolts are tightened correctly.
- Page 7 2. Assembly Instructions 6. Seat 7. Pedals Attach the pedals to the cranks, paying attention to Release the seat post clamp lever and set the seat post height to the position which is suitable the markings on the axle. The pedal marks inside showing side, L means left and R means Right.
-
Page 8: Safe Riding Recommendations
If you are unfamiliar with cycling, we also advise you to attend do so. your local SmartMotion dealer. Your e-bike is not a toy and 7. If a rear child seat is tted, ensure that the seat is installed should be considered a serious mode of transport. - Page 9 3. Safe Riding Recommendations Pre-ride Checklist Torque Settings Please make sure the brake lever sequence is Check bolts are tightened according to the following correct for your country before riding. In UK, NZ and Australia the left brake lever is for rear brake a.
-
Page 10: Maintenance & Adjustment
4. Maintenance & Adjustment For basic adjustment, tools Required is in line with the outer line of the smallest sprocket when looking from the rear. Turn the crank arm to • Allen/Hex Key Set: 8mm, 6mm, 5mm, 4mm, 3mm, 2.5mm set the derailleur to the low position. - Page 11 5. Fork & Rear Shock Adjustment pump to the shock and in ate to the desired Your Hypersonic is equipped with a rear shock and pressure. The correct pressure can be found by fork which works by both air and coil resistance. For...
- Page 12 Excluding the electronic components, your Warm soapy water and a cloth can be used to clean Smartmotion e-bike uses regular bicycle components the frame of your bike, but care must be taken not which are subject to proper care and maintenance to immerse any of the electrical components;...
-
Page 13: Main Specifications
5. Main Specifications HyperSonic FRAME 27.5” soft tail aluminium frame, 16”/18”/20” size options Smartmotion 140mm travel air suspension fork with rebound and air lockout adjustment. FORK SHOCK Exaform 588RL 190x50mm air shock,50MM travel with rebound and lockout. HEAD SET Integrated bearing tapered. -
Page 14: Do's And Don'ts
This will ensure the longevity of your ebike and its return your eike to the Smartmotion dealer where subcomponents and will help streamline maintenance pruchased for service and maintenance. - Page 15 Anti-tampering labels are applied to both the motor and battery units and breakage of the Note: A Smartmotion battery neglected for a prolonged seals will void the Limited Warranty period of time causes exponential voltage loss and associated cell damage.
- Page 16 7. LCD Display Panel Controls Your display is easily controlled with 4 buttons located Sport mode: Engages up to 100% motor output via dynamic power assist. Suitable when you need on your handlebars max power for steep terrain. Power On/Off Tour Mode: Engages up to 75% motor output via Press to start the display and power up the...
- Page 17 7. LCD Display Panel Controls Code Description Solution Setup Over Current Protectiton Recovery In 5 Secs Low Voltage Protectiton Charge Battery Press and hold for 2 seconds to enter the Over Voltage Protectiton Change Battery setup menu. Stalling Protection Reset Touch to select the menu.
-
Page 18: Display Panel
8. LCD Display Panel Motor Tempreature Shows current tempreture of motor Power Meter Shows how much power the motor is using. Speedometer Large display of your current speed. You can toggle between average and max speed also. Cadence This outer ring lights up to show you your Pedalling RPM (Cadence).The color of ring will change with current cadence to show motor efficiency. - Page 19 8. LCD Display Panel Light Mode Displays if the lights* are switched on. *For the bike with LFC. Power/Assist Displays the selected assist level. 1 – 5: incremental assist modes T: Tour mode S: Sport Mode Both T and S mode are Smart mode. Odometer Displays the total distance the bike has travelled.
-
Page 20: Battery Instructions
9. Battery Instructions Charging your Battery Battery Removal You can charge your battery while it is mounted on The battery is secured by double lock. To remove the the bike, or separately. Safe charging practice is battery, you need to insert the key and turn.Then turn covered in the Battery Care Guide. - Page 21 The capacity display button is found on the top of the All ebike components (sensors, controller, etc) battery unit. When single-pressed, the LED will display on the SmartMotion bikes have isolating a coloured light for 4 seconds, indicating the marine-rated plugs, so, should you damage a approximate battery capacity component, replacement is easy.
- Page 22 SMARTMOTION BIKES (“WARRANTOR”) warrants that each limited warranty Smartmotion PRODUCT will be free from defects in quality, material and workmanship from TWELVE (12) months to THIRTY-SIX (36) months (refer to the warranty schedule for FRAME...
- Page 23 Using any charger unit other than a correct ii) Subjecting the motor or controller unit(s) to electrical original or replacement Smartmotion charger unit; overload caused by improper use of the gear train / shifter; iii) Using the throttle to power the bike from a stationary ix) Gradual decline of battery capacity that falls position;...
- Page 24 10. Warranty h. Any damage in icted to the PRODUCT or (i) Chain, gear or sprocket wear; subcomponent that may have been caused by irregular or (ii) Bearing wear including that of hub, motor substandard aftermarket components installed on the and drive train component assemblies;...
- Page 25 10. Warranty PROCEDURE OF WARRANTY CLAIM p. Any defect or non-conformity that has not been timely In the event of any alleged fault, malfunction or defect and promptly communicated in writing to WARRANTOR or with the PRODUCT or any of the PRODUCT’S WARRANTOR’s authorized representative as set forth herein;...
- Page 26 10. Warranty NO TRANSFER OF LIMITED WARRANTY 3. Allow up to THIRTY (30) days from the date of This warranty is made by the WARRANTOR with only rst submission for the WARRANTOR to provide con rmation PURCHASER of the PRODUCT via an authorized dealer. as to the repair, replacement or other remedy that the The limited warranty does not extend to any subsequent WARRANTOR has deemed appropriate, unless the...
- Page 27 Your Hypersonic is designed for Cross-Country (XC) riding. This includes o -road trails of moderate di culty and intensity. While the parts on the Hypersonic are designed for o -road riding, any claim made against damage to parts where there is evidence of excessive force / extreme riding will not be accepted.
- Page 28 www.smartmotionbikes.com Sonic user manual.indd 24 9/4/2017 3:51:06 PM...
Need help?
Do you have a question about the Hypersonic and is the answer not in the manual?
Questions and answers