Table of Contents
Advertisement
Quick Links
INTRODUCTION
Thank you for selecting KNOW SUGAR Blood Glucose Monitoring System. The system was produced
in close association with diabetes healthcare professionals, most importantly, people with diabetes.
i
This manual contains important information you must know about the system. Please read it thoroughly
and carefully. For short simple instructions, a quick reference card is provided for your convenient
use. If you have any questions or enquiries, please contact your local distributor or us for help.
The KNOW SUGAR is designed to help you and your healthcare professionals monitor your blood
glucose levels. All questions about interpreting the results should be directed to your healthcare
professionals.
The KNOW SUGAR is the latest technology for blood glucose monitoring, easy to use and will give
you fast and accurate results with a minimal sample of blood.
The KNOW SUGAR Meter :
Allows you to perform test with capillary whole blood or venous whole blood.
Allows you to perform Alternative Site Testing (capillary whole blood from palm and forearm).
Has memory and data management capabilities. It gives you and your healthcare professional
powerful graphic tools to manage your diabetes.
1
Advertisement
Table of Contents

Summary of Contents for Rahul Surgicals KNOW SUGAR
-
Page 1: Introduction
All questions about interpreting the results should be directed to your healthcare professionals. The KNOW SUGAR is the latest technology for blood glucose monitoring, easy to use and will give you fast and accurate results with a minimal sample of blood. - Page 2 IMPORTANT SAFETY INSTRUCTIONS READ THIS BEFORE USING. The following basic safety precautions should always be taken. 1. Close supervision is necessary when the device is used by, on, or near children, handicapped persons or invalids. 2. Use the device only for the intended use described in this manual. 3.
-
Page 3: Table Of Contents
TABLE OF CONTENTS INTRODUCTION ............. 1 COMPARING WITH LABORATORY RESULTS..32 TABLE OF CONTENTS .......... 3 MEMORY RECALL ..........34 ABOUT ALTERNATIVE SITE TESTING(AST) ..7 REVIEWING RESULTS ON A PERSONAL ABOUT OKMETER OPTIMA SYSTEM ....9 COMPUTER............36 CONTENTS OF THE SYSTEM ......11 REPLACING THE BATTERY ........ - Page 4 IMPORTANT HEALTH-RELATED INFORMATION Apply only fresh, capillary or venous whole blood sample to test your blood glucose. Applying other substances or plasma, serum will cause wrong results. Severe dehydration and excessive water loss may cause false low results. If you believe you are suffering from severe dehydration, consult your healthcare professional immediately.
- Page 5 Compounds Uric Acid Gentisic Acid Acetaminophen Hydroxyurea Ascorbic Acid Lowest concentrations 0.48 mmol/L 0.28 mmol/L 0.53 mmol/L 0.39 mmol/L 0.28 mmol/L tested at which no (8 mg/dL) (5.0 mg/dL) (8.0 mg/dL) (3 mg/dL) (5.0 mg/dL) interference occurred Compounds Dopamine Levodopa Methyldopa Tolbutamide Triglycerides Lowest...
- Page 6 REFERENCE: *1: Kahn, R. and Weir, G.: Joslinis Diabetes Mellitus, 13thed Philadelphia : Lea and Febiger (1994), 489. * 2: Krall, L.P. and Beaser, R. S.: Joslin Diabetes Manual. Philadelphia : Lea and Febiger (1989), 261-263.
-
Page 7: About Alternative Site Testing(Ast)
ABOUT ALTERNATIVE SITE TESTING(AST) There are important limitations for doing AST. Please consult your healthcare professional before you perform AST. What is AST? Alternative Site Testing (AST) means you can use parts of the body other than your fingertips to check your blood glucose levels. The OKmeter Optima allows you to test your palm and forearm with equivalent results to fingertip testing. - Page 8 exercise or stressful event, take the blood sample from your fingertip only. Use AST only: In a pre-meal or fasting state (more than 2 hours since the last meal). Two hours or more after taking insulin. Two hours or more after exercise. During steady state blood glucose conditions.
-
Page 9: About Okmeter Optima System
About the System The KNOW SUGAR Meter system uses the latest technology to provide you with easy and comfortable testing. The system requires only a 0.7¼L of blood sample to complete the testing in only 6 seconds. - Page 10 Important : Use only KNOW SUGAR test strips and control solutions with your KNOW SUGAR meter. Use other test strips and control solutions with this meter can produce inaccurate results. Caution 1. The user should not take any decision of medical relevance without first consulting his or her medical practitioner.
-
Page 11: Contents Of The System
Battery (CR2032) -preinstall in the meter X 1 NOTE : The KNOW SUGAR meter is available as a meter only or as a complete kit. Contents might vary by different package. For meter only, products with * mark are excluded. Please review the contents of your purchase. -
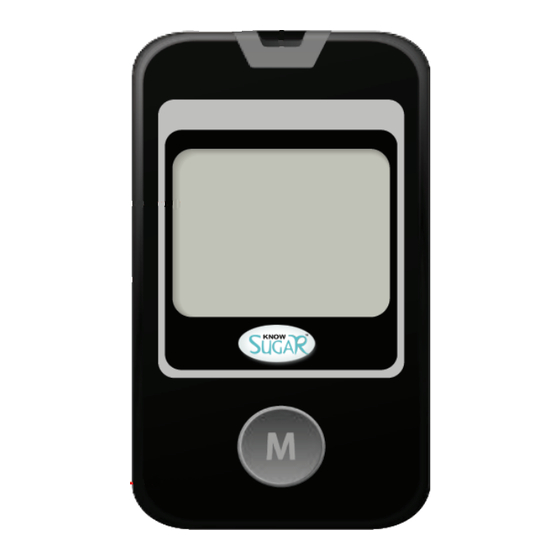
Page 12: Key Functions Of The Meter
KEY FUNCTIONS OF THE METER Study this diagram and become familiar with all the parts of your OKmeter Optima. 1. LCD DISPLAY: The large, easy to read display shows test results, messages, test results stored in memory. 2. M BUTTON: Main button, press button to turn the meter on or perform other functions... - Page 13 described in this manual. 3. STRIP SLOT: Insert the test strip here. The meter will turn on automatically. 4. SET BUTTON: Located in the battery compartment; press button to enter meter setting. Refer to “SETTING YOUR METER” section of this user s manual for details. 5.
-
Page 14: Meter Display
METER DISPLAY 1. DATE: Display Year, month and date. 2. TIME: The meter is programmed for a 12 hour period format. 3. AVERAGE: Appears when the meter is in the memory mode while recalling 7/14/28 day test averages. 4. MEMORY SYMBOL: Appears when in the memory mode. 5. -
Page 15: Key Functions Of The Test Strip
KEY FUNCTIONS OF THE TEST STRIP 1. ABSORBENT CHANNEL: apply a drop of blood here, the blood will be drawn in automatically. 2. CONFIRMATION WINDOW: this is where you confirm if enough blood has been drawn into the test strip s absorbent channel. - Page 16 Do not use test strips beyond the expiration date indicated on the strip vial label. Do not place in direct heat or sunlight. Do not carry loose glucose strips in your carrying case. 10. Do not use damaged test strips or test strips changed in any way. Warning : Keep the test strips vial away from children;...
-
Page 17: Setting Your Meter
SETTING YOUR METER Your KNOW SUGAR meter comes with the date, time, and unit of measurement preset. However, if you change the time or replace the battery, you should check and update the time and date. STEP 1. Enter Setting Mode Start with the meter off. Open the battery cover. - Page 18 STEP 4. Set the Date The date appears with the number flashing. Press and release the M BUTTON to obtain the desired date. Press SET BUTTON to confirm and move to next HOUR setting. STEP 5. Set the Hour The hour appears with the number flashing. Press and release the M BUTTON to obtain the desired hour.
- Page 19 STEP 8. Delete Memory When the dEL symbol and the flashing memory symbol appear on the display, you can choose to clear the memory. If you do not want to clear the memory, press the SET BUTTON again to skip this step. If you want to clear ALL memory, press and hold M BUTTON for 4 seconds.
- Page 20 IMPORTANT : 1. The time, date and unit of measurement can ONLY be changed in the setting mode. Therefore, when you perform a blood glucose testing, it is not possible to change those parameters. 2. Your meter displays 7, 14 and 28-day averages which you can access from the meter memory. These averages are calculated from your latest result obtained during the last 7, 14 and 28 days.
-
Page 21: Control Solution Test
When should the control solution test be performed? 1. When you first get your KNOW SUGAR meter. Before use this system to test your blood, you can practice the procedure by using control solution. When you can do three tests in a row that are within the expected range, you are ready to test your blood. - Page 22 8. After changing the batteries. Important Control Solution Informatio 1. Use only KNOW SUGAR control solution. 2. Check the expiration date on the control solution bottle. Do not use if expired. 3. Control solution, meter, and test strips should come to room temperature (68-86 ºF/20-30ºC) before testing.
- Page 23 How to Perform a Control Test STEP 1. Insert Test Strip Insert a new test strip into the strip slot, the meter will activate. STEP 2. Check Code Number When the code number appears on the screen, compare the number against the code number on the strip vial.
- Page 24 STEP 4. Squeeze a drop of Control Solution Shake control solution bottle well. Remove the cap. Squeeze the bottle, discard the first drop and wipe off the dispenser tip with a clean tissue paper or cotton. Squeeze the bottle again to get the second drop onto a clean non-absorbent surface or on your fingertip first.
- Page 25 3. If test result falls outside the range printed on the test strip vial, repeat test first. If you continue to get the result falling outside the range, your meter and test strip may not be working properly. DO NOT use the system to test your blood until you get a test result falls within the control range.
-
Page 26: Prepare For Blood Sampling
PREPARE FOR BLOOD SAMPLING Adjustable Lancing Device Lancet Your lancing device and lancets are used for obtaining 1. Protective cap capillary blood samples from the puncture site. 1. Lancing Device Cap 2. Depth Selector 3. Lancet Holder 4. Cocking Control 5. Release Button Important Lancing Device and Lancets Information Lancet is for single use only. - Page 27 Set Lancing Device 1. Screw off the cap of lancing device. Insert a lancet into the lancet holder and push down until it is fully seated. 2. Twist off the protective cap until it separates from the lancet. 3. Replace the lancing device cap and set the puncture depth to the desired number.
-
Page 28: Performing Blood Test
PERFORMING BLOOD TEST STEP 1. Wash Your Hands and the Puncture Site Wash your hands in warm, soapy water. Rinse and dry completely. Warm your fingers to increase blood flow. STEP 2. Insert Test Strip Remove a new test strip from vial. Be sure to tightly replace vial cap after removing test strips. - Page 29 STEP 4. Select and Lance a Puncture Site *For Fingertip Hold the prepared lancing device firmly against the side of your fingertip. Press release button. *For AST(palm and forearm) Please refer to the “About Alternative Site Testing (AST)” Section. Please consult your healthcare professional before obtaining blood from site other than your fingertip.
- Page 30 Discard the used strip and lancet safely in a puncture resistant container. IMPORTANT : 1. The KNOW SUGAR Meter only requires a tiny sample of blood to perform a test. Choose a different spot each time you test. Repeat puncture in the same spot may cause soreness and calluses.
-
Page 31: Understanding Your Test Result
UNDERSTANDING YOUR TEST RESULT Normal Blood Glucose Range The normal blood glucose range is 70 to 105 mg/dL (3.9 to 5.8 mmol/L) for a fasting, non-diabetic adult, but less than 140 mg/dL (7.8 mmol/L) two hours after meals. Consult your healthcare professional to find out your target blood glucose value. -
Page 32: Comparing With Laboratory Results
COMPARING WITH LABORATORY RESULTS The result you obtain from your meter may differ somewhat from your laboratory result due to normal variation. Meter results can be affected by factors and conditions that do not affect laboratory results in the same way. To make an accurate comparison between meter and laboratory results, follow the guidelines below. - Page 33 experienced stress* . In addition, if you have eaten recently, the blood glucose level from a finger stick can be up to 70 mg/dL (3.9 mmol/L) higher than blood drawn from a vein (venous sample) used for a lab test* .
-
Page 34: Memory Recall
MEMORY RECALL The KNOW SUGAR Meter automatically stores 120 test results, letting you review them in order from the most recent to the oldest. The meter also calculates and displays 7, 14 and 28-day averages. You can review the individual or average test result by entering the memory mode. - Page 35 STEP 3. Recalling Individual Test Results After 28-day average, the most recent test result with date and time will be shown. Press M BUTTON once and the next most recent test result will appear. Each time you press and release the M BUTTON, the meter will recall up to your last 120 test results in order.
-
Page 36: Computer
REVIEWING RESULTS ON A PERSONAL COMPUTER Results in memory can be transmitted to a personal computer. Diabetes Management Software and an RS232 Interface Cable are needed before installation. To learn more about Diabetes Management Software or to obtain an RS232 Interface Cable sold separately, please contact your local retailer or distributor. -
Page 37: Replacing The Battery
REPLACING THE BATTERY The meter comes with ONE Lithium batteries (battery type CR2032) (preinstalled when new purchasing). Battery life will vary depending on usage, so always keep a spare battery on hand. The battery should last about 1000 tests or 12 months when testing 3 times a day. When the battery symbol appears on the meter display, battery is getting low. - Page 38 2. With the plus (+) side up, place the battery (battery type CR2032) in the compartment and slide it upwards until it is locked into place. You should hear a beep to indicate the battery installed correctly. If not, please replace the battery correctly.
-
Page 39: Caring For Your Meter And Test Strip
CARING FOR YOUR METER AND TEST STRIP To avoid the meter and test strips getting dirt, dust or other contaminants, please wash and dry your hands thoroughly before use. Cleaning Your meter does not require special maintenance. As long as no blood or control solution comes in direct contact with the meter, there is no special cleaning required. - Page 40 * Do not refrigerate. * Store your test strips in their original vial only. * Do not transfer to other container. * Store test strip packages in a cool and dry place. Keep away from direct sunlight and heat. * After removing a test strip from the vial, immediately replace the vial cap and close it tightly. * Touch the test strip with clean and dry hands.
-
Page 41: Performance Characteristic
PERFORMANCE CHARACTERISTIC Accuracy: Within ± 15 mg/dL(0.83 mmol) at glucose concentration < 75 mg/dL(or 4.2 mmol/L) and within 20% glucose concentration > 75 mg/dL(or 4.2 mmol/L). Precision: CVs(%) of intermediate precision and repeatability were less than 5%. - Page 42 SYSTEM SPECIFICATIONS Model Name OK-10H Assay Method Electrochemical biosensor Test Sample Capillary or Venous Whole Blood Test Result Referenced to plasma glucose value Alternative Site Testing YES (palm, forearm) Sample Size 0.7 ¼L Measuring Time 6 seconds Measuring Range 20 – 600 mg/dL (1.1 – 33.3 mmol/L) Acceptable Hematocrit Range 35~55% Operating Condition...
-
Page 43: Display Messages And Problem-Solving Guide
DISPLAY MESSAGES AND PROBLEM-SOLVING GUIDE The following is a summary of some display messages and symbols. These messages help to identify certain problems but do not appear in all cases when a problem has occurred. Improper use may cause an inaccurate result without producing an error message. In the event of a problem, refer to information under “action to take”... - Page 44 Deleting memory Deleting is complete Test result is higher If this is not confirmed by the way you feel, review than 600 mg/dL proper testing procedure and perform a control test. (33.3 mmol/L) Repeat blood test, if the display still appears, please call medical assistance immediately.
- Page 45 Maybe: You have to: 1. Used strip or 1. Repeat test with sufficient sample. moistened strip 2. Contact your local distributor for help 2. defective meter The meter is not working. Move to an area with temperature between 10ºC to 40ºC Temperature is out of (50ºF - 104ºF) and wait at least 30 minutes.
-
Page 46: Symbols Description
SYMBOLS DESCRIPTION For in vitro diagnostic use. Temperature limitation / Store at Please consult instructions for use Use by /Expiry date Do not reuse Manufacturer Lot number EC REP EU representative Caution, consult This product fulfils the requirements accompanying document of Directive 98/79/EC in vitro 0123 diagnostic medical device. -
Page 47: Contact Information
CONTACT INFORMATION Mkt by Parsi Anjuman, Vazirabad, Nanded - 431 601 (INDIA) Ph : +912462 244778 Fax : +912462 244779 E-mail : info@rahulsurgicals.com www.rahulsurgicals.com... -
Page 48: Limited Warranty
To obtain warranty service, you must take the Product, or deliver the Product freight prepaid, in either its original packaging or packaging affording an equal degree of protection, to Rahul Surgicals, Nanded or your local distributor. - Page 49 This warranty will be applicable only if the complete product & the warranty card are sent and if the warranty card is completely filled-in & returned within ten (10) days. Rahul Surgicals, Nanded & its authorized distributor / resellers reserve the right to refuse warranty services if any unclear information has been given.
- Page 50 FROM STAMP...
-
Page 51: Warranty Registration Card
WARRANTY REGISTRATION CARD The manufacturer warrants to the original retail purchaser that this meter will be free from defects in materials and workmanship for 2 years from the date of the original purchase. During the 2 year period, we shall, at no charge, repair or replace a unit found to be defective with an equivalent or current version of the owner s model.
Need help?
Do you have a question about the KNOW SUGAR and is the answer not in the manual?
Questions and answers