Advertisement
Quick Links
Advertisement

Summary of Contents for Petasense Vibration mote 3
- Page 1 FCC ID: 2AJW7-00002...
-
Page 2: Revision History
Mote Model 3 User Manual Revision History Version Date Notes Contributor Dec 5, 2019 Initial Release Kevin Du... -
Page 3: Table Of Contents
Mote Model 3 User Manual Table of Contents Revision History Data Sheet How to Install Vibration Motes How to Remove Petasense Motes Blink Up - How to Connect Vibration Motes to WiFi RF exposure information... -
Page 4: Data Sheet
Mote Model 3 User Manual Data Sheet Model 3 Accelerometer Tri-axial MEMS Frequency Response 2 to 6,000 Hz (+/- 3 dB) Frequency Response At X Hz: X% Accuracy At Y Hz: Y% Measurement Range +/- 2g to +/- 16g Transverse Sensitivity AD Conversion 16 Bit Sensitivity... - Page 5 Mote Model 3 User Manual PHYSICAL Height: Dimensions 58.1 mm (2.29 inches) S-ring diameter: 38.7 mm (1.52 inches) Weight 125 g Epoxy: Mounting (recommend epoxy Steel-enforced two-part epoxy Stud: or stud) 6.35 mm (¼ inch) 28 UNF Cover: Materials Base, Mount and S-ring: ENVIRONMENTAL Operating Temperature -40°C to 85°C (-40°F to 185°F)
- Page 6 Mote Model 3 User Manual Processor 32-bit 144 MHz ARM Cortex M4F (remote firmware updates) ACCESSIBILITY User Interface Web: Internet browser access Mobile: iOS application available in App Store Security TLS 1.2 with AES encryption...
- Page 7 Mote Model 3 User Manual...
-
Page 8: How To Install Vibration Motes
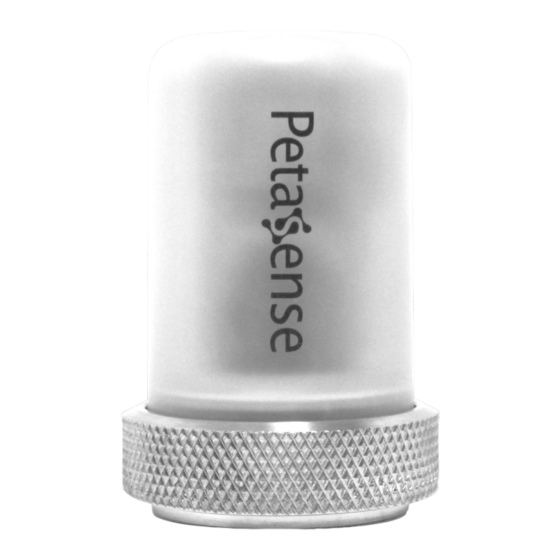
User Manual How to Install Vibration Motes Overview Mounting Petasense Motes is simple and does not require any special skills. Each Mote takes about 5-10 minutes to mount. Start monitoring the health of your industrial machines in four simple steps: Step 1. - Page 9 Mote Model 3 User Manual Mote Components: These instructions will reference specific components of the Mote as follows:...
- Page 10 Motes and which machines they are mounted on. This attention to detail is essential for any successful asset monitoring program. Note: Before handling Petasense Motes, be sure to wash your hands to avoid getting dirt or other particles inside the device.
- Page 11 Mote Model 3 User Manual Step 2. Prepare the machine surface 2.1 Identify a mounting location close to where the bearing is located on the machine. The ideal mounting location will be a rigid, flat surface. Avoid mounting on sheet metal covers, fins or other flimsy surfaces that are prone to rattle.
- Page 12 Mote Model 3 User Manual Step 3. Mix the epoxy 3.1 Wearing rubber gloves, knead one piece of 2-part steel-enforced epoxy thoroughly in your hand until the color is uniform. Ensure that the epoxy is in good condition (firm and slightly moist, not too hard or crumbly).
- Page 13 4.1 Place the Mote on the mounting location with the Petasense logo facing the closest machine shaft. Press down firmly for 15-20 seconds. Note: It is important that the Mote is mounted with the Petasense logo facing the direction of the machine’s shaft for orientation purposes 4.2 Visually check that the epoxy is only bonding to the base of the Mote, not touching the knurled...
-
Page 14: How To Remove Petasense Motes
How to Remove Petasense Motes Overview: Petasense Motes will need to be removed and reinstalled from time to time as your equipment will require maintenance or replacement. There are a few options when it comes to removing your Motes safely and efficiently. - Page 15 In the case your equipment will be replaced with new components, you can safely remove the Mote and recover the Mount. Step 1: Follow the steps above to remove the Petasense Mote from the mount. Step 2: With a chisel and rubber hammer you can gently chip away the SteelStik Epoxy easily and...
- Page 16 Mote Model 3 User Manual Step 3: Clean the Mount by chipping away any leftover epoxy residue with the Chisel/Rubber Hammer. A Handheld Grinder can also be used to clean the Mount.
-
Page 17: Blink Up - How To Connect Vibration Motes To Wifi
Blink Up. This is a method of using your mobile device to optically communicate WiFi login credentials to a Vibration Mote. * Note: If your WiFi network was provided by Petasense, your Vibration Motes should already be configured to the wireless network when you receive them. - Page 18 Using your iOS mobile device, install the Petasense App from the App Store. 1-2. Login using your email and password If you have not set up a personal Petasense Login, contact your Petasense Account Admin to gain access. Step 2: Configure your WiFi credentials 2-1.
- Page 19 Step 5: Confirm a successful WiFi connection 5-1. Confirm a recent measurement on the Petasense App To confirm that the mote has taken a measurement select the Sensors option at the bottom of your screen. Then select the Sort option at the top left of the screen. From there select Serial Number - Ascending/Descending.
-
Page 20: Rf Exposure Information
Mote Model 3 User Manual Once you have confirmed the connection, you may remove the battery until it is time to install the Mote on a machine. Then replace the plastic cap and place the Mote on the steel mount. Lastly, place the steel S-ring over the top of the Mote and tighten clockwise at the base.