Advertisement
Quick Links
Advertisement

Summary of Contents for Evac+Chair 900H POWER
- Page 1 USER GUIDE 900H POWER...
- Page 2 WARRANTIES & LIABILITIES The Evac+Chair 900H Power is guaranteed for 5 years against defective material and workmanship. This does not include parts subject to wear, such as powered belt tracks, batteries, chargers or damage caused by abuse or sabotage, and/or other damage which has occurred due to a breaching of the guidelines contented in the User Guide or Training Manual.
-
Page 3: Table Of Contents
CONTENTS Training & Maintenance Records General Information 10-11 Deployment 12-13 Preparing for Passenger 14-15 Preparing for Ascent/Descent 16-19 Ascent 20-21 Descent Battery Installation Wall Hook Installation 24-25 Storage 26-27 Training & Maintenance Accessories Visual Inspection International User Guide Online evacchair.co.uk/user-guides 30-31 Battery Maintenance Guidelines Troubleshooting... - Page 4 TRAINING RECORD Trainee Name KT / OT* Training Date Expiry Date Trained by * KT = Key Trainer * OT = Operator Trainer...
- Page 5 MAINTENANCE RECORD Date Service or Inspection Belts Changed Company NOTE: Powered Belt Tracks should be rotated every three months.
- Page 6 900H POWER Intended Use: The 900H Power is specifically designed for transporting one passenger at a time during emergency and non-emergency evacuations. Please read this user guide in full. Should you have any questions, please contact your Evac+Chair Account Manager or authorised Evac+Chair distributor for more information.
- Page 7 TRAINING MANUFACTURERS (STRONGLY ADVISED) (STRONGLY ADVISED) WARRANTY 5 YEARS *5 year warranty applies to your 900H Power chair only. The Lithium-Ion battery has a 1 year warranty ADVISORY STAIR ANGLE MINIMUM ALLOWABLE STAIR WIDTH *Two-person operation is advised for heavier passengers...
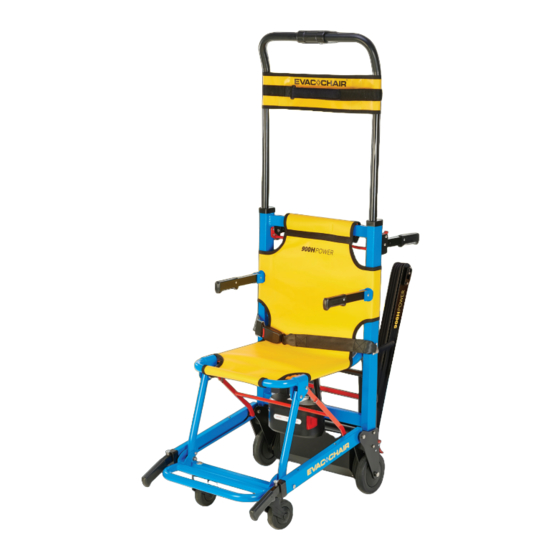
- Page 8 WHAT IS INCLUDED? CHAIR BATTERY BATTERY CHARGER BATTERY ANTI-THEFT KEY USER GUIDE SAFETY HARNESS DUST COVER WALL BRACKET & FITTING KIT PHOTOLUMINESCENT SIGN...
-
Page 9: Ascent
CONTROL PAD FEATURES BATTERY CAPACITY DISPLAY DESCENT ASCENT CONTROL CONTROL SPEED POWER CONTROL ASSISTANT LIGHT... - Page 10 Battery Capacity Speed With the chair in the stored position, check that the battery Check that the battery has a minimum of 40% charge before using. is correctly fitted into the battery station, located underneath Battery capacity should be checked when chair is stationary. the seat.
- Page 11 Locked Unlocked With the brakes on, open the chair by pulling the seat Release brakes and remove the chair from the wall bracket/stand. frame down until the chair is on all four wheels.
- Page 12 Locked Pull and hold the red release bar whilst Raise the pushing handles until they Apply the brakes on both rear wheels. simultaneously pulling the telescopic lock into place; you will hear a ‘click’. handle upwards. NB: Ensure the handle fully engages with the holes in the the telescopic handle.
- Page 13 Whilst holding the chair, allow the Slide the head support into position and Deploy armrests and footrest, if needed. passenger to sit and fasten their seat belt. fix in place by tightening the hook & loop either side of the handle. Ensure the head NB: Additional seat belt straps are supplied.
- Page 14 Locked 250mm Release brakes and manoeuvre the chair to a safe landing/ Apply the brakes on both rear wheels. refuge area. For ascent, leave a small gap between the chair and the bottom stair.
- Page 15 If two-person operation is required, pull the ascending To deploy the Powered Belt Track, push the red lever outwards control handles out to the desired position. to the right, whilst pulling the stabilising bar on the track towards you.
- Page 16 Step onto the stair and place hands either side of the Place one foot in front of the other (on separate stairs, if control pad. The chair should be approx. waist height when necessary), tilt the chair backwards towards the stairs until stood on the second stair.
- Page 17 Battery Capacity Battery Capacity Speed Speed Using your thumb, press and hold the ‘UP’ button Press handle firmly downwards, into the stairs while ascending, while hands remain on the handle. keeping one foot in front of the other. Speeds can be adjusted at this point using the ‘+’...
- Page 18 Battery Capacity Speed Whilst moving from the top step to the top landing, continue CAUTION to hold the ‘UP’ button while walking backwards and smoothly move the extension handle from waist height to chest height. Maintain steady control of the chair while stepping backwards. When approaching the top of the flight of stairs, ensure Speeds can be adjusted at this point using the ‘+’...
- Page 19 WARNING Turn Battery Off After Use. Once the front wheels have enough clearance Tilt the chair forward until all four wheels are on the floor. from the top step, release the ‘UP’ button to allow Change hand placement from the extension handle to pushing a safe four-wheel landing.
- Page 20 Battery Capacity Battery Capacity Speed Speed The chair will begin to descend down Descend at a normal walking pace, When the chair is positioned at the top of the stairs, with one foot in front of the the stairs, the extension handle will keeping one foot in front of the other, other, tilt the chair backwards.
- Page 21 WARNING Turn Battery Off After Use. Once the rear wheels make contact with Tilt or push the chair forward until all four Transition hand placement from extension the ground, allow the chair to move wheels are on the floor. handle to pushing handles and manoeuvre forwards until there is a gap between the chair safely away from landing area, to the chair and the first step, then release...
-
Page 22: Battery Installation
If the battery needs charging, use the supplied battery charger. WARNING CHARGE TIME: 5 HOURS BATTERY WARRANTY: 1 YEAR Turn Battery Off After Use. FLIGHTS OF STAIRS: BATTERY LIFE HOURS: 90 MINS In the event of a gas leak do not use the 900H Power. - Page 23 WALL BRACKET - FOR WALL MOUNTING INSTALLATION Evac+Chair, or an authorised distributor, can install your evacuation chair as well as provide expert advice and guidance on the most effective locations within Back your building. evacchair.co.uk /maintenance 235mm Side View (9.25 inches)
- Page 24 Store extension handle and armrests. With chair tracks in the stored position, Push chair into the wall bracket/stand - Ensure seat belt is fastened and placed line up welded stabilising bar and wall ensure both wall bracket clips have fully on chair seat.
- Page 25 WARNING Turn Battery Off After Use. Dust Cover Apply both rear wheel brakes. To store the chair, pull the red lever Once the chair is securely fitted onto the underneath the seat, downwards and wall bracket/stand, loop the straps provided towards yourself whilst pushing the seat around the front of the chair and clip the frame upwards.
- Page 26 A 2.5 hour course which provides practical training for 2-4 delegates, Regulatory Reform Order 2005 (UK Only) on how to correctly use and deploy an Evac+Chair. On course completion, all delegates meeting the training standards Renew your three year certification for are certified and deemed competent.
- Page 27 & LABOUR MAINTENANCE evacuation situation, your chair will be fully operational. Our CONTRACT contracts include labour and genuine replacement parts, ensuring your Evac+Chair is kept fully operational and meets legal requirements. To discuss your maintenance ENGINEER CALL TESTING requirements, please call...
-
Page 28: Accessories
ACCESSORIES DUST COVER POWERED CHAIR STAND PATIENT CARRY SEAT ANTI-THEFT DEVICE BATTERY RECEPTION NOTICE For more information on these accessories visit: evacchair.co.uk/accessories... -
Page 29: Visual Inspection
VISUAL INSPECTION Please contact Evac+Chair, or an authorised distributor immediately if any of these defects appear on your chair. WE RECOMMEND YOU CARRY OUT A QUARTERLY INSPECTION TO ENSURE THE INTEGRITY OF THE CHAIR IS MAINTAINED. DEPLOYMENT/STORAGE CHECK HEADREST Ensure chair deployment is smooth No obvious threading around seams ... - Page 30 LITHIUM-ION BATTERY MAINTENANCE GUIDELINES LITHIUM-ION RECHARGEABLE BATTERIES REQUIRE ROUTINE MAINTENANCE AND CARE TO ACHIEVE THEIR MAXIMUM BATTERY LIFE SPAN. GENERAL STORAGE Ensure battery is fully charged every 3-6 months. Regularly DO NOT place the battery near heating equipment, nor expose ...
- Page 31 WARNING Turn Battery Off After Use. In the event of a gas leak, do not use the 900H Power or any other electrical equipment. PRECAUTIONS Keep away from heat/sparks/open flames/hot surfaces. Keep battery away from children. Keep free of dust and debris.
-
Page 32: Troubleshooting
TROUBLESHOOTING IF BATTERY ISN’T WORKING AS DESCRIBED IN THIS USER GUIDE, PLEASE FOLLOW THE INSTRUCTIONS BELOW: Symptom Remedial Action Chair non-operational - Check battery is installed and switched on Battery not charging - Turn battery off and on again and retry - Check plug is installed into battery adapter correctly –... -
Page 33: International User Guide Online
INTERNATIONAL USER GUIDE ONLINE To view our downloadable User Guide please visit www.evacchair.co.uk/user-guides Als u onze gebruikershandleiding online wilt bekijken, gaat u naar: Um unser Benutzerhandbuch online anzuzeigen, besuchen Sie bitte: Pour consulter notre guide de l’utilisateur en ligne, veuillez visiter: Per visualizzare la nostra guida utente online, visitare: Para ver nuestra guía de usuario en línea, visite: Para ver o nosso guia do usuário on-line, visite:... - Page 35 35 35...
- Page 36 Evac+Chair International Ltd, Unit 4, Central Boulevard, Blythe Valley Park, Solihull, West Midlands, B90 8AW, UK +44 (0)121 706 6744 evacchair.co.uk enquiries@evacchair.co.uk 1-900H-UG-UK-01(V2)
Need help?
Do you have a question about the 900H POWER and is the answer not in the manual?
Questions and answers